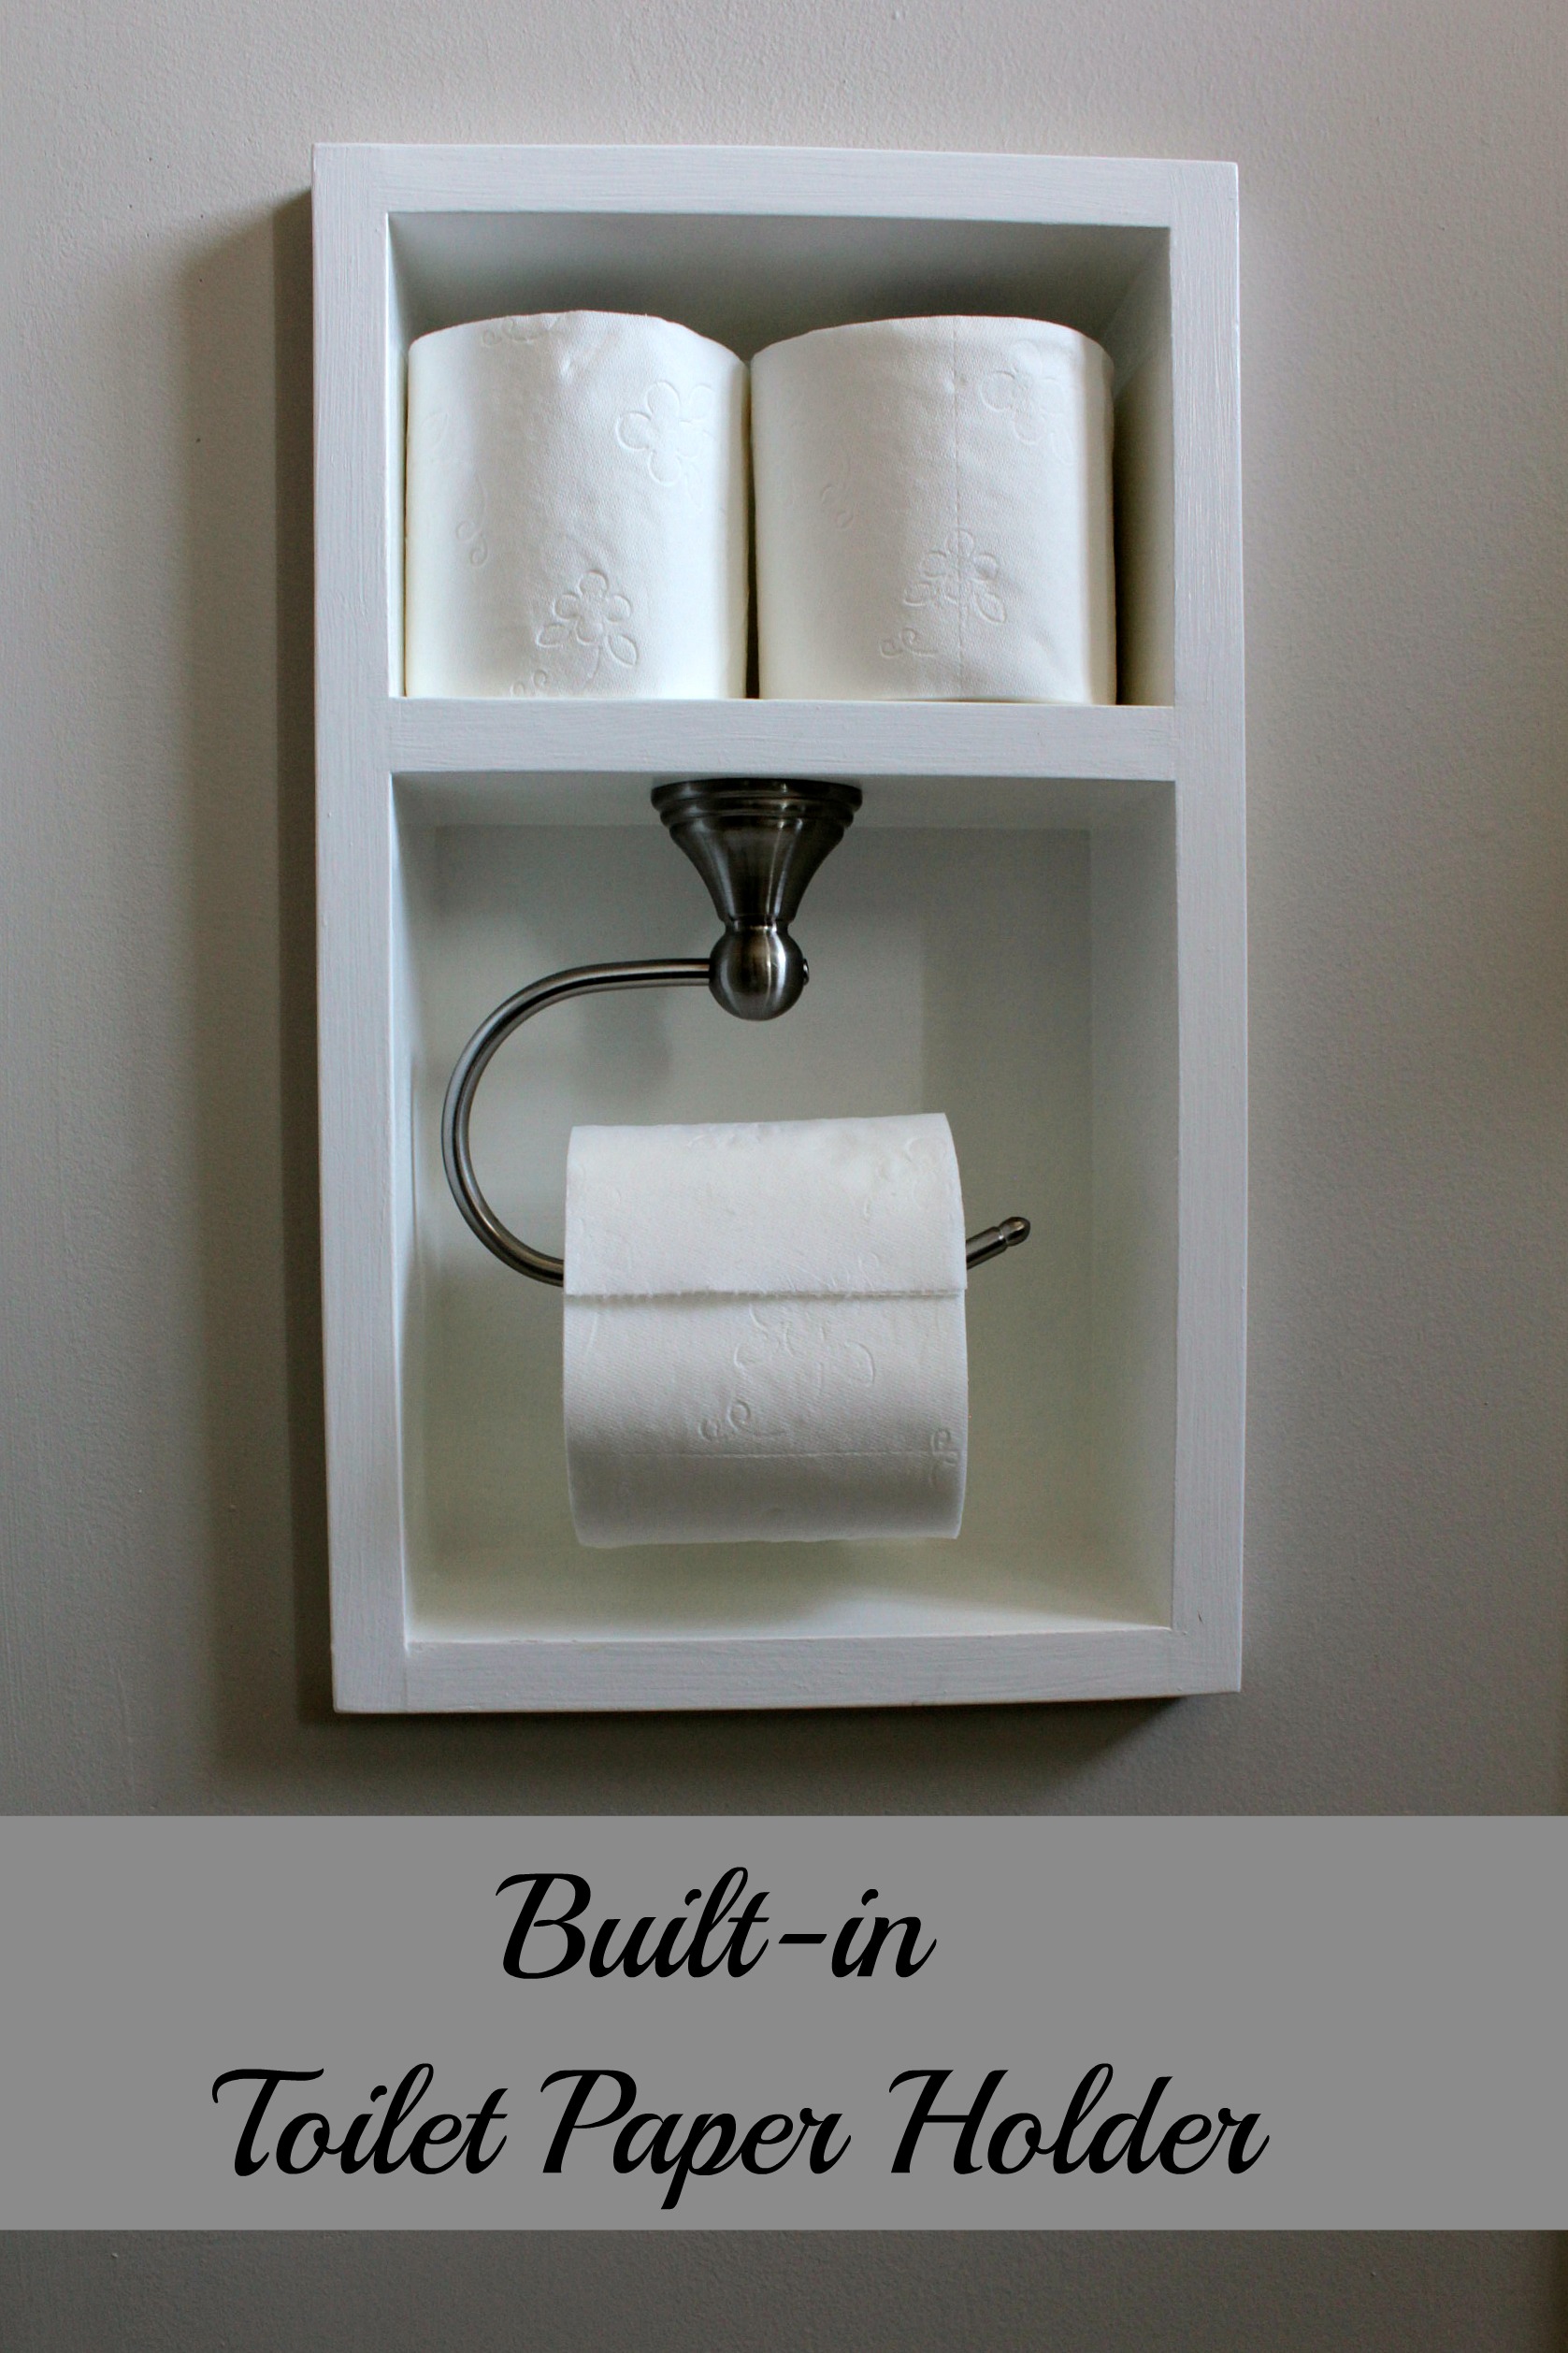
Back when we renovated our bathroom, we had to decide where the new toilet paper holder was going to go. Now that we had a sliding glass shower door we couldn't hang it beside the toilet like it was before. There were three options - 1) attach it to the side of the vanity, 2) have a free-standing holder on the floor, or 3) attach it to the wall across from the toilet.
The first choice was shot down because it was too close to the toilet and I didn't want holes drilled into the vanity anyway. The second choice didn't have a chance because Tom hates those holders that stand on the floor. Not to mention that it would be in the way whenever we were entering or exiting the shower. So that left mounting it across from the toilet. Tom was concerned that we would still bump into it since it would stick out from the wall and the room isn't that large anyway, so he decided he would build a box and inset it into the wall.
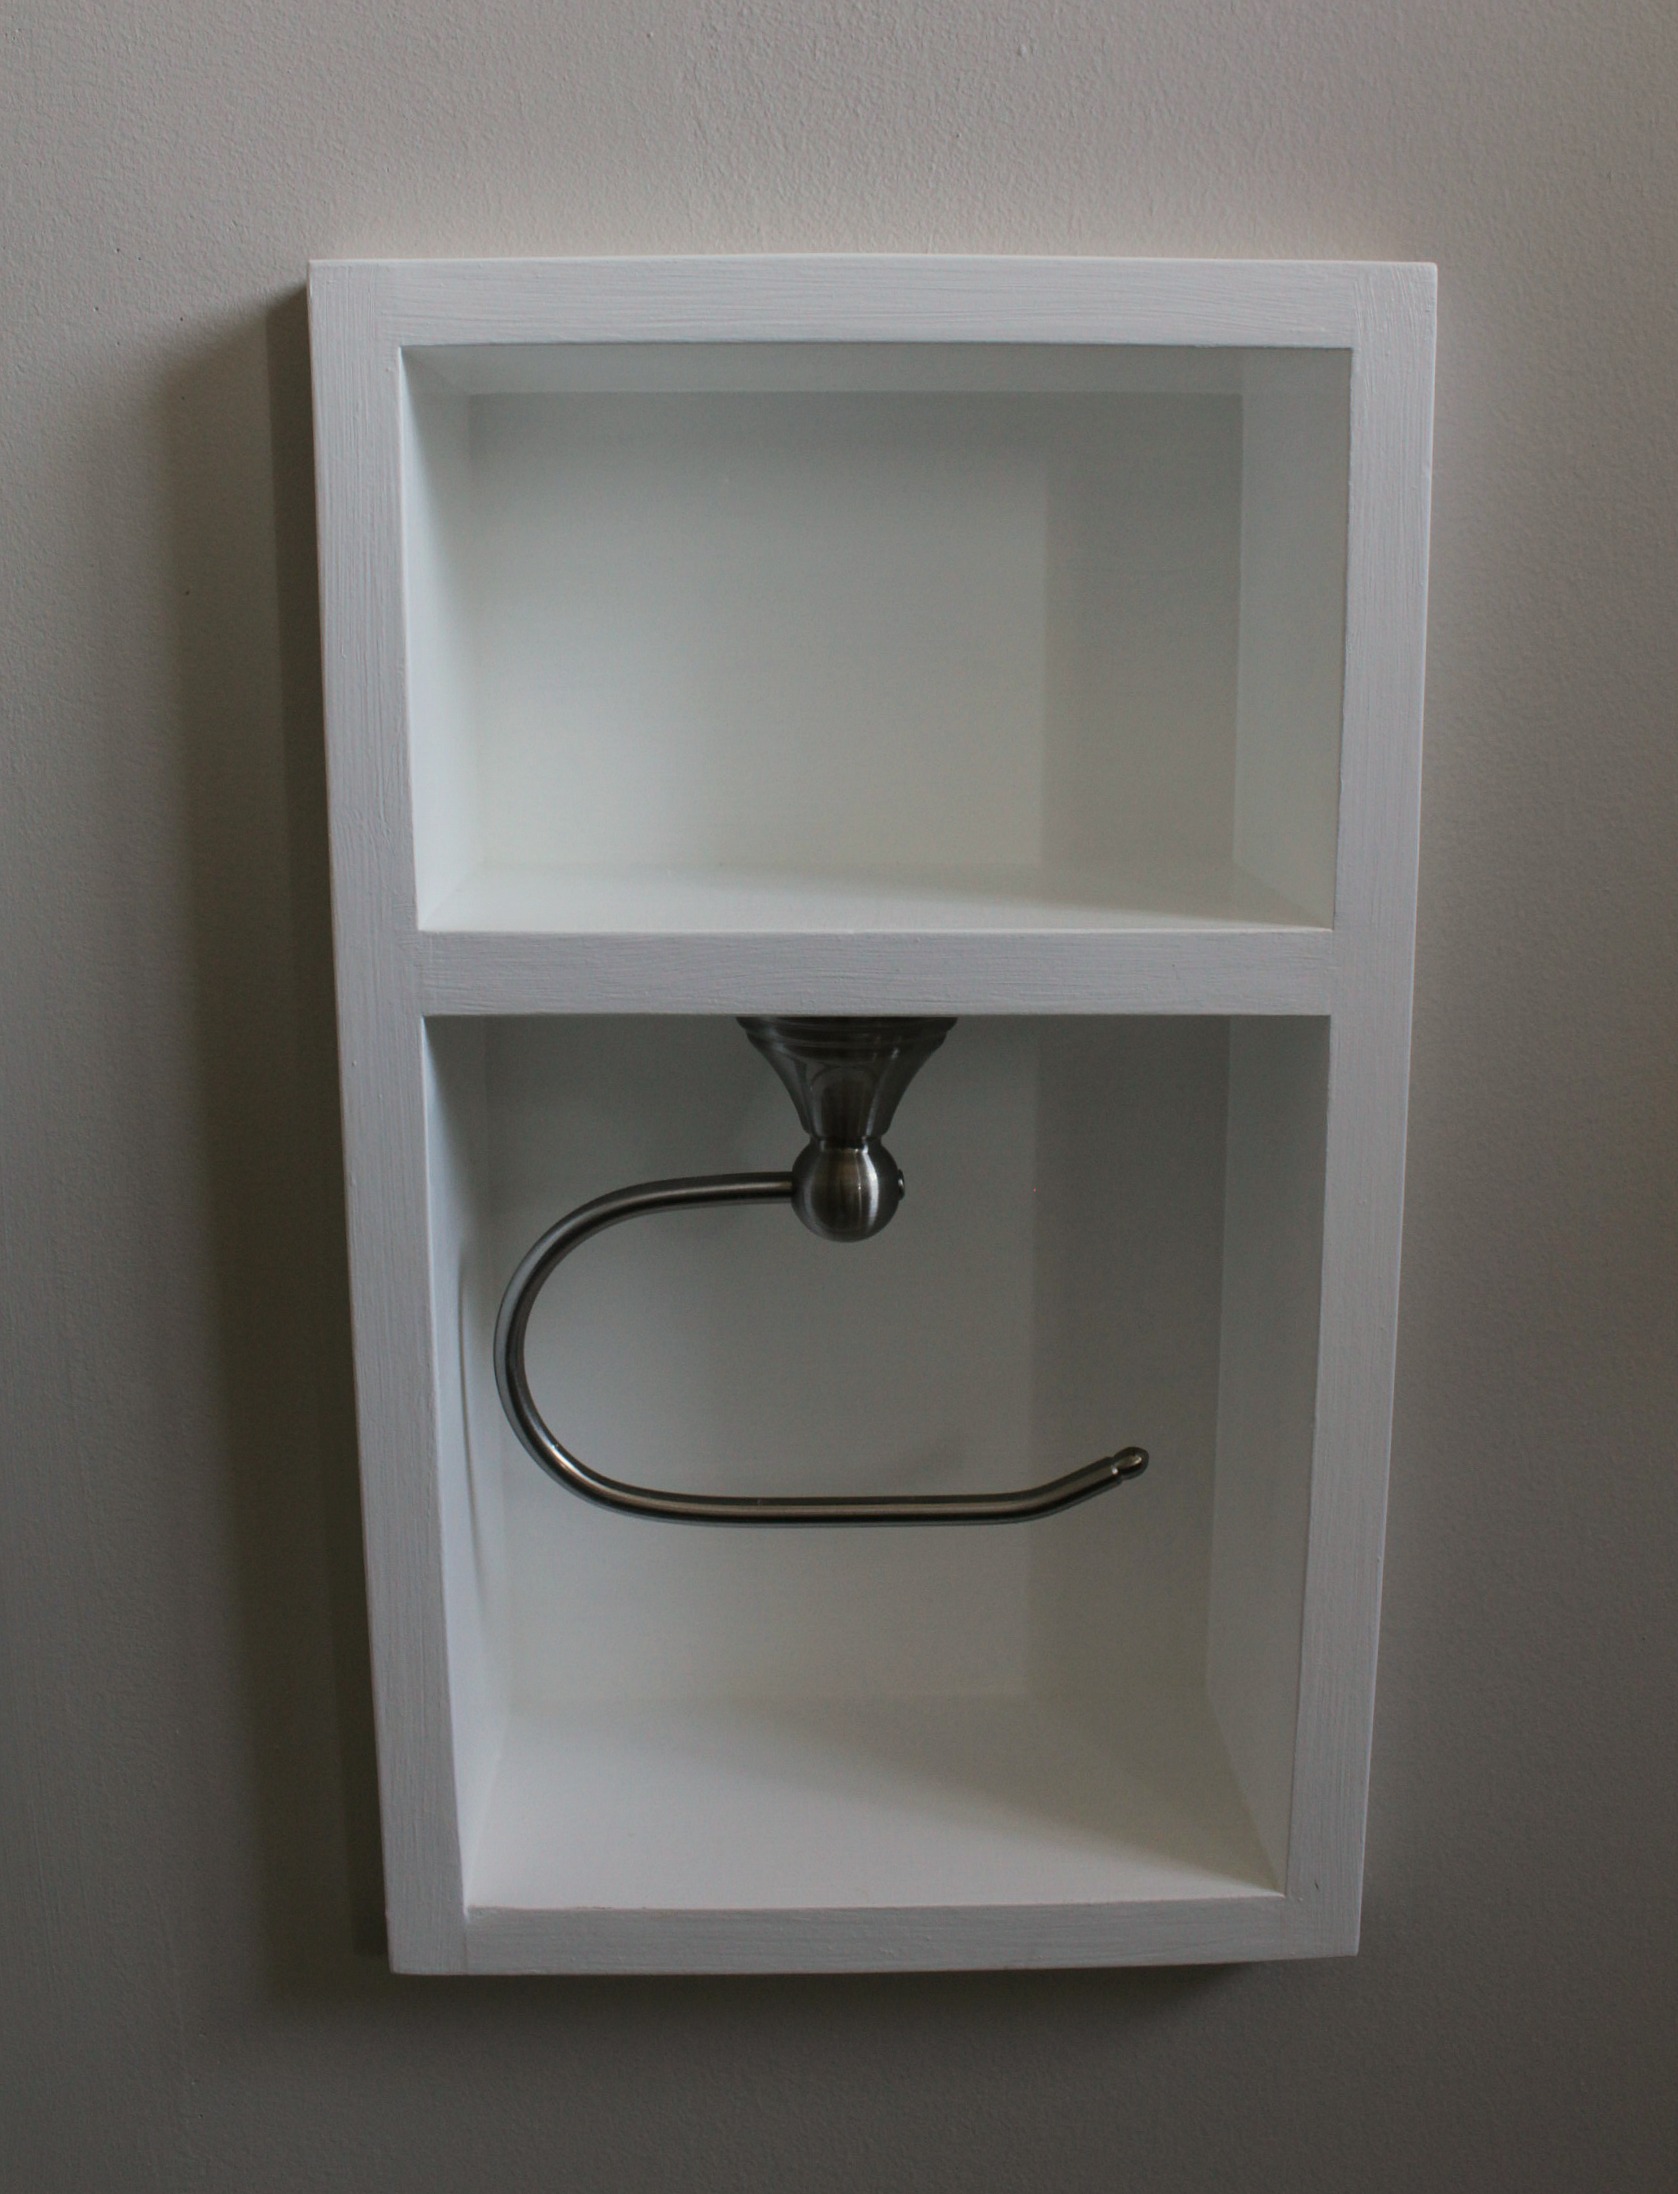
First we had to choose a toilet paper holder so that we would know how much space we needed for the holder and roll together. We wanted a holder that swung out a bit to accommodate any sized roll, and one that let you "reload" from one side. Once we had that we could build the box around it.
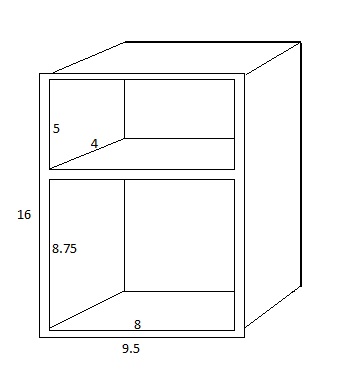
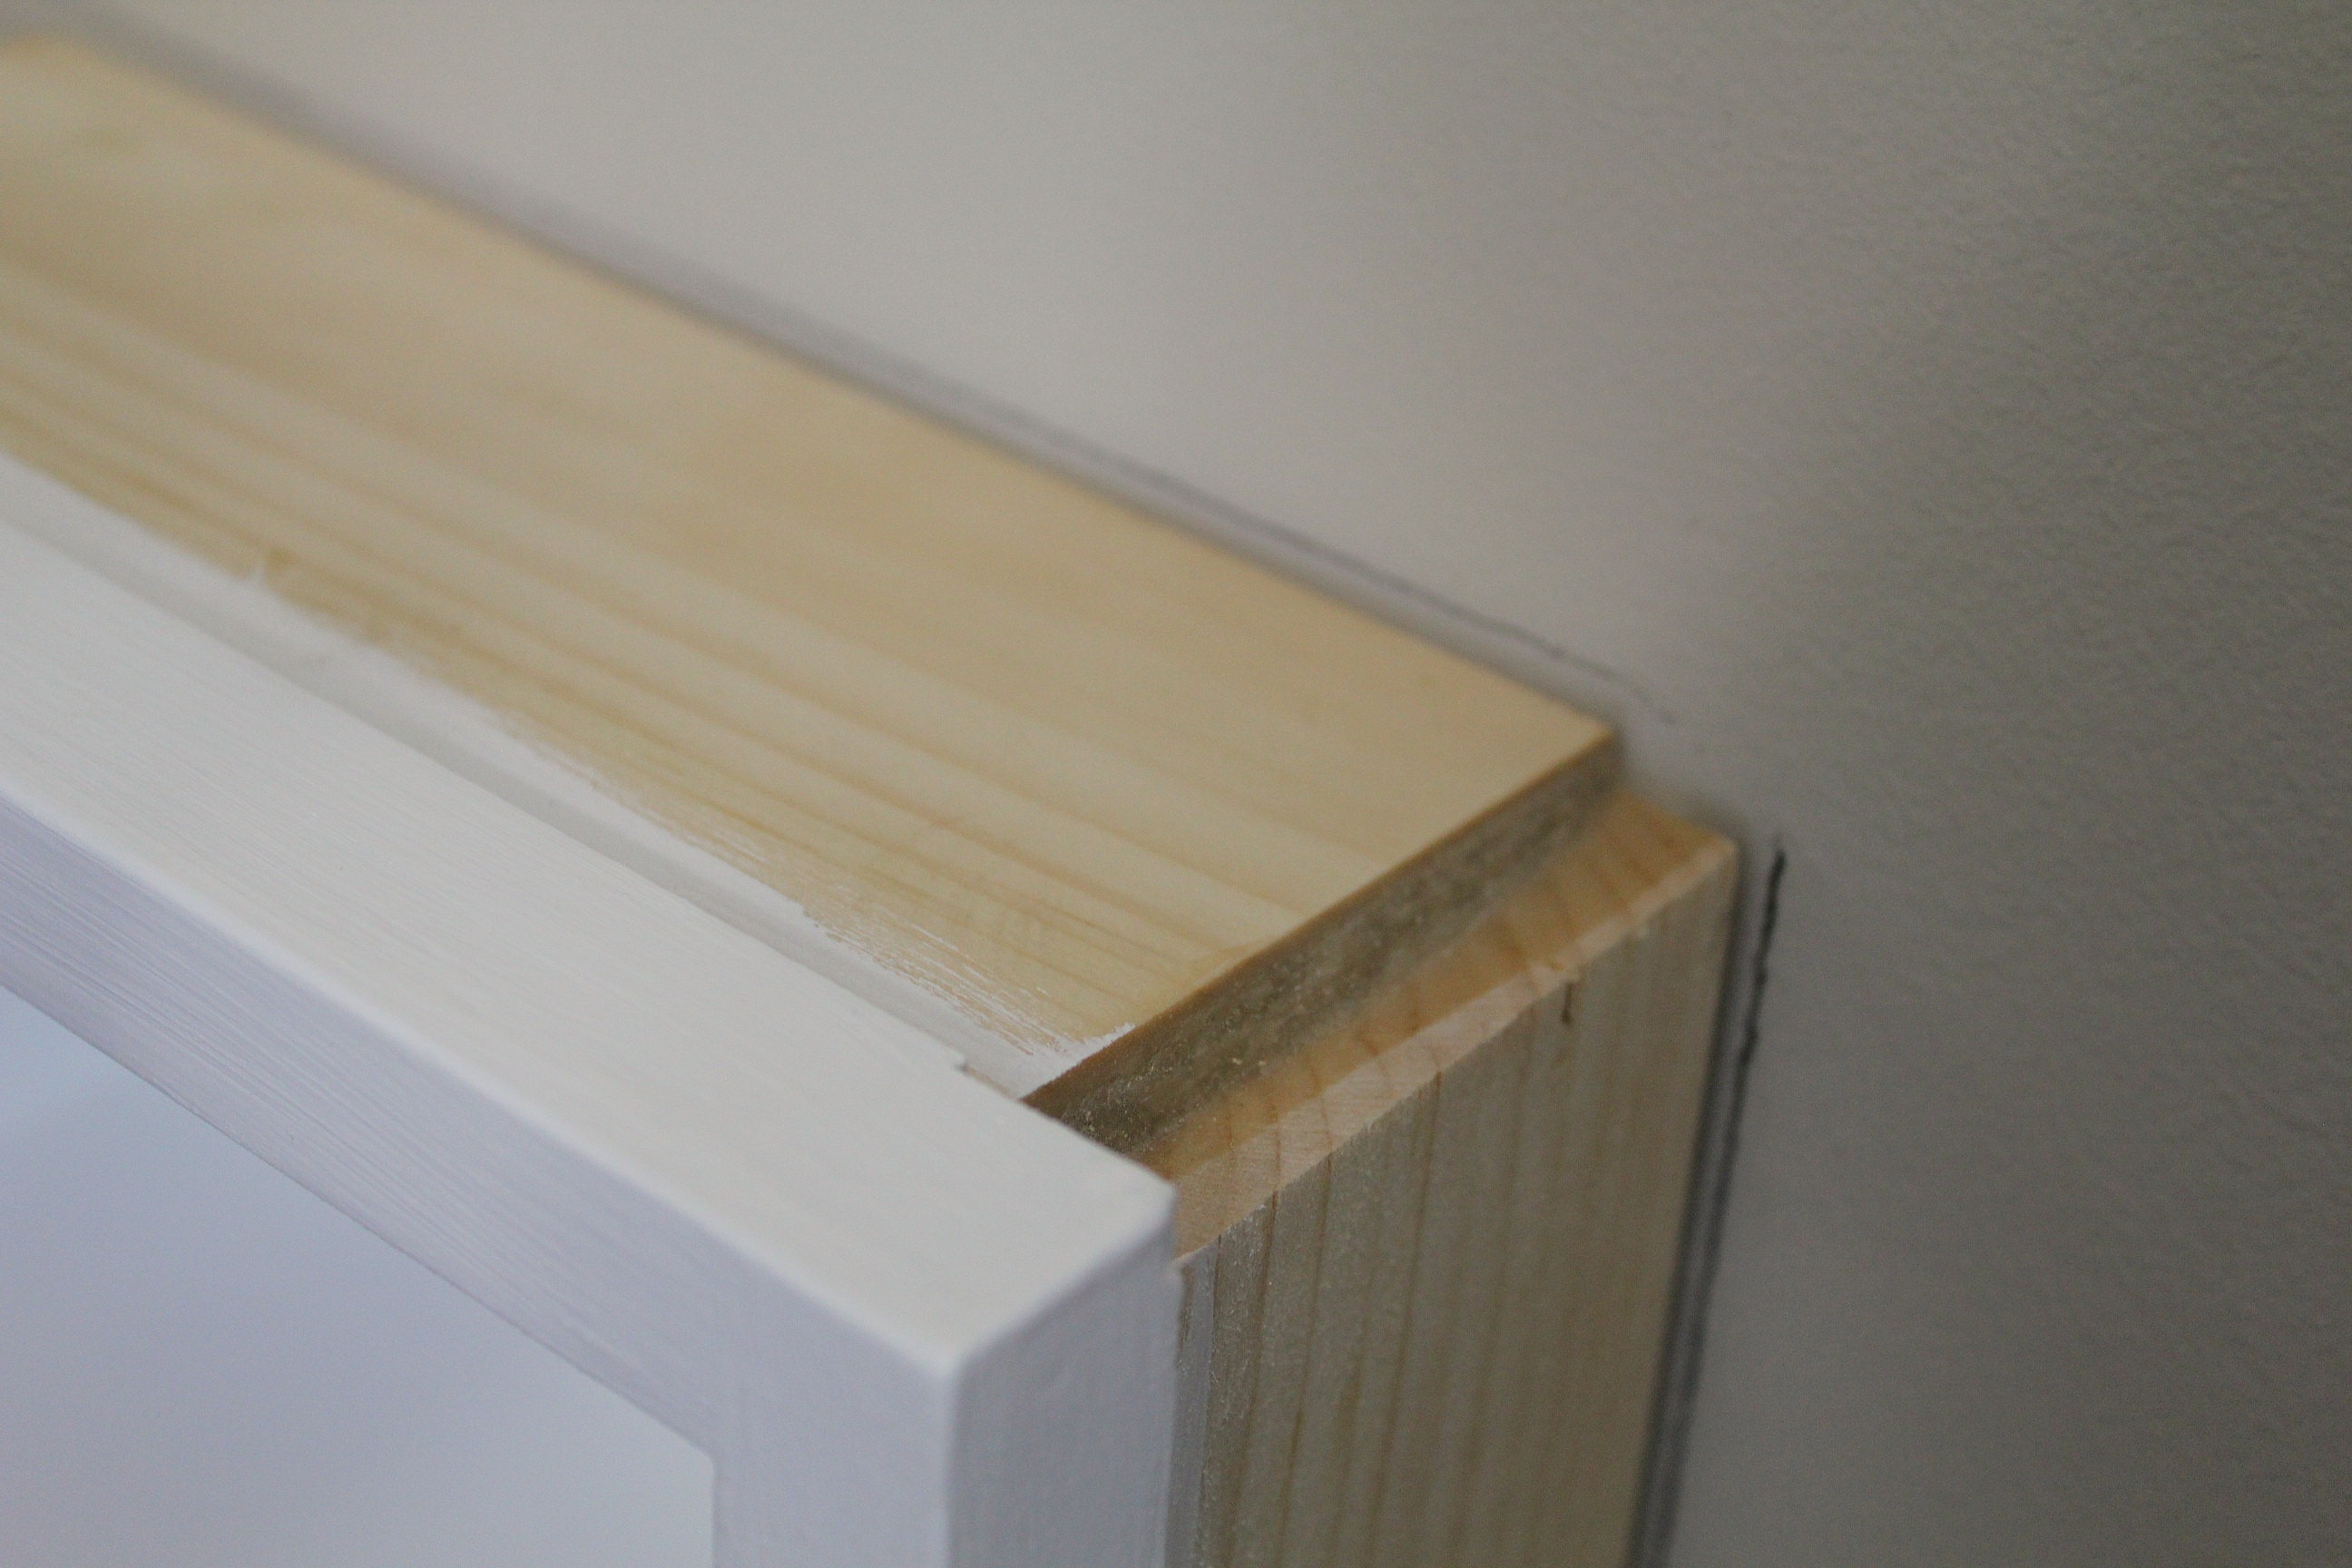
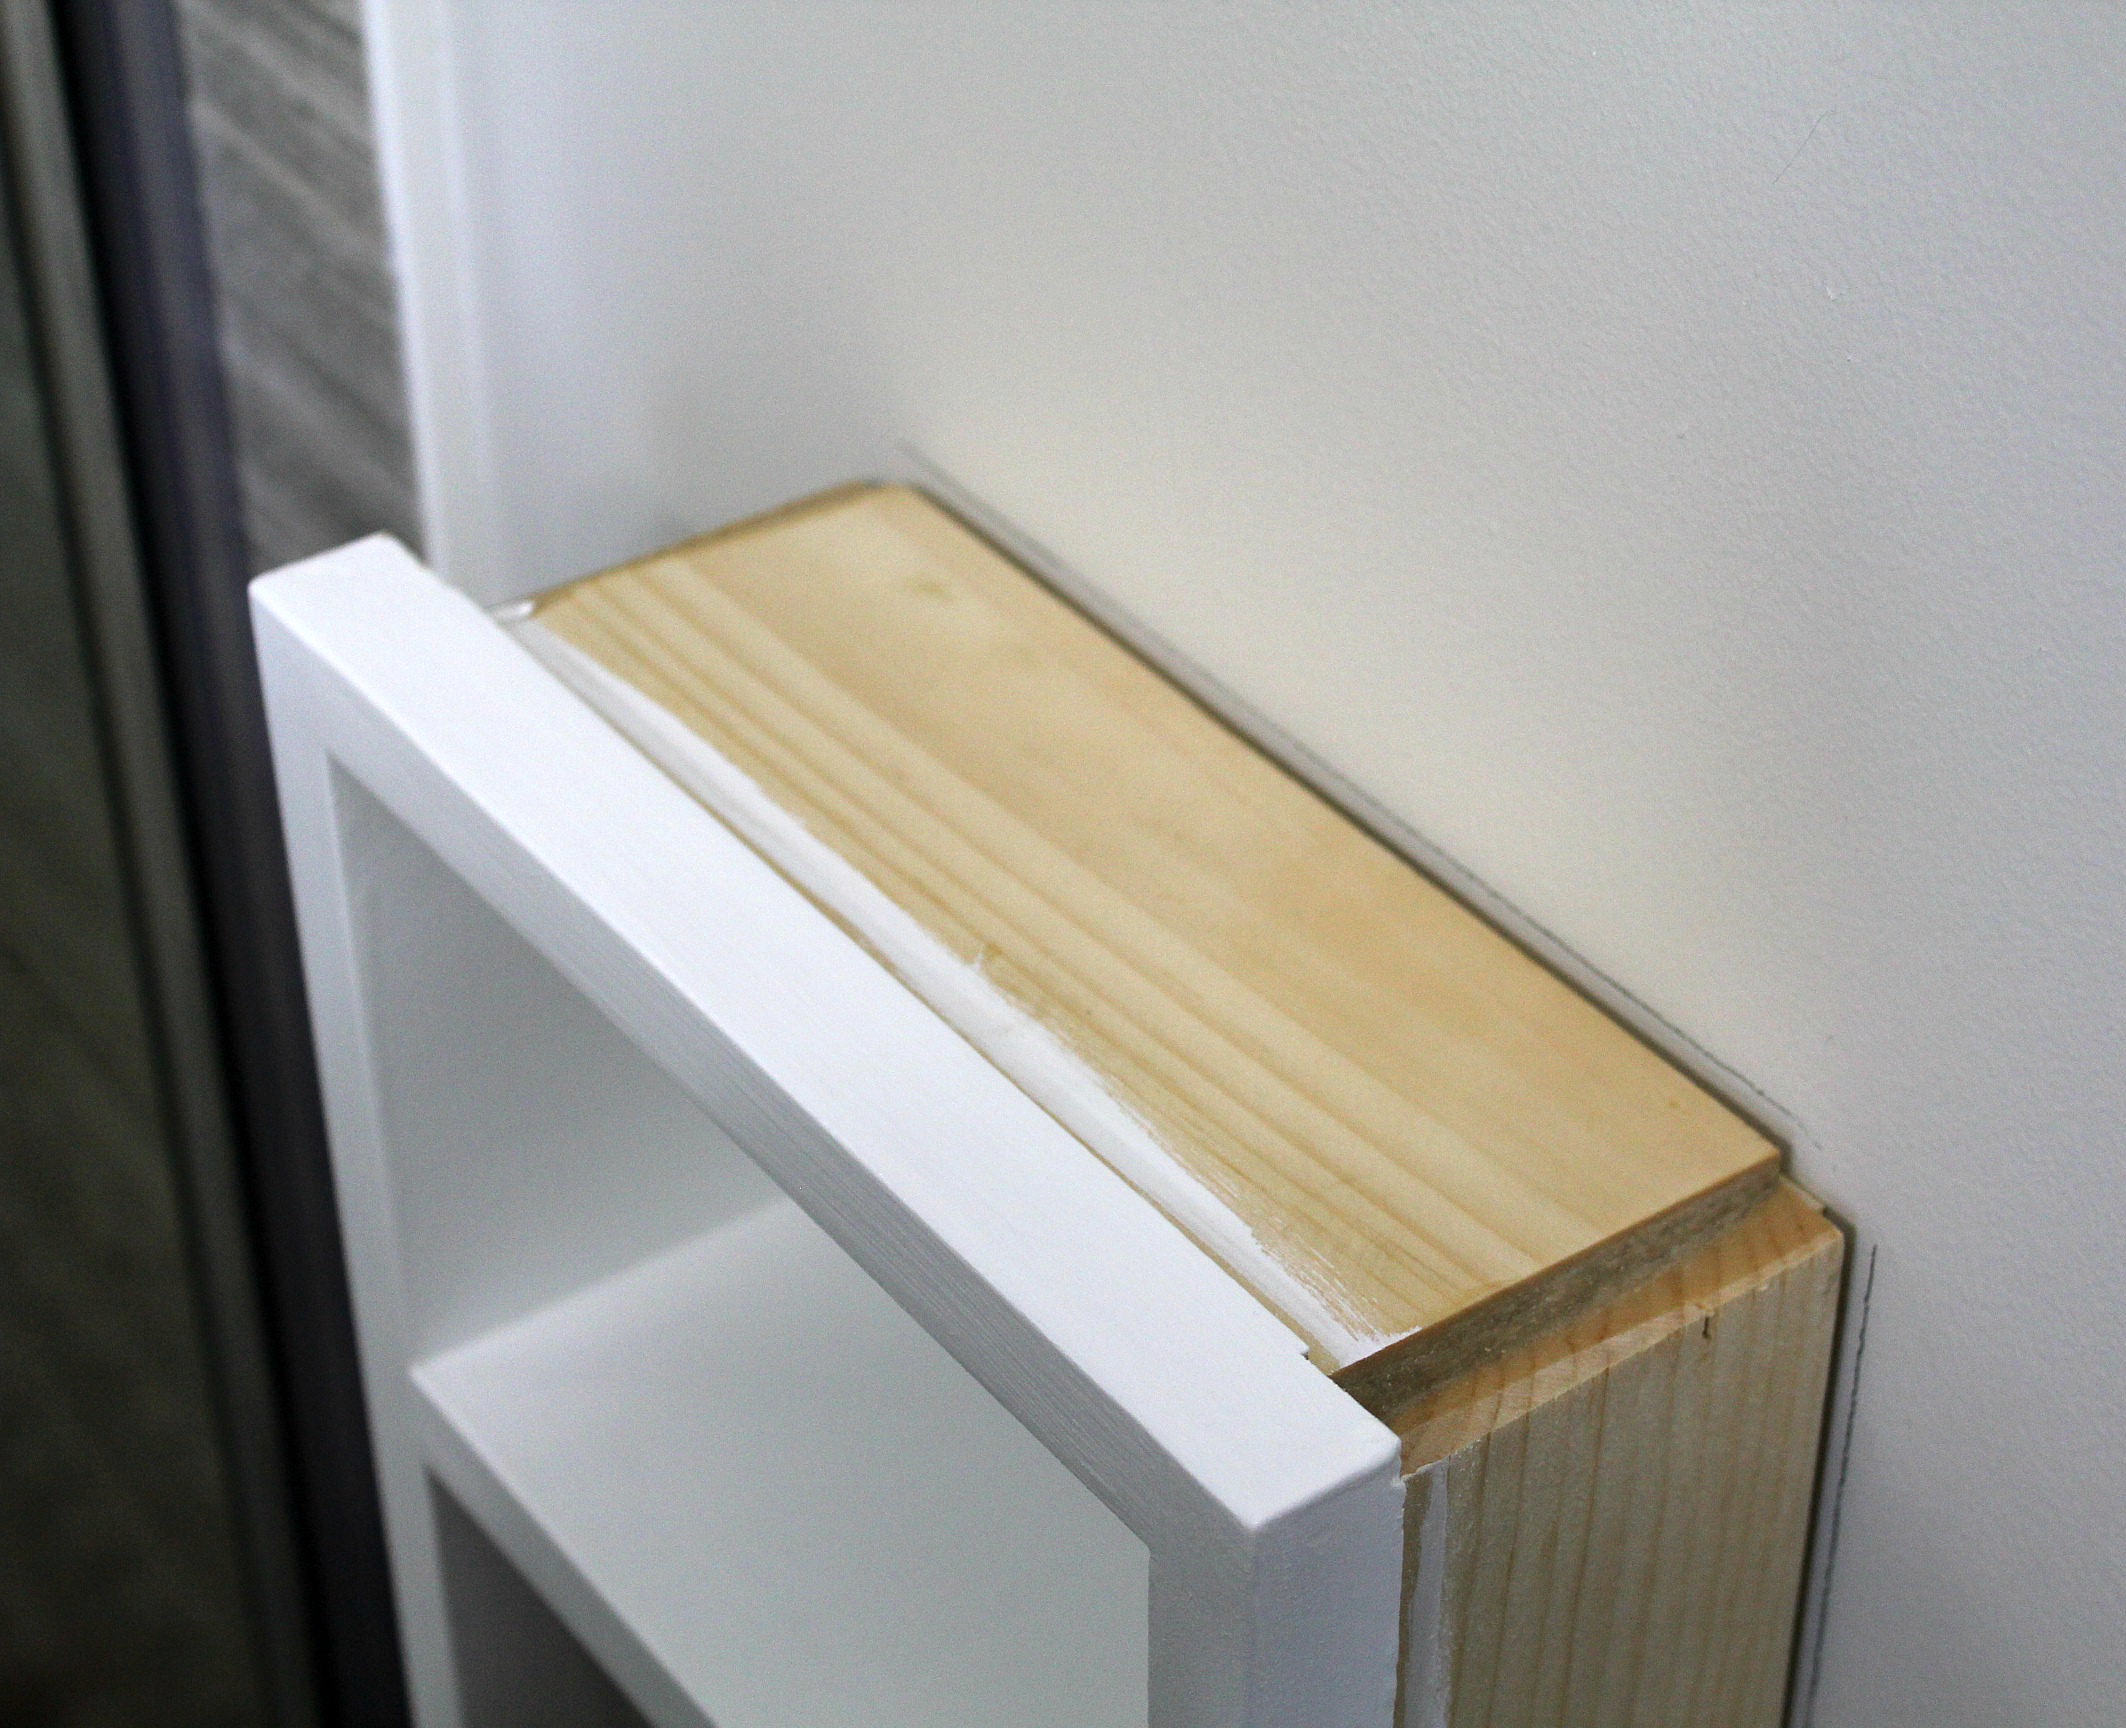
Below is a simple drawing of the dimensions of our box. You could of course modify it to suit your own needs. We used 1x6 boards, so the face of the box is 3/4" thick, but the rest of the board has been cut down behind to be slightly thinner. This gives a nice overhang around the edge that can be caulked so that it looks like a built-in.
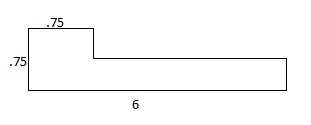
Unfortunately I didn't take any pictures of the box while it was being built and before I painted it. I have no idea why not. So I'll try to describe what was done to the best of my ability. Tom took a 1x6 board and using the table saw cut away part of the board, leaving a 3/4" inch lip along one side. Like this:
He cut the board down to 4" wide (the width of a roll of toilet paper) and then into 4 pieces - 2 at 16" long and 2 at 8" long. When you fit the pieces together to form a box you can see that a notch needs to be cut out at each end of the 16" boards so that they meet up with the 8" boards correctly, giving a frame around the entire box. Tom accidentally cut the notch a little too low so that the wood behind isn't flush, but the pieces do meet on the inside where it's important. The 4 boards were screwed together and the joints visible on the front were puttied.
A spare piece of 1x6 was cut down to 1x4x8 for the shelf in the middle. We used the toilet paper holder and a roll of toilet paper to determine the spacing above and below the shelf. The final step in construction was to add a back onto the box using a piece of plywood.
Once it was all puttied and sanded, I painted the inside and all around the outer frame with two coats of white primer and 3 coats of white semi-gloss paint to match the baseboards and trim. There was no need to paint the outside of the box as it wouldn't be visible once installed.
Now for the installation. You'll need to determine where you want the unit to be. We centered it between the edge of the shower tile and the door frame at a height that was comfortable to reach when you're doing your business.
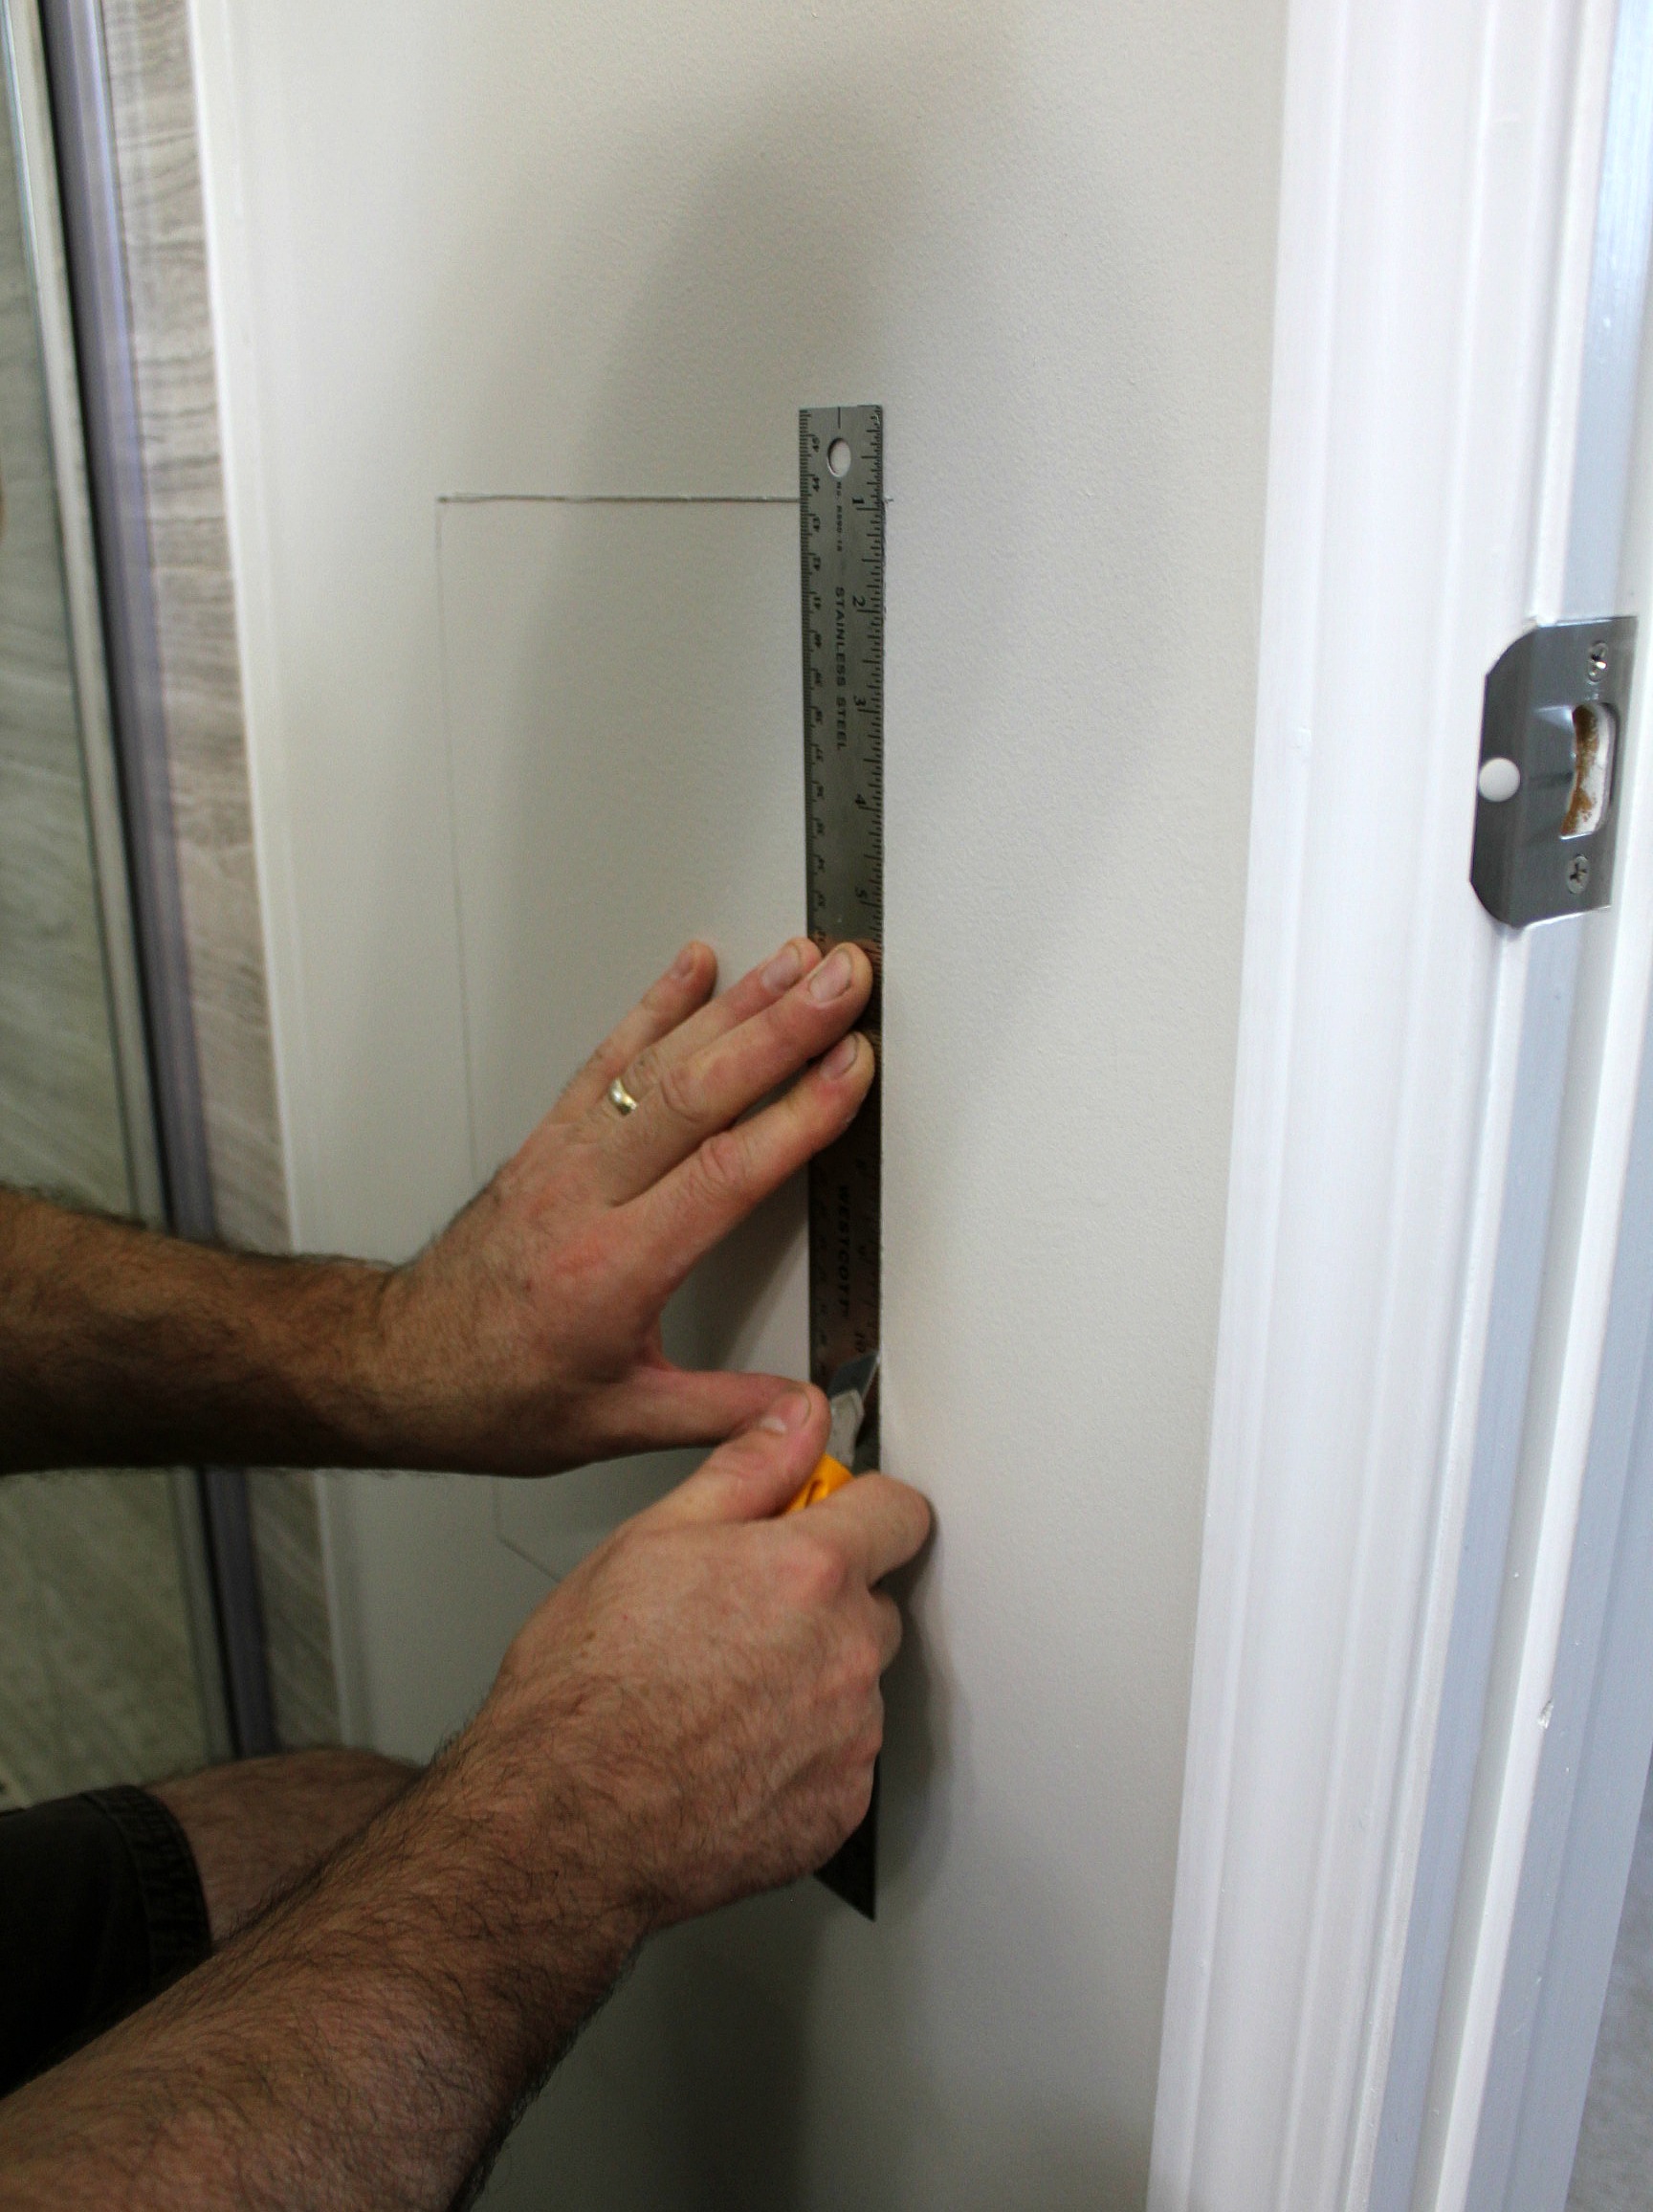
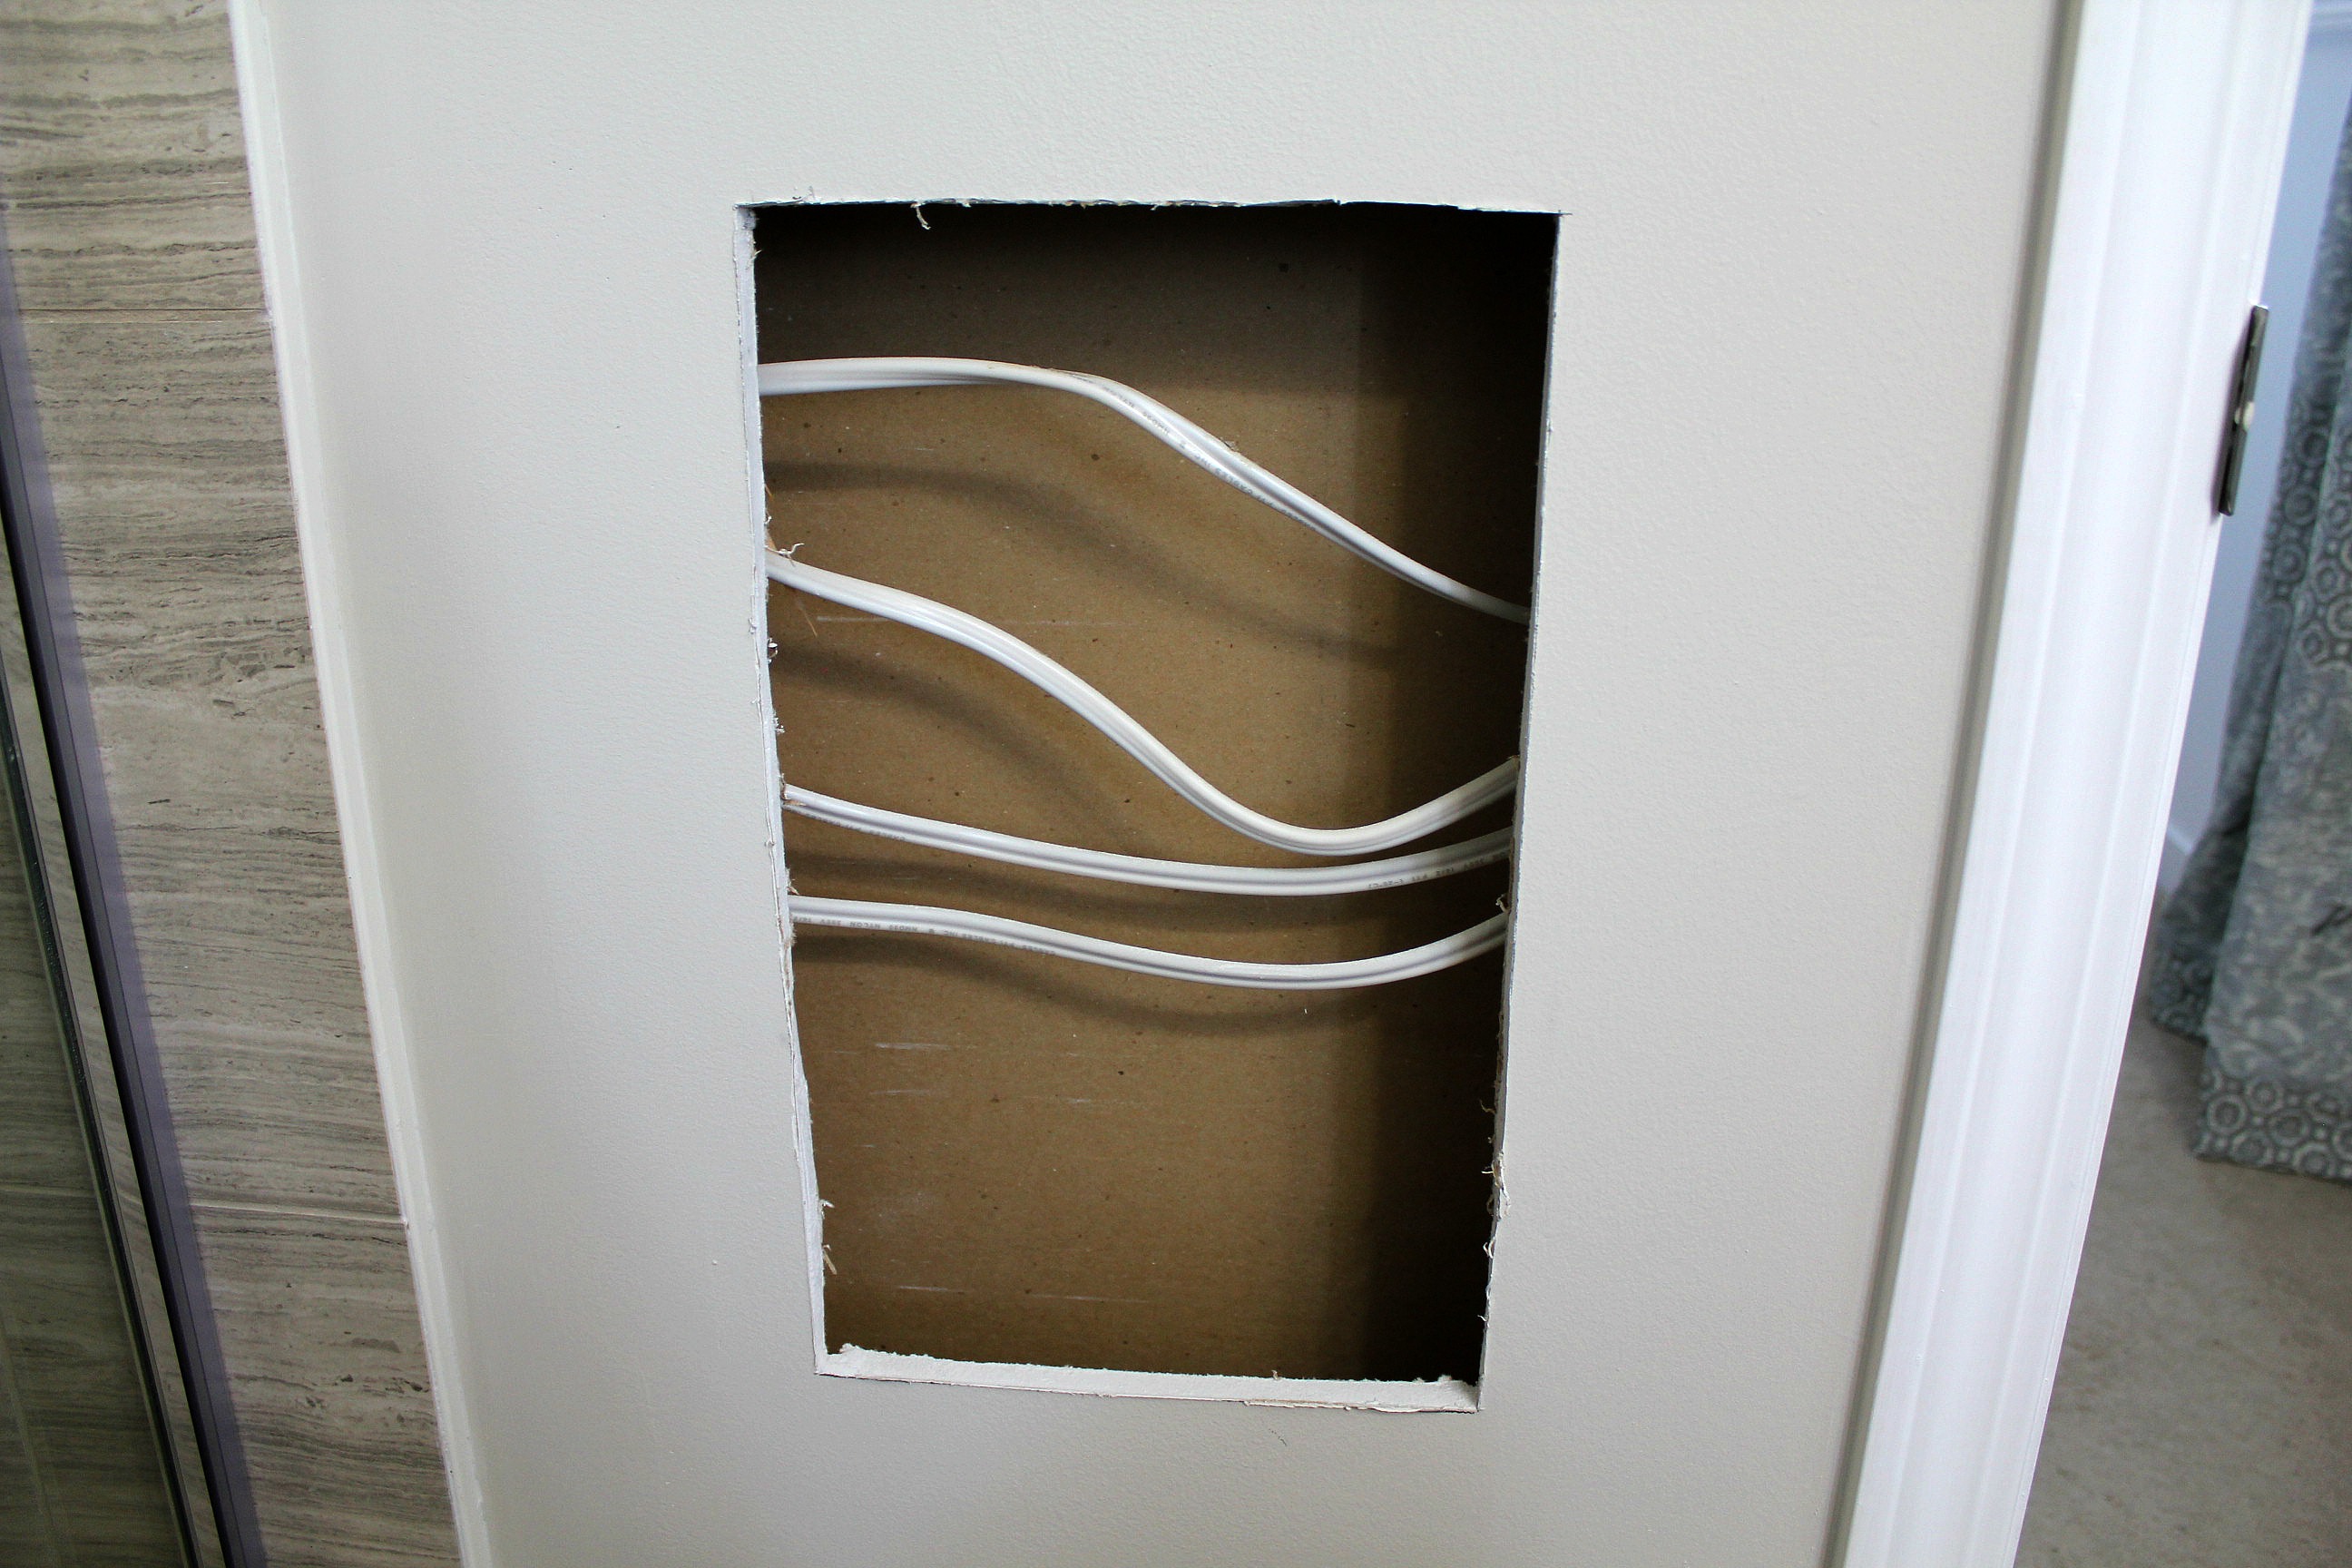
Tom held the box against the wall and traced the outline with a pencil, then cut out the drywall with a straight edge and utility knife, and made sure the box would slide through the opening. Make very sure you are only cutting the drywall and not through any electrical wiring or boxes! Also, if wiring needs to be re-routed, please make sure a qualified electrician does that for you.
We had wiring behind the wall that led to the lightswitch on the other side, but there was enough excess wire that we were able to push it up out of the way and secure it to the studs without having to alter anything.
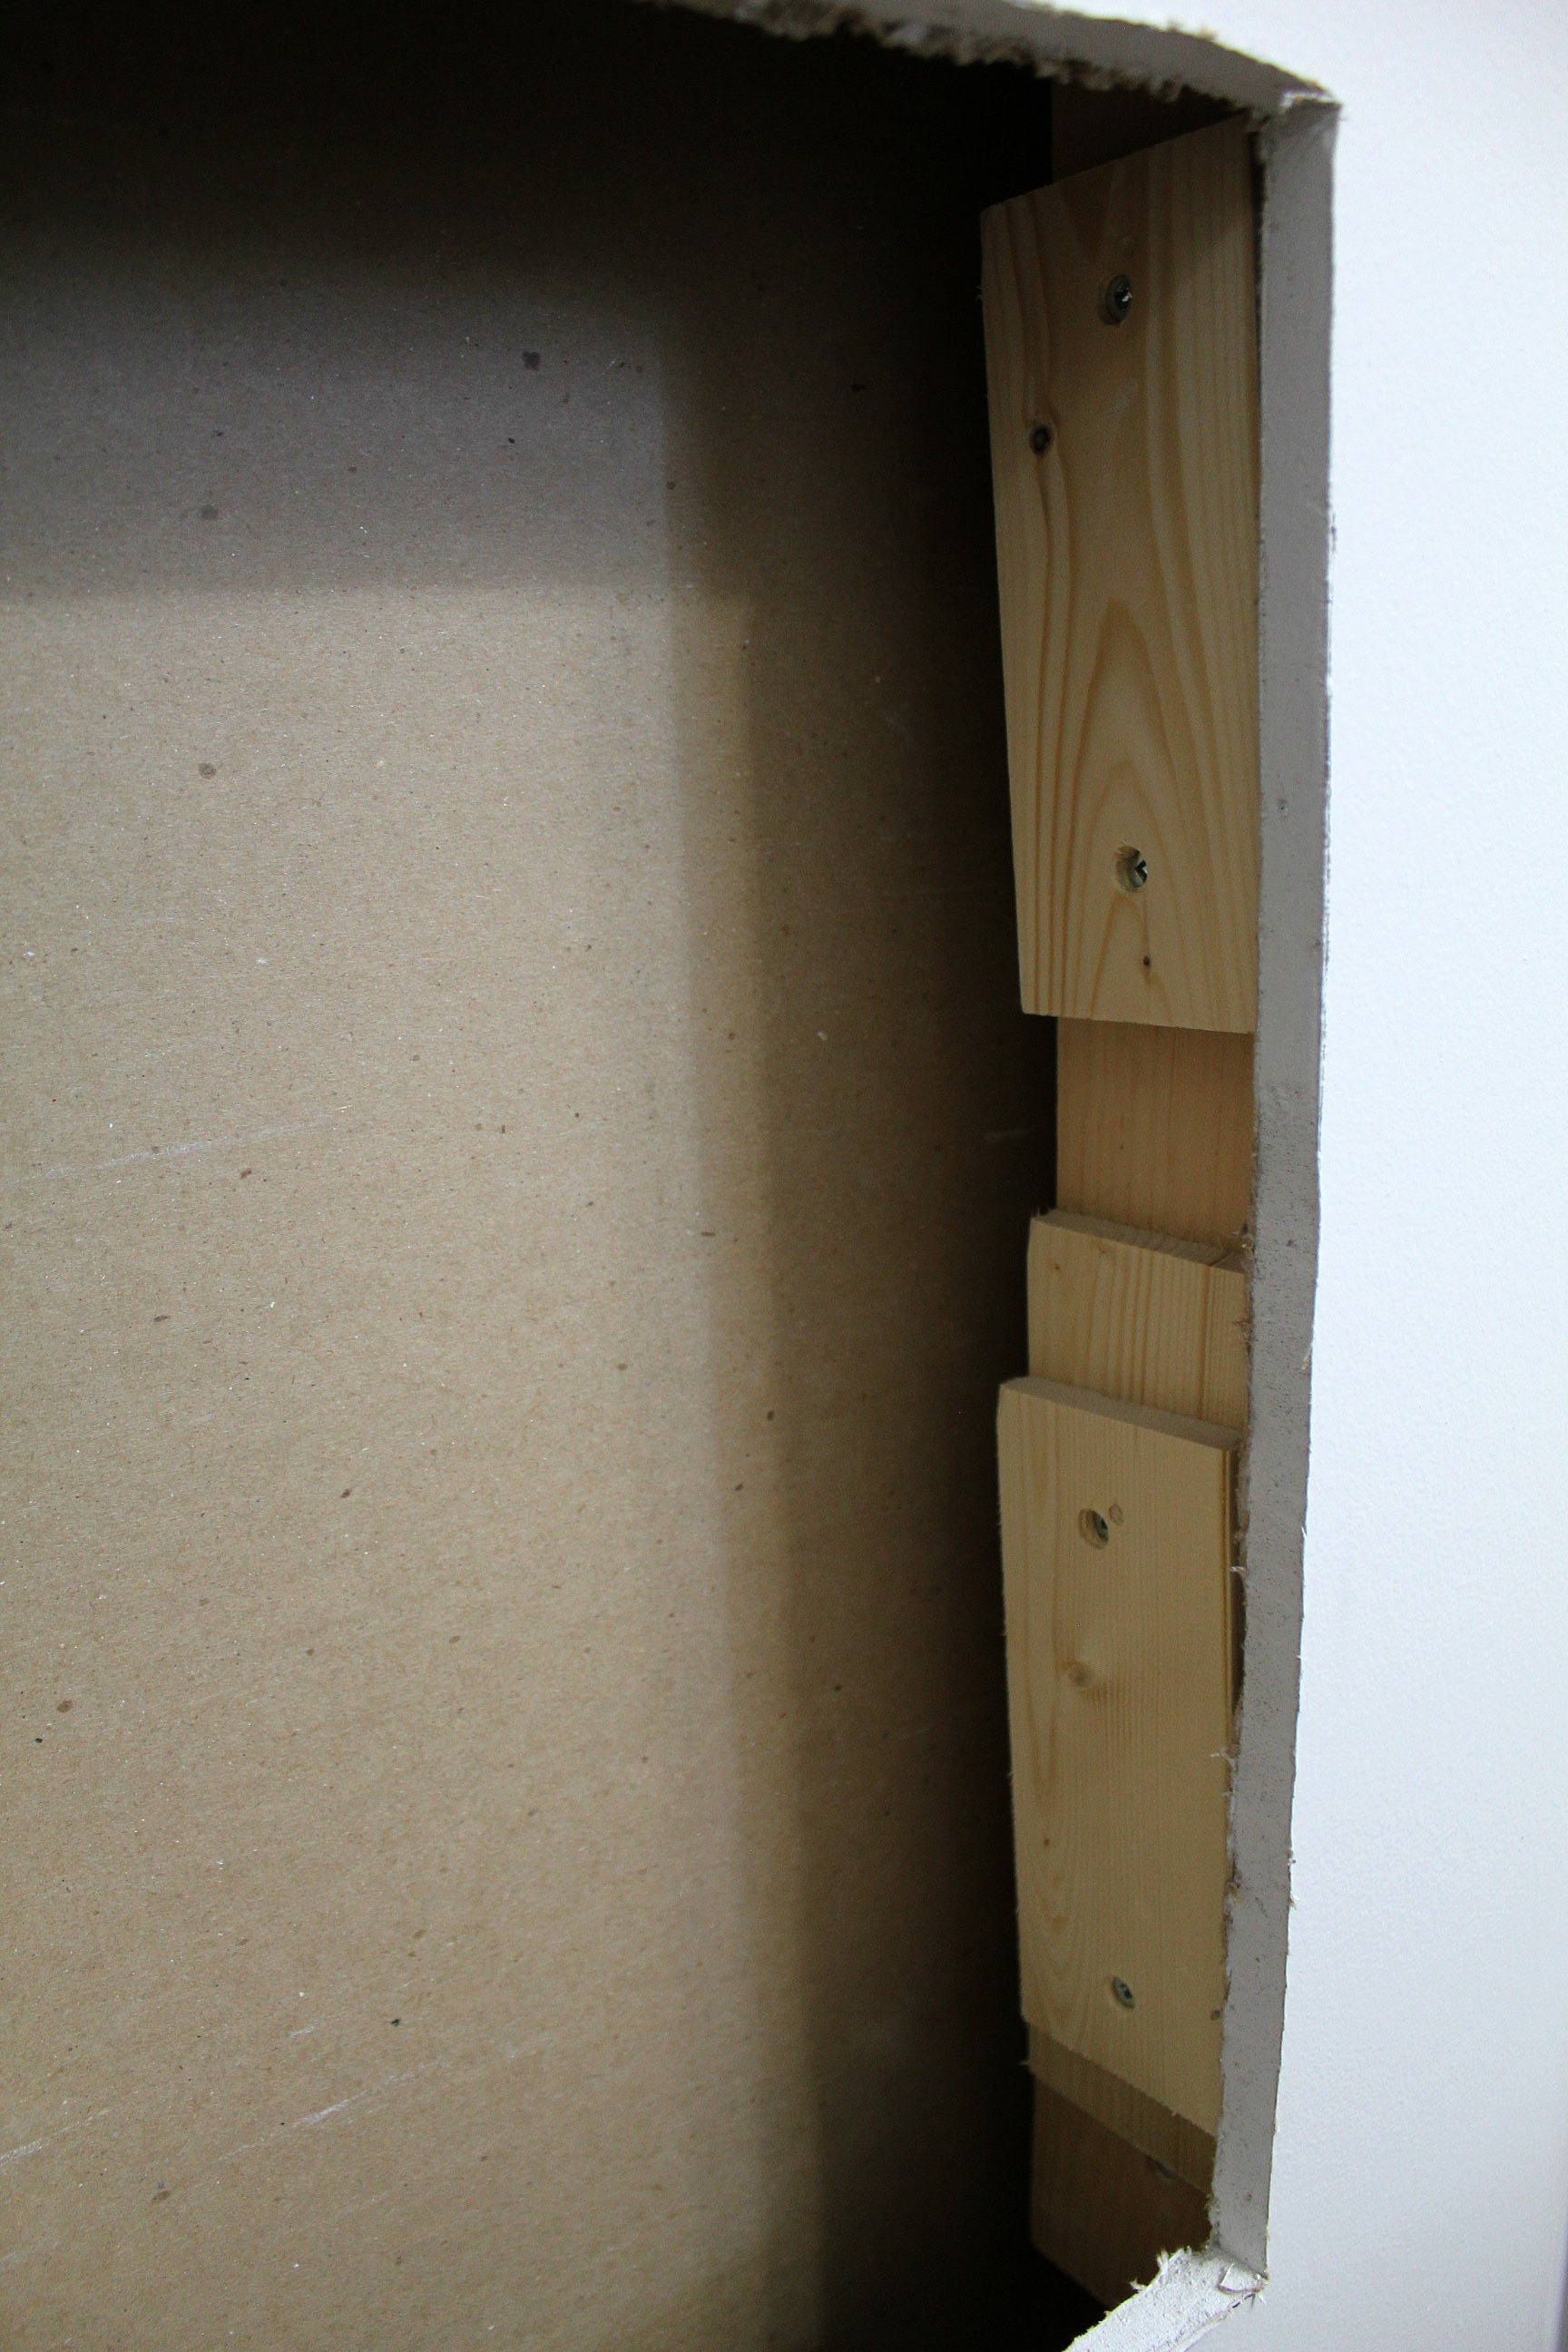
Once the wiring was clear we had to determine how to attach the box securely. Since the spacing between studs is 12" and the box is only ~9" wide, we had to shim up the studs on both sides until they met the box. We just layered scrap pieces of wood, screwing them into the studs and then into each other until we had the right width. The box was then put in place and screwed into the shims from the inside using countersunk screws.
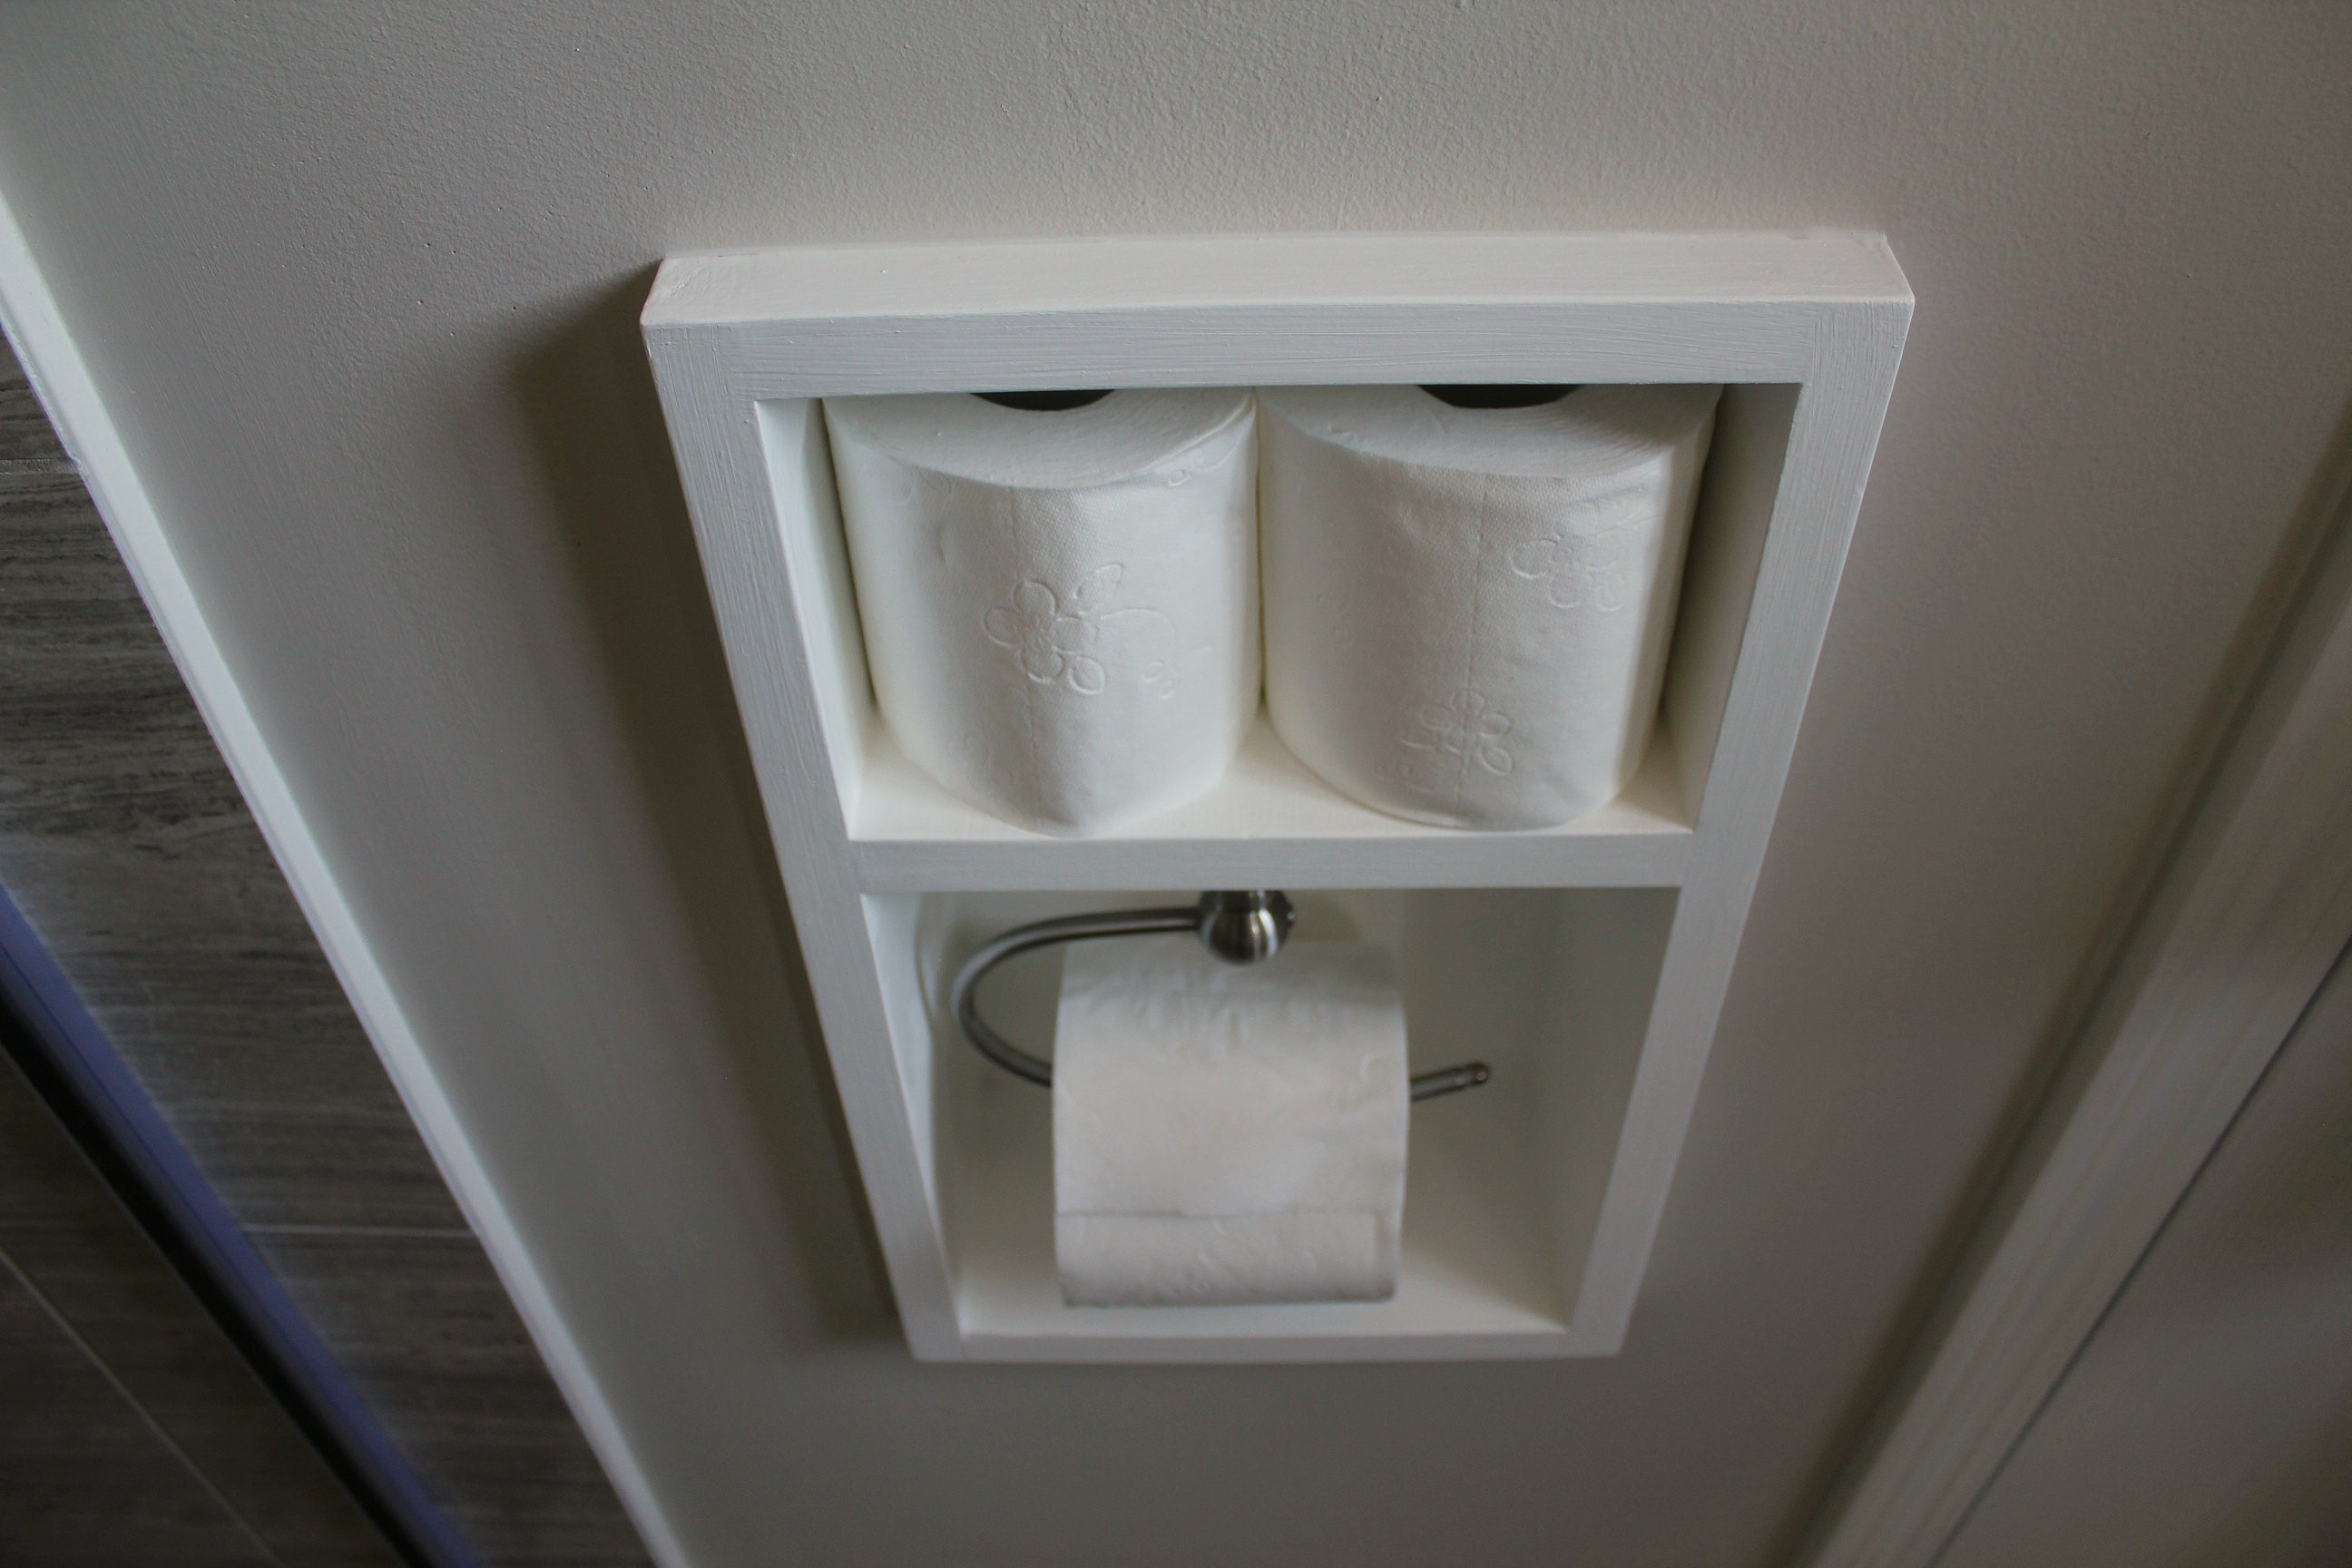
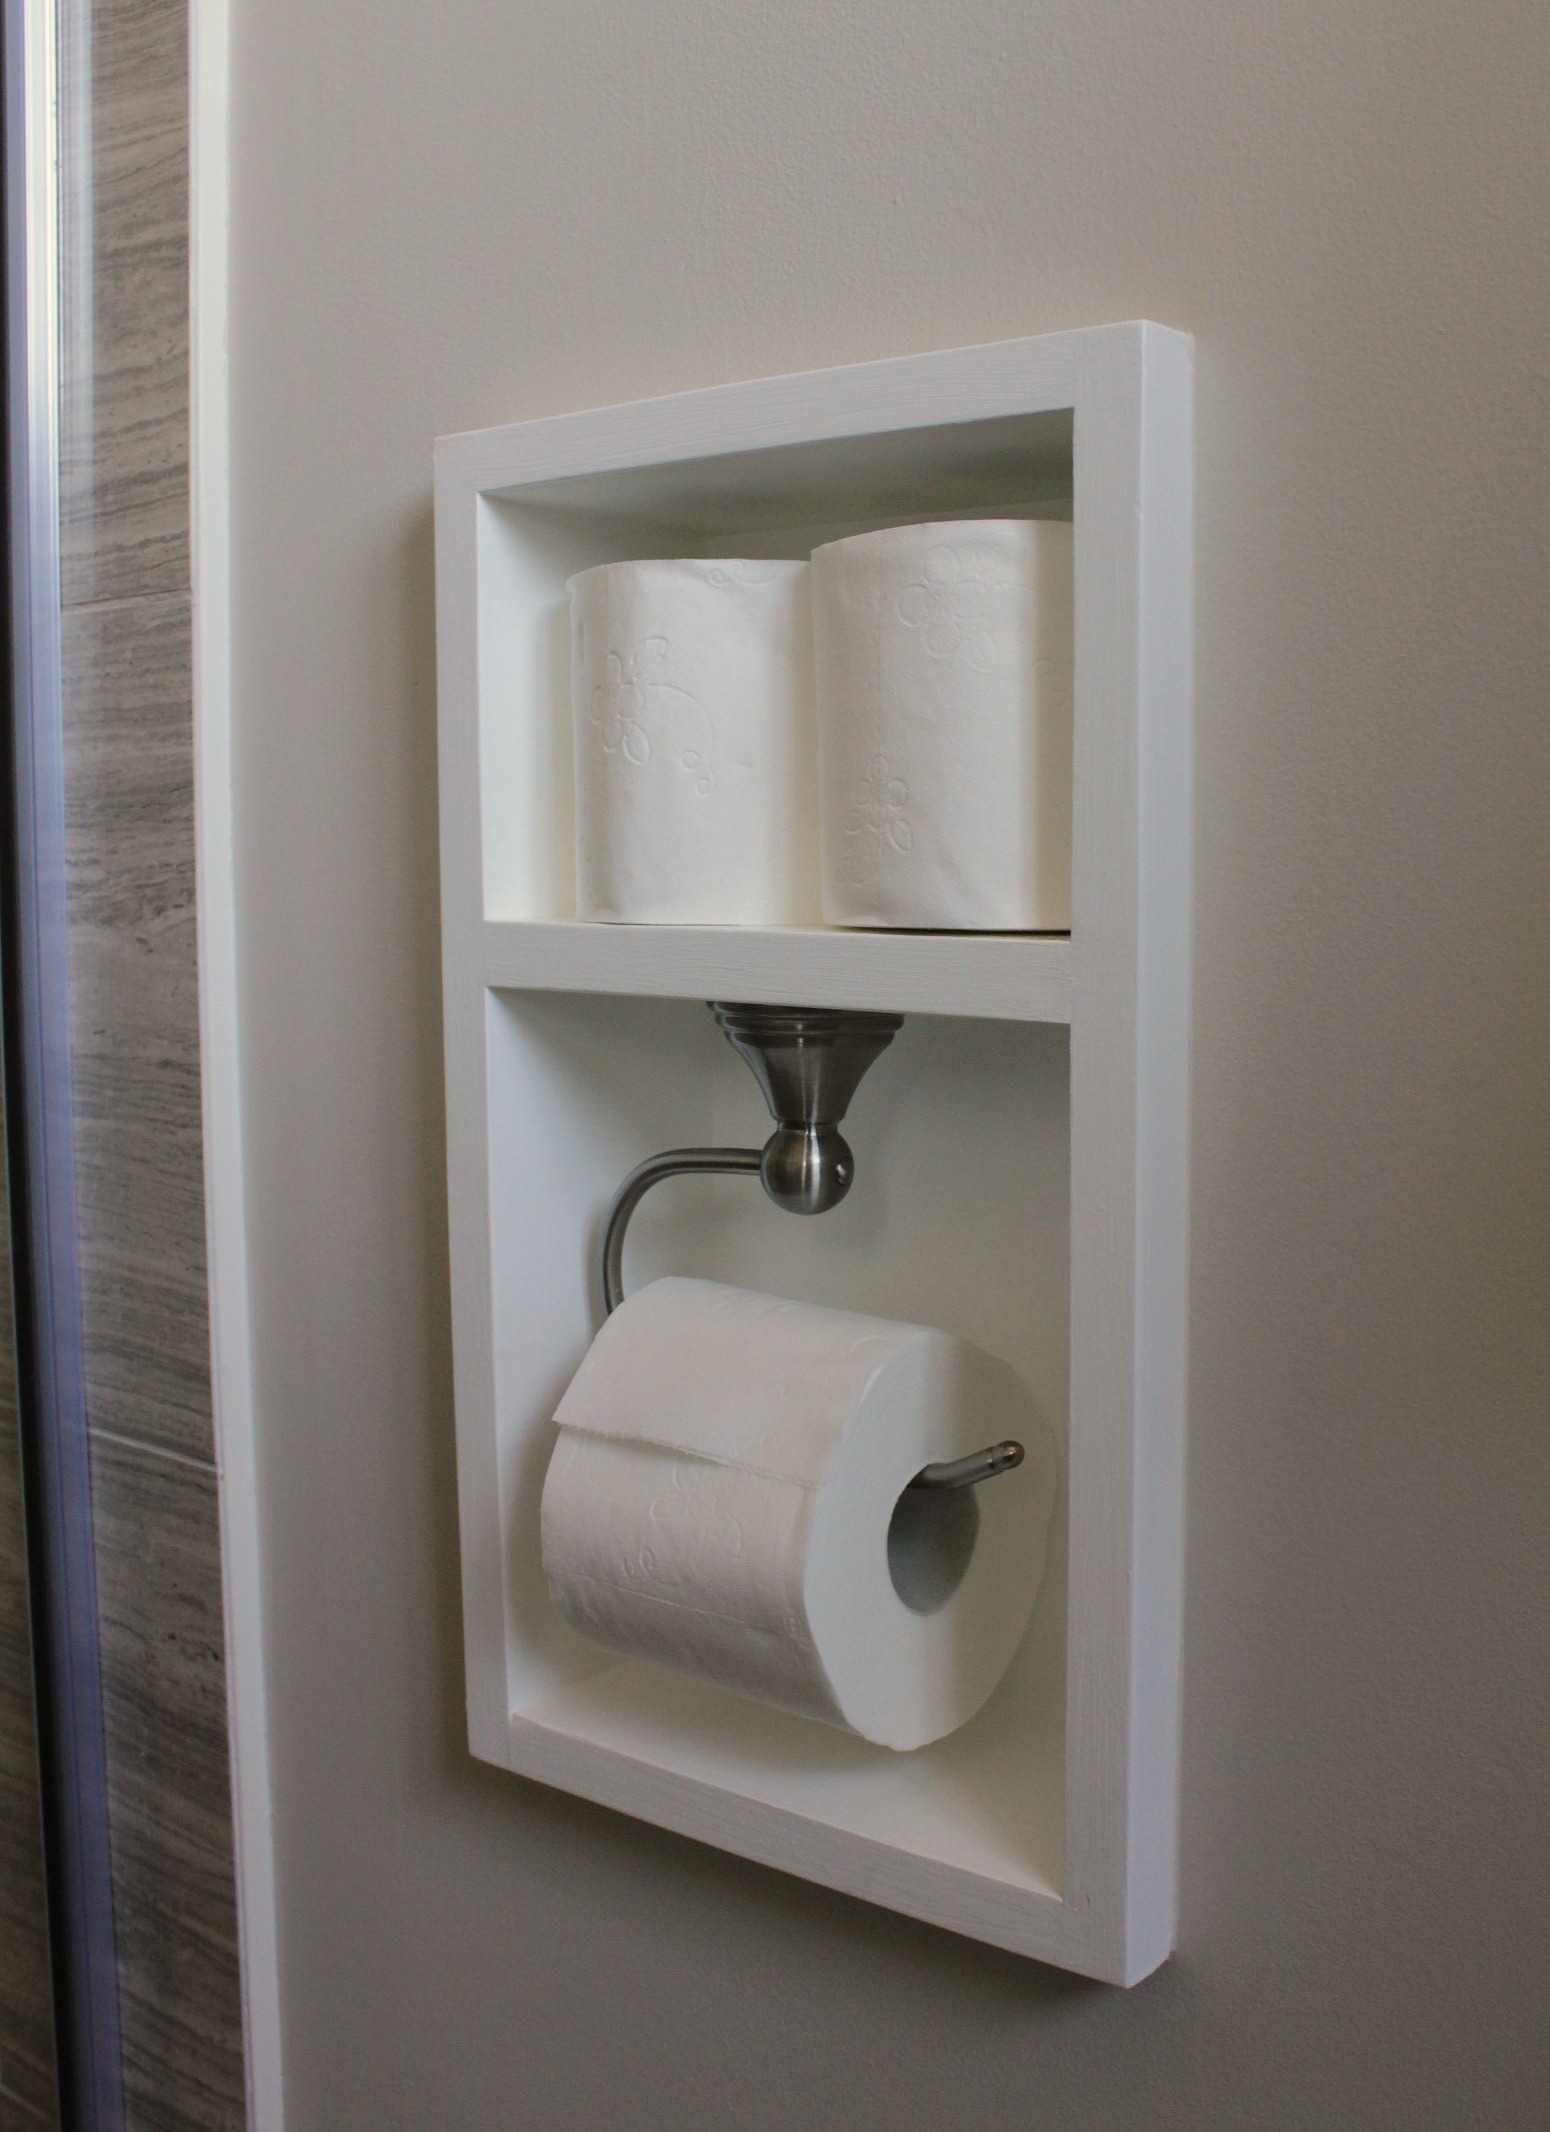
The last step was to attach the toilet roll holder to the underside of the shelf. The holder is mounted slightly forward of center so that there is enough clearance when the arm swings up to put a new roll on. A double roll will stick out slightly at the front when it's new.
I also puttied and painted the screw holes, and caulked the seams between the frame and the wall. You don't have to caulk the seams, but I like how it gives the project a finished look, and makes it seem like an original part of the room.
The toilet roll holder we chose was the Moen Preston model in brushed nickel.
Most of my favourite projects are designs that we came up with ourselves, and this one is near the top of the list. When you're working in small spaces you have to improvise sometimes. This solution for toilet paper supplies in a tiny ensuite bathroom really makes use of an otherwise unused space.


1 comment:
We have two small bathrooms, soon to be renovated with no extra floor space. This is a great idea! Thank you for sharing.
Post a Comment