Pages

May 31, 2012

Hurry Up Weekend!

I can't believe how quickly this week has flown by, and I've only posted once. Shame on me. Can I blame it on work? We now have to complete month end in 3 days (it used to be 6) and I am the only one in the accounting department full-time. Add to it that our office is moving to another town 45 minutes away - this weekend. I have been packing and sorting and labelling for the last two weeks. I get home at night and just collapse.

I haven't been running in over two weeks. I don't remember the last time we grocery shopped. My PVR is filling up with season finales that I may get around to sometime next month.

We are working on a cool carpentry project (at least we think it's cool), but I'm doing the staining and poly-ing very slowly because I want this one to look amazing. So it may be next week before I'm ready to show it to you.

If I can just make it through to tomorrow night. Because this is where I'll be spending my weekend:


Tom's employer is holding their (postponed) Christmas party at Blue Mountain Resort on Saturday night and they are paying for us to stay there as well. We are going up on Friday night so that Tom can bike the trails with his friends on Saturday morning.  

Have you ever been to Collingwood (the nearest town) or Blue Mountain?  They are both so beautiful. Blue Mountain is mainly a ski resort but I like it more in the summer. The mountain stays open with cross-country and downhill biking and hiking trails. They also have an outdoor rock-climbing area as well as a beach.


Photos of The Grand Georgian - Blue Mountain Resort, Blue Mountains
                                                                                 source


I'm looking forward to time in the pool and the hot tub,

Photos of Westin Trillium House Blue Mountain, Blue Mountains

And hopefully, if it doesn't rain too much, some time in the square listening to a concert.

Photos of Westin Trillium House Blue Mountain, Blue Mountains


I'll have my own pictures to share on Monday!

May 28, 2012

Cocoa-toasted Cauliflower

Are you looking for an easy, oh-so-tasty side dish recipe? 
Well I have one for you. 
Let me introduce you to Cocoa-toasted Cauliflower. 


You think that's a typo don't you? 
Maybe it should be coconut? Or coconut oil? Or Coca-cola
Nope, there is no typo. 

Don't worry, it won't taste like chocolate, this isn't a dessert. You have to admit that cauliflower on its own is a little bland. The cocoa has a crisp flavour that gives the cauliflower a much-needed bite.

The recipe comes from Melissa Joulwan's cookbook Well Fed (I've raved about it before.) You won't believe how good this tastes. The first time I made it, it barely made it onto the plates because we kept eating pieces from the baking sheet.

What you'll need:
1 large head of cauliflower
1 tsp. unsweetened cocoa
1 tsp. paprika
1/4 tsp. salt
1/4 tsp. pepper
1 tsp. garlic (powder or fresh)
2 tbsp. melted coconut oil

Pre-heat the oven to 400 degrees. Cut the cauliflower up into bite-sized pieces. 


In a bowl mix the cocoa, paprika, salt, pepper, and garlic. 


Add the coconut oil and mix well. Add the cauliflower and toss 
with two wooden spoons until all of the cauliflower 
is evenly coated with the mixture. 


Spread the cauliflower out on a foil or parchment-covered baking sheet 
and roast in the oven until it starts to brown (25-30 minutes). 


Remove from oven and enjoy! 

We paired ours with slow-cooker beef stew but it goes with just about anything.


~~~~~

I'm linking to these parties this week!

May 24, 2012

Candy and Cookies

I revisited a couple of past projects this week.

One was the gumball machine-style candy dishes I posted about in the fall. Go here and here for a step-by-step tutorial. I had one glass bowl left over so I stopped by the dollar store to pick up a flower pot & some ribbon. The flower pots come in sets of two so now I have a pot left over. It never ends.

We are participating in a neighbourhood-wide garage sale on Saturday and I thought I could offer this one along with the black one I made before.

I went with yellow paint this time because it was so cheery and the baby blue ribbon is also sweet. And I found some Dubble Bubble gum in colours to match. I'm really loving this one. I won't be sad if no one buys it.


The black one is filled with individual caramels. I think the blue ribbon lightens it up from the burgundy ribbon that I had attached before. Doesn't it look like a little man with a top hat and bow tie?


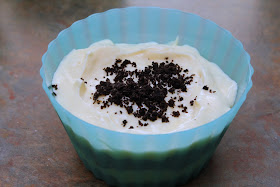
The second project was Oreo Dirt Cake for people at my office. They are shutting down our location in less than 2 weeks so I thought we all needed a treat. This is such a simple recipe - it takes less than an hour to make and can be eaten right away. Here is the list of ingredients and directions from the last time I made it.


Don't they look good?  I'm trying very hard not to eat them all myself.


May 23, 2012

I Feel Pretty...


Oh so pretty...


I feel pretty and witty and bright!


And I pity...


Any dog who isn't me tonight!


May 22, 2012

Main Floor Bathroom - Final Installment

I hope all of my Canadian readers had a fantastic long weekend, and I'm sure my American readers are gearing up for theirs. Our long weekend flew by in a haze of projects, yard sale prep, and just plain enjoying the weather. It was an absolutely beautiful weekend and that doesn't happen often here in Ontario in the middle of May.

One of the projects that is finished - FINISHED! - is the main floor powder room. Are you tired of hearing about it yet? Well, you may have to look away because I'm going to jabber some more.

This weekend we installed a new faucet, new lighting, and hung some art. I also painted the vanity a few weeks ago but haven't shown it off yet.

This is the old faucet. Pretty basic. Something you'd see in just about any home. We decided after framing in the mirror and painting the vanity that the sink needed some new bling too.


This is the new faucet.  It's a pretty "Tuscan bronze" colour.  I love the two handles instead of the single knob. They're much easier to turn when your hands are slippery.


And the spout itself is higher, making it easier to get your hands under or to fill a container if you needed to. The installation was simple - Tom's done quite a few of them  - so I just left him to it and waited for the final results.


I've always thought the lights in this bathroom were too large for the room. Do you see how the light is pressed right up against the wall on the left? When I painted the walls I also sprayed the light fixture oil rubbed bronze, but that was just a temporary fix.


There was a smaller fixture at Lowe's that I've been wanting for a while, so this week we bought it. We also bought seeded glass shades for the bulbs. I wanted something that would virtually disappear in the room since it's so small.


But I was wrong about these. First, the base for the light bulb with its safety sticker is visible and ugly. Next, unless you're up close, the glass doesn't look seeded, it just looks water-spotted. I was ready to paint the bases brown and live with the water spots but Tom convinced me to go back to the store and look at the other choices. Since the lights are mix and match, you can choose whichever shades you like.

There was a whole lot of pouty-face when I couldn't find anything I liked. We picked out some tulip-shaped frosted shades that weren't great but I was willing to give them a try. What's another trip from one end of town to the other, right? But these ones, they looked good. (Sorry, no shot with them turned off.)


The white offsets all of the browns in the room and ties in to the sink and toilet colour. And I like the clear glass rim at the bottom instead of just a plain frosted edge.

The cabinet is painted Behr's "Espresso Brown". Before it was an awful beigey-pink colour. The cabinet surface is laminate so there wasn't much we could do with it in terms of refinishing. I don't usually like painting furniture but it works here. The vanity top has swirls of brown, and a green that matches the colour of the walls. Like it was planned or something. :-)


Lastly, we hung some artwork. Originally I had put up two smaller pieces that looked like weathered wood siding with large rusted door knockers (sounds weird but they're really cool.)  I moved them up and down, putting multiple holes in the wall. Nothing was right and I realized it was because they were too small. I dug out some large pictures we've had packed away since we moved. There are three of them and they each have a single water-colour flower on a white background. The blue flower is the one we decided on.  It's just the perfect size to fill the space and again lightening up the small room that can easily look gloomy.


Okay class, here is a review from beginning to end.

Before: Bathroom as decorated by previous owners


During 1: Painted walls and ORB fixtures (and new toilet)


During 2: Framed mirror


After: New lights, faucet, painted cabinet


Quite a change, don't you think?


Without including the new faucet and toilet, this entire makeover cost around $100. And I still have a ton of paint left over.


How was your weekend?


~~~~~

I'm linking up here this week!

May 17, 2012

Lights, Faucet, Action!

Tonight after work we went out to buy lighting for the dining room and living room.  We had intended to buy the same light as is in the kitchen - a 3-bulb for the dining room and a 5-bulb for the living room. The three rooms are open-concept so we wanted them to be relatively the same.

But we fell in love with these ones instead:


They are from the Hendrik line by Kichler. They aren't that much different than the kitchen one. And I'm sure it doesn't really matter if they are. The shape is basically the same, they're just a little bit fancier.

We then headed over to Lowe's to look at a faucet for the main floor bath. Once we painted the walls, framed in the mirror, and painted the other fixtures, we realized that it really needed an updated faucet. Since the light fixture, towel rod, and toilet paper holder are all oil rubbed bronze, we went with this one:


It is from the Sonterra line by Pfister and the colour is Tuscan Bronze.  We were wavering between this and the brushed nickel, but figured if we didn't like it we could easily take it back and switch to the other finish.

I've always thought that the light in the bathroom right now is too big for the space and wanted to switch it out for a 2 or 3-bulb light. There is a vanity light at Lowe's that I've been eyeing for a while. Since we were there and spending all of our money anyway, we picked up the light too.


The brand is Portfolio. The shades are mix and match, and I chose the clear seeded glass.


Quite the shopping-spree, wasn't it? It's a long weekend here in Canada this weekend, so you can guess what we'll be doing. I can't wait to show you it all in place!


May 16, 2012

Velvety Butternut Squash

(When I first entered the title I accidently typed "buttnut squash".  Hahahaha! I am a twelve year old boy.)

About a month ago I purchased a new cookbook called "Well Fed: Paleo Recipes for People Who Love to Eat" by Melissa Joulwan. Now I read it every day. And I refer to it when I'm making my grocery list. It's like my bible. I love this book so much. It's more than just a cookbook though, there are also little background stories about how she came up with the recipes, why certain ingredients go together, and ways that you can alter the recipe and still end up with a tasty dish.

One of the recipes I tried recently is Velvety Butternut Squash. If you like pumpkin pie you will love this recipe. I myself was not a fan of squash, but this one has won me over.


Here are the ingredients as listed by Melissa:


2 1/2 pounds butternut squash
2 tablespoons water
1 head fresh garlic, or 1 tablespoon of minced garlic
1 tablespoon coconut oil
2 tablespoons coconut milk
1/4 teaspoon salt
2 teaspoons Ras el Hanout seasoning (see below)
1 large egg
1/4 cup pecan halves, chopped (reserve a few whole for garnish)

Ras El Hanout

2 teaspoons salt
2 teaspoons ground cumin
2 teaspoons powdered ginger
2 teaspoons ground black pepper
1 1/2 teaspoons ground cinnamon
1 teaspoon ground coriander
1 teaspoon ground cayenne pepper
1 teaspoon ground allspice
1/2 teaspoon ground cloves
1/4 teaspoon ground nutmeg


One of the great things about these recipes is that you can substitute for whatever you have in the cupboard. I didn't have any Ras el Hanout made up so I just added whatever was close.

Here is what you do:

Preheat the oven to 375 degrees. Cut the squash in half lengthwise, remove the seeds, and place the two halves face down on a cookie sheet. I also added some garlic seasoning just for fun.


Bake in the oven for 45 minutes or until the flesh is soft. If you are using fresh garlic, remove the outside papery layer of the garlic, wrap the head in aluminum foil and place it in the oven along with the squash.

Once the squash is tender, remove it and the garlic from the oven and let them cool. Increase the oven temperature to 400 degrees.


When the squash is cool, scoop the flesh into your food processor or blender (we have a Ninja - I must tell you about it later). Squeeze the roasted garlic pulp (or your minced garlic) into the blender with the squash. Blend the two until you have a smooth puree.


Add the coconut oil, coconut milk, salt, and Ras el Hanout. Blend again and then taste. Adjust the seasonings to suit.

Beat an egg in a small bowl. Transfer the squash puree into a mixing bowl and add the egg, stirring until they are smooth.

Grease the inside of a casserole dish with a little coconut oil and pour in the puree. Garnish the top with some chopped pecans (I used macadamia nuts) and bake in the oven for 25-30 minutes until the edges are bubbly and the top is lightly golden brown.


Next time I think I'm going to leave out the nutmeg and cinnamon and add more garlic and pepper to make it a little more spicy and a little less like pumpkin pie.

Do you have a squash recipe that you love?  
Let me know what it is - I'm always looking for something new.

~~~~~

I'm linking up to these parties this week!