I decided that I'd rather have photo shelves instead. There would still be the randomness of the different sized frames, but they'd be more orderly and cohesive. Not to mention that you can take them down or rearrange them without having to patch the wall and make new holes.
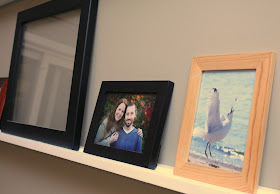
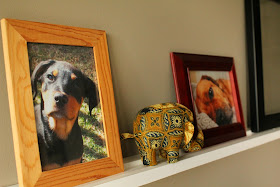
I was going to wait until I had all of the frames filled before I posted about them, but who am I kidding? It's been two weeks already and I'm no closer to being done. So you'll just have to look at some empty frames. (And my gorgeous cousins. And a seagull eating snack mix.)
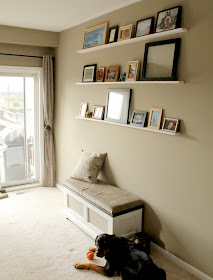
Before:
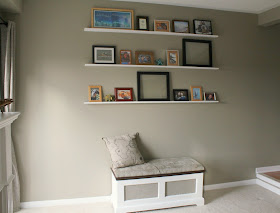
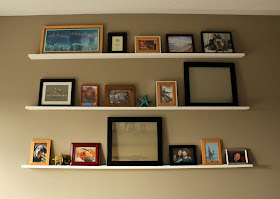
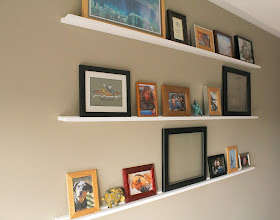
After:
I wanted the lowest-profile shelving we could get, while not having to worry about the weight of the frames pulling them out of the wall. I liked the style of the postcard ledges that Young House Love installed in their last house, though ours needed to be deeper because of the thickness of the frames.
While Tom found a practice board, I laid the picture frames I wanted to use out on floor and arranged them to get a rough idea of how long each shelf should be and how many we would need (6 feet long and three shelves).
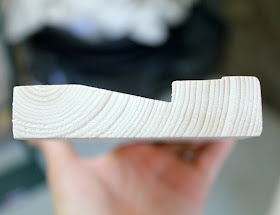
It was going to be a plain floating shelf, but we also wanted a groove routered in to keep the frames from sliding forward and off the shelf. We used a scrap piece of board to figure out how deep the shelf needed to be, and where the groove should go to have the frames rest on it correctly. We just rested the thickest frame on the scrap board and tilted the frame until we got the angle we wanted. Tom would then router the scrap piece and we'd try it again.
Each shelf had to be at least 4 inches deep, so once we had decided exactly what we wanted, Tom bought 2x4s and planed them down to just over an inch thick, and then routered an angled groove down the length of each shelf. Why plane them? Well, 2x4s are too chunky, and 1x4s are actually less than 1 inch thick. Sometimes it has to be DIY start to finish.
We were having trouble finding the wall studs - the stud finder was going crazy, beeping all over the place - so we came up with another plan. There is an electrical outlet in the center of the wall and we knew it had to be attached to a stud, so we just followed it up the wall (using a laser level) and marked that spot. We then held a shelf in place on the wall and marked on the shelf where the stud would hit. Tom then drilled counter-sunk pilot holes at 16" intervals to match the studs. Yes, we were working on blind faith that they were 16" apart (spoiler alert: they were).
Once the shelves were cut and holes were drilled, I sanded them, primed them, and gave them two coats of semi-gloss white - the same paint we used for the trim.
The distance between the top of the upper picture frame and the bottom of the lowest shelf was about 50", so we added an extra 4 inches of clearance and mounted the bottom shelf 54" from the ceiling. Before drilling any holes, we tested out this height with Tom sitting in various chairs beside the wall. There probably won't be a chair or sofa under the shelves, but we wanted to make sure no one would bang their head, just in case.
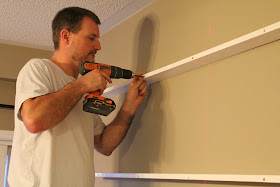
Then it was just a matter of attaching the shelves to the wall starting with the first stud we found and working outwards. I held the level against the shelf and Tom drilled 4 inch screws through the boards and into the wall. Since we were on studs each time, there was no need to use anchors. The screws were sunk at least an inch into the board so there was enough sticking out the back to go into the wall, and the screw heads weren't visible at the front.
Once all three shelves were mounted, I puttied the holes, sanded, and painted over the putty so that the fronts looked seamless.
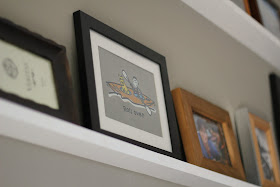
The frames aren't in their final place, I just put them up there and tried to vary the heights. The top row is still a little too even for my liking. The two large frames are going to hold photos of the dogs or vacation shots, once we narrow it down to two favourites. (As if there aren't enough pictures of the dogs up there already, right?)
The shelves fill the space so much better than the frames did by themselves, and as I mentioned before, I love that I can change the photos or just change the arrangement whenever I want to. The area is a bit empty right now - I'd like to find a sideboard or old desk to put under the shelves to fill it in. And maybe one of those 5 foot wooden giraffes we saw at the farmers' market this weekend.
What do you think, Tom?
~~~~~
I'm linking up here this week!



I love this idea glad I saw your post before I put holes in the wall. Followed you here from
ReplyDeleteShow Me What You Got Linky Party.
Consider sharing on Tuesdays With a Twist Link Up runs through Friday.
http://yourlife7.blogspot.com/2013/07/tuesdays-with-twist-16-link-up.html
Thank you! I'm tired of filling those nail holes myself!
ReplyDeleteIt looks great! I am thinking of doing something similar so I appreciate your detailed post!
ReplyDeleteFound you via Creations by Kara :)
The shelves look great! So much neater than before! Found you over at the Made You Look Linky! Carly :)
ReplyDeleteI'm all about loosely designed gallery walls but this streamlined look of floating shelves would have my vote. Looks amazing. Thanks for sharing on BeColorful this week.
ReplyDeletep
Thank you. I've decided I like "organized randomness" myself.
ReplyDeleteThank you! It was kind of crazy before, wasn't it?
ReplyDeleteThank you! I hope the details help (I can get a bit wordy).
ReplyDelete