Now with the deck cleaned, we could get our outdoor furniture back out there. Yes, back out there. Over the summer I have been slowly stripping the wood, then staining and sealing it. I did all of the sanding on the deck, but once each piece was stripped I took it to the garage for refinishing. So the deck has been a bit empty for the last two months.
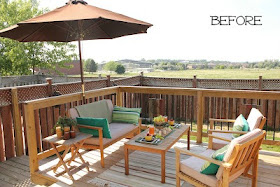
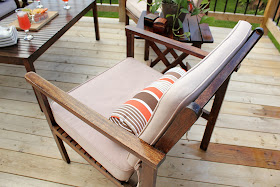
The furniture came in a honey/reddish tone with beige seat cushions. Kind of bland and vanilla, but it did look nice when it was dressed up with pillows and throws.
That served us well for a couple of years, but the elements took their toll on the finish and it was starting to peel. The wood that was no longer sealed started to weather in an uneven way, so that we had grey patches mixed with the original honey colour. And a bit of mildew.
Here's my sleepy helper. She's not a fan of the noise. But she matches the Ridgid colours - new mascot perhaps?
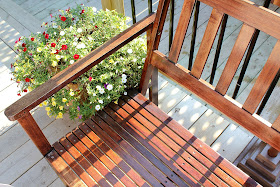
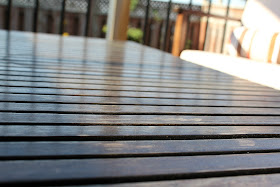
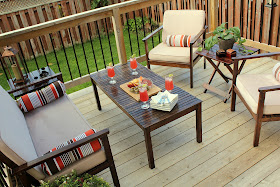
Once everything was completely sanded and wiped down, I stained each piece with two coats of Minwax stain in Red Mahogany. Just gorgeous. If these pieces were inside my house I would have just waxed them to a soft glow and let them be, but because they had to withstand our ever-changing weather, I needed to apply polyurethane. Three coats just to be safe.
With all those slats there was a lot of drip-through to the other side. By the time I got to the second piece I'd learned it was best to apply a coat to the underside, flip it over while wet, and then wipe off the drips on the top side. Then when you apply the poly to the top, you can wipe the drips underneath, but if you miss a couple it's no big deal because no one will see them. That's my theory anyway. And if you're that person looking under my furniture: just stop it right now.
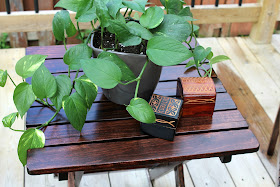
Along with the loveseat, chairs, and coffee table that came in a set, I also refinished the two side tables so that the entire area is cohesive. In fact, they are the same shade as the fold-down bar we made last year. How's that for tying things together? There is a method in my madness.
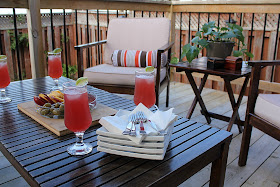
I set up the area with a little impromptu party - pickles, cheese, salami, etc. - and fizzy drinks of course. And then took a million artsy pictures of the glasses.
But they're so cute, how could I be mad?
Cheers!








They look brand new! Love it :)
ReplyDeleteThey look great! Ours need a little work as well - will have to bookmark!
ReplyDeleteThanks! Be prepared for sanding all those nooks and crannies!
ReplyDeleteWow, what a difference! Looks brand new...beautiful!
ReplyDeleteThanks so much for linking up @ Inspire Me Fridays this week Barb!
Maria
@Five Simple Things
What is the stripe fabric you used - it's perfect for my living room.
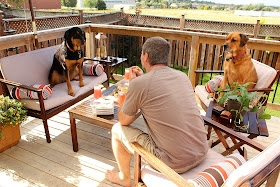
ReplyDeleteI need to do this Barb. You've inspired me. I love your party guests! They've made themselves right at home! LOL I'm featuring this at this week's Thriving on Thursday. Thanks for linking up!
ReplyDeleteAnne @ Domesblissity xx
Thanks, Anne - that's awesome!
ReplyDeleteDo you mean the orange & brown pillows? I didn't make those - I bought them from our local grocery store, The Superstore (Real Canadian Superstore).
ReplyDeleteI'm not sure if you're in Canada, or near the border, but all of the stores carry the same items.
If you mean the green striped pillows from the before shot - I made those ones using teatowels from the dollar store. Here is the link if you'd like instructions: http://turtlesandtails.blogspot.ca/2012/04/terrycloth-pillows.html
Thanks, Maria!
ReplyDeleteThanks, Kim - they feel brand new too!
ReplyDeleteHi Barb - I know this isn't a recent post, but I just stumbled across it. I actually have a non-furniture question (although you did a great job with the refinishing and they look amazing!!): how do you have that umbrella attached to your fence post? Something similar would work wonders on a spot in our yard, and I was curious about it. :-) Thanks!
ReplyDeleteHi Barb - I know this isn't a recent post, but I just stumbled across it. I actually have a non-furniture question (although you did a great job with the refinishing and they look amazing!!): how do you have that umbrella attached to your fence post? Something similar would work wonders on a spot in our yard, and I was curious about it. :-) Thanks!
ReplyDeleteHi,
ReplyDeleteWe made a base out of 3 pieces of 2 x 10, cut into different sized squares and stacked like a pyramid, with a hole for the umbrella pole drilled down through the middle. We then screwed a 2-hole pipe strap/clamp to the side of the top railing. You set the umbrella against the railing, then screw the clamp around it. Usually we can loosen just one side and slide the pole out when we need to put it away and the clamp stays in place until the following year.
You can even get pipe clamps that are lined with felt if you're worried about scratching the pole. Neat, right?
Great job they look brand new! Thanks for linking up on Made in a Day!
ReplyDeleteKim