Pages

Apr 30, 2013

The Post About Nothing

What do you write when you have nothing to write about? 

Do I just wait for inspiration and risk the chance that people stop checking in? I think if I post one more picture of my half-finished kitchen (painting the base cabinets this week by the way!) you'll all revolt and only my cousin will be reading this blog.

We're kind of hanging in limbo here - we don't want to start a big indoor project until the kitchen is done, but  Mother Nature is taking her own sweet time letting springtime happen in the Great White North. We did uncover the patio furniture, but then it's rained for the last two days so there's been no chance to clean it up.


I could post pictures of my dogs - I'm teaching the little one to balance cookies on her paws. Not easy for a dog with impulse control issues.

Sasha dog balancing cookies on paws

Sasha dog balancing cookies on paws

How about this gorgeous picture of the sugar snap peas, blackberries, and raspberries I had for a snack today? I love the colour contrast.

berries and sugar snap peas

I'm going to snag some of those berries and make blackberry cheesecake streusel muffins this weekend. I stumbled on a recipe that I've been dying to make. For once I have all of the ingredients in the house at the same time.

Do you ever hit a decorating/DIY/writing wall? How do you overcome it? Do you force yourself into action or just let it ride?


Apr 22, 2013

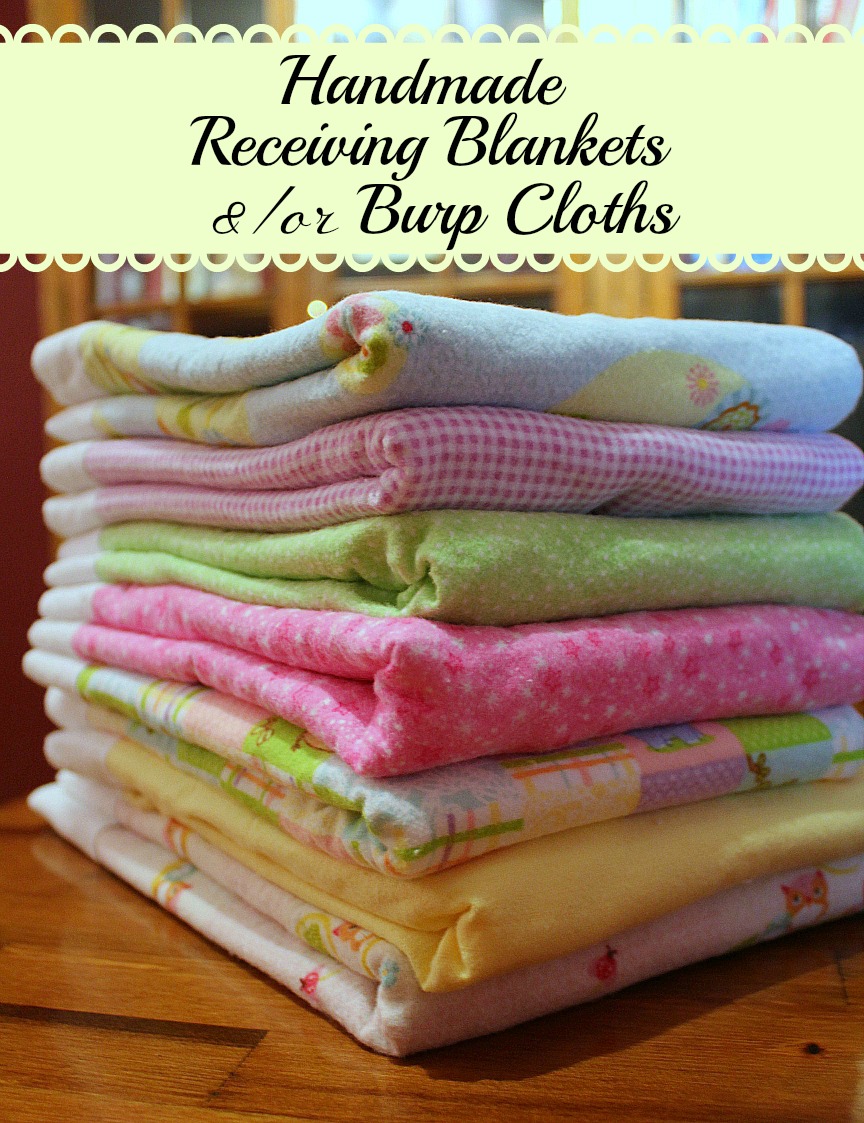
Handmade Receiving Blankets

This weekend was filled with two things - a baby shower and a basement clean out.  Which one would you rather see pictures of? I thought so.

My favourite cousin (technically my cousin's wife, but we're not that technical around here) is due in June, so her mom and sister threw her a baby shower this past Saturday. Yes, they did in fact pick the coldest day of the month. Near freezing temps here. Crazy, because it was 22 degrees (72 F) on Thursday. I'm going to have to get another closet so I can have winter & summer clothes available all the time, just in case.

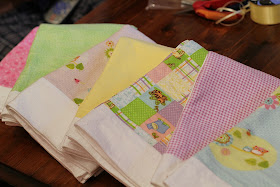
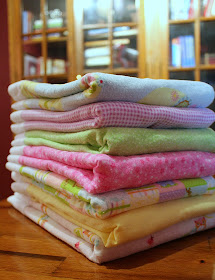
For months I have been planning on making receiving blankets for her - you know, the ones made from cloth diapers and patterned flannel - but it was impossible to find cloth diapers anywhere. Unless I was willing to buy $100 worth from a diaper service. Not really in my budget. So instead I bought about 5 metres of white flannel and some assorted patterned flannel pieces from the fabric store. My idea was to sew them together with white on one side and a pattern on the other.

Handmade Receiving Blankets

The first thing I did was wash and dry all of the fabric so that it was pre-shrunk. There's nothing like the feel of fluffy flannel right out of the dryer. I may or may not have snuggled up to it for an extra minute or two. Be warned, if you are using fabric with raw edges it will fray in the dryer.

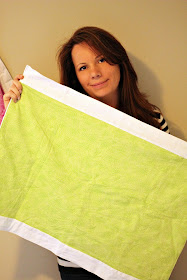
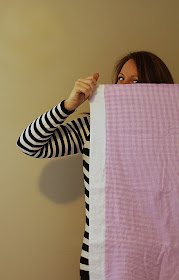
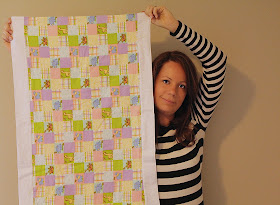
I estimated that each blanket should be about 26" x 30", but the printed fabric was only about 22" wide, so with the white flannel being 30" wide I decided to leave it uncut and wrap it around to the front to make a two inch white stripe down each side of the patterned piece. Does that make sense?

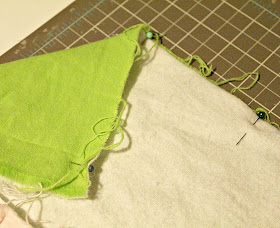
I cut the white flannel to 31" lengths, then matched up the patterned flannel and cut each one to the same length. I pinned the long side of one white and one patterned piece together with right sides facing in and sewed them together with about a 1/4 inch seam. I did the same with the other long side, so I would end up with a "tube" of material.

handmade receiving blanket - burp cloth

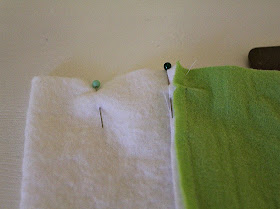
I then flattened it so that there were two inches of white on each side of the patterned piece and sewed the short ends together, leaving about three inches unsewn on one end so I could turn it right side out.

handmade receiving blanket - burp cloth

Once right side out, I ironed the blanket flat and sewed all around the four edges so that the blanket would stay flat, especially after washing. The hardest part was pinning and carefully sewing the small opening that I'd left before. You could also hand sew it closed first but I don't think it would look any different. And my hand sewing skills leave much to be desired.

handmade receiving blanket - burp cloth

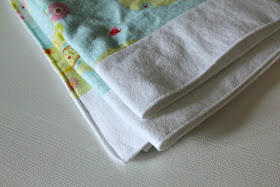
I like that finished edge. It makes the blanket look a little more upscale. Once I got the hang of it, they were done in no time at all.

handmade receiving blanket - burp cloth

handmade receiving blanket - burp cloth

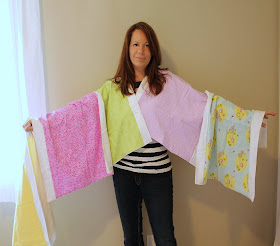
And now some gratuitous photos of me showing off the blankets. 

handmade receiving blanket - burp cloth

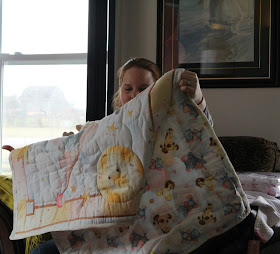
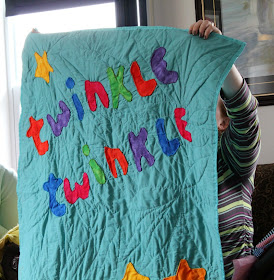
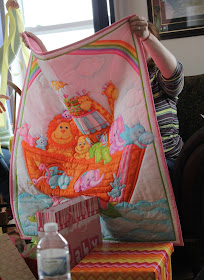
At the party, my cousin received some other handmade gifts as well. Here are some shots of just three of the quilts she received (from grandma, grandma, and great grandma).

handmade quilt
handmade quilt
handmade quilt

Are those amazing or what? That baby is a lucky little girl. 


~~~~~

I'm linking up here this week!


Apr 12, 2013

Doors? Check!

The boys doors are back in town. That's right folks, we found Blum dowels!


You have no idea how exciting this is. We couldn't put the hinges back on the doors and the doors back on the cabinets without them. Can you believe something so small caused so much trouble? There is nothing stopping us from getting these kitchen cabinets painted and back together now. Other than time, space,...and general laziness.

Tom stopped in at a local cabinetmaker one day this week and the guy gave him a box of dowels for $20. There has to be well over 200 in there.

So right away, that very night, we got the doors back on the pantry. I'm practically bouncing up and down, I'm so happy.


Aren't they lovely? Am I imagining it or does the space look larger? I think the white makes the space look larger. And cleaner. I didn't notice it before, but I think that hunter green colour looked dingy. It definitely made the kitchen look darker. And with only a window in the dining area, it doesn't need any help looking dark.

Here is a reminder of the before:


And the after:


Now all we have to do is pick out hardware. Right now I have to stand on my tiptoes to open the doors from the top. This is my go-to hardware guy:


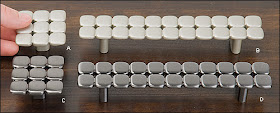
I'm thinking simple cup pulls for the drawers,


Check out these fancy ones. Not really our style though.


And how fun are these?


Maybe these handles for the doors...


I like these too.


But this set might have everything I need, cup pulls and handles.

I have such a hard time deciding. Especially when I'm there and can see them all in person. It's like being in a candy store. Really it's more fun than a candy store. Yes, the way to my heart is through hardware.


Apr 10, 2013

Take a Seat

I bought a chair. There I said it. Aren't you glad you know now?


But this chair, ahhhh this chair. She's a beauty. Of course it's a she - just look at that cushy seat.

Buying this chair is a big step for me. My family and friends are probably shocked - Barb bought furniture with a pattern on it? Is she okay?


I love this chair more every day. I got so excited when I saw it. Truth be told, I went to the store to buy a grey and white chair for the bedroom (yeah, that sounds more like me) - something like this one, although in an adult size -


but came home with the blue one instead. I kept hovering around it, waiting for a salesperson to show up to carry it to the front for me. I was so afraid someone else would see it and want to buy it, and then I'd have to throw myself on it like it was a grenade.

My craft room is tiny tiny so I had to do some rearranging to work the chair in while still keeping the room functional. I decided to set up a computer area under the shelves, and a sewing/Silhouette area under the ribbon/paper holder. Yes, that is a stability ball. It hurts my back to sit in a straight chair for too long so I sit on the ball. Plus it works your core, so I can say I'm exercising...even if I am only playing on Pinterest.


No, the room isn't usually this tidy. Well, it goes back and forth from this tidy to a complete disaster - no happy medium.

I even attempted a panoramic shot. My first one. A little uneven but not a bad first try. Too bad we couldn't get some sunlight up in this here place. Hello, Mother Nature, are you there?


But back to the chair. The pattern is made up of turquoise, green, brown, yellow, and off white shades. Those are a lot of different colours to work with. This chair is the reason I painted the yellow diamonds on the table. I also painted a bookcase with turquoise trim, but it looks just awful so there is no way I'm showing it off. The footstool has brown and off white - I guess I'll have to find a way to incorporate some turquoise into it. Maybe I can find a new ribbon for the trim.


I can't wait to curl up under the throw and get caught up on my magazine reading. It's funny, when I bought the chair it sat in the living room for a couple of days (and looks amazing there by the way), and I thought "Wow, that's a bright chair!" But now that it's been in this room for a week or so I can't imagine it not being there. Perfect fit.


Apr 8, 2013

Her Diamonds (Craft Table Re-do)


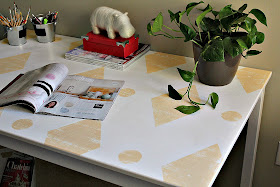
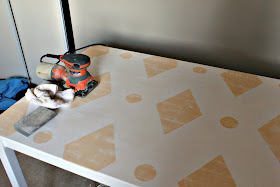
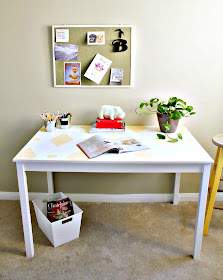
Over the Easter weekend, in between putting coats of paint on the kitchen cabinet doors (did I mention that you have to wait 16 hours between coats?), I gave one of the worktables in my craft room a facelift.

Diamond patterned craft table

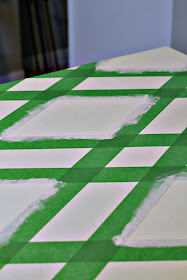
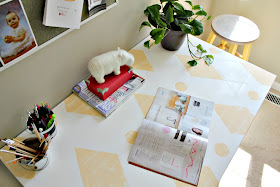
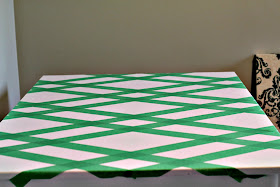
It was just a plain Ikea dining room table that I'd given a couple of coats of white paint last summer. I started off by drawing in my diamonds with a straight edge and a pencil, marking which ones were to be painted, then taping off the lines with painters' tape. Because the tape is so wide, I wouldn't be able to paint all of the diamonds at the same time - I'd have to wait for the first set to dry and then re-tape the table. The paint I used was a Behr colour tester in "butter cookie".

Diamond patterned craft table

Diamond patterned craft table

I don't have any photos of painting in the diamonds, but note that I painted along the edges with white paint to seal the tape and keep any yellow from seeping under.

Diamond patterned craft table

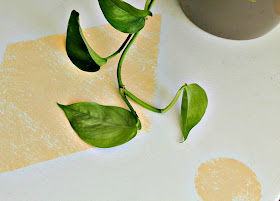
Once the tape was removed I realized that painting in the other half of the diamonds would make the table too busy. I decided to add smaller circles between the diamonds instead. I used my Silhouette to cut a 2.5 inch circle out of adhesive vinyl and just kept moving it along the table as I went.

The first "after" picture I took was after I'd sanded it, so you can't see how sharp the lines came out, though since I sanded them maybe it doesn't matter. I had to use the power sander as that paint wasn't going anywhere without a fight! I wanted the table to have an old, weathered appearance, like it had been used for years and the yellow was fading.

Diamond patterned craft table

After sanding it I just gave it a wipe down with a damp cloth and it was good to go, no need to seal it.

Diamond patterned craft table

I'm slowly building up this room to where I want it to be.  Lots of soft, relaxing tones offset with white. And a splash of colour here and there.

Diamond patterned craft table

Diamond patterned craft table

~~~~~

I'm linking up here this week!



Apr 4, 2013

In the Spotlight


Something pretty exciting happened on the little ol' Turtles and Tails blog this week. The fold-up patio bar that Tom and I built last summer was featured in an article called, "30 DIY Ways To Make Your Backyard Awesome This Summer".

Fold-up Patio Bar

Fold-up Patio Bar


The article was picked up by three different sites:


How cool is that? We love our little bar, and we love how much interest there's been in it. It was incredibly easy to build - you could easily do it in a weekend. And for people with a small backyard like we have, it's nice to have someplace to freshen your drink without it taking over the seating area.

You should take a wander by one (or all) of the sites to check out the other 29 as well. Just click on the images above to go straight there. You'll find some truly unique ideas. My favourite is the hammock swing - I wish we had the space!


Apr 2, 2013

Irish Soda Bread


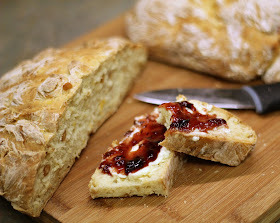
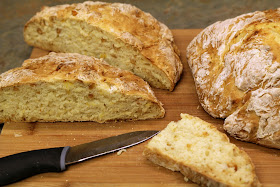
I tried something new this weekend. Irish Soda Bread. I'm by no means a baker - I don't have the patience - but this bread is so easy. Since there's no yeast and proofing to wait for, you can have the whole thing done in an hour. And a warm slice on your plate with butter and jam two minutes after that.

Irish Soda Bread

Here's what you'll need to make two loaves.

3 cups all-purpose flour
1.5 tsps baking soda
1.5 tsps salt
2 cups buttermilk (or you can use regular milk and add 2 tbsp. of lemon juice to it)
1/2 cup chopped nuts
1/2 cup dried fruit


Preheat oven to 400 degrees.

In a large bowl, mix together your flour, baking soda, and salt.  Add in your fruit and nuts. We were really low on supplies so all I had were cashews and canned pineapple. I would have preferred dried cranberries, but you work with what you have. Add your buttermilk. If you are using milk & lemon juice, let it sit for 10 minutes before adding it to the mixture.

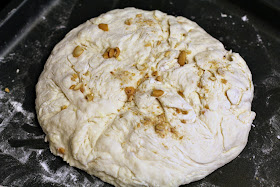
Stir your mixture for a minute or two but don't over mix it. Dust some flour onto the counter or a cutting board and plop your dough down. Form it into a ball and divide it into two parts. Shape each half into a loaf and place it on a baking sheet (dusted with flour if you want). This bread doesn't rise very much so you'll have to decide how tall you want it to be. I think I'll make smaller, higher loaves next time. Cut a cross-hatch or stripes into the top of each loaf to allow for expansion and to ensure the bread bakes evenly.

Irish Soda Bread

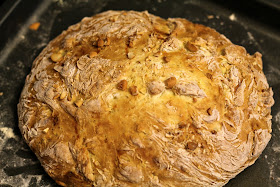
I had some leftover cashews so I sprinkled them on the top. You could also brush the loaves with melted butter if you wanted to. Put the loaves into the oven and bake for 30 minutes. Insert a toothpick or knife into the centre of each loaf. If it comes out clean your bread is finished baking. Adjust baking time as needed.

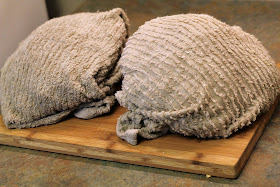
Once removed from the oven you have two choices. If you want a crusty loaf, let them cool as they are. If you like your bread softer, wrap each loaf in a damp (not wet) tea towel and leave to cool. I personally like a harder crust but Tom doesn't, so I wrapped them.

Irish Soda Bread

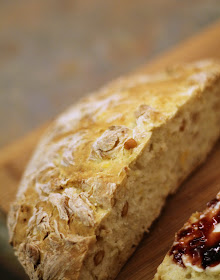
Look at that. Perfect golden brown doneness.

Irish Soda Bread

At this point you'll want to slice into this beauty and slather it with butter and jam. Or peanut butter. Or cream cheese. Or even guacamole. The options are endless.

Irish Soda Bread

Irish Soda Bread

Irish Soda Bread

This bread was just a little too easy. Dangerously so. Especially since I'm trying to stick to following a Paleo lifestyle. I could see myself baking (and eating) a loaf every day. I'm going to have to start giving it away I think.


What's your favourite quick bread recipe?

~~~~~

I'm linking up to these food parties this week!