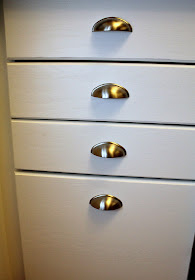
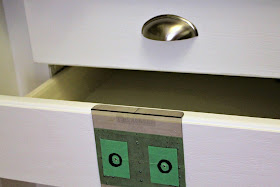
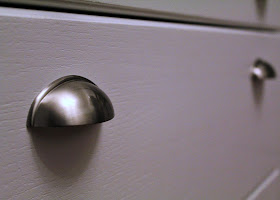
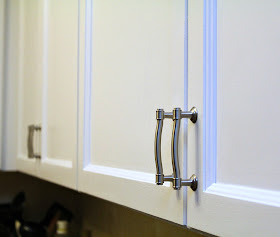
I'm still chipping away at the kitchen - the cupboard doors are back on! All that's left is to:
-sand and paint 3 lower doors
-paint the microwave shelf
-attach the handles and pulls
Then we have to do something about the backsplash and we're done. You can't believe how happy I'll be when it's all finished. I'm loving how it looks already.
One project I haven't shared with you is the deck we rebuilt last summer. This wasn't a complete start-from-scratch build, but more an overhaul of a bad original design.
The houses in our neighbourhood all come with a small 4'x6' deck with a set of steep stairs down one side. The previous owners extended the deck by putting on a 10'x10' addition, but with a 4-6" drop from the first to the second level. This drop made it feel as though there were two decks, with neither one really large enough to place furniture comfortably. This is the only photo I have of it before. There is no room to move; you can barely pull your chair back from the table without hitting a rail or the step up to the other section.
We decided a redesign - and slight expansion - was in order. This wasn't a "build your dream backyard space" project, more a "get the most bang for your buck" project. I think we spent over 6 months drawing and re-drawing our plans until we had something we were both happy with. I'll admit, I kept going for grand sweeping staircases, while Tom was picturing utilitarian steps and high railings.
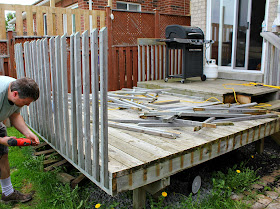
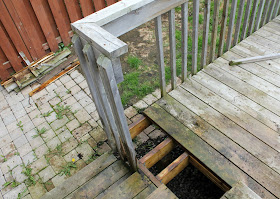
We tore down all of the railings, took out the oddly placed flower box, and the stairs. You can see how dark and damp that corner by the stairs ended up most of the time. And we never used it for anything other than storing the garden hose and some tools.
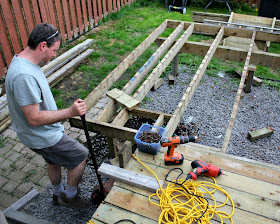
We then removed all of the deck boards and raised the lower deck up to be level with the top one. The previous support posts were attached to the concrete pilings with brackets so it was just a matter of jacking up the deck one corner at a time, removing the shorter posts, and attaching new, longer ones.
We couldn't really extend the length of the deck because our backyard is so small to begin with. While our neighbour decided to build a deck over his entire backyard (!!), we thought the dogs might appreciate having some grass to run around and do their business on.
Instead we extended the width of the deck. The previous "upper part" went from 6 feet to 10 feet wide and the "lower part" from 10 feet to 12 feet wide. Tom did this by building two box frames of 2x10's and attaching them to the existing joists and beams. Sounds kind of crazy but it is very secure.
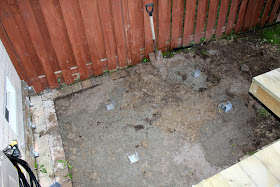
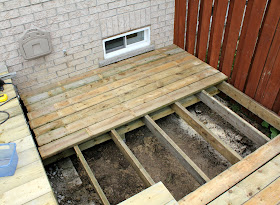
Beside our deck, near where the stairs used to be is one of only two basement windows. I was insistent that we have a place to hang the hammock, but we didn't want to cover up a precious light source for the basement. We decided to build a lower deck that sat nearly on the ground, just under the window ledge. It runs from the upper deck to the fence and outwards about 10 feet.
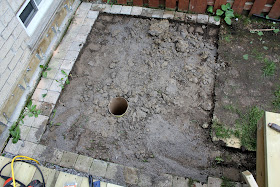
First we had to tear out the bricks that were already laid. Then Tom dug 4 post holes for the concrete footings and support posts of the new deck. He filled the holes with concrete and inserted brackets for the posts (this is the building code in our area). He then installed the joists and beams, attaching them to the house with a ledger board and metal connectors.
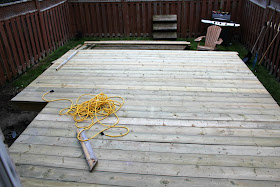
The one thing we wanted to make sure of was to reuse as many of the old deck boards as we could. A lot of them were in really good shape so it would have been a shame to just throw them away. We were able to use the old 10 foot boards on the lower section (it's about 6 feet wide) and a few on the section closest to the house. We only had to buy boards for the 12 foot section and to finish up the 10 foot section.
The two decks are joined to each other with wide steps (only two so we don't need a handrail!), and then there is another step down from the end of the lower deck to the ground. We wanted the descent to be gradual instead of a steep set of stairs. And making them wide opens up the space even more. (Ignore the unfinished edges - this is a "during" shot.)
We used some of the bricks that were removed from under the lower deck area to make a break when you step down from the lower deck to the ground. This area gets very little sun and the dogs are always stomping on it so no grass would ever grow there. We figured out our pattern, laid the bricks, and then finished with a layer of polymeric sand to lock the bricks in place.
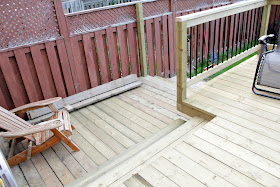
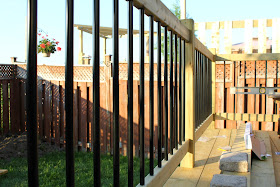
As for the deck railing, we used 2x4's for the upper and lower railing, with black metal balusters between. There are so many different designs for deck railings but we decided to keep it as simple as possible. Just a bottom rail, a cap rail directly on the top rail, and 4x4 rail posts. It was a serious test of my math skills calculating the number of balusters per section so that it looked good
and followed the bylaws.
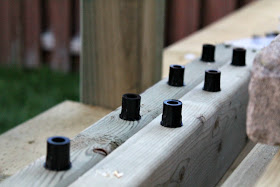
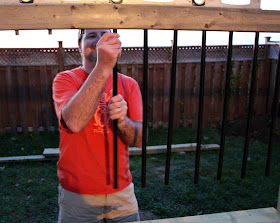
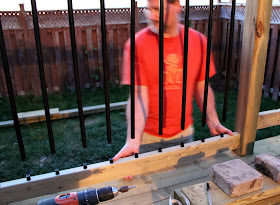
These balusters are so easy to install. You just install your top rail, then screw in the baluster connectors to your rail boards, pop the balusters onto the top rail connectors, and then install the bottom rail, squeezing the balusters in between.
These pictures always make me laugh. You can see the smile on Tom's face in the middle shot and - spoiler alert! - the metal level sitting on the rail above him. It was pretty late by the time we got to this part and getting dark fast. Just after the bottom picture was taken, the level fell on Tom's head. He swore REALLY loudly. I told him to shush because it was so late and I didn't want the neighbours to hear. I'm horrible and didn't even ask if he was okay. Our neighbours told us later that all they heard was, "#$&*%@!!!!!", and then, "Shhhhh! We have neighbours!", and then, "The level fell on my head!" They thought it was hilarious and weren't offended at all.
The black metal gives the deck a much more upscale look than the old wooden pickets ever did. And even though we only added a few square feet to the upper deck, it feels like it's doubled in size.
We sold the old patio table and chairs and replaced them with a seating area that is more our style - a loveseat, two chairs, and a low table. We added a large umbrella behind the loveseat, and I accessorized with my
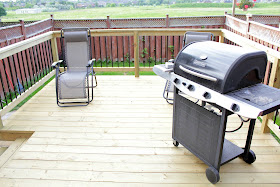
terrycloth pillows. On the lower deck we have an Adirondack chair with a little side table (not the one shown) for anyone who would like to stay in the shade. There is even room for the barbecue just outside the sliding door.
As for the hammock? Tom attached a boat cleat to the wall of the house and a hook to a 4x4 post installed at the bottom corner of the lower deck. The hammock hangs at a diagonal across the deck giving us the greatest length possible. When it's open you can still walk past it to the backyard, and yet it swings freely without bumping into the deck railing, the chair, or the fence.
This was one of our first big projects at this house and I'm so happy we did it. Before, we hardly spent any time out here, but now it's one of our favourite places to be. We worked so hard on this deck, doing everything ourselves, but I think that makes us appreciate it even more.
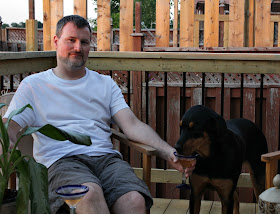
And the dogs love it too. You have to fight Chloe for a seat (usually the loveseat), and don't even think about lying in the hammock by yourself if Sasha's in the area.
~~~~~
I'm linking up
here this week! You should too!


