SEARCH THE BLOG

Jun 30, 2017

June Progress Report

I hang my head in shame that June is now gone and we don't have any new projects completed. We have friends getting married this summer, and we've been busy with wedding events 3 out of 4 weekends this month.That isn't to say we haven't been working on things, there just isn't much to show. It's definitely not looking pretty around here.

How about a progress report instead?

The front yard and the front of our house is pretty bare - I liken it to a face without eyebrows. So we took a trip to our local garden center to see what we could see. We decided on two cherry trees, a dark purple lilac, and a smoke bush.

We planted the cherry trees along the front edge of the property where we will also eventually have a low fence. Here is a rough drawing of our plans:


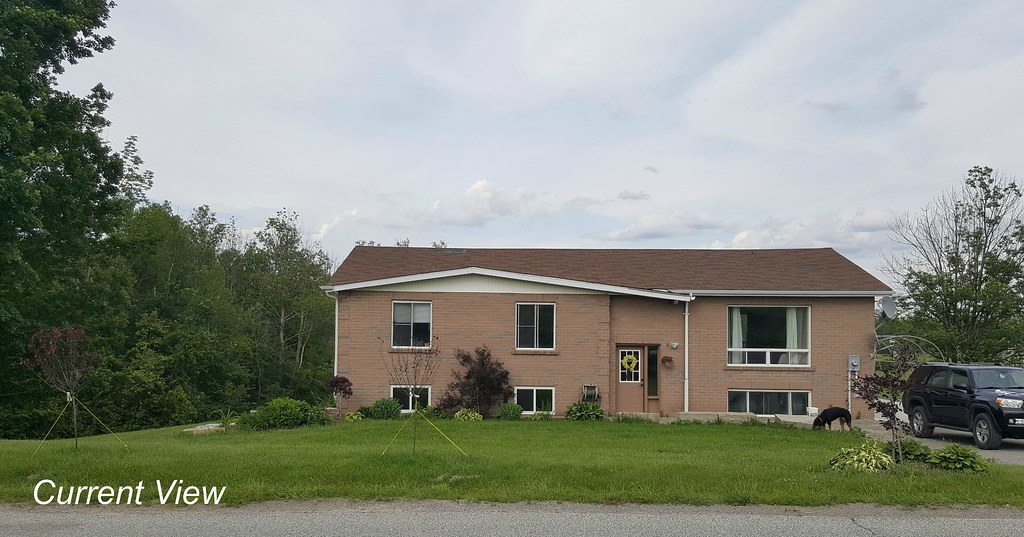
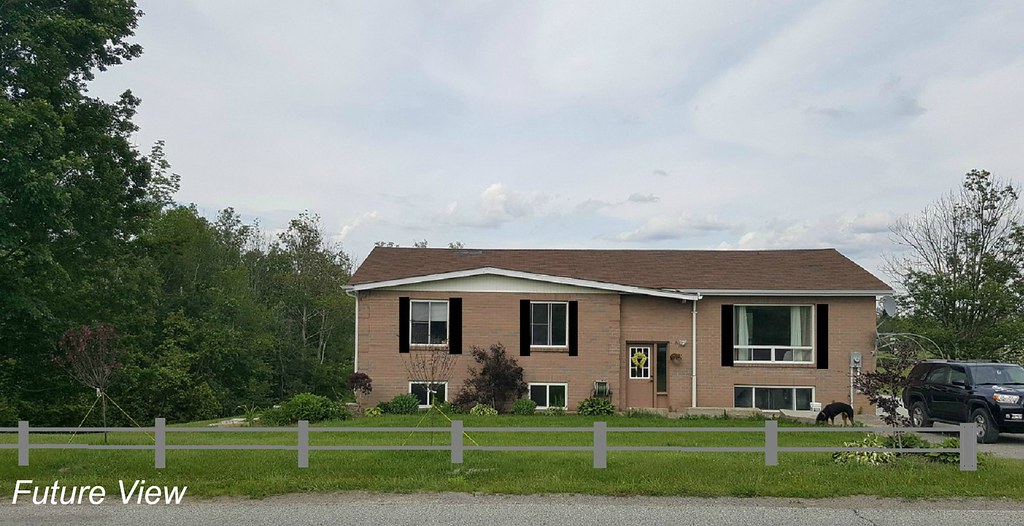
The lilac went over on the property line at the edge of the driveway, and the smoke bush was planted in the garden by the corner of the house. It will eventually disguise the downspout that's in that corner.

Purple Smoke Bush
Purple Smoke Bush

I adore smoke bushes. We had a huge one at our first house - planted by the previous owners - and it would grow to over 10 feet tall each year. You cut it down each winter and it all just comes right back the following year. Then in the fall all of the flowers go to seed and turn into soft purple cotton candy-like fluff. That's the only way to describe it - fluff.


We now have an abundance of purple trees (these, along with another cherry tree and a beech tree), so we're thinking about adding in some white to break it up. Sounds like another trip to the garden center is in the cards - though that's not a hardship at all.


Cherry Trees

The front yard slopes down towards the house and the basement windows. We're always worried when it rains that water is going to leak into the house. A couple of weekends ago, Tom rented a mini excavator and dug a trench across the front of the house and down the far side of the driveway.


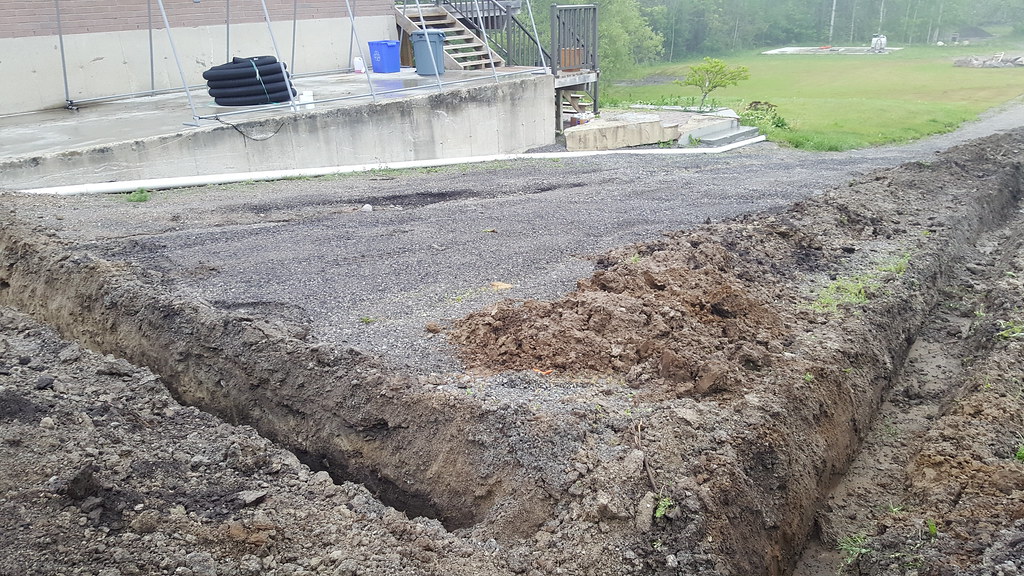
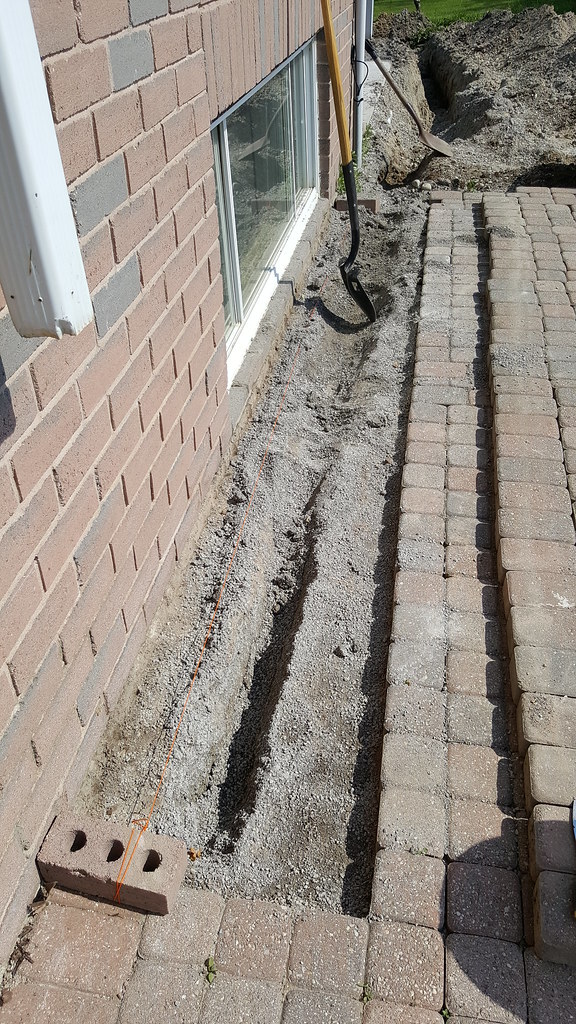
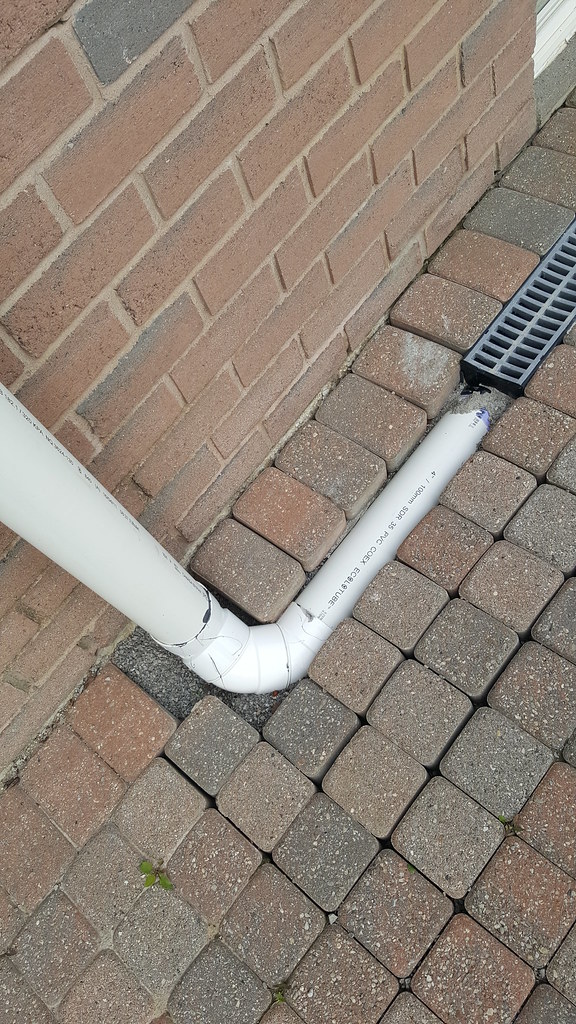
He ran corrugated perforated pipe along the driveway and in front of the parking pad, and connected it to a 12 foot "rain drain" that runs along the front of the house in front of the basement window.

Drainage Grate

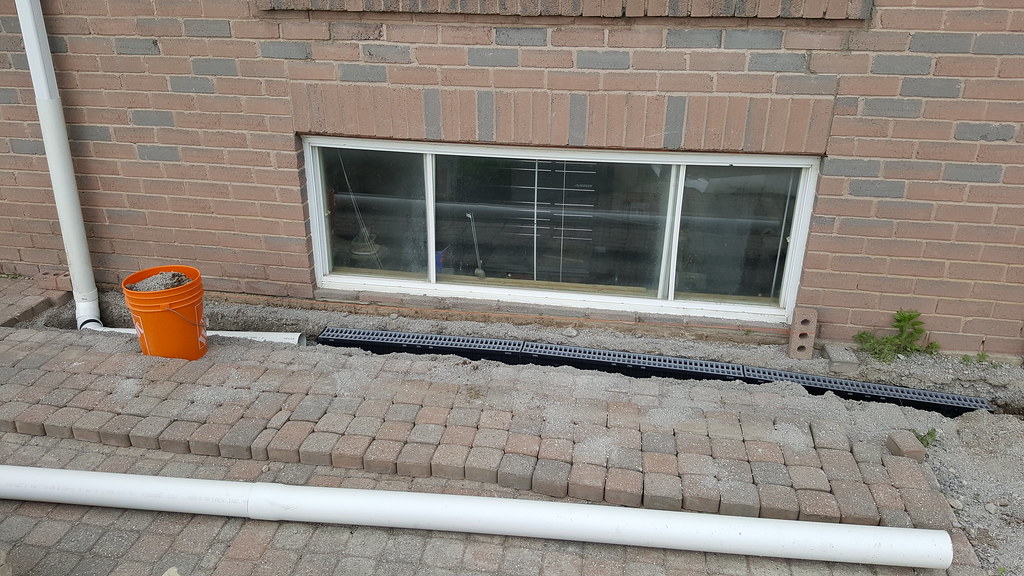
The front downspout connects to the drain at one end so that the water from the roof runs through the drain and out the pipe. As well, any water that lands on the sidewalk and runs towards the house runs directly into the grate, through the drain, and to the runoff pipe. All of the bricks are back in place, we just need to cut some odd-shaped ones to fit around the downspout.

Drainage Grate

We're also doing some more work in the basement getting the drywall up. Tom's helper had to cancel a couple of times, but they did manage to get two of the outer walls done in one night.


And that's where we are right now. Hopping around here and there, hopefully moving forward all the time.


Jun 1, 2017

Basement Renovation Progress Report - Subfloor

Believe it or not, we're still chipping away at the basement renovation. We always seem to have other things going on each weekend that keep us from putting in a good day's (or 2 days') work. Sometimes Tom mentions taking on a house flip, and I think, "We can't even get ours renovated in a reasonable time - how could we do two?"

So most of the subfloor is in now. There is still an area in the workshop that we're holding off on completing until the window is replaced. It's on order now so, fingers crossed, it'll be in by the end of June.

amdry subfloor basement renovation

The subfloor we decided on was AmDry insulated flooring in 2 ft x 4 ft panels. Along with the plywood and foam insulation, the panels have a "waffled" vapour barrier underside that allows moisture and air to flow beneath. If there's ever a water problem, the water will flow under the floor to the sump in the corner.

amdry subfloor basement renovation

The panels fit together with plastic connectors rather than connecting directly to each other. It's still tongue and groove, but the boards are all "groove" and the connectors are all "tongue" so you never have to think about which way to place the board; it always fits.

amdry subfloor basement renovation

It was a little more expensive than the other subflooring available, but it also has a higher R value (R-5 vs. R-1.7), meaning that our basement will stay toasty warm in winter.

I say "we", but Tom did most of it. I had fun banging some of the panels into place, but I left all of the cutting to him. The floor is laid in a staggered pattern to minimize long joints and flexing, with shims placed along the wall all the way around the room. This small extra space created by the shim allows for expansion and contraction of the panels over time/temperature changes.

amdry subfloor basement renovation

amdry subfloor basement renovation

We're both really happy with how it looks and how easy it was to install. I like that it looks like the panels are grouted. The dogs were a little wary of walking on it, but once we moved some furniture and a dog bed into the area, they decided it wasn't so bad after all.

amdry subfloor basement renovation

amdry subfloor basement renovation

amdry subfloor basement renovation

And there you have it. Not the most exciting update - but some progress has been made.
Related Posts Plugin for WordPress, Blogger...