Now that it's easier to breathe outside, we've turned our focus to the back deck. We have a huge deck that runs the entire width of the house - just a gorgeous amount of space to work with. But we spend so much of our free time working on other projects, that we don't get to enjoy it often enough. And it shows. I've vowed that this year we'd make it a place we'd wanted to hang out. The first step was to add more greenery.
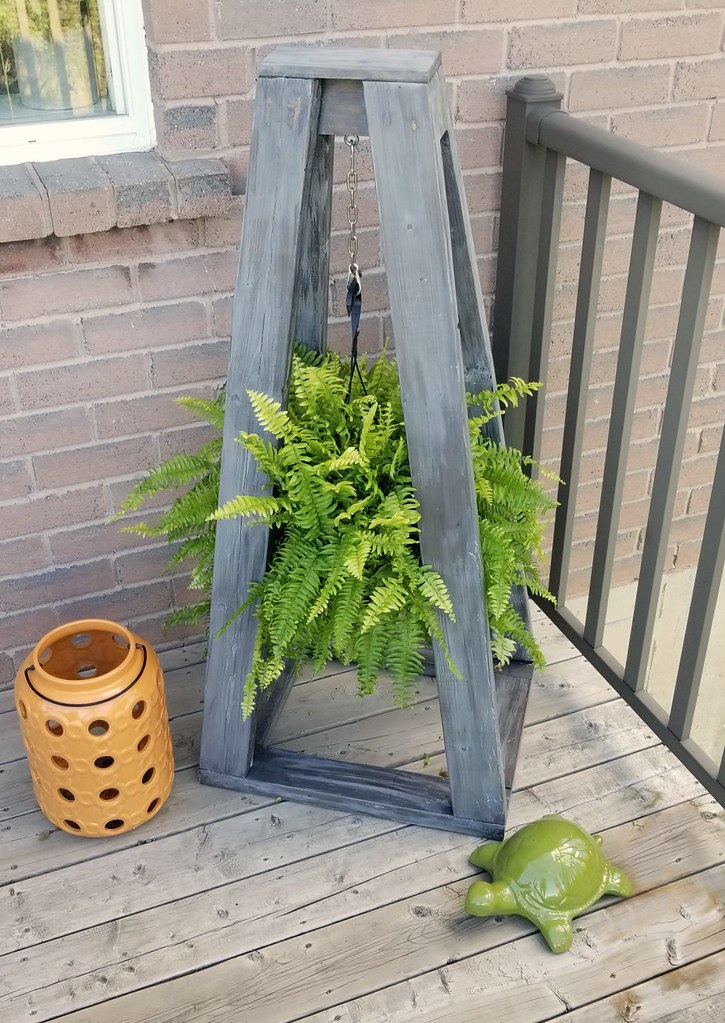
This plant stand idea comes from Overalls and Power Saws, and Brittany has very detailed instructions if mine aren't clear enough. Our planter is taller than hers so the measurements will be different, but the idea is the same. We also changed the top support to a 4x4 and added a board on top to cap it off.
Materials:
4 - 2x4x47" (uprights)
2 - 2x4x22" (base)
2 - 2x4x12" (base)
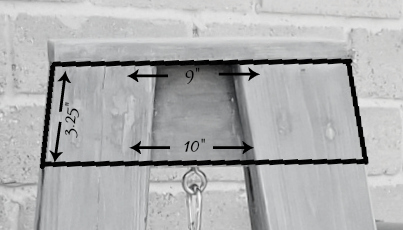
1 - 4x4x10" (top support)
1 - 1x4x9" (top)
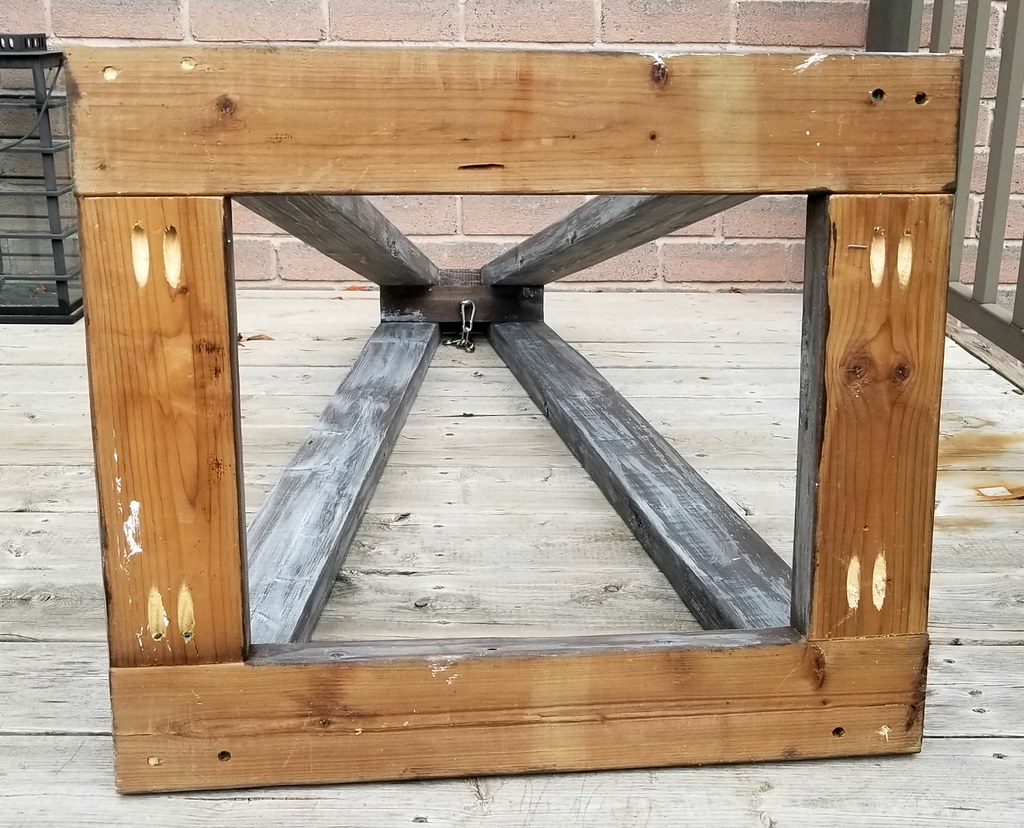
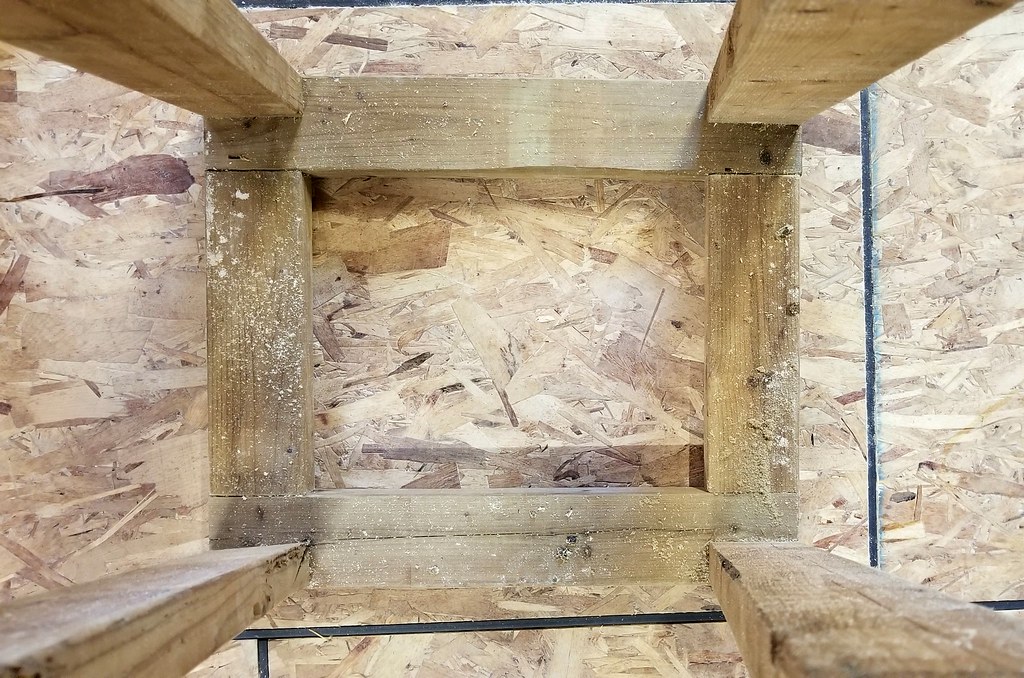
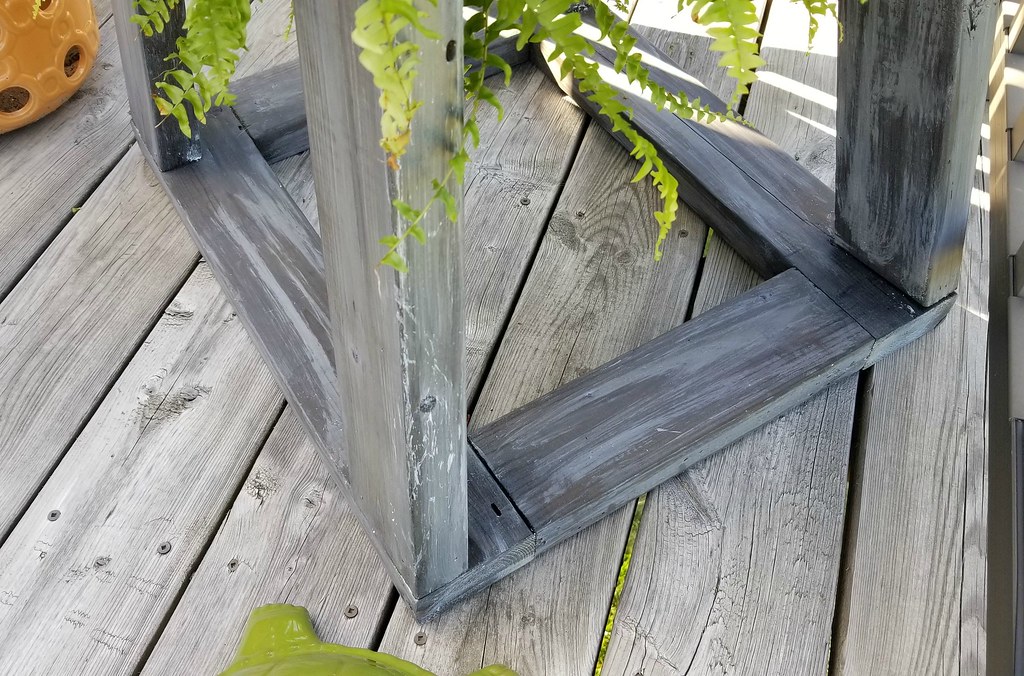
Start by building the base. The four base pieces are attached to each other in a rectangle using pocket screws on the underside. The 22" pieces go along the front and back with the 12" pieces on the sides.
To make the uprights, you'll cut the ends of your long 2x4s with a miter saw. The upright boards slope inwards side to side and front to back, so you'll need to cut the board at two angles at the same time. Set the bed angle at 7 degrees and the blade angle at 12 degrees. This is a complicated cut that you might want to practice on a scrap board first to make sure it's right.
The four upright boards are anchored to the base with screws attached from underneath. Once the boards have been screwed in place, stand the frame upright and lean the boards against each other while the top support is put in place.
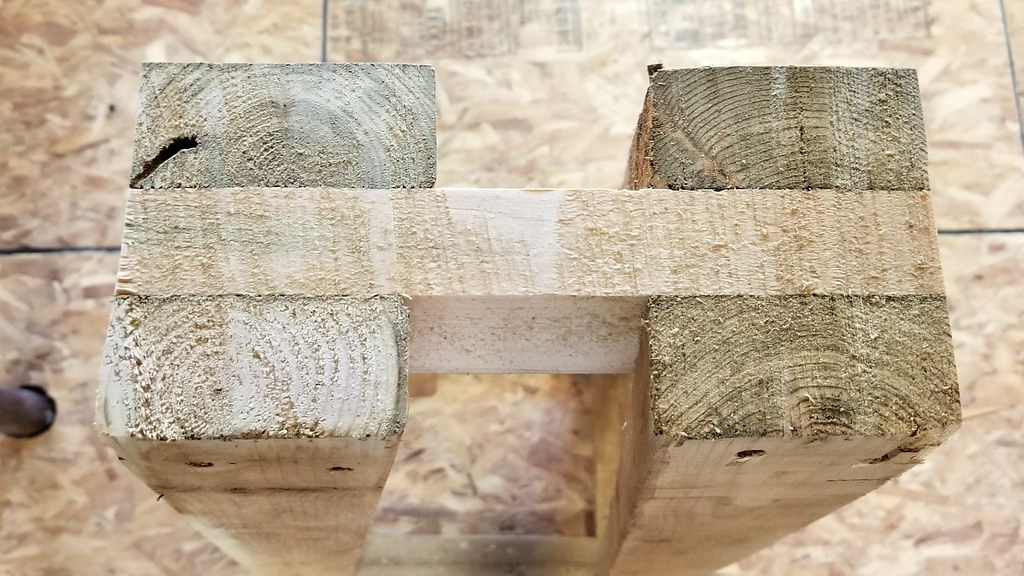
For the top support piece, take the 4x4 and run it through the table saw with the blade set at a 7 degree angle. Flip the wood around and do the same to the other side to get a trapezoid shape.
Now that your frame is built, you'll need to cut off the extra "bits". Take a reciprocating saw or a handsaw and cut off the upper corners of the support piece so that the angle matches the upright boards. Cut off the tips of the upright boards so that they're level with the top of the support piece. Finish with a palm sander to smooth out any rough or uneven spots.
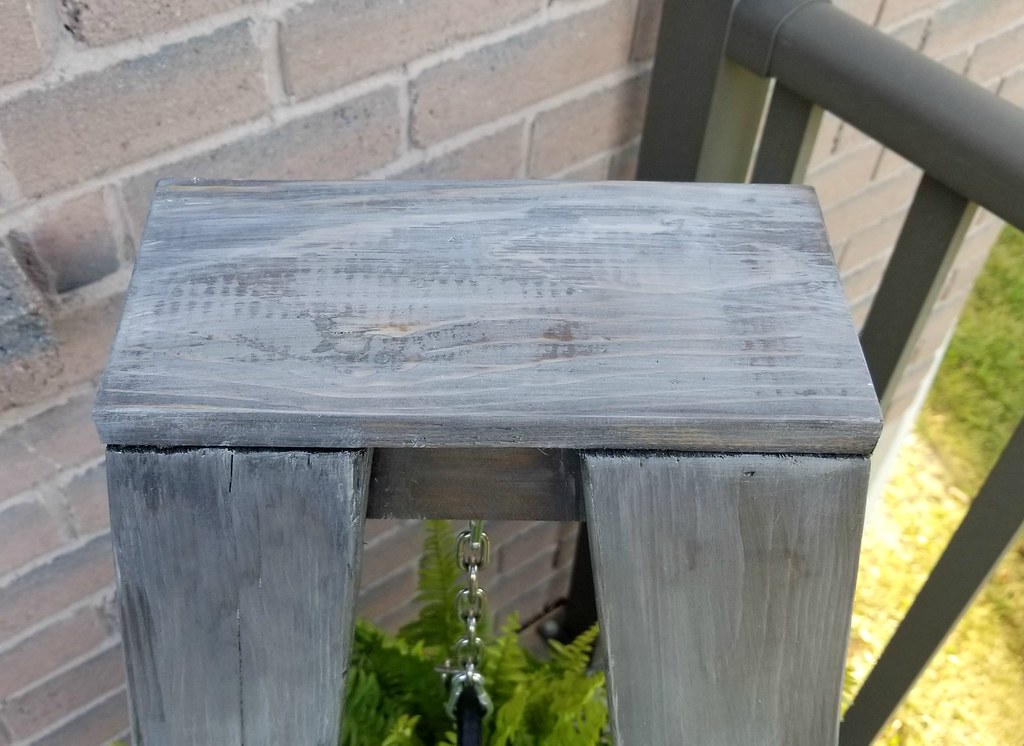
The final piece to attach is the "crown" on top. This piece isn't on the original plan, but we added it just to give the planter a more finished look, and to provide a level spot if we ever wanted to set something on it. Attach it with finishing nails for a cleaner look or screws if you don't mind filling them.
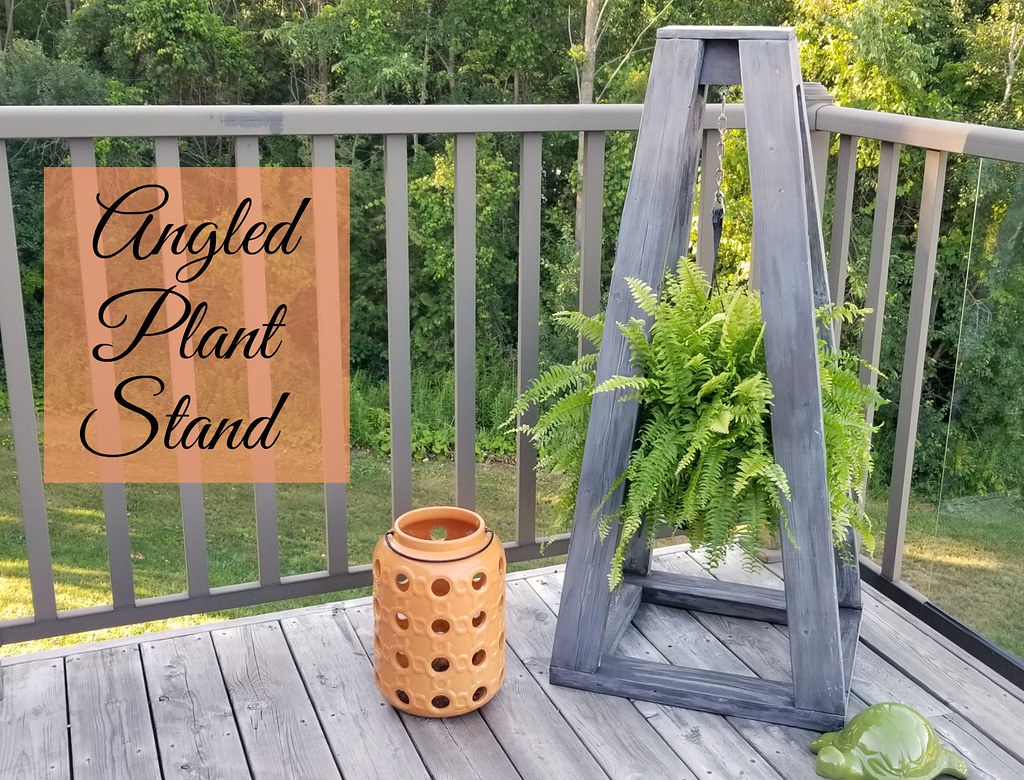
You can now finish your planter in whatever way you desire - paint, stain, lacquer - or leave it bare if that's the look you like. I puttied and sanded the screw/nail holes that were visible, and then I did a multi-step process - first a coat of stain in Minwax's Jacobean, then a coat of stain in Minwax's Classic Grey, and then finally some light brush strokes of white paint to give a weathered look. After applying the white paint I went over some areas with more grey stain if they needed to be blended.
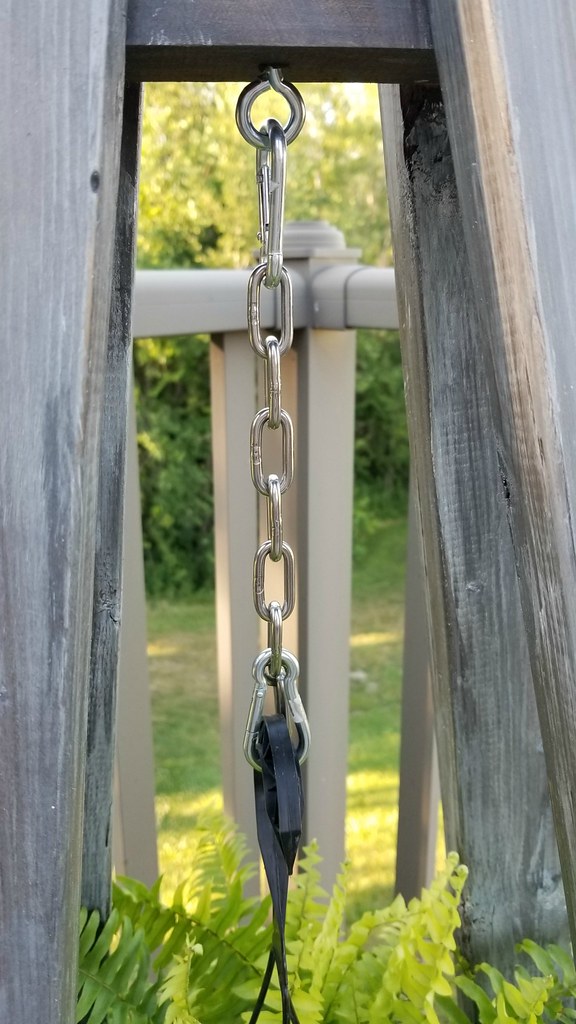
Once dry, you'll add your chain and plant hook. We used the combination of an eye hook, carabiner, chain, and then one more carabiner at the bottom, as the chain loops weren't wide enough for the plant hook.
And there you have it. A plant stand that's also a bit of an art piece. There's a mix of texture with the rough wood, smooth chain, and nearby glass and metal, yet the neutral colours let the green in the plants's leaves just pop.







No comments:
Post a Comment