


Our dogs are really hard on their stuffed toys so we've taken to either buying toys from the dollar store or from Goodwill because they aren't going to last anyway. And if I could find a way to make something than it would be even cheaper. Plus, if they're cute enough maybe I could sell them.
Well, they aren't cute enough yet, but I'm getting there.
The original tutorial is on make it-love it.com. She also provides a template for the fabric pieces. I used her pattern exactly for the first one and I found the body to be far too large. I cut it down for the second and it was better, but I think I'm still going to tweak it a bit. Maybe an oval instead of a circle.
I followed her steps exactly but I'll walk you through it.
Cut out all of your pieces from whatever fabric you like. I went to Goodwill and bought an old sheet, some pillowcases, and some cloth napkins, trying to find complementary patterns/colours. I used two different patterns for the top of the shell, and then a third one for the head, legs, tail, and bottom.


Take two of your leg pieces, and sew them together with the right sides facing in, remembering to leave the top edge open. Do the same with the rest of the legs, the tail, and the head.
Here is my fancy needle work. Don't be jealous.

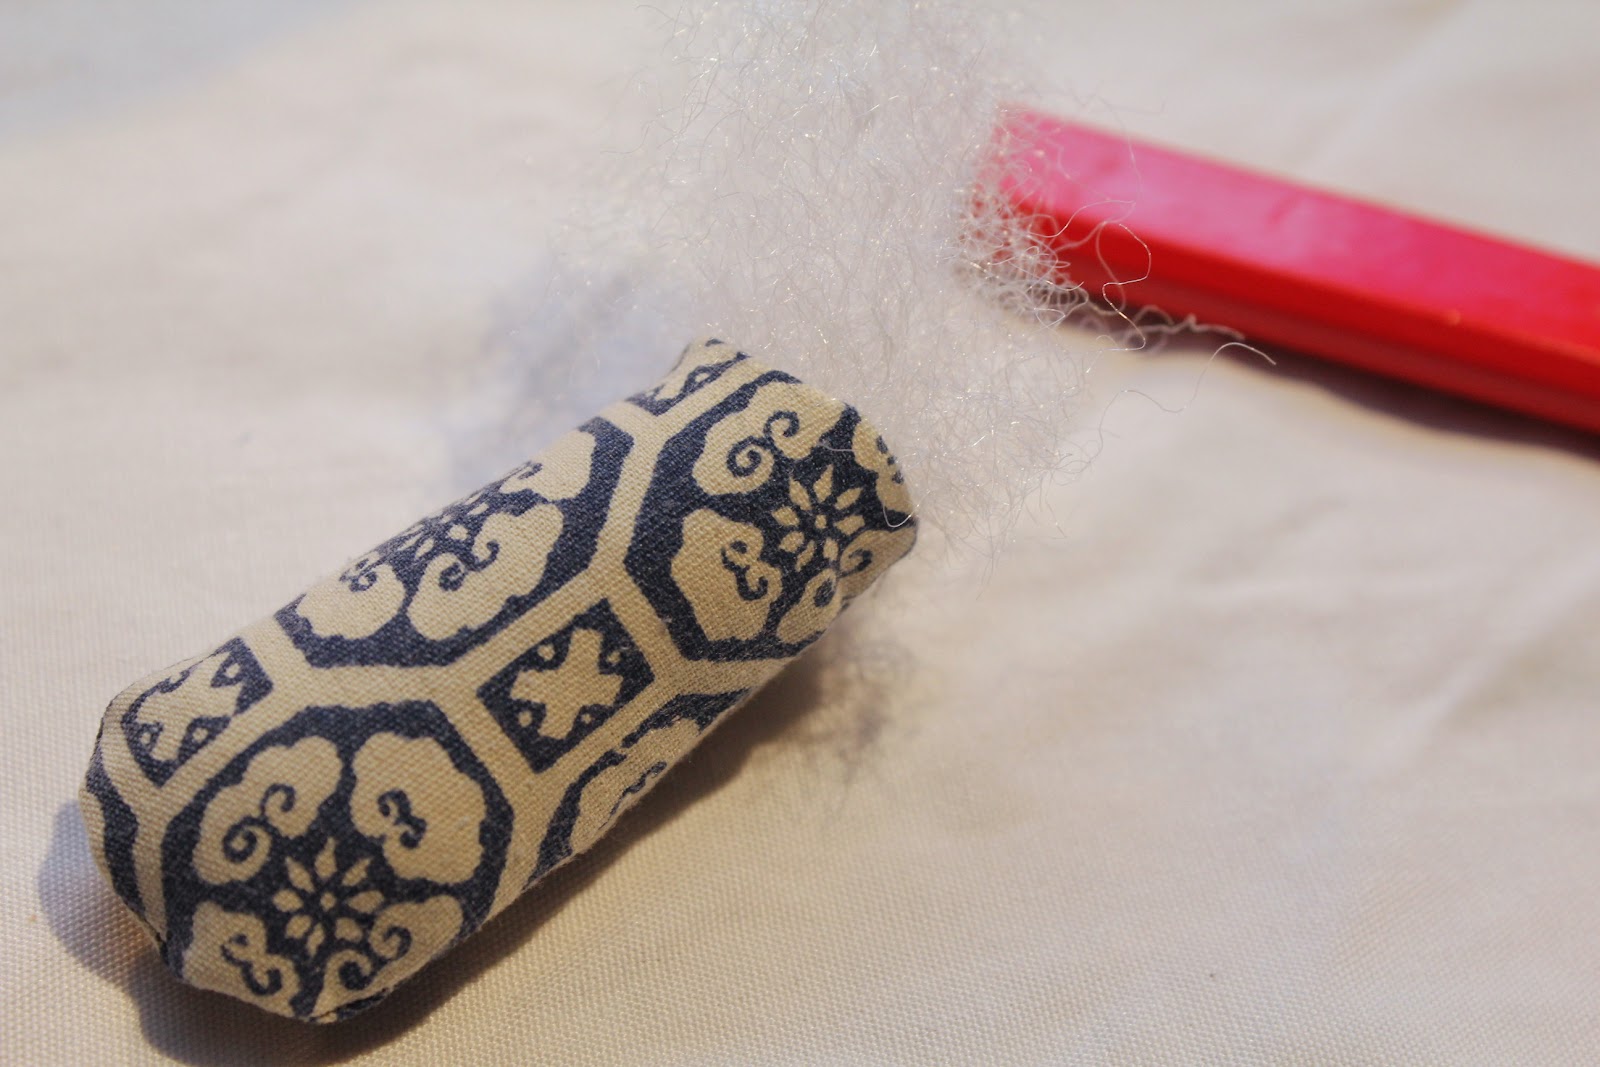
Turn each sewn piece right side out using a pencil,
paint brush, or whatever you can find.

Fill each sewn piece with stuffing (I bought a huge bag of polyester fiberfill at Michael's for about $5), using the pencil to push it in firmly.

Sew each piece closed, leaving yourself about a 1/4 inch seam.

Take two of the shell pieces, face the right sides in, and sew from the top of the shell, down ONE side to the bottom. Do this again with your other two pieces.

Open the shell pieces up. Pin the head to one of the sides about 1/2 inch up from the bottom. It should be pinned onto the right side (i.e. the good side) with raw edges facing together. Do the same with the tail on the other end. Sew the two pieces into place. (Note: I sewed the head on upside down on this one. I haven't decided yet which way I like better.)

Take the other shell half, lay it on top of the first one - right sides in - and sew the two pieces together leaving the bottom of the shell open. It should look like this when you're finished. (Or it might look better. There's a pretty good chance.)

Pin each of the feet to the bottom edge of the shell, approximately in the center of each shell piece. Attach each of the feet as you did with the head and tail.
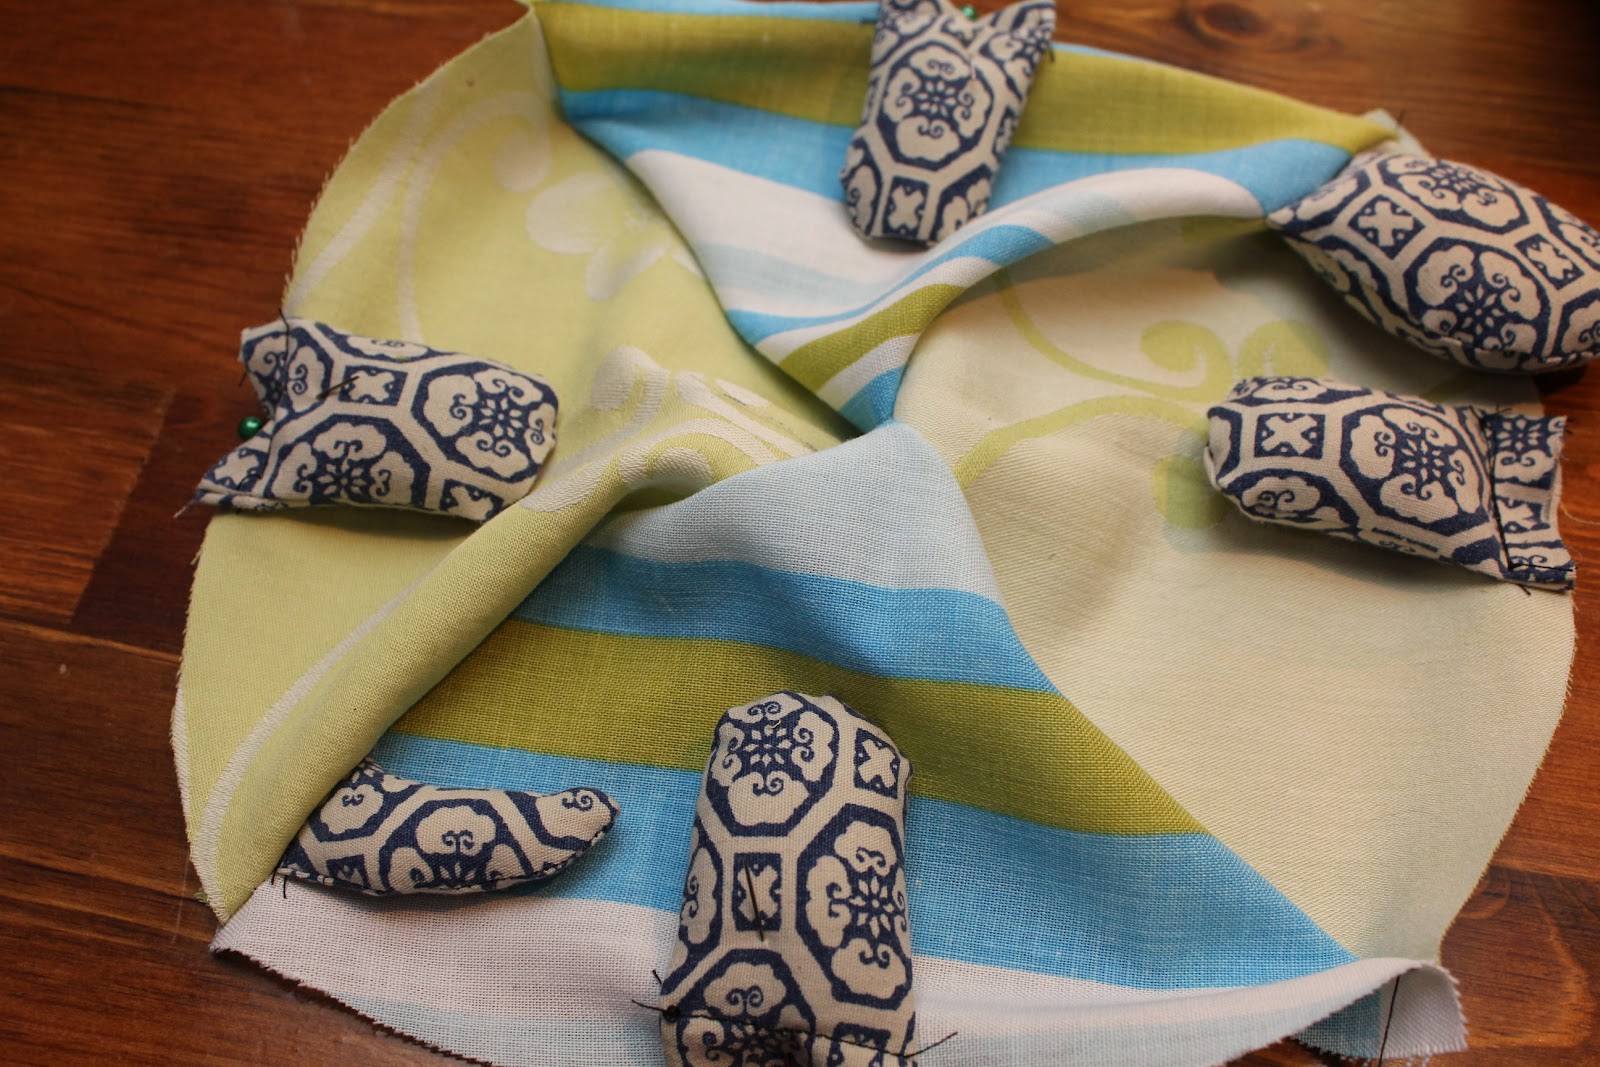
Turn it inside out and place it on top of the circle bottom, right sides facing together. Pin all around the circle attaching the two pieces together. Sew around the circle leaving yourself an opening about 2-3 inches long between two of the side legs.

Turn the turtle right side out and fill with your stuffing. Make sure it is really fluffy but not lumpy. Fold your raw edges in and finish with your choice of stitch. I won't be demonstrating that. Here is a tutorial for a blind stitch.
And there it is! Yeah, kind of awkward. But I love him.


And someone else does too.
Chloe adopted him right away and wasn't about to let go.


For my second turtle I only used two fabrics and made the shell pieces significantly smaller. I'm really digging the bottom fabric. I think I'll use just that one next time.


He's a little more proportioned. But still kind of funky.
I'll keep working on it.

~~~~~~
I'm linking up here this week!

55 comments:
Thanks so much for sharing this with our readers at Sharing Saturday.
~MiaB
www.mamamiasheart2heart.com
So cute! Love your fabric selections. Thanks for linking up to Share the Love Wednesday. Hope you'll be back this week--
Mary
Oh my gosh, first of all, HOW CUTE. Secondly, I HAVE THOSE BLUE PILLOWCASES! The one with the small pattern. Isn't that funny? I've always loved them, but they don't match much. Know I know what to do, make a turtle! Thanks for linking up to Refresh Your Nest Friday!
Awww! Would make such a cute pin cushion!!
such a cute turtle. thanks for sharing the how to. I have a new link party starting today and would love you to add your link to it. http://asouthernladysramblings.blogspot.com/2012/01/pinterest-love-and-thursday-link-party.html
I love that blue pattern - it's my favourite. I'd like to see what you come up with.
thanks!
Thank you for hosting!
Thank you!
Let me know when you do - I'd love to see it!
It looks well-loved already - she's removed all the stuffing. :-)
Thank you!
So cute! If only I could sew!! found you on Lisa's Craft Blog link party.
Leanne @ Because (I think) I Can
How cute are those turtles and Cloe is adorable, too! I found you through Creative Bloggers Party and am now a new follower ;). Best wishes, Joanna #283
I love the photos of your dog with the turtle! SO cute. I also like your fabric choices. I made these too. I think I want to try scaling down the shell size as you did for the smaller turtle.
Very cute! and your doggie seems to like it too! These would make great birthday presents!
Thanks for linking up to Tell it to Me Tuesday!
--Katie
Love the turtle and looks like your puppy does too:) I have a dog too and she would absolutely love this! I just don't know how long it would last since she likes to pull apart stuffed animals. Thanks for sharing this!
Simply adorable. I wish I was more nimble with a needle and thread.
These turned out great! I love the blue-and-white patterned fabric you used :) Thanks for visiting my blog!
I love that you made this cute little guy for your puppy! The turtle and the puppy are both adorable!
This is so cute!! And I love it for the pup :)
I'm happy to be your newest follower and am hoping that you'll visit my BRAND NEW blog and follow me back!
Thanks a million :)
Sarah @ Dotted Line Crafts
Adorable. I think dogs, humans, adults, whomever would love having a turtle toy.
So pretty! Hoping you can link this up at my turquoise lovin' party!http://www.sweetlittlegals.com/2012/01/turquoise-lovin-20.html
So sweet - we have a pet turtle so my kids would love this!
What a precious project and you're tutorial is soo detailed - it's wonderful!! Thank you so much for sharing and linking up to Lisa's Linky List!!
~Lisa @ Lisa's Craft Blog
Thanks!
It was so easy!
Good thing they're not picky, right?
I'm definitely going to keep practicing so I can give some away!
It's my favourite too.
I'm no professional!
That looks adorable and love the fabric as well :)
Did you post about them? I'd love to see.
Thank you for hosting!
Thank you!
Thank you!
so cute...all from goodwill too, way to recycle, i'm sure i have alot of junk around here i can recycle, haha...i have a 120 lb. american bulldog who is my life, my world, my savior. I love this idea because there is no stupid squeaker for him to "have" to remove before he can snuggle with it. Thanks, I'm gonna make this tomorrow, cute as can be! Melinda
Thanks! They're not cute yet, but I'm working on it.
Squeakers are the worst! So hard to find dog toys without them. We call it a "squeak-ectomy" when the dogs take them out - always the first thing to go.
I'd like to see what you come up with!
Those toys didn't last long here either. If you look at the picture of the two together, the first one is already missing a tail!
Hi, Barb! I'm admiring all your creativity here. Can you please share your posts at my Creative Bloggers' Party & Hop? Hope to see you there at the party :)
Thank you, I'll stop by.
Thank you!
Thank you!
Chloe is sooooo cute!! I love her last picture. Our Jack Russell's name is Kloee, too!
The turtles just look so huggable. What a great idea!
How great! I need one too! :)
And my cats also always steals my stuff! Last time I made a little needle pillow... it went away as soon as I looked the other direction!
i love it! Honestly i've never tried to stuff something that complicated...i'm scared!
you should join me for handmade 52! http://raisingoranges.blogspot.com/2012/01/handmade-52-2.html
This is way toooo cute!!! Love it. I love that your dog is enjoying it as well :) I'm your newest follower and would love it if you could share this here -
http://www.mamamiasheart2heart.com/2012/01/crayon-monogram.html
Have a great weekend.
~MiaB
I'm no sewer and it wasn't that hard. Give it a try!
Thank you!
Thank you, she's a sweetie.
Very cute, I love that your dog immediately adopted it. I had a stuffed dog my dad and sister made for me when I turned five very similar to this style. Love it!
oh my this is so cute!!! thank you so much for sharing this! I will be trying this one for sure :)
I see a darling turtle project like this replacing all of last years owls. :0 So cute and I love your mix of patterns and colors. Thanks for sharing on Motivated Monday at BeColorful
Pam
Thank you! I'll stop by!
Post a Comment