So I gave it a go. My first project? Stenciling the dogs' names onto their food bowls. Now I didn't really intend to stencil them, I actually was planning on using vinyl letters, but that comes later in the story.
Do you have a Cameo? I've been wanting one forever. I've done some stenciling by hand in the past year and I can tell you, cutting out those letters or images by hand is just no fun. And the Cameo lets you do more than make stencils of course - you can cut out paper, fabric, vinyl, even temporary tattoos.
Glamour shot:
And so I got started. Now keep in mind that this was the first time I've ever used a Silhouette machine so I wasn't going for anything complicated. Also keep in mind that I didn't get around to starting until 5pm on Sunday night. Am I a procrastinator? I'll let you know. ;-)
My machine came with sheets of different coloured plastic - what I thought was vinyl. Why else would they be different colours? I planned to cut out the letters of the dogs' names and stick them on to the sides of their bowls. I opened up the program and got to work deciding on the size and font. I even put the names really close to each other so that I wouldn't waste any material.
I fed the yellow plastic into the machine and pressed start. Oh my gosh, so exciting. I actually videotaped it cutting the letters. Is that too nerdy? When it was done I peeled off the first letter and that's when I realized that it was a clear stencil and the yellow was just the backing paper. Sad Barb.
But that's okay, I have lots of paint - I can just paint the names on! Tom chose (he was home by then) Annie Sloan chalk paint in Aubusson Blue.
Our dog bowls are more like buckets with lids. They are so great because not only are they tall so the dogs don't have to lean way over to eat, but you can fill the bucket part with food and it's a travel bowl for trips.
I applied the stencil to the side of the bowl (Yay for self adhesive!) and pressed painters tape around the edges to block any stray paint strokes. And since I'd put the two names so close together I had to block the other name.
It took two coats of paint and only about 20 minutes to dry completely. I did some touch ups with a plastic scraper and an artist's brush, and then sprayed the names with a few coats of matte acrylic coating to seal.
Tell me that isn't adorable. Maybe I'll add some girlie flowers.
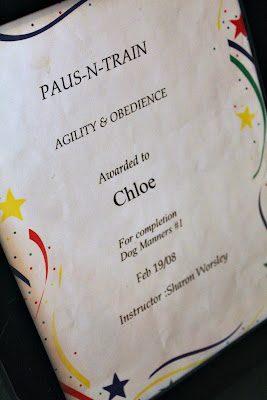
Over Chloe's bowl we hung her graduation certificate from obedience class - framed of course. Isn't she a smartypants? She graduated first in her class. (She was the only one in her class.)
~~~~~
I'm linking up here this week!


4 comments:
What a cute idea...wish I had gotten a cameo for Christmas ;-)
I keep hoping to get a cameo myself. My first project would probably be along the same lines. I'd mark Max's bowls, Food & Water, not that he ever confuses the two lol! Thanks for sharing this at the party this week!
Super cute idea :) love the doggie portrait! Thanks for sharing at the weekly creative.
Shannon @ Sewing Barefoot
I'm excited to see what else I can do!
Post a Comment