SEARCH THE BLOG

Apr 25, 2017

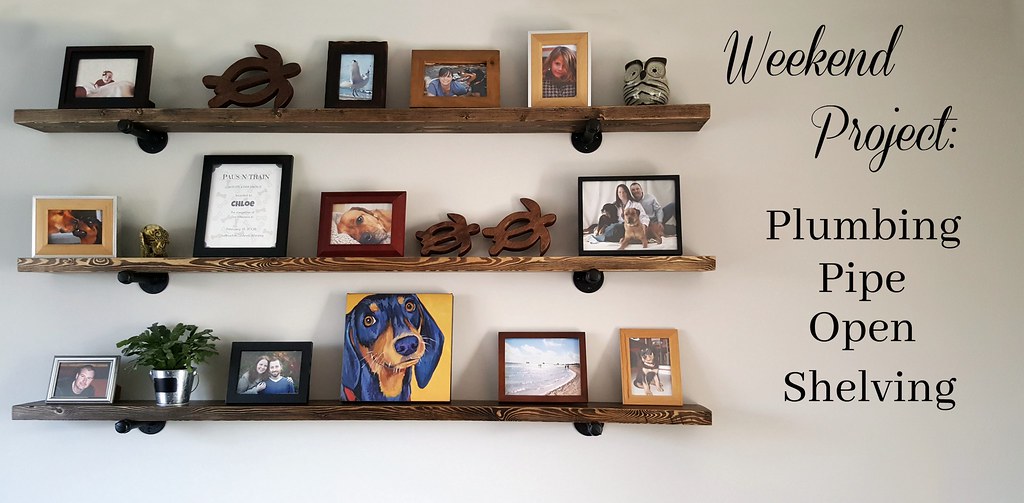
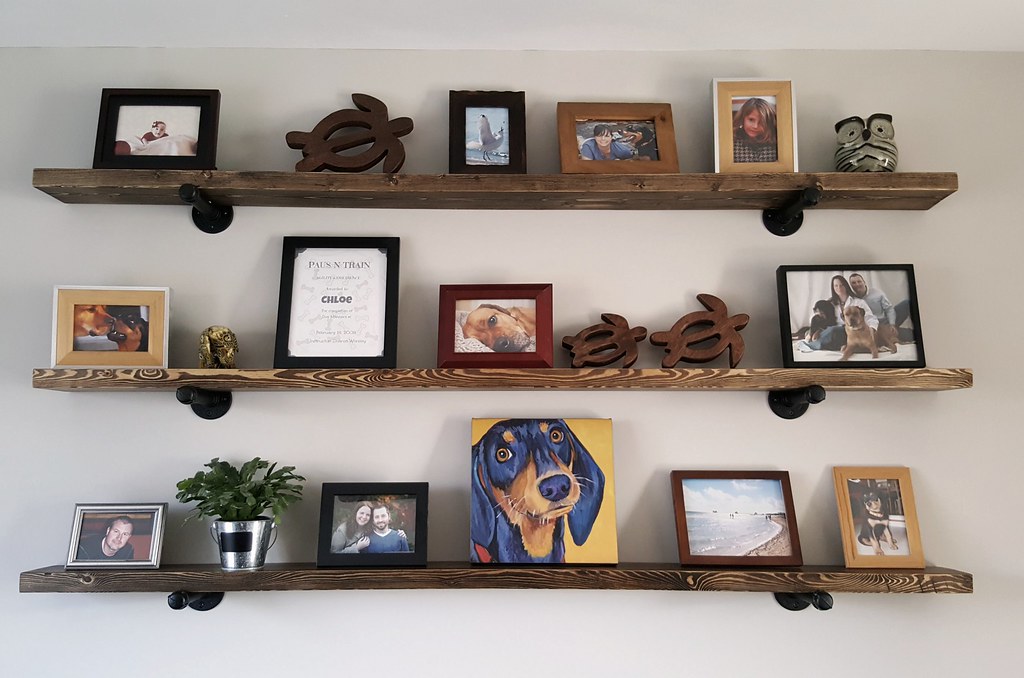
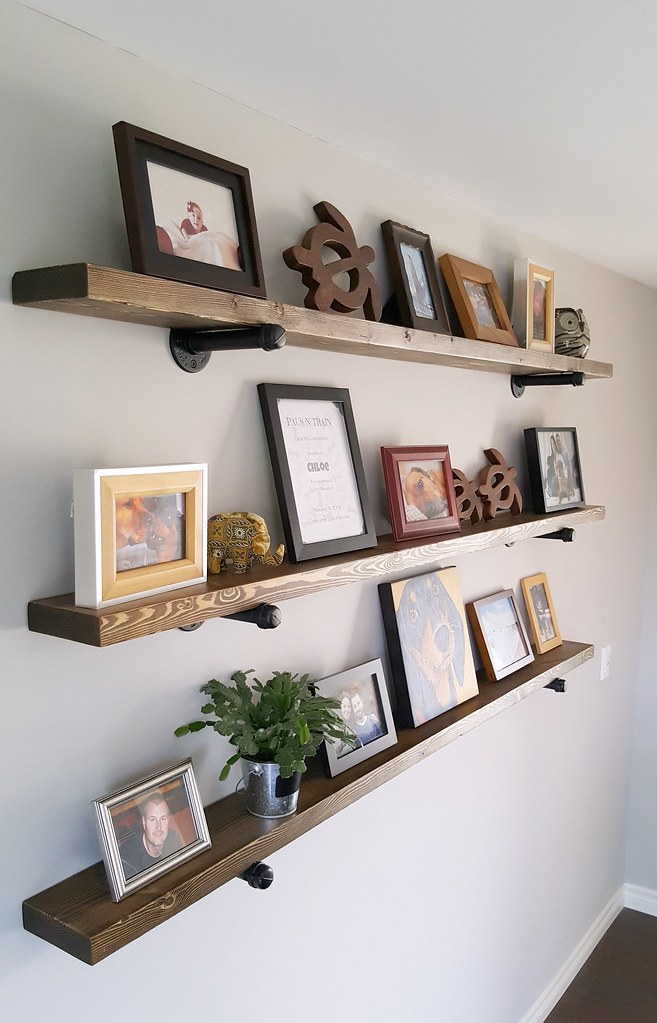
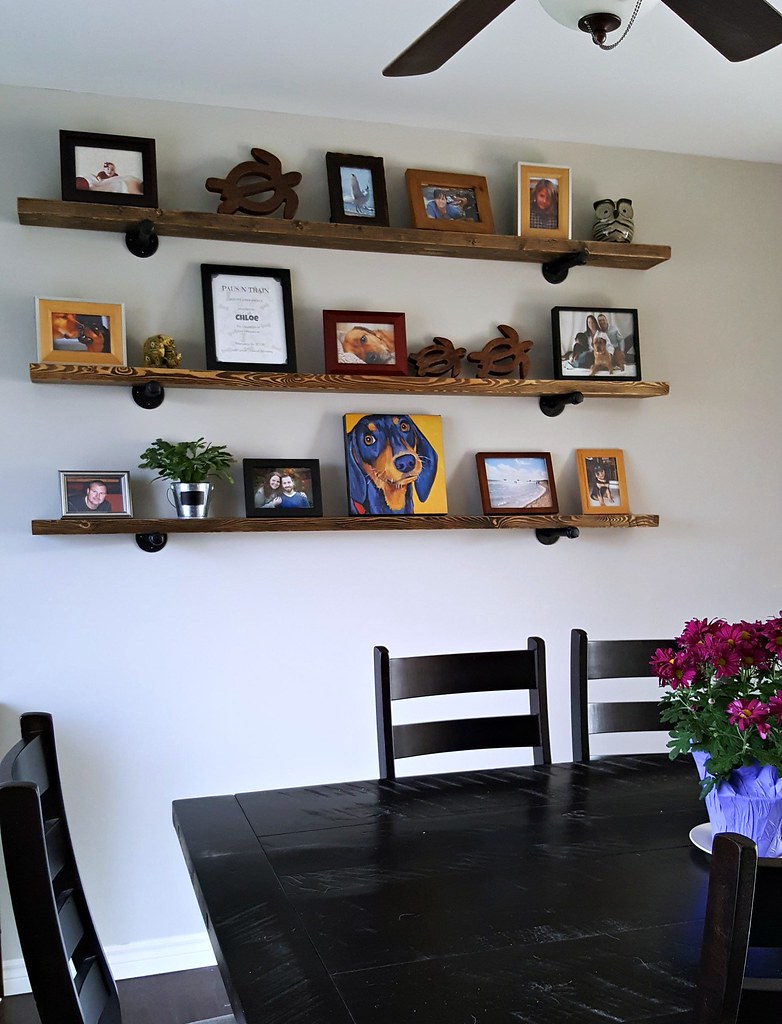
Plumbing Pipe Open Shelving

I don't have a cute intro for this post - I just had too many framed photos filling cardboard boxes and stacked against the walls in the spare room and I was really tired of looking at the blank walls every day!

One Saturday morning I told Tom that we really needed to build shelves and that it shouldn't take very long. I loved the floating shelves we had in the living room in our last house. But this time I wanted them to be chunkier, and it didn't really matter if they were floating. I grabbed the iPad and Tom went to his computer so that we could both look for ideas. I walked into the room to show him one I'd found that I liked, and hand-to-heart, he had the same image on his screen and was about to show me. Fate, baby.

Plumbing Pipe Open Shelving DIY

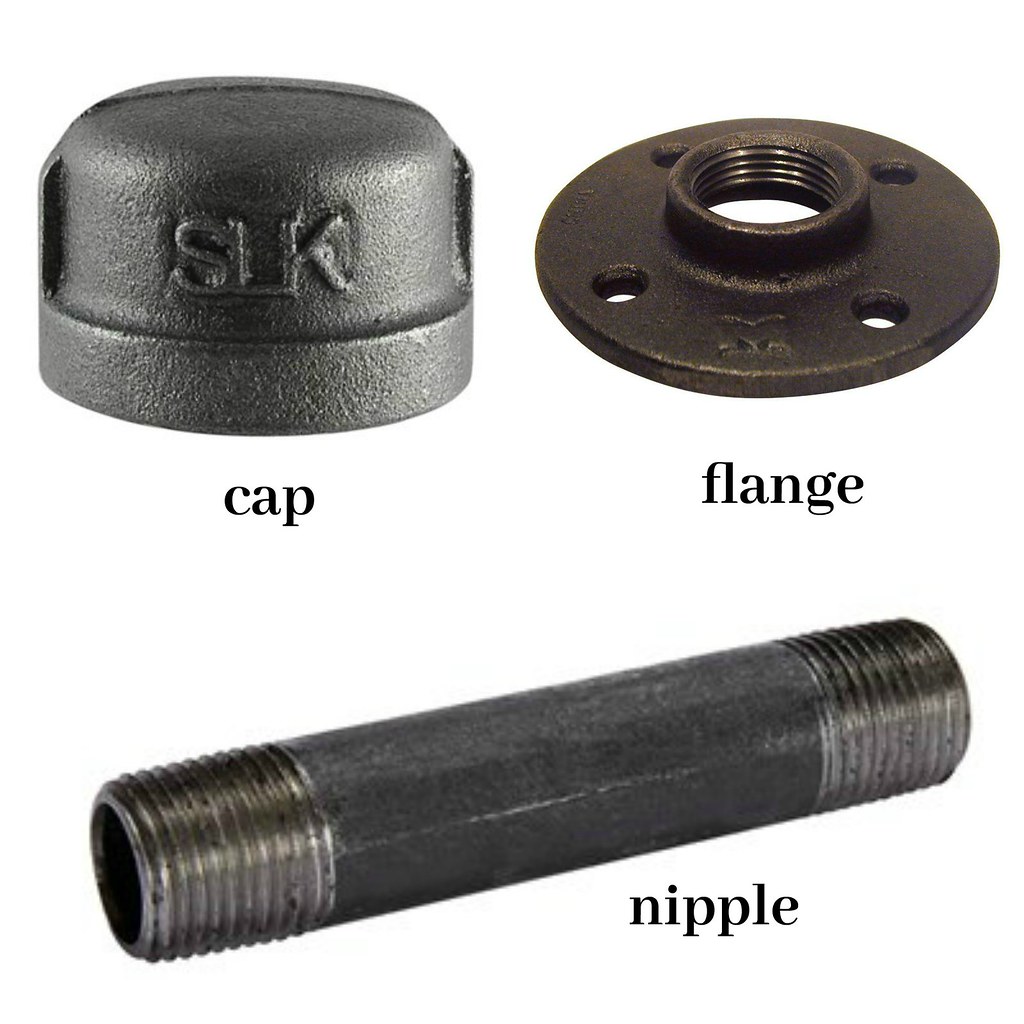
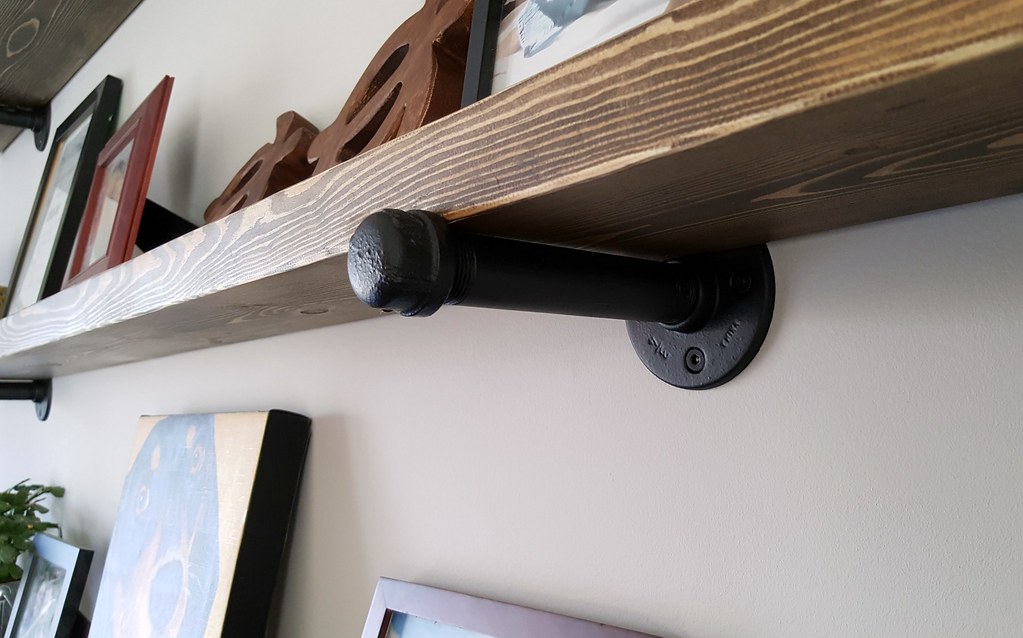
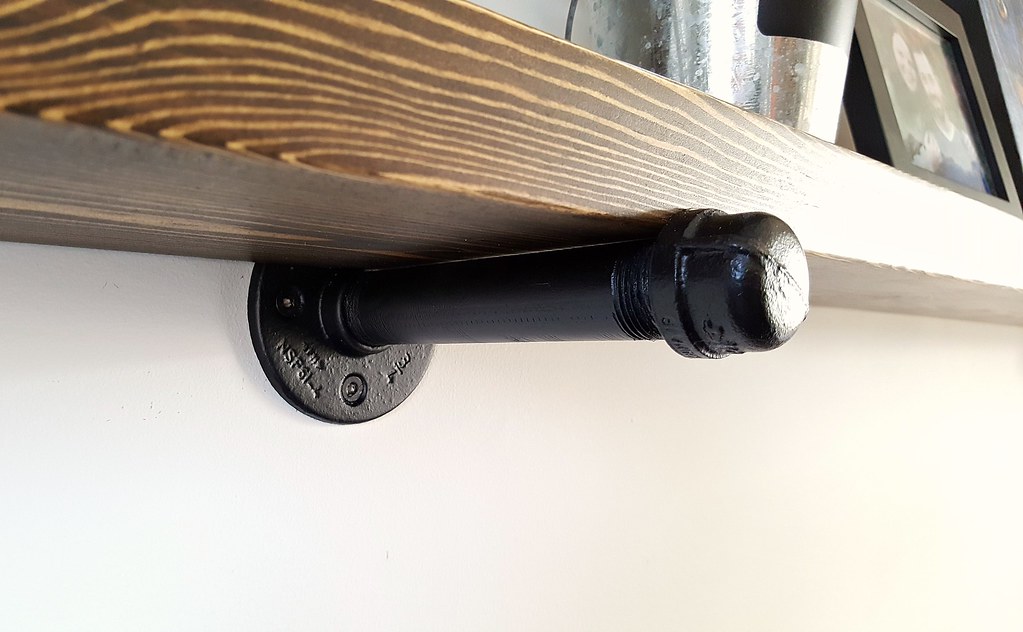
We headed into town for supplies - three 2x6x8 foot boards (shelves would be 6 ft long) and pipe fittings for 6 supports (2 per shelf). We were looking for 6 inch pipes (called nipples), but the shortest pipe we could find was 10 inches - that would make the shelves far too deep for our liking. Tom remembered that he had a length of 3/4" plumbing pipe at home that was left over from relocating the washer/dryer that he could cut up, so we only had to buy end caps and flanges.

Plumbing Pipe Open Shelving DIY

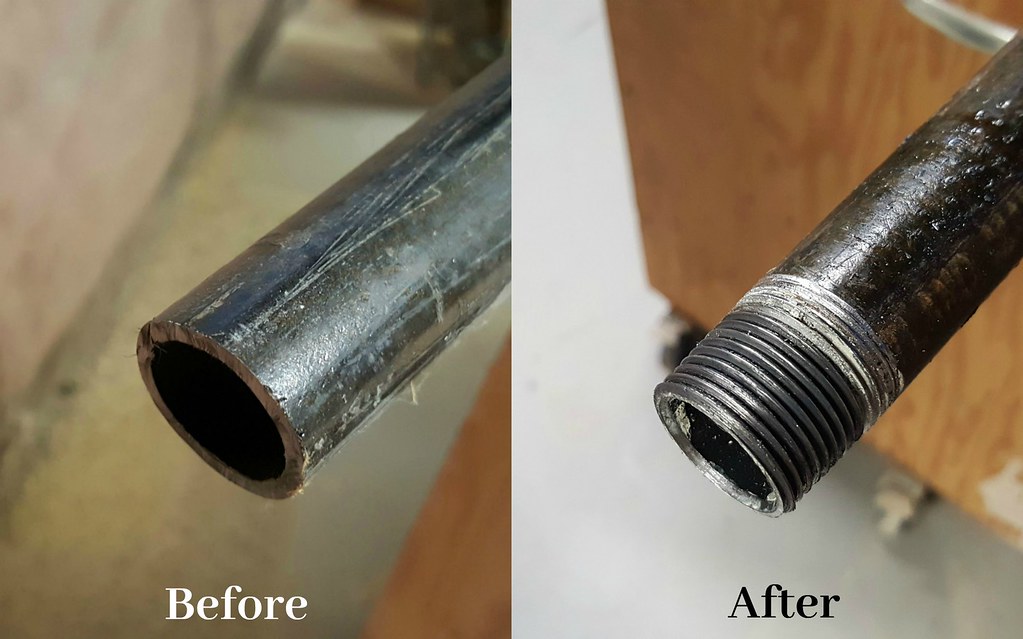
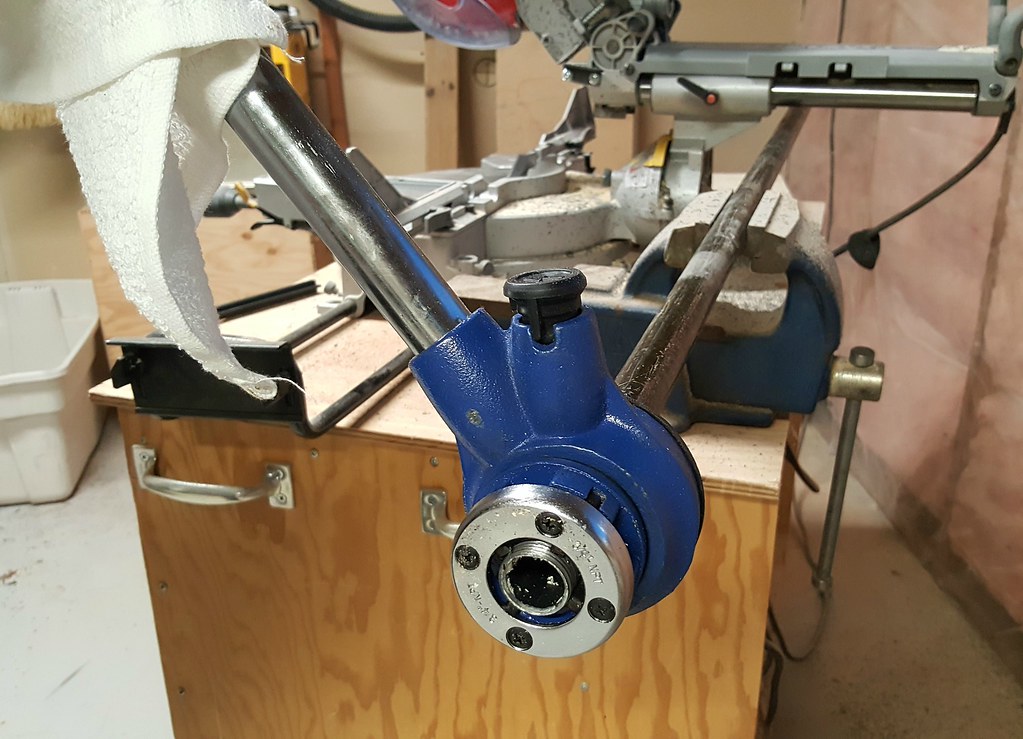
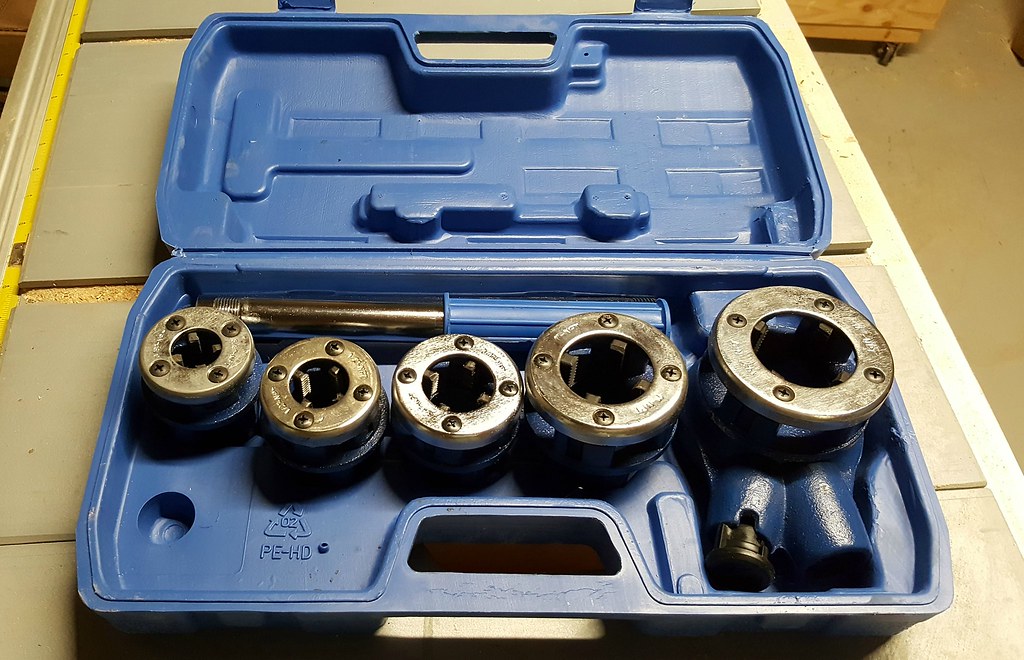
Back home, Tom went off to cut the pipe down to ~6 inch lengths and I sanded the boards. Now were you to buy the correct length of pipe it would already come threaded at each end. Our pipe pieces, having just been cut, were not. You need those threads to attach the end cap and flange. Luckily, we also have a pipe threader - a nifty little tool that carves threads into the pipe. It's a bit messy - metal dust will fly - but quick and efficient.

Plumbing Pipe Open Shelving DIY Pipe Threader

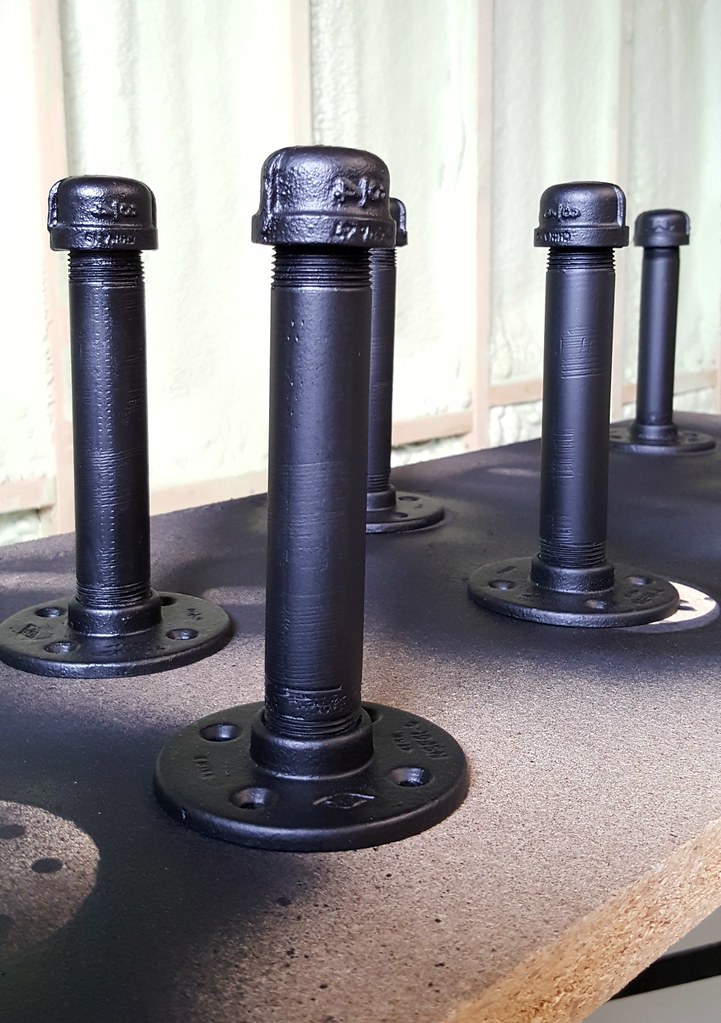
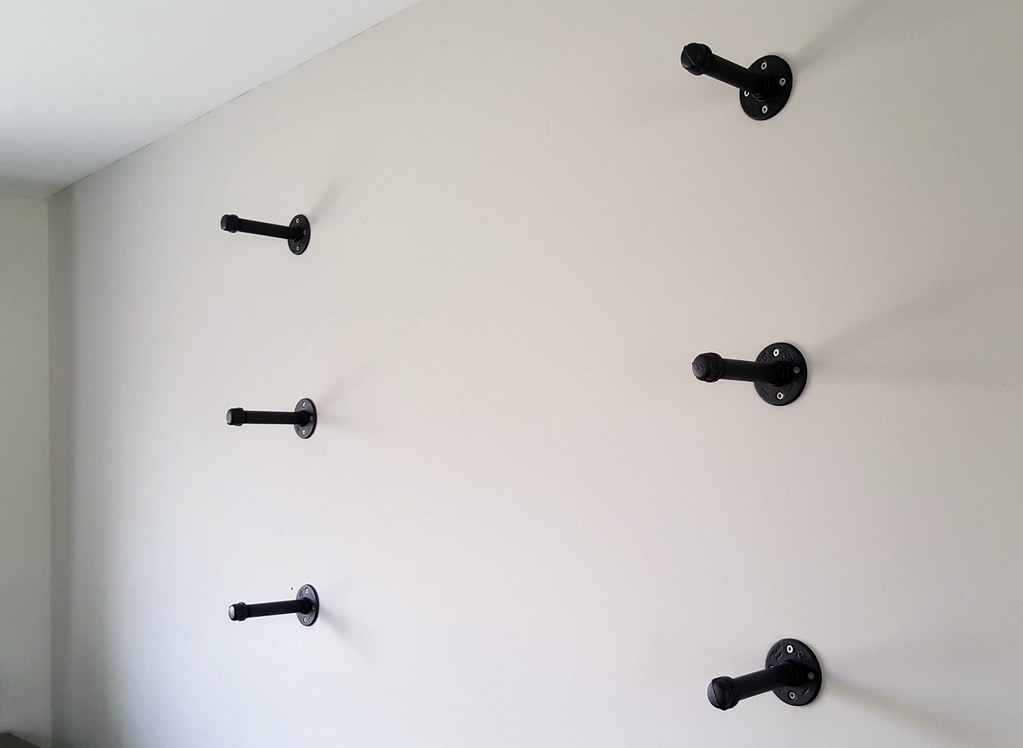
Once Tom had the pipes cut and threaded, he attached the end caps and flanges. We then figured out where we wanted the supports (i.e. where the studs were in the wall), and secured them to the wall. We also set the boards in place to make sure we were happy with the look.

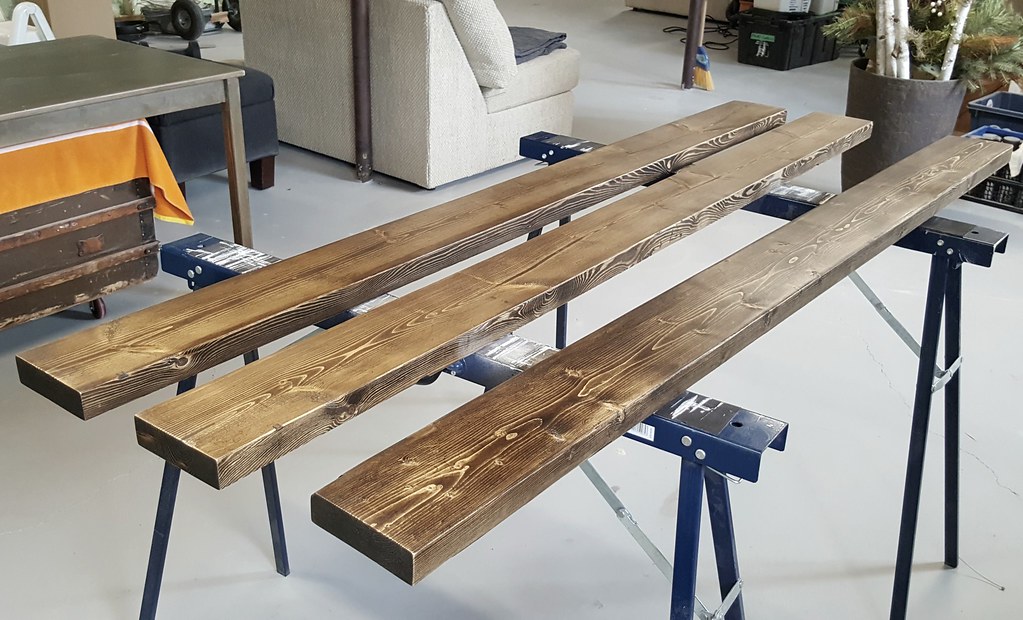
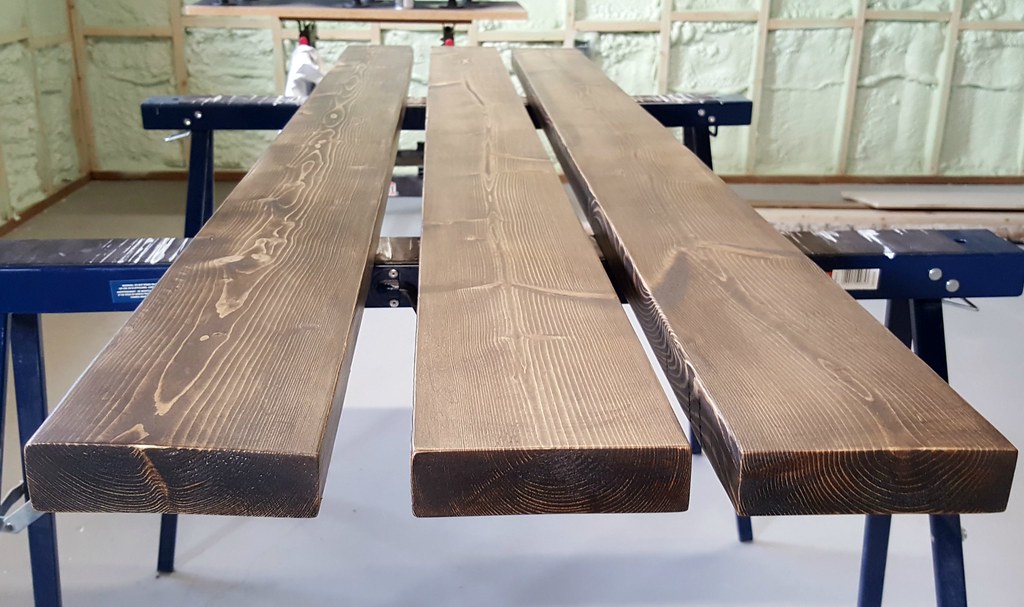
We took it all down and headed back to the basement where Tom set up the supports on some cardboard and spray painted them a matte black while I stained and waxed the shelf boards.

Plumbing Pipe Open Shelving DIY


I had planned on using an espresso-coloured stain that I'd had for awhile (maybe too long), but the colour was really washed-out, so I went with my usual - Minwax stain in Jacobean - which I also had on hand. I swear, I should be their spokesperson, I use it so often.

Plumbing Pipe Open Shelving DIY

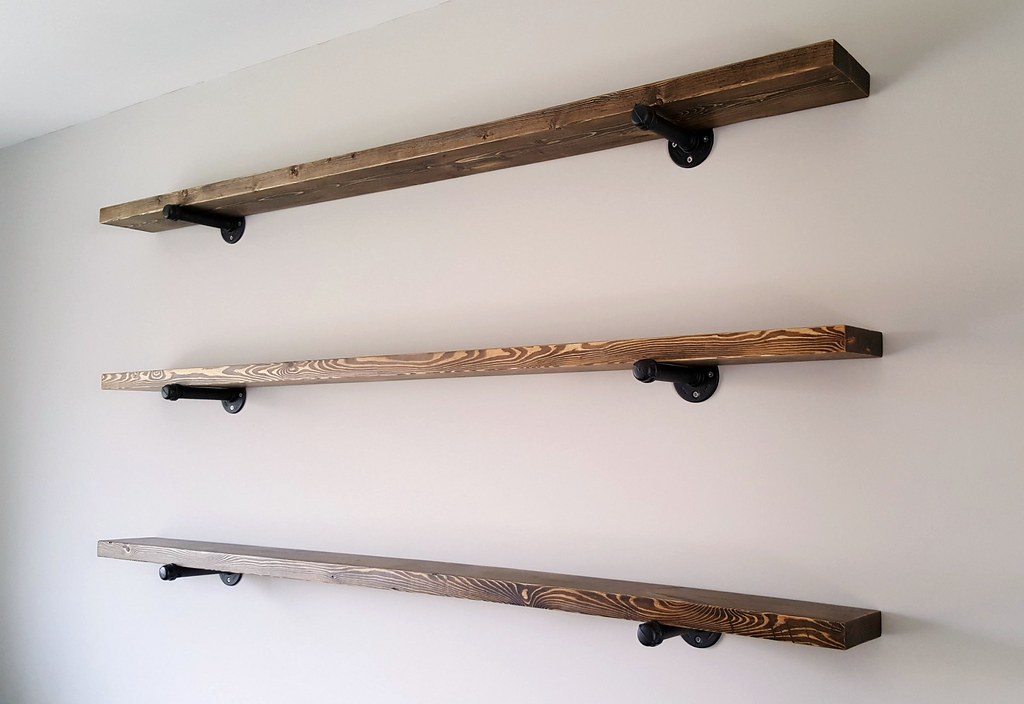
The next day we hung the supports back up and put the boards in place. Tom did make a couple of adjustments to the supports (tightening or loosening the end caps) so that the shelves were very secure. And any adult...toy joke you can think of has already been made. Trust me.

Plumbing Pipe Open Shelving DIY

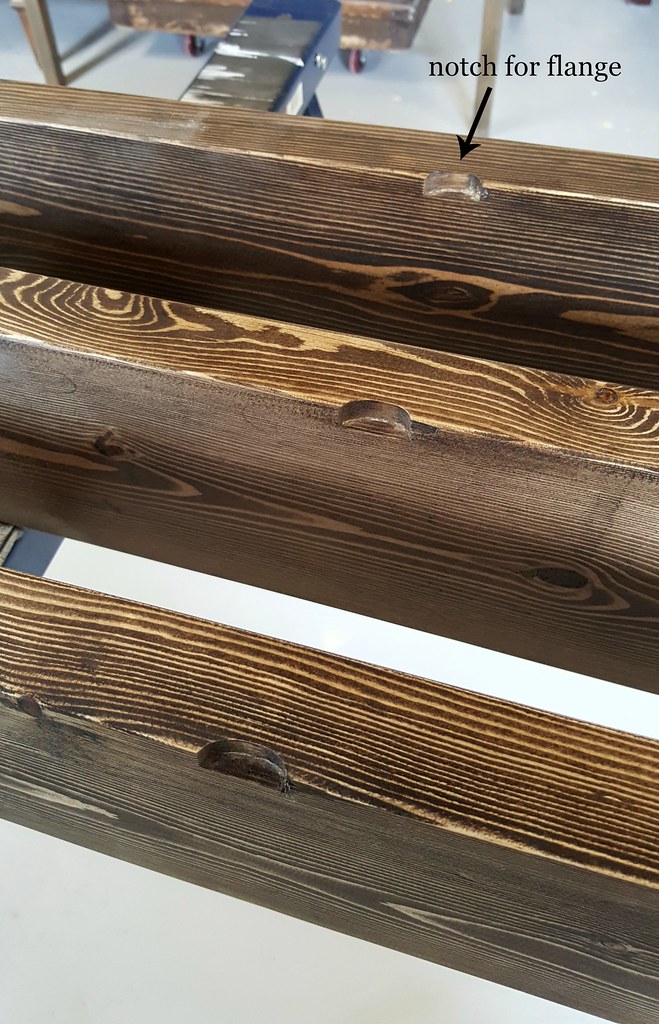
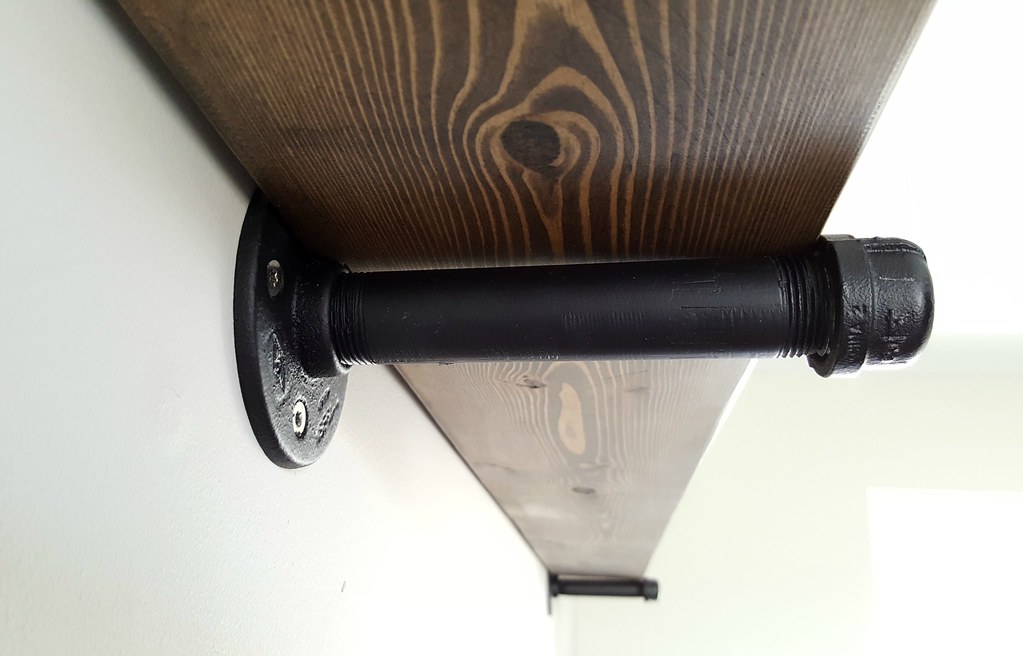
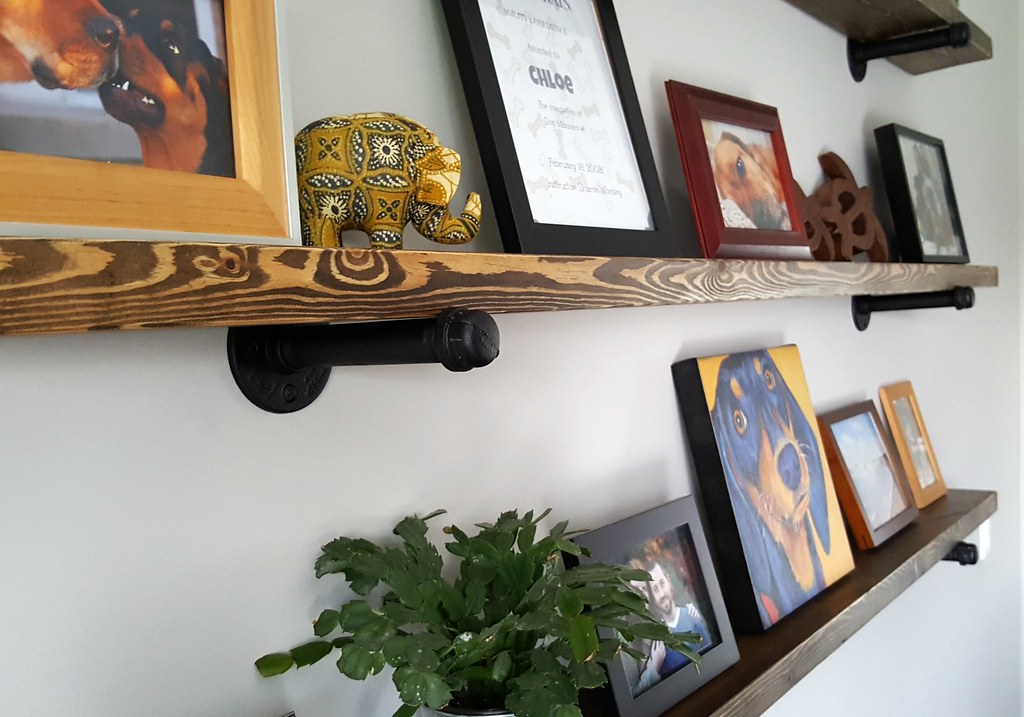
One other modification we made: since you want the shelves to be level, the boards will sit only on the pipe, not up on the flange. But the flange has a little neck that sticks out and that puts a pretty big gap between the shelf and the wall. To overcome this, Tom marked where each board rested on a support and cut a semicircular notch in the back of each shelf so that the neck of the flange drops into it.

Plumbing Pipe Open Shelving DIY

That way the shelf sits as close to the wall as possible. You could make the notch even bigger so that the shelf is flush against the wall, but we've found in the past that walls (and boards) are rarely perfectly straight and you end up with gaps anyway. Better that they look intentional.

Plumbing Pipe Open Shelving DIY

I considered spray painting the screw heads to match when the supports were being painted, but instead I just used a Q-tip and painted them by hand. I figured they would have to be touched up anyway after installation so there was no point in doing the work twice.


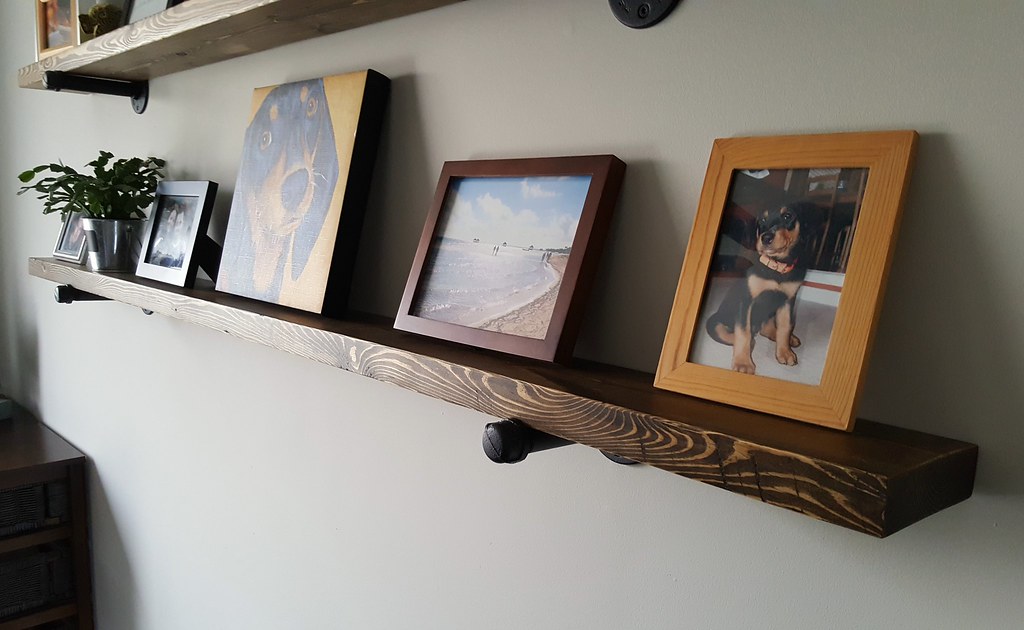
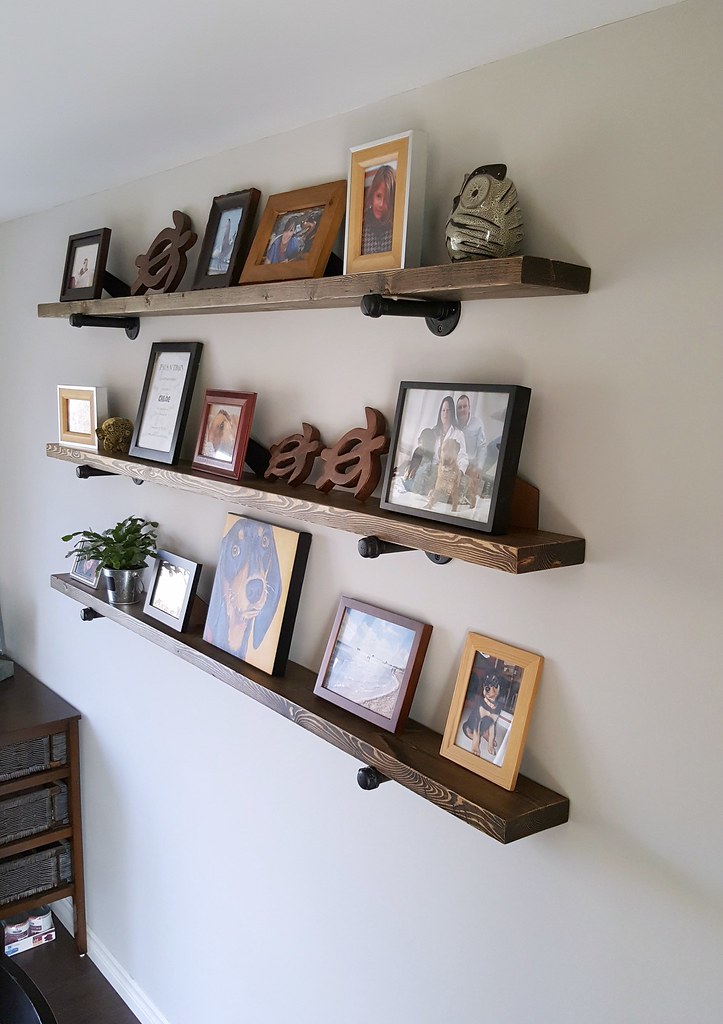
Now to the fun part - decorating. Most of the pictures are the same ones that were on the shelves at the old house, but there are a couple of new ones - including the painting that looks like Sasha that we found at HomeGoods in Ohio. It used to hang over her food bowl at the old house. I was also able to include the turtle carvings that we bought on our last trip to Hawaii. We bought them about 4 hours before our flight left, from a store that was going out of business, so it was a lucky find. They've been tucked away in the bookcase ever since.

Plumbing Pipe Open Shelving DIY

I love the wood. Some people have mentioned that we should have matched the stain to the dining room table, but I like being able to see the wood grain. And I don't think the supports would make as much of a statement if the wood was darker. The bench we built a few years ago looks very similar, so I think once it's available (it's currently being used as a TV stand) we'll place it nearby so they can complement each other. The picture frames are also so many different shades of wood that it's a perfect mishmash of colour.

Plumbing Pipe Open Shelving DIY

Apr 12, 2017

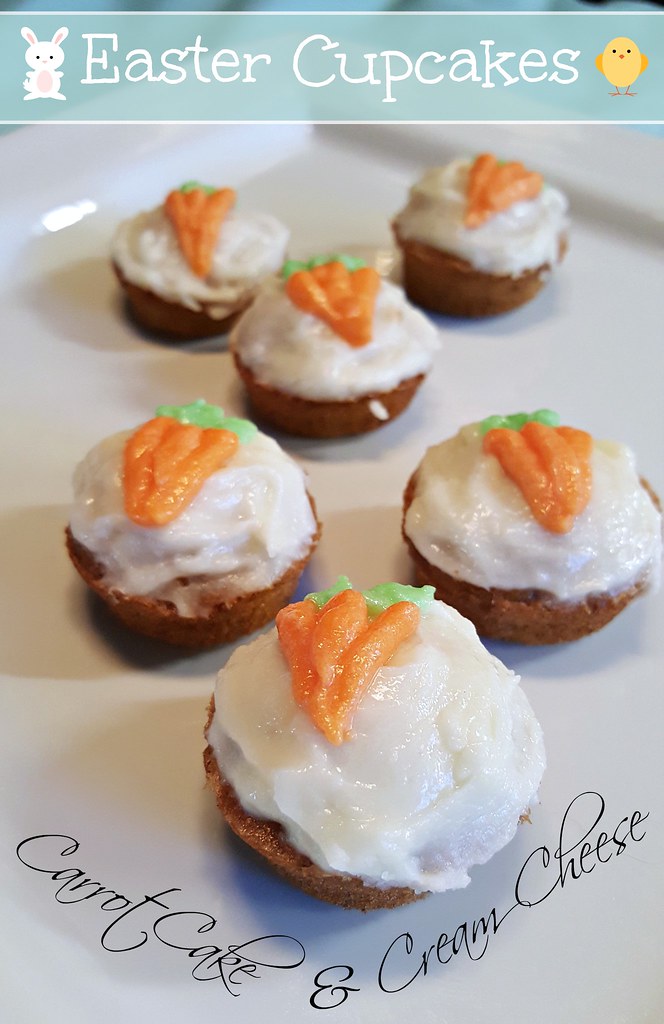
Carrot Cake Easter Cupcakes (with Cream Cheese Frosting)

I'm not a baker by any means. But there's something about spring and Easter that just makes me want to get creative. I have a recipe for carrot cake that I love - I think it's the pineapple that really makes it - and nothing is better than cream cheese frosting.

Easter cupcakes carrot cake cream cheese frosting


For the cupcakes:

1 cup pastry flour
1/2 tsp baking soda
1/2 tsp baking powder
1/4 tsp salt
1 tsp cinnamon
1/2 tsp pumpkin pie spice*
1/2 cup granulated sugar
1/2 cup vegetable oil
1 large egg
3/4 cup grated carrots
1/2 cup crushed pineapple with juice

Pumpkin Pie Spice:
(This will give you more than enough spice)

1/2 tbs cinnamon
1/2 tsp nutmeg
1/2 tsp ginger
1/2 tsp allspice


For the frosting:

1/2 cup of cream cheese - softened
1 cup of icing sugar (i.e.confectioners' sugar)
butter
food colouring
piping bag and tips (or plastic sandwich bags if you're like me)

~~~~~

Preheat the oven to 300-325 degrees depending on your oven. Cupcakes cook faster than cake and you don't want to dry them out.

Mix the dry ingredients together in one bowl.  In a separate bowl, mix the sugar, oil, and egg, stirring well. Add the carrots and pineapple, stirring again. You could add coconut or chopped nuts as well at this point. Slowly add the dry ingredients to the wet mixture a little at a time, blending as you go.

Spoon the batter into greased cupcake tins, filling them about half full. I found that the batter rises quite a bit so don't overfill them. Bake for 20 minutes or until the tops are golden brown.

While the cupcakes are baking you can prepare the frosting. Cream the sugar and cream cheese together until smooth. If you would like the frosting a little softer add butter a little at a time to get the consistency you like. I added my butter (about 1/4 cup) at the start and didn't like how soft/runny the icing was so I suggest testing as you go. If you want stiffer icing, add more icing sugar.

Divide your icing into small containers and dye each with the food colouring of your choice. For orange you will need just one drop of red but several drops of yellow. That red is strong stuff!

I don't have a piping bag so I just used several small sandwich bags with the corners snipped off instead. Spoon in some icing and squeeze it down to the corner you've snipped. Then use your imagination for the decorations!

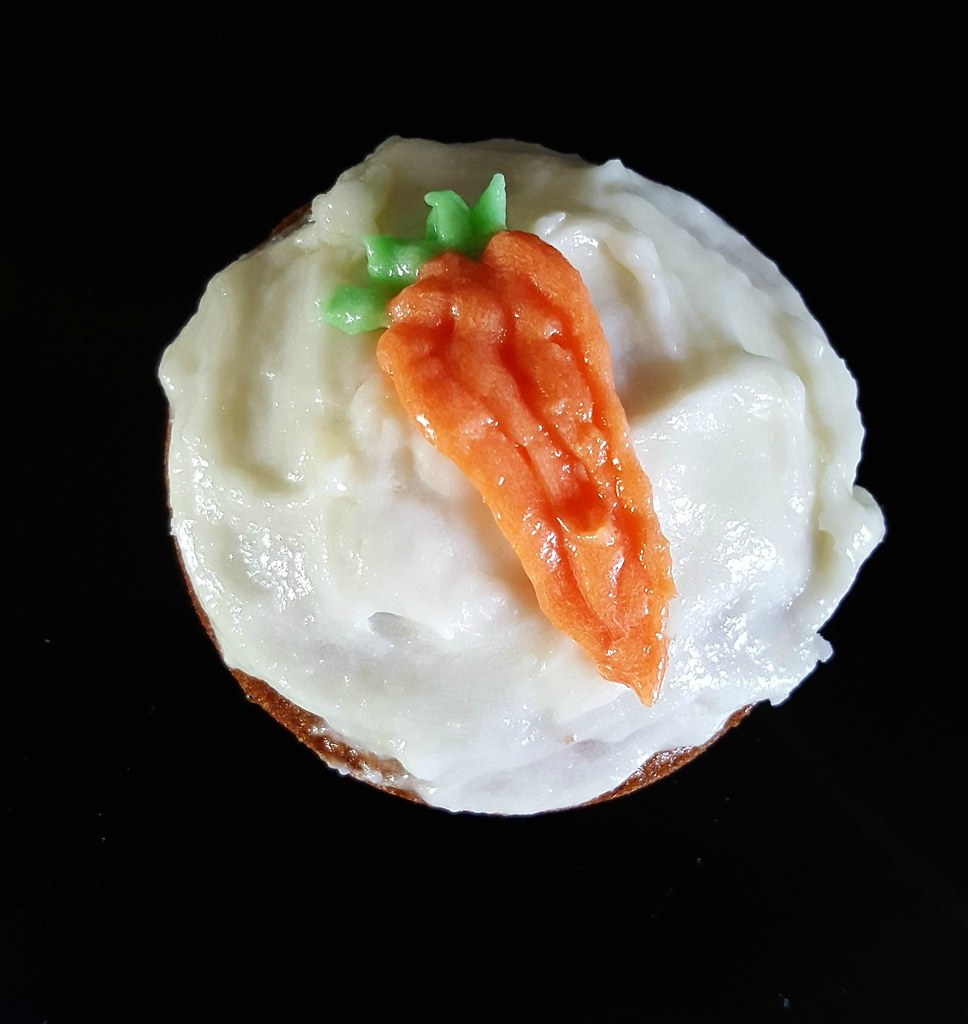
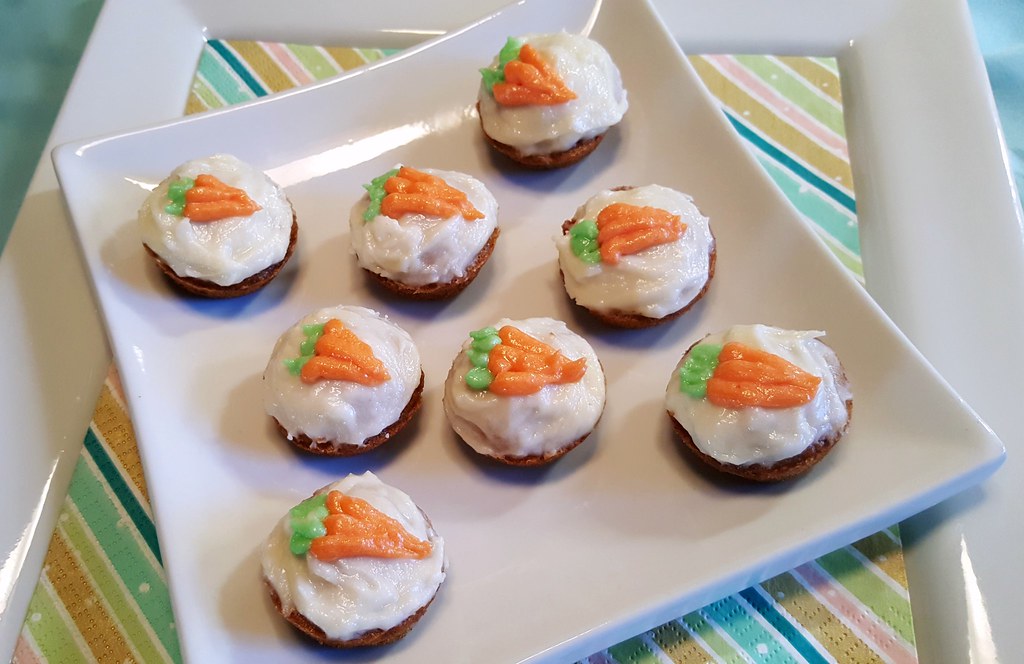
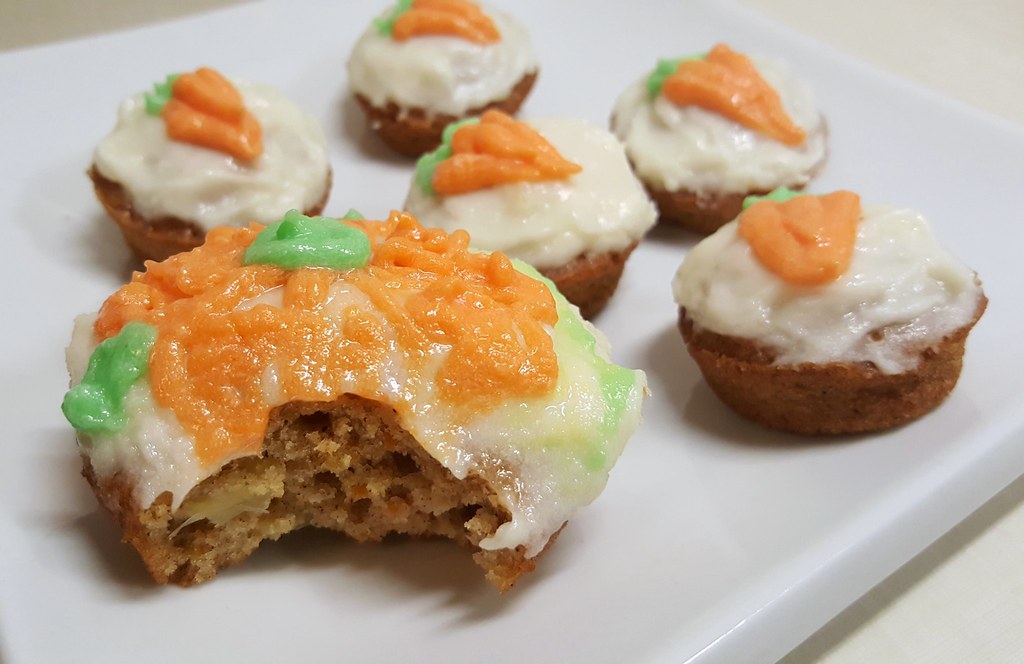
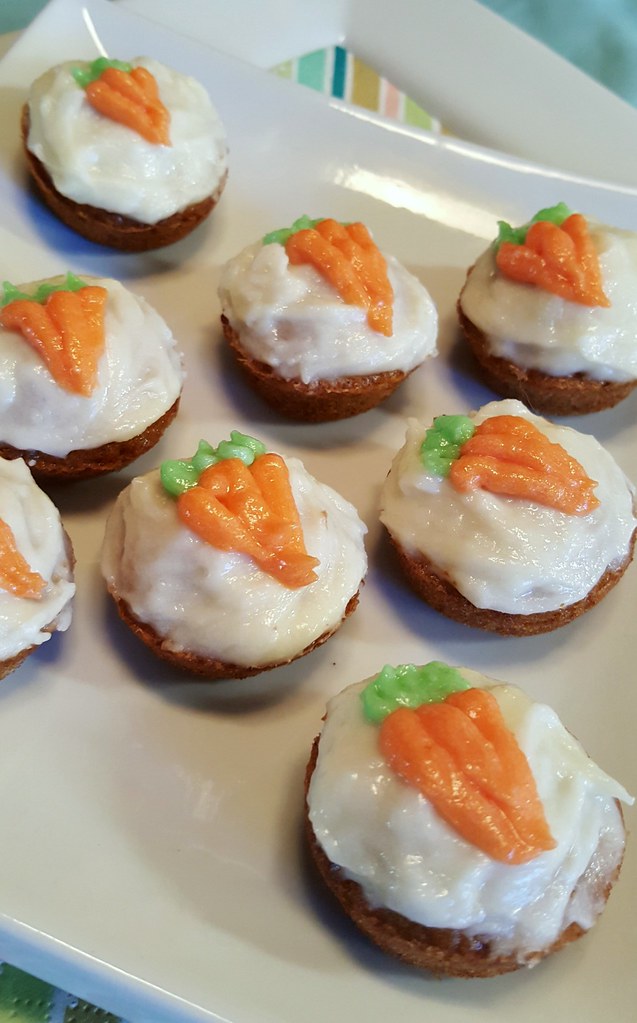
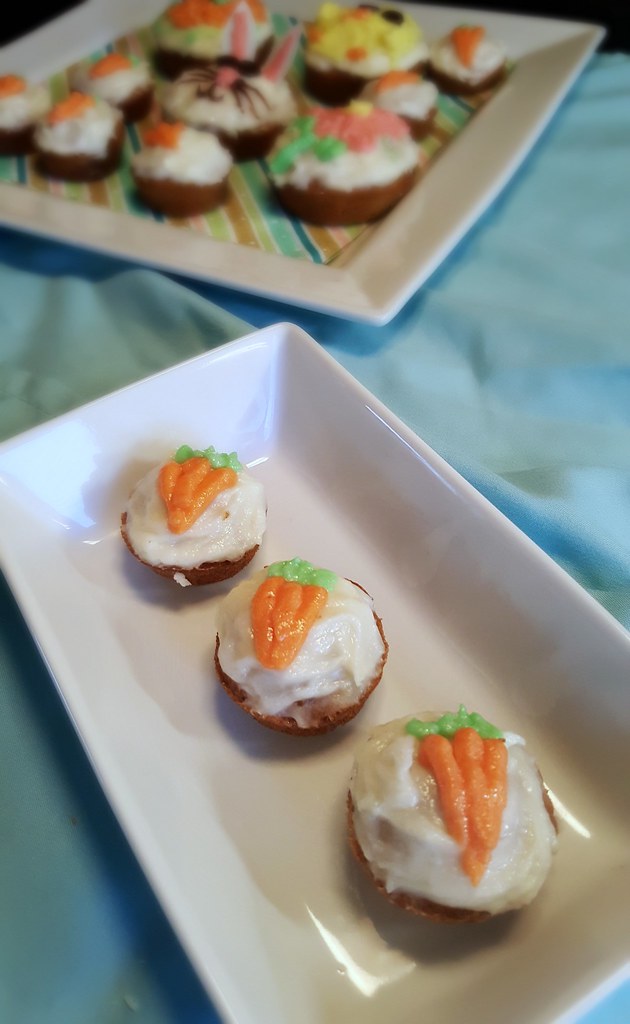
Here is my first cupcake. I liked the look of the carrot so much that I made all the small ones the same. Carrot cake has to have carrots on top.

Easter cupcakes carrot cake cream cheese frosting

Easter cupcakes carrot cake cream cheese frosting

Easter cupcakes carrot cake cream cheese frosting

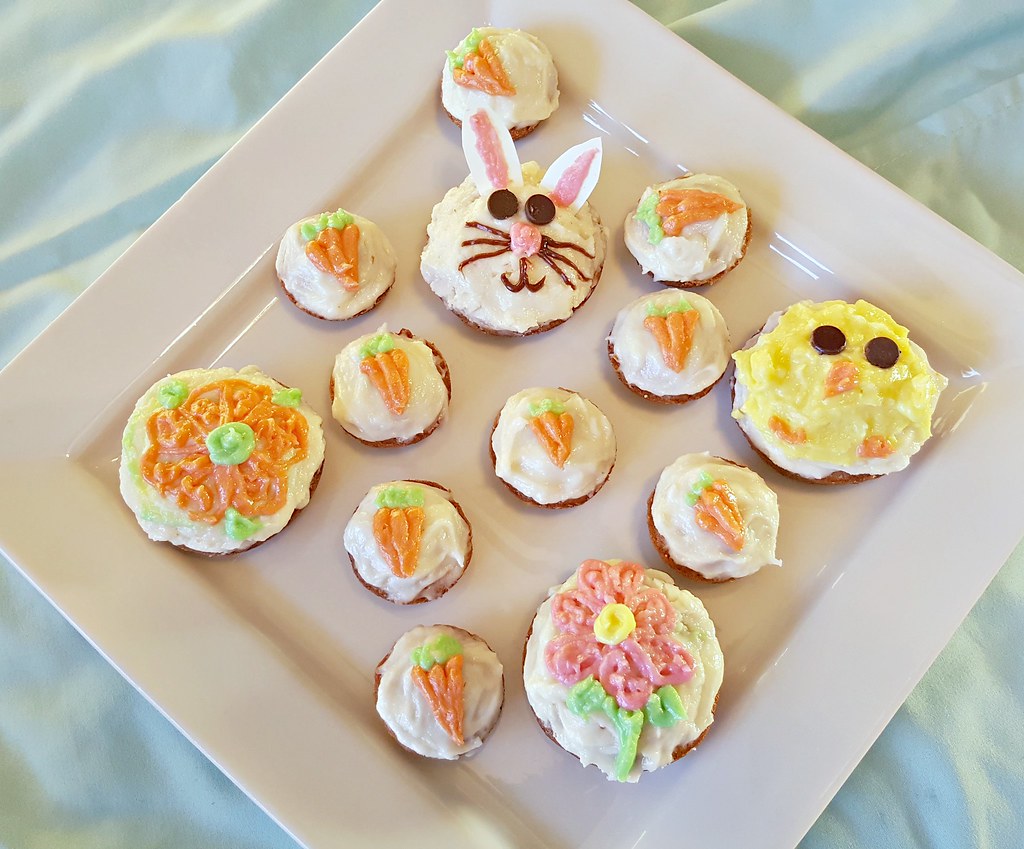
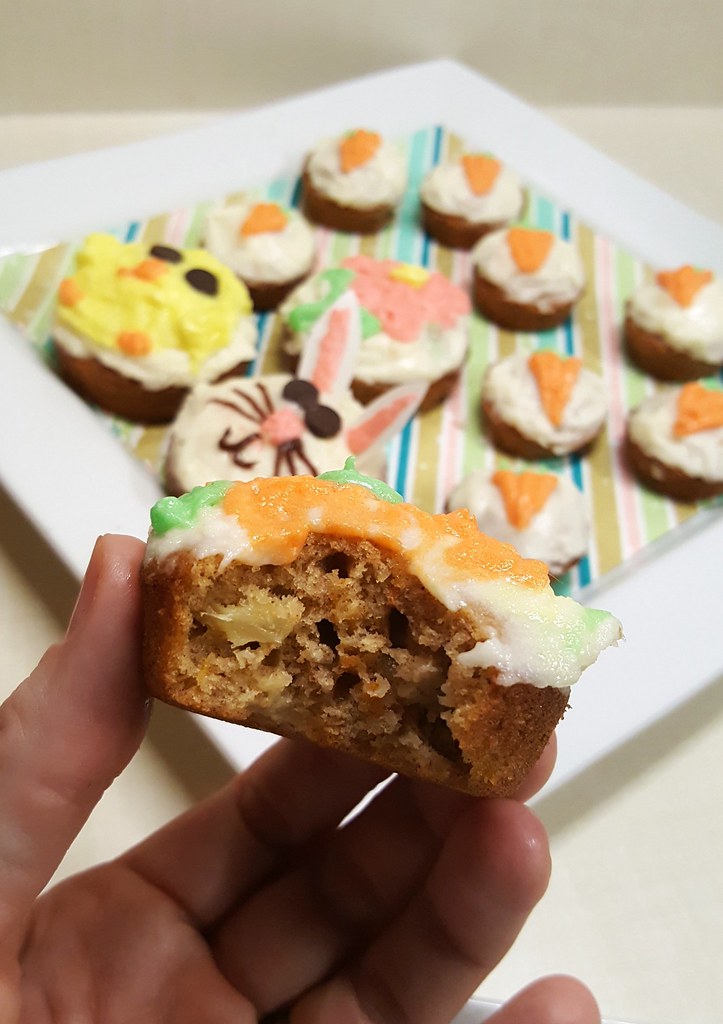
In the spirit of full disclosure, I attempted some other styles that are not quite as pretty. I think the baby chick and the rabbit look like they're wearing sunglasses, don't you? The rabbit ears are made from pieces of paper with some pink icing applied.

Easter cupcakes carrot cake cream cheese frosting

They're not professional looking - I get it. But I had a lot of fun. And they were fun to eat too! The pineapple makes a huge difference to the moistness and flavour. You know, the more I look at them, the cuter I think they are. Well done, me.

Easter cupcakes carrot cake cream cheese frosting

I think I'm going to keep working on this decorating thing. I'll give you an update when my bakery is opening. Image result for happy face emoji

Easter cupcakes carrot cake cream cheese frosting

Easter cupcakes carrot cake cream cheese frosting

Easter cupcakes carrot cake cream cheese frosting

Apr 3, 2017

Spring Hydrangea Wreath

We went to the Newmarket Home & Lifestyle Show on the weekend, and being surrounded by kitchen cabinet refinishers, bathroom renovators, and interior decorators really put me in a mood to get back into some projects - big and small.

We have so many jobs on hold right now because some other job needs to be done first: the rest of the basement can't be insulated until the one window is replaced, but that can't be replaced until we have drier, warmer weather, and we can't seem to force Mother Nature to skip some steps. (Though this time last year we were preparing for a snowstorm so I'm not complaining, I promise!)

Then there are the baseboards in the bedroom to be installed, but the carpet needs to be replaced first, and we can't do that because there is nowhere to move the furniture to (see unfinished basement previously mentioned).

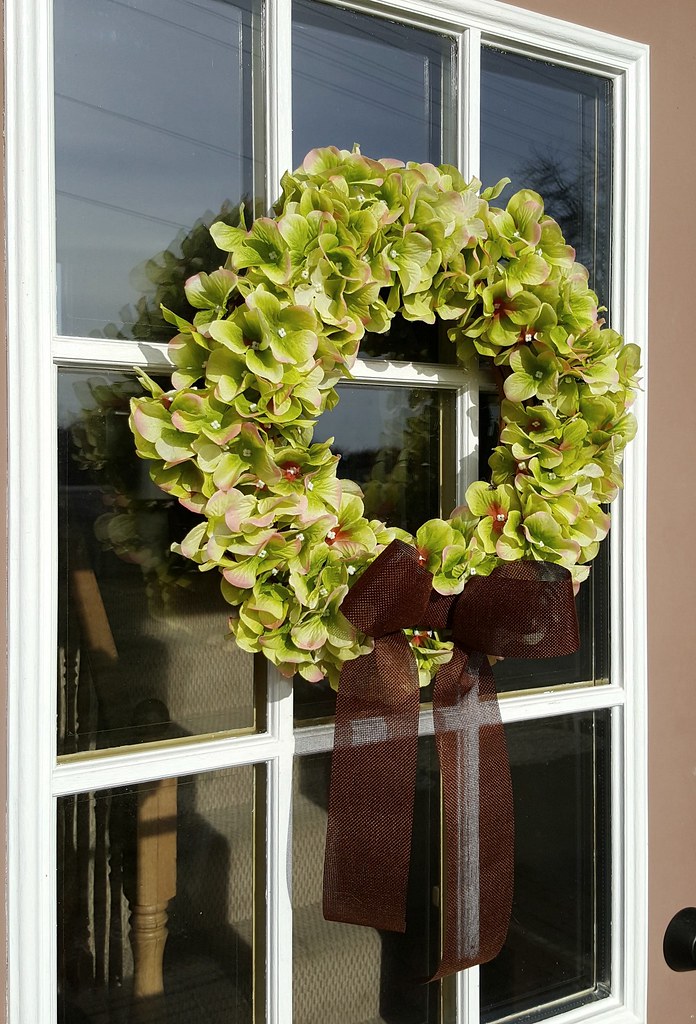
So I decided to forget about all of the things I couldn't finish and work on a little project I could - namely a new wreath for the front door.

Spring Hydrangea Wreath


It's been a long, long time since I've made a non-Christmas wreath for the house - if you're interested here are some of my past favourites:

Spring Wildflower Wreath

Spring Vine Wreath

Monogram Wreath

House Number Wreath

Layered Picture Frame Wreath

Apparently I've made a few wreaths!

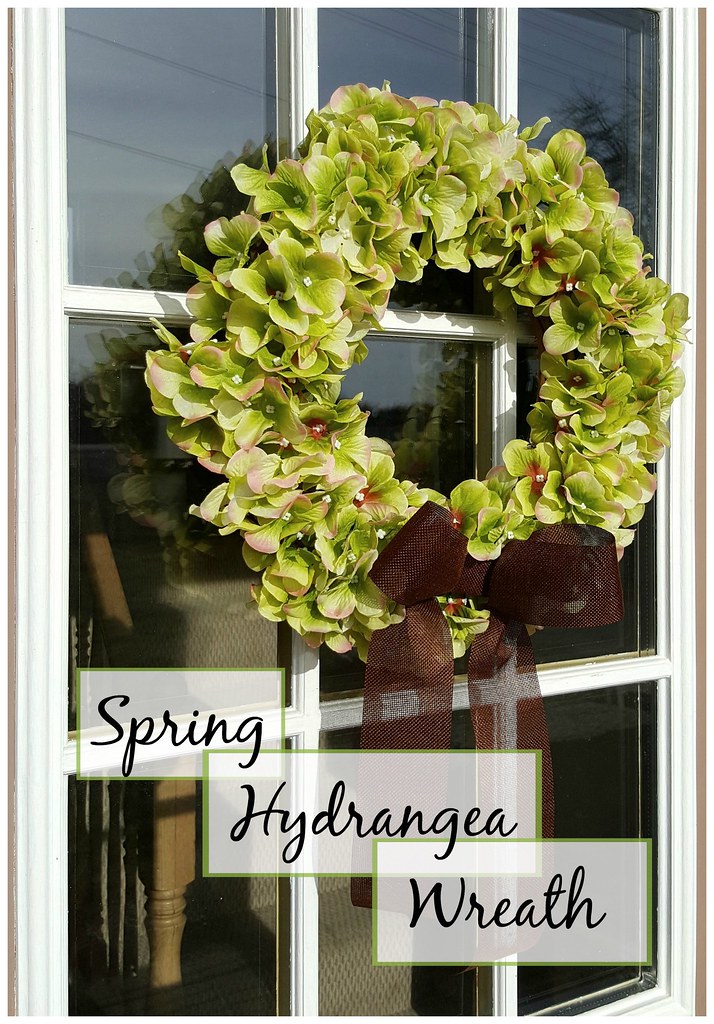
The front of our house is pretty drab right now what with the gardens still dormant, so I wanted something with plenty of blooms and a bright, cheery colour. At the dollar store I bought out half of their supply of green "silk" hydrangeas, plus a roll of brown burlap ribbon. This ribbon is a little stiffer that the burlap I've used before so hopefully it will keep from fraying in the wind.
Spring Hydrangea Wreath

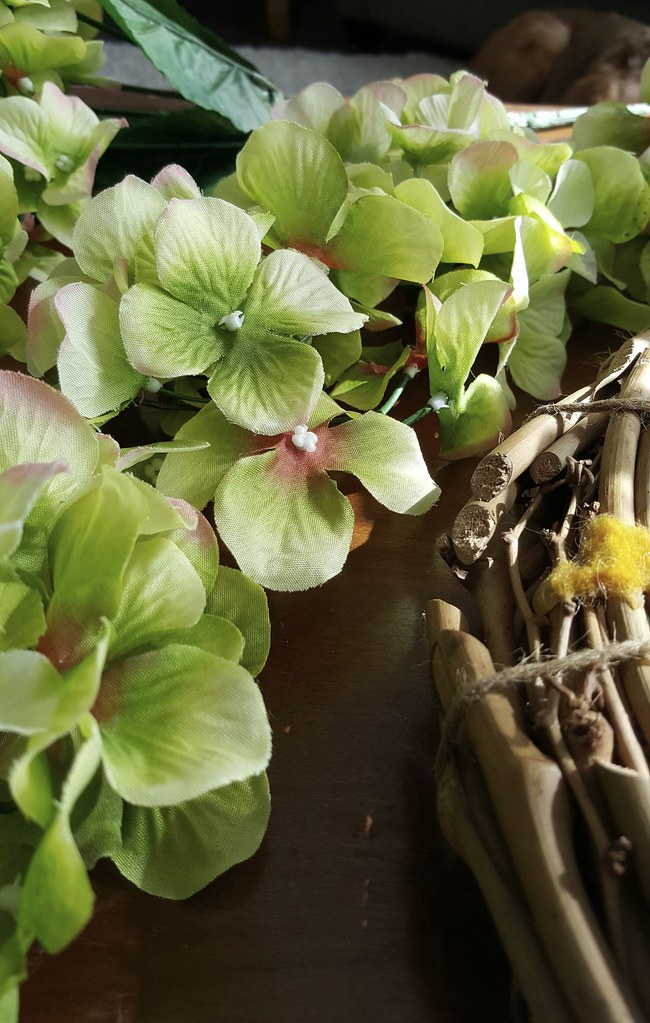
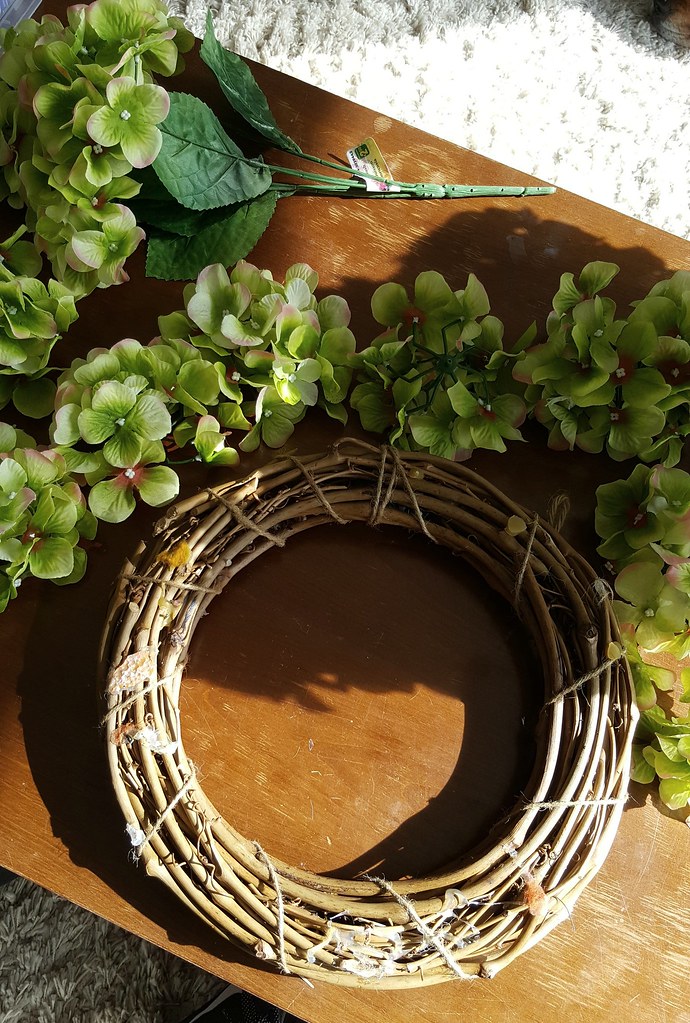
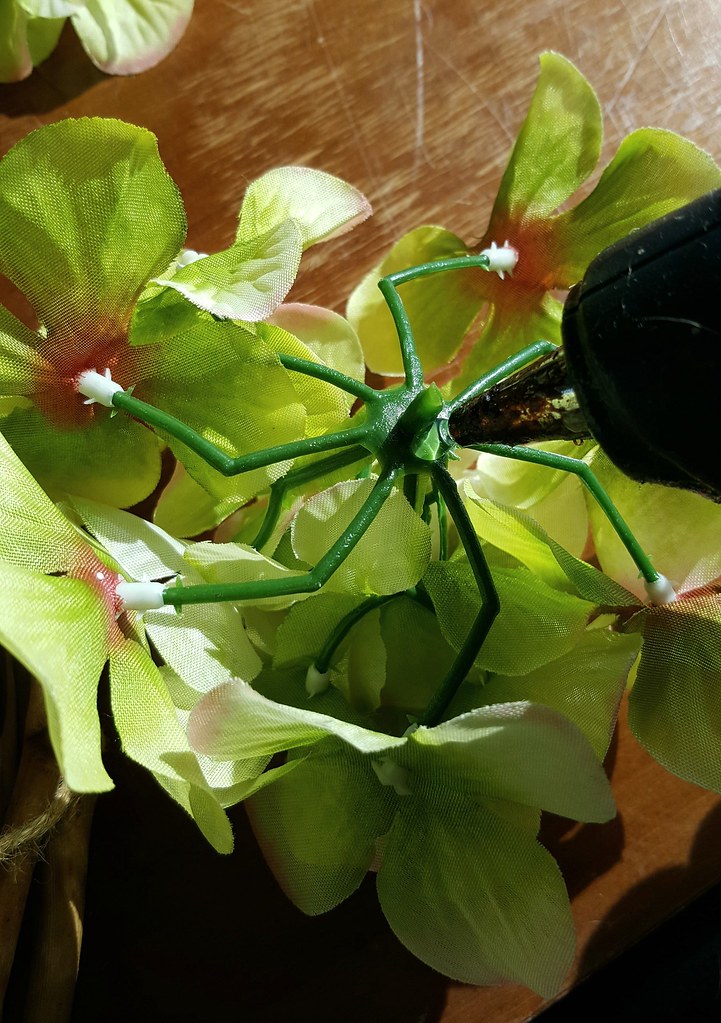
I used an old bentwood wreath form that I've used many times - you can still see the glue marks from ghosts of wreaths past (they're on the back too! :-) ) The heads of the flowers easily popped off the stems and I hot-glued them close together all the way around the form. I was prepared to have to fill in places with smaller blooms but these ones were so full that it wasn't necessary, and I was finished in no time.

Spring Hydrangea Wreath

For the bow, I cut one piece for the loops and tails and a separate piece for the center knot. I wasn't able to tie it from one long piece like I normally would due to the stiffness of the fabric. I laid the long strip out in the position I wanted and then wrapped the smaller piece around the middle and glued it to itself at the back.

Spring Hydrangea Wreath burlap bow

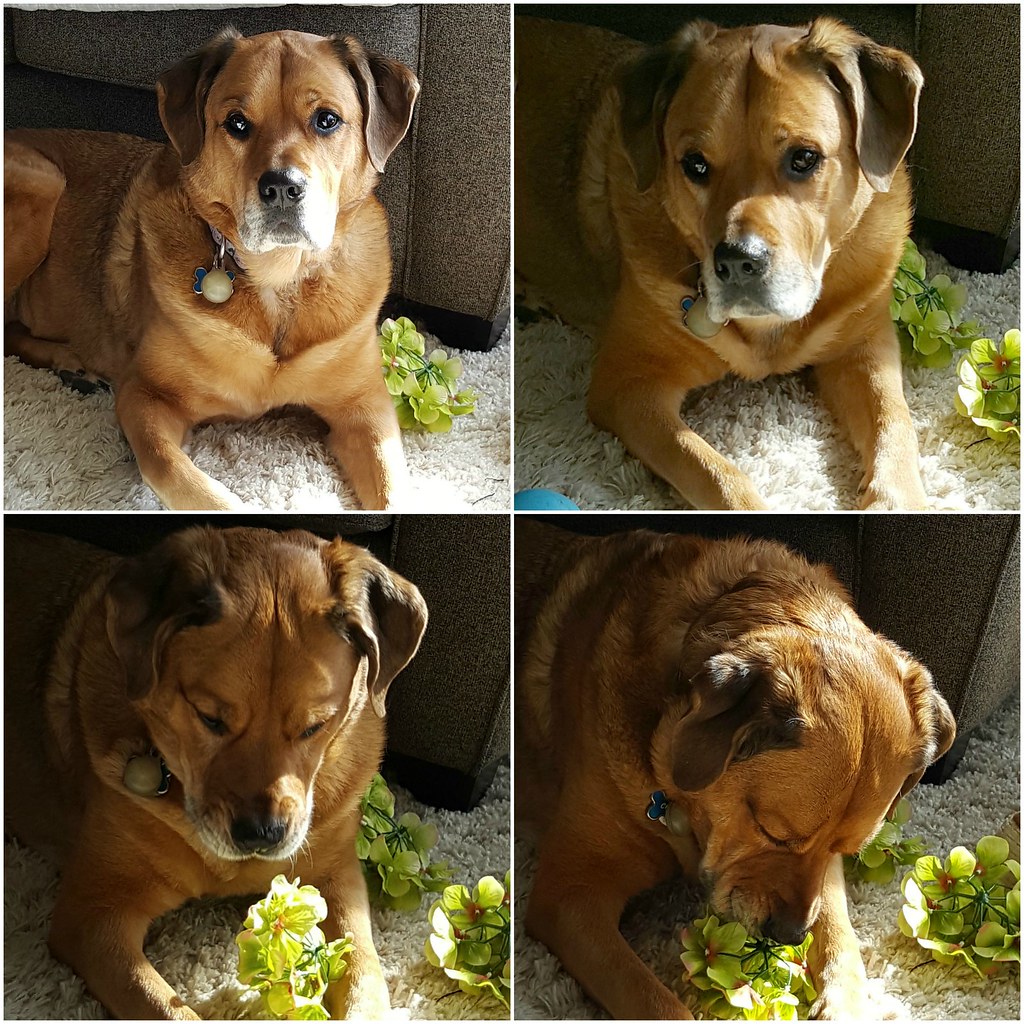
I then burned my thumb with the glue gun and had to take a break to feel sorry for myself. To distract from the pain I tossed flowers at Chloe, trying to get them to land between her paws. It took a few tries. Patient dog.

Sweet Mastiff with flowers

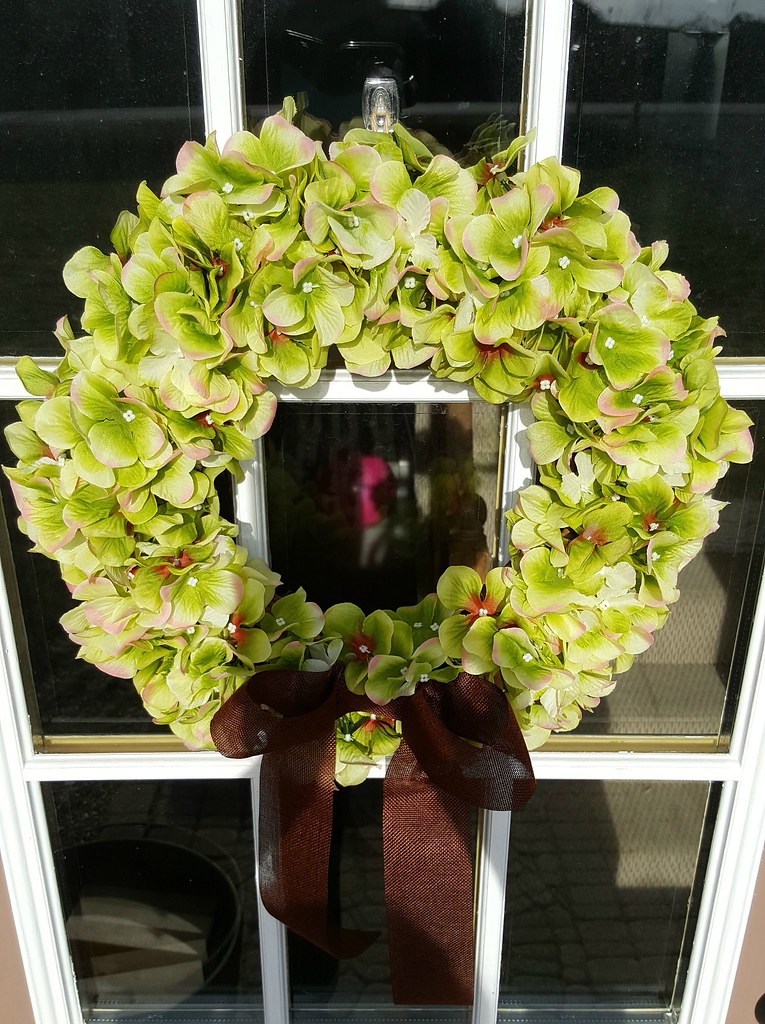
Back at it, I attached the ribbon at the bottom of the wreath and hung my new pretty on the front door. Yesterday was a beautiful sunny day - perfect for picture-taking.
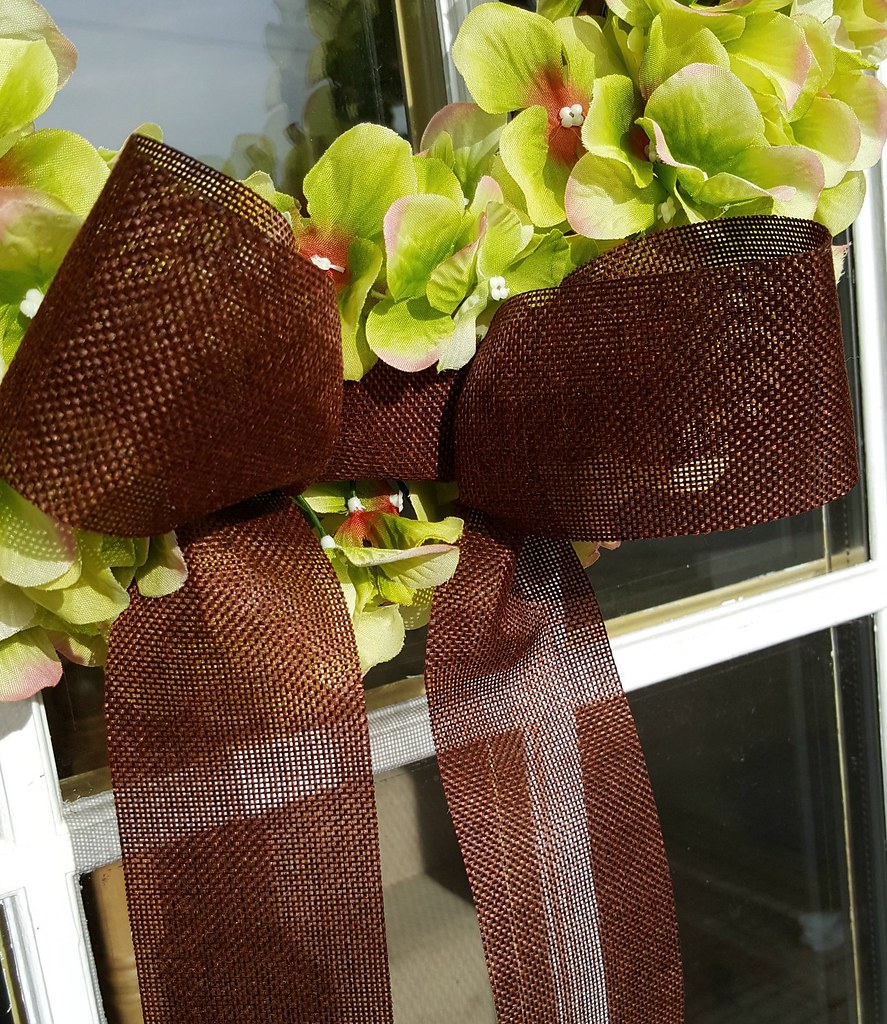
Spring Hydrangea Wreath

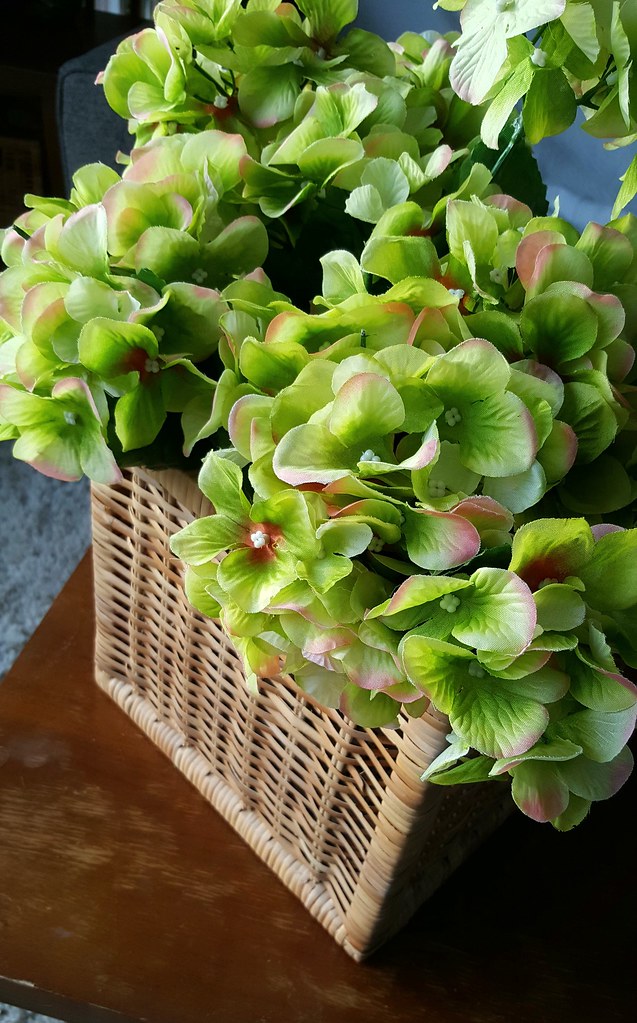
There were plenty of flowers left over (I guess I went a little crazy), so I put them in a wicker basket on the living room coffee table. They brighten up the room so much...and distract from that poor table that needs to be refinished so badly.

Spring Hydrangea Wreath

Happy Spring!


Related Posts Plugin for WordPress, Blogger...