SEARCH THE BLOG

Showing posts with label DIY. Show all posts

Sep 17, 2019

On To New Things...


Hi All. You've probably noticed that there haven't been any new posts since Christmas. I'm still here of course, but...I think I've lost my love for DIY blogging. I still LOVE to renovate rooms, refinish furniture, even crafts are still fun, but the process of filming, editing, and writing the blog posts to describe in detail what we did has become a chore instead of an enjoyable hobby. With Tom & I both working full time we've always only been able to work on the house on weekends, so projects take a very long time to complete, and then I was never posting on a regular basis. I didn't want to post filler just for the sake of posting.

And as much as I do like DIY (I really do!), I want to spend more time with our dogs and working on their development, as well as spending more time outside our house - field trips, festivals - just discovering the beauty in our community, province, and country. Tom and I took a week off this summer and went somewhere new each day - sometimes with the dogs, sometimes without - and it was one of the best vacations we've ever had.

Thank you all for giving me a place to flex my creative muscle these eight (!) years - I appreciate each and every view, comment, and email I've received. And don't worry - this blog will stay active so that all of my past projects are accessible. I will continue to respond to questions - just click one of the icons at the top of the page to email me or go to my Instagram page (@rottsandpots). 


Dec 7, 2018

4x4 Wooden Candle Holders

I still had some 4x4 posts left over after making the wooden snowmen, so I kept on going. You can never have too many candles, am I right? These wooden candle holders let you switch out between tea lights and LED flameless lights any time you want.

4x4 wooden candle holders

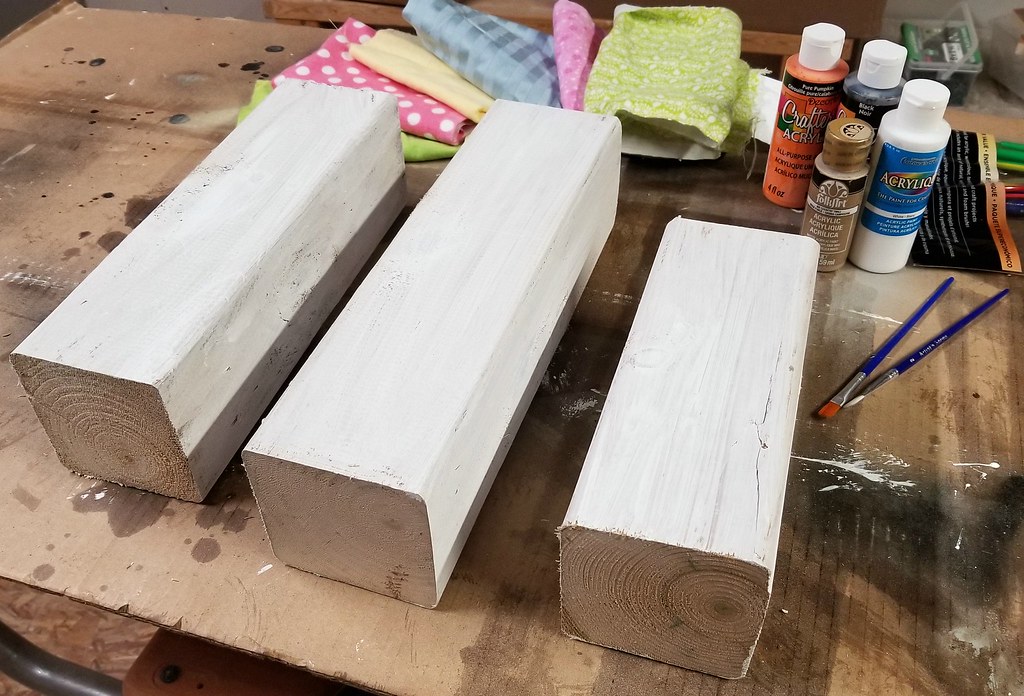
Start with pieces of 4x4 post - any length you like. You can go small, medium, and large, or all the same height - the sky's the limit. I just eyeballed the post and cut it into three approximately equal lengths. One piece is slightly longer than the other two, which I think looks better than all exactly the same.

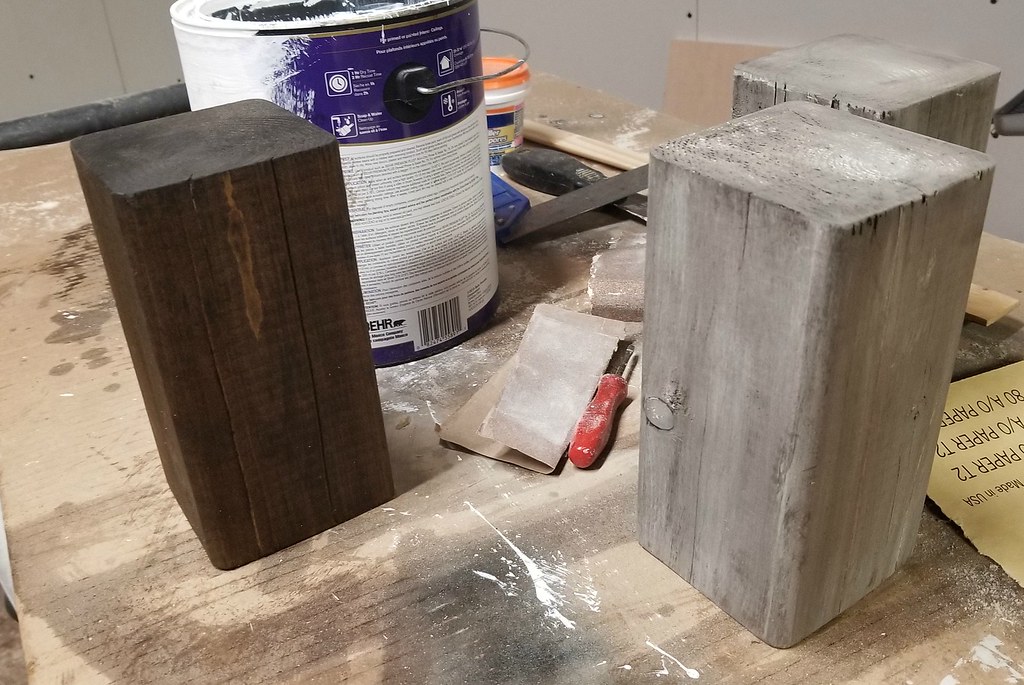
I stained all four sides and the top of each with Minwax stain in Jacobean, and then wiped flat white paint right over the stain using a clean cloth. The paint was applied unevenly - intentionally - so that it looks aged and a bit like old barn wood. In some places the stain even shows through.

4x4 wooden candle holders

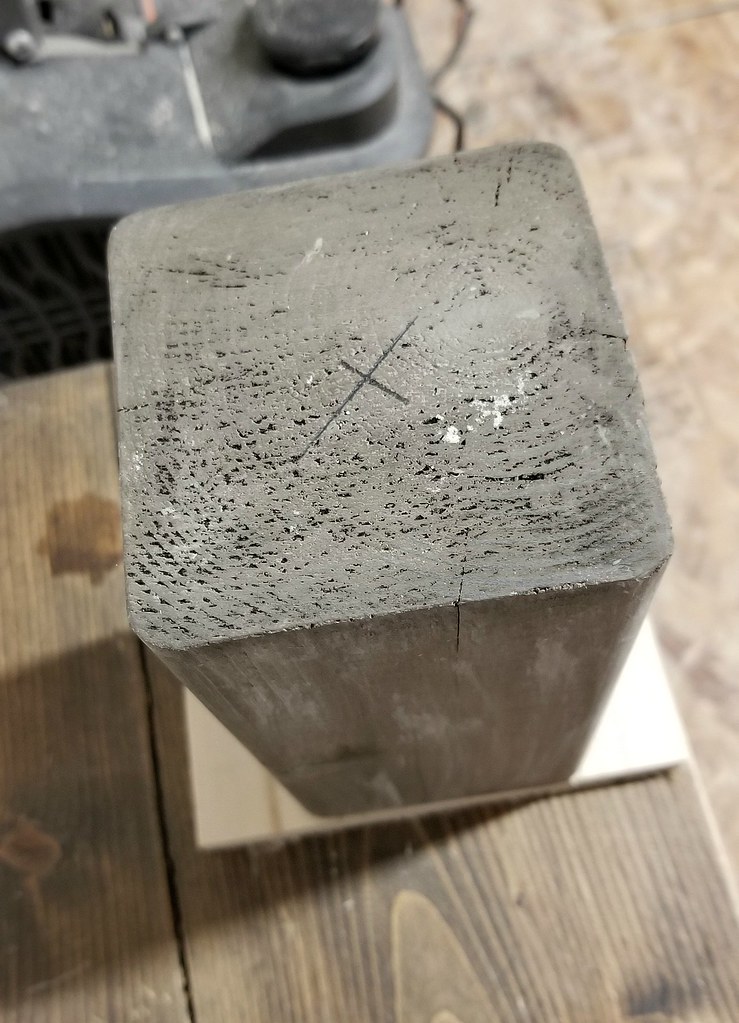
To drill the insert for the light, I had Tom use his hole saw set. The hole saw only cuts around the outside of the circle, so this method involves using a series of progressively smaller hole saw bits and then finishing with a spade bit. The other option is using a Forstner bit, which I don’t have (but I’d like to!) This bit has several angled blades and drills out the entire hole at once. The hole saw is slower, but it is easier to control.

4x4 wooden candle holders

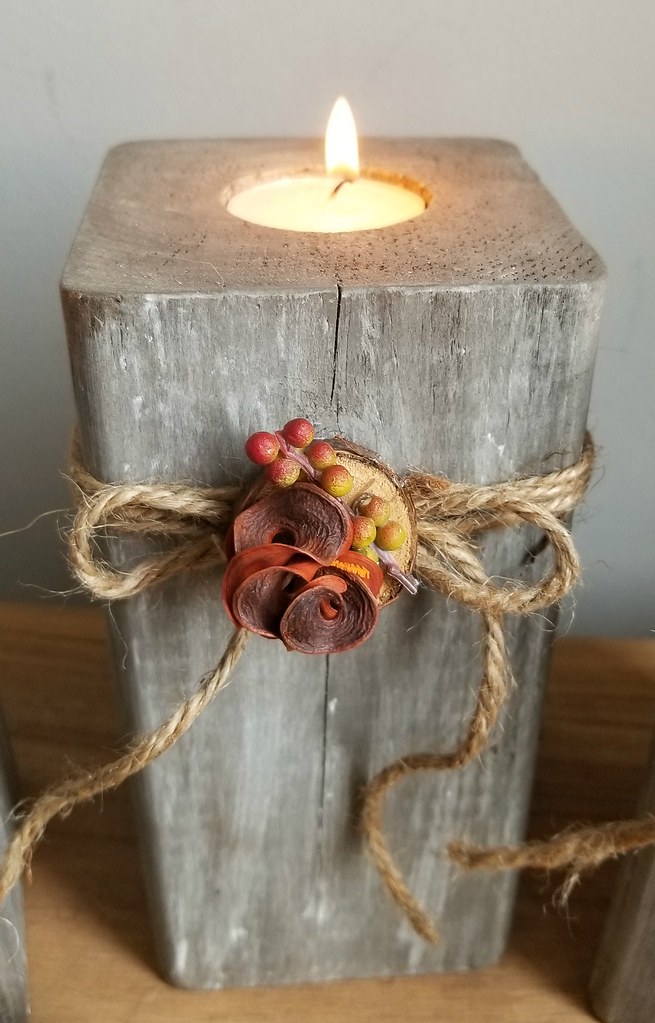
Once the hole was drilled, I rubbed the interior with stain and paint like the sides. I then wrapped jute twine around the candle holder three times and tied it in a bow. Over the bow I glued a slice of tree branch and a bit of potpourri.

Pretty little things, aren’t they?

4x4 wooden candle holders


Dec 3, 2018

4x4 Wooden Snowmen


The town resurfaced our road this summer and that extra layer of asphalt they put on was enough such that our mailbox was now too low by postal standards. We had to replace the 4x4 post, so the old one went into the scrap wood bin until I could make these adorable 4x4 fence post snowmen.

4x4 wooden snowmen


To make one you will need:

3' of 4x4 fence post
white, black, & orange paint
scrap fabric
yarn
buttons
miter saw
hot glue gun


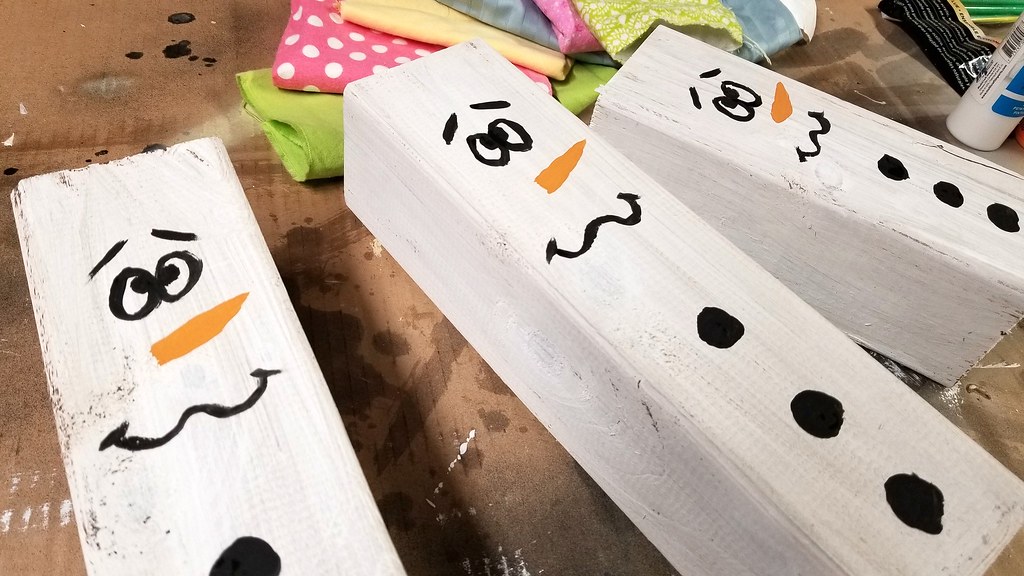
Cut your post into three pieces. It's up to you if you want your snowmen to be all the same or different heights. I randomly cut the post lengths without measuring, and ended up with pieces that were 9-1/2", 11-1/2", and 13-1/2" long.

4x4 wooden snowmen

I wanted a flat paint finish for the snowmen bodies, so I chose white ceiling paint, and rubbed it on with a cloth to give it just a light washed look.

Once the white paint was dry, I used poster paint to add the eyes, nose, mouth, and buttons. I used a fairly wide artist's brush which gave the features a more rustic, cartoonish look instead of being sharply defined.

4x4 wooden snowmen

You can use any type of fabric you want for the hat and scarf. I used scraps of flannel left over from the receiving blankets and stuffed animal I made for my cousin's baby.

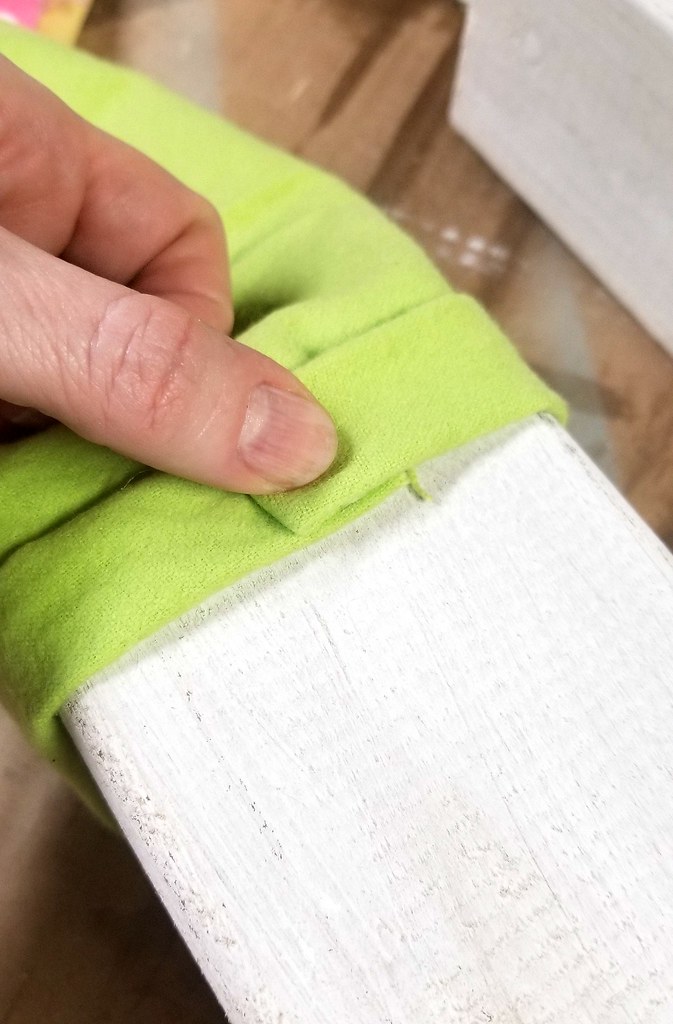
Cut a fabric rectangle measuring 10"x15". Fold the fabric over twice - about an inch - on the long side to create the brim of the hat, and wrap it around the top of the post, just above the eyes. Glue one end of the rolled edge of the hat to the post at the back, then fold over the other end and glue it to the first edge.

4x4 wooden snowmen

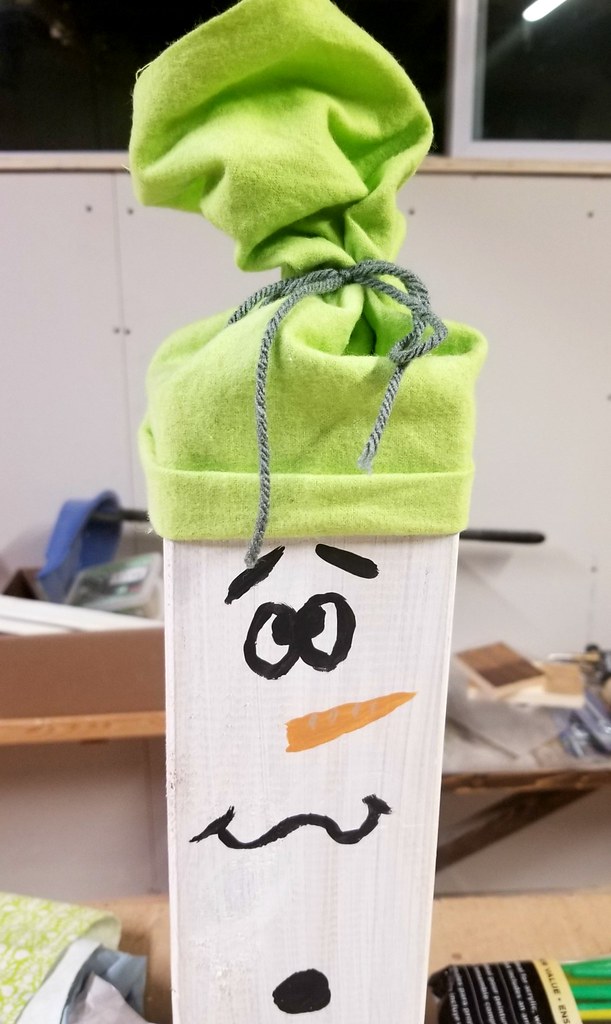
Gather the top of the hat together and tie it off with yarn. Floof the top of the hat like a pompom.

4x4 wooden snowmen

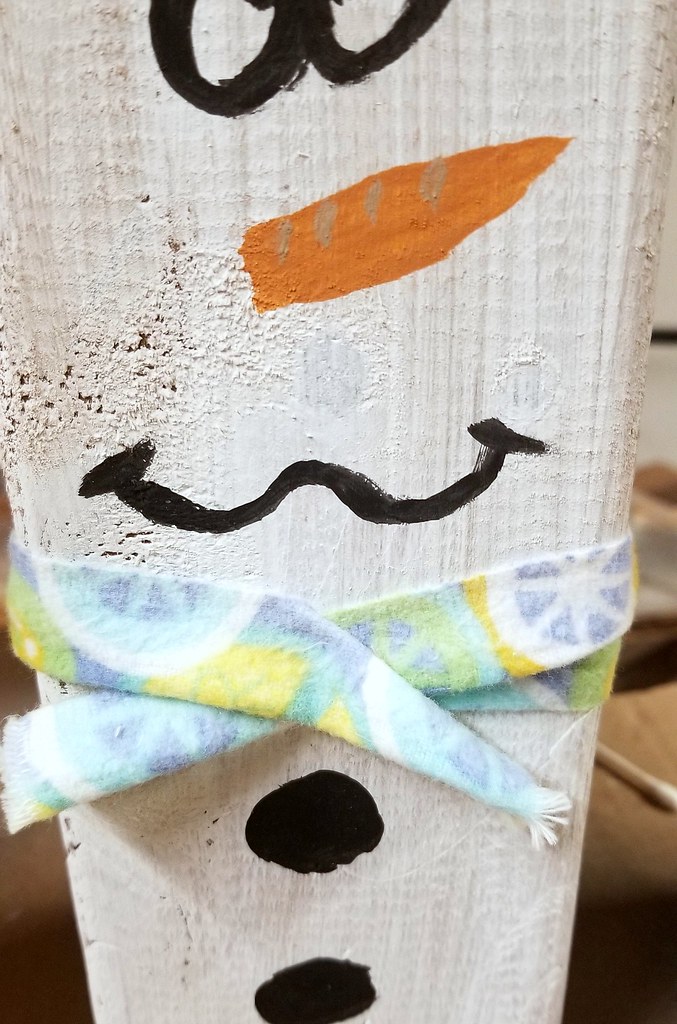
Take another scrap of fabric, 17" long and about 1" wide, and wrap it around the post at the neck. I picked fabric for the scarves that didn't quite match the hats because, when we go out to play in the snow we don't worry about matching, we just make sure we're warm. Crisscross the scarf fabric and secure in place with a dot of hot glue. Glue a button where the two ends cross.

And you're done!

4x4 wooden snowmen
4x4 wooden snowmen
4x4 wooden snowmen
4x4 wooden snowmen
4x4 wooden snowmen


Nov 9, 2018

DIY Wood and Metal Plant Stand

Have you ever seen an item in a store, fell in love, put it in your cart, and then realized you could make it yourself for a fraction of the price? That happened to me this week when I was at Walmart. I saw an adorable plant stand and had it halfway to my basket when it hit me - this is just a cookie tin with dowel legs. I can do that!

And so we have my latest creation:

DIY wood & metal plant stand

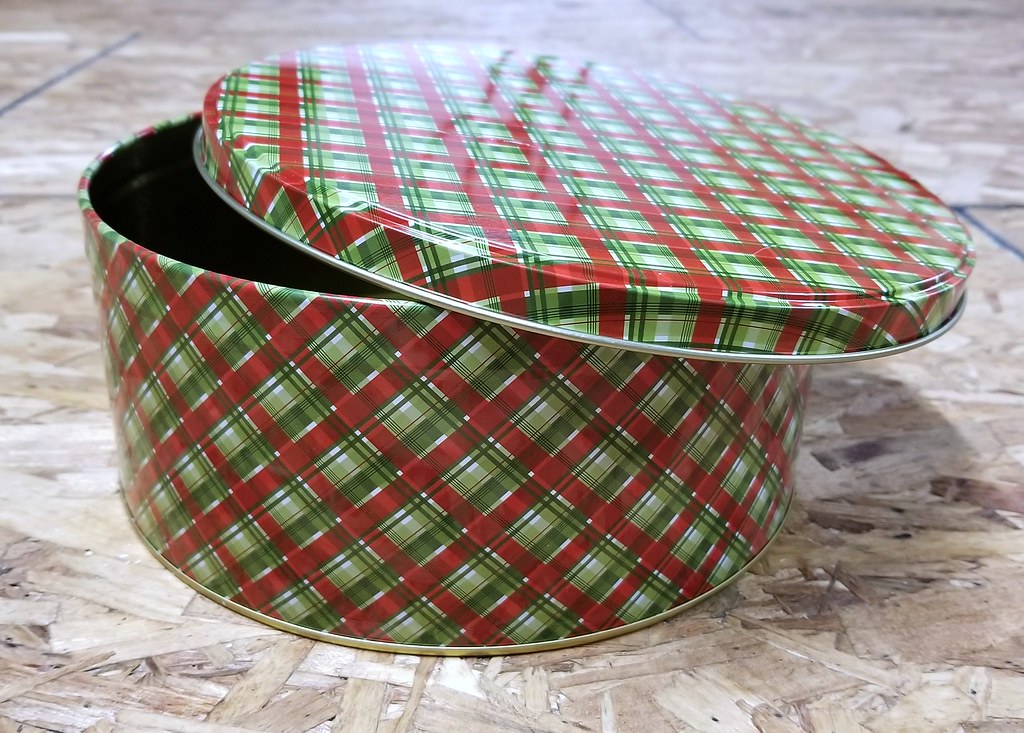
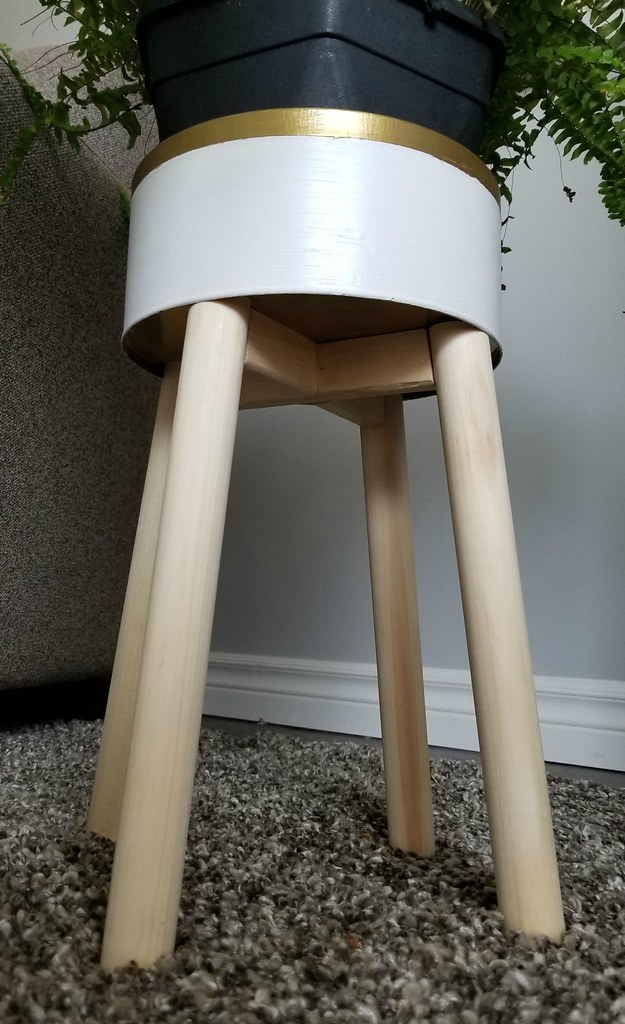
I bought the largest cookie tin I could find at the dollar store, and an 8-foot 1-1/4" dowel at the big box store. Total price - $10.50. And that's with 4 feet of dowel left over for another project. I used scrap wood for the cross pieces that go between the dowels - the same partially-rounded boards that I used on the ironing board holder.

DIY wood & metal plant stand


For this project you will need:

1 - 8.5" cookie tin
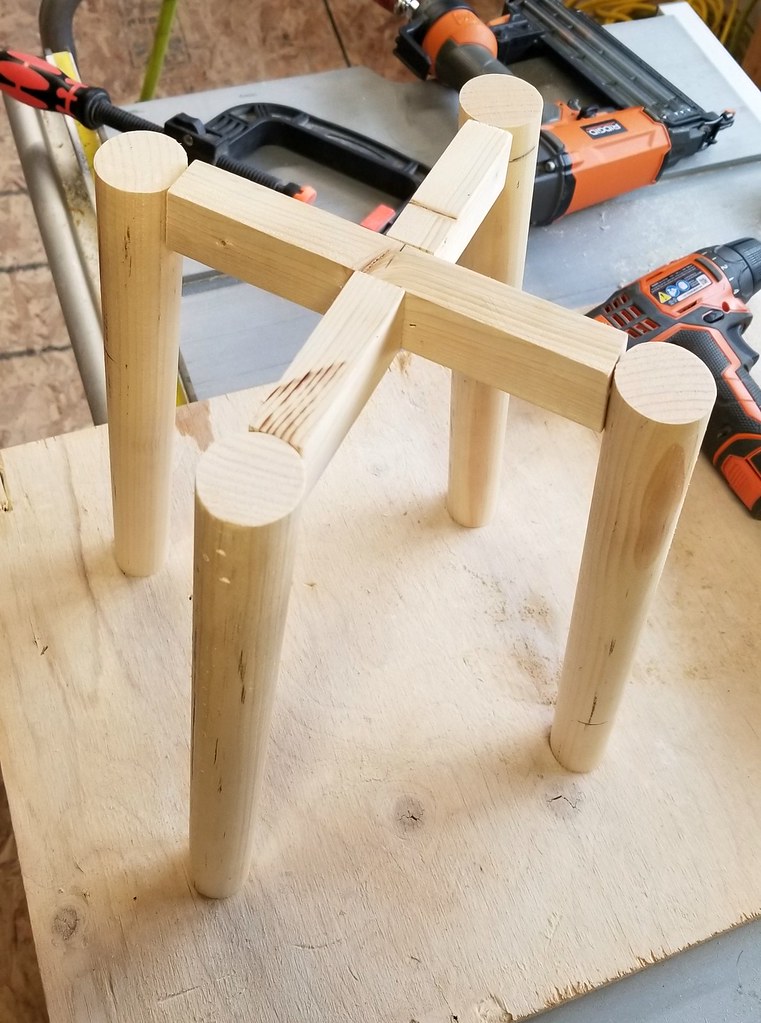
4 - 12" dowels (1-1/4" diameter) - cut them a little longer to account for the angle
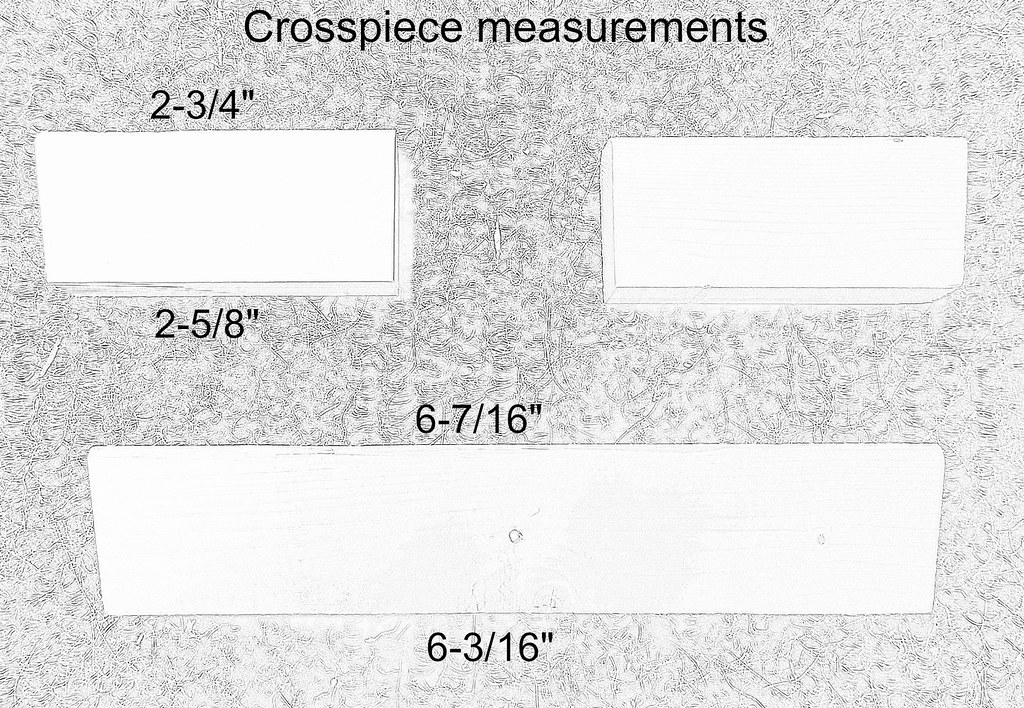
1 - 1-1/4" x 3/4" crosspiece with angles at both ends (see drawing for lengths)
2 - 1-1/4" x 3/4" crosspieces with angles at one end (see drawing for lengths)
screws, brad nails
spray paint

Tools I used:
miter saw
drill with countersink bit
air nailer

DIY wood & metal plant stand

First I spray painted the cookie tin inside and out. It doesn't have the fancy scalloping pattern that the original has, but I can live with a plain stand. I could even stencil something on at a later date.

I wanted the legs to be about 12 inches long when finished, so I cut them to 13 inches, just to give myself some wiggle room for the angles. Through a little trial and error, I settled on a 7 degree angle. That gives the stand some stability without the legs sticking out too far to the sides. The cross pieces are also cut at a 7 degree angle so that they fit snugly against the legs.

DIY wood & metal plant stand

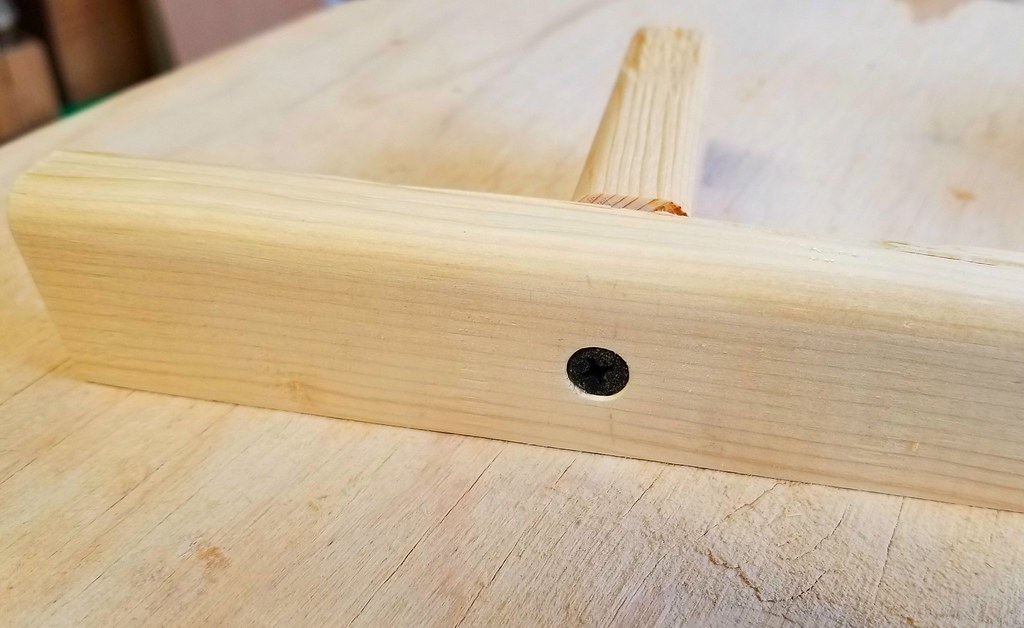
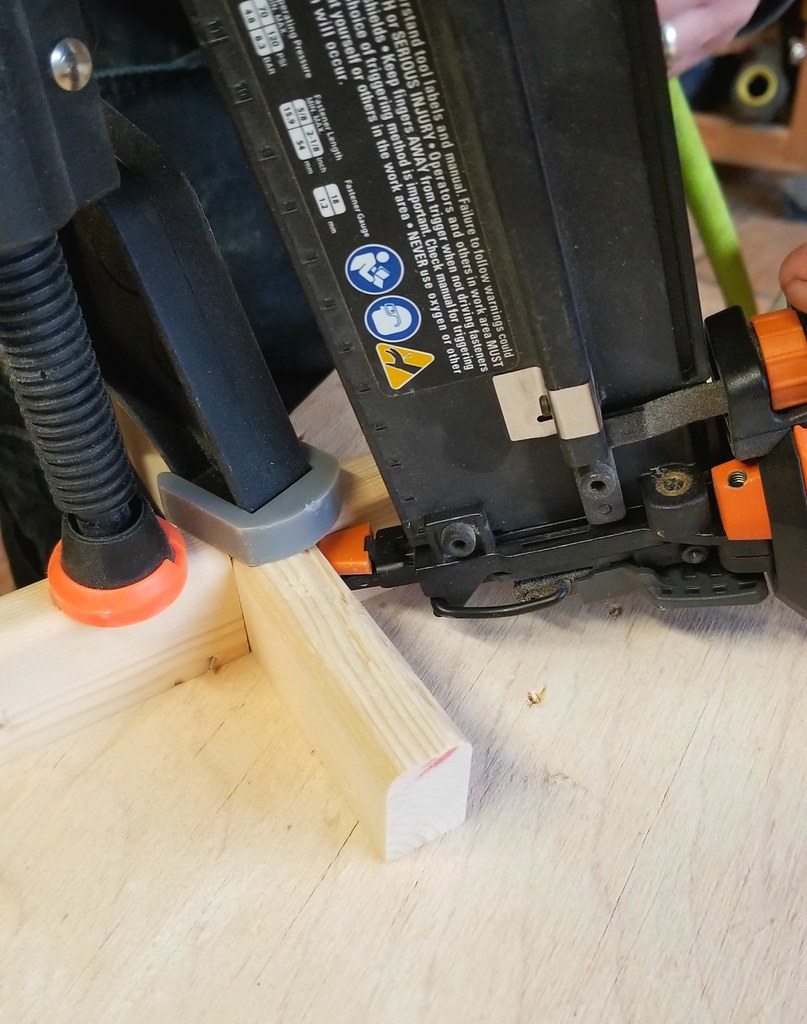
One of the shorter crosspieces was attached to the longer one with a countersunk screw. The other short crosspiece was then attached with two brad nails, one through each side. Clamping them together makes is easier to keep them lined up while nailing.

DIY wood & metal plant stand

Once the crosspieces were secured, the legs needed to be attached. I flipped the tin over, put the crosspiece in the center, and held two of the legs in place while Tom nailed them to the crosspiece with two brad nails each. Then I held the other two legs in place and he nailed them in place as well.

DIY wood & metal plant stand

The base can now stand on its own.

DIY wood & metal plant stand

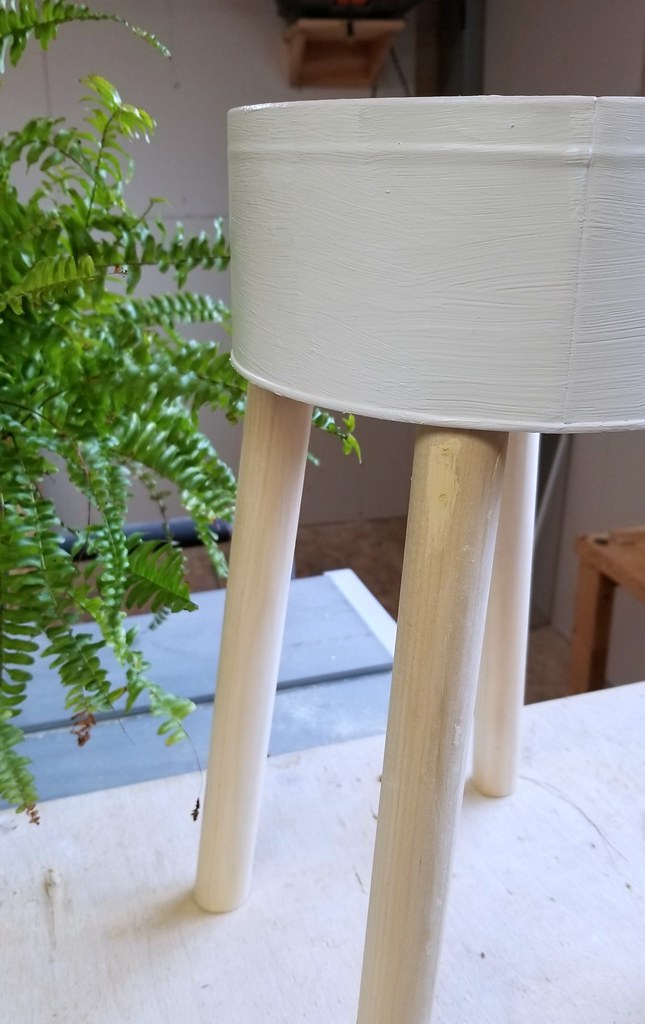
The tin went back up on the legs and I marked the position of each leg on the inside bottom of the tin. Using a small drill bit, I drilled a pilot hole in each spot.

DIY wood & metal plant stand

The last step was to attach the tin to the base with 4 white pan head screws.

DIY wood & metal plant stand

I puttied the nail holes on the legs, sanded all of the wood, and did a bit of paint touch-up around the screw heads. I also added felt feet to the bottom of the legs to keep them from scratching the floor.

DIY wood & metal plant stand

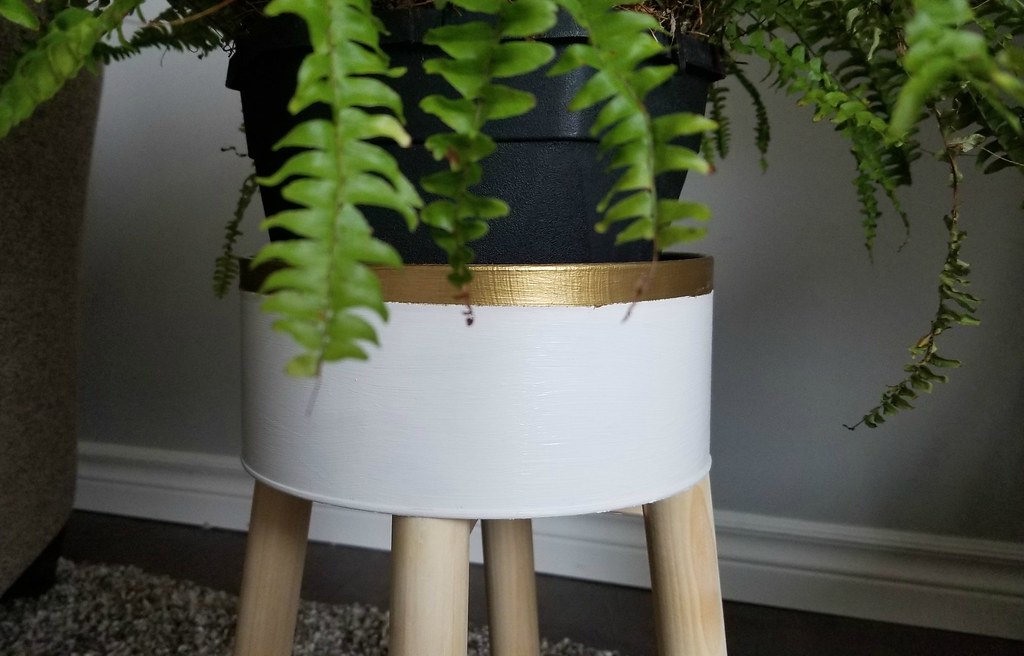
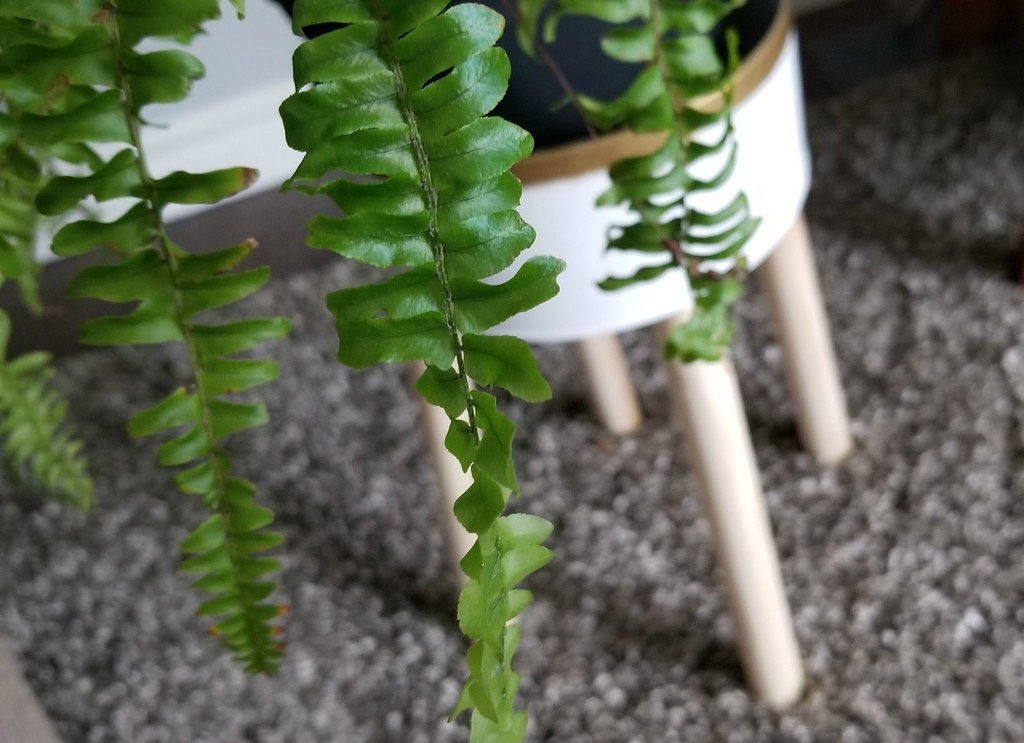
I decided to leave the wood unfinished instead of staining it. I like the Scandinavian feel of the pale poplar and white together. However I did add a gold painted band around the top.

DIY wood & metal plant stand

DIY wood & metal plant stand

DIY wood & metal plant stand

DIY wood & metal plant stand


Jul 17, 2018

DIY Angled Plant Stand

We've been through a bit of a heat wave these last couple of weeks (I'm not complaining - honest!) that put a halt to any outdoor projects. We've spent most of our off time lounging on the couch just trying to stay cool. We've also been ridiculously busy getting the new pups settled and into a routine we can all live with. Check out my Instagram feed for more - it's supposed to be DIY/travel/crafts, but it ends up being mostly dog pics.

Now that it's easier to breathe outside, we've turned our focus to the back deck. We have a huge deck that runs the entire width of the house - just a gorgeous amount of space to work with. But we spend so much of our free time working on other projects, that we don't get to enjoy it often enough. And it shows. I've vowed that this year we'd make it a place we'd wanted to hang out. The first step was to add more greenery.

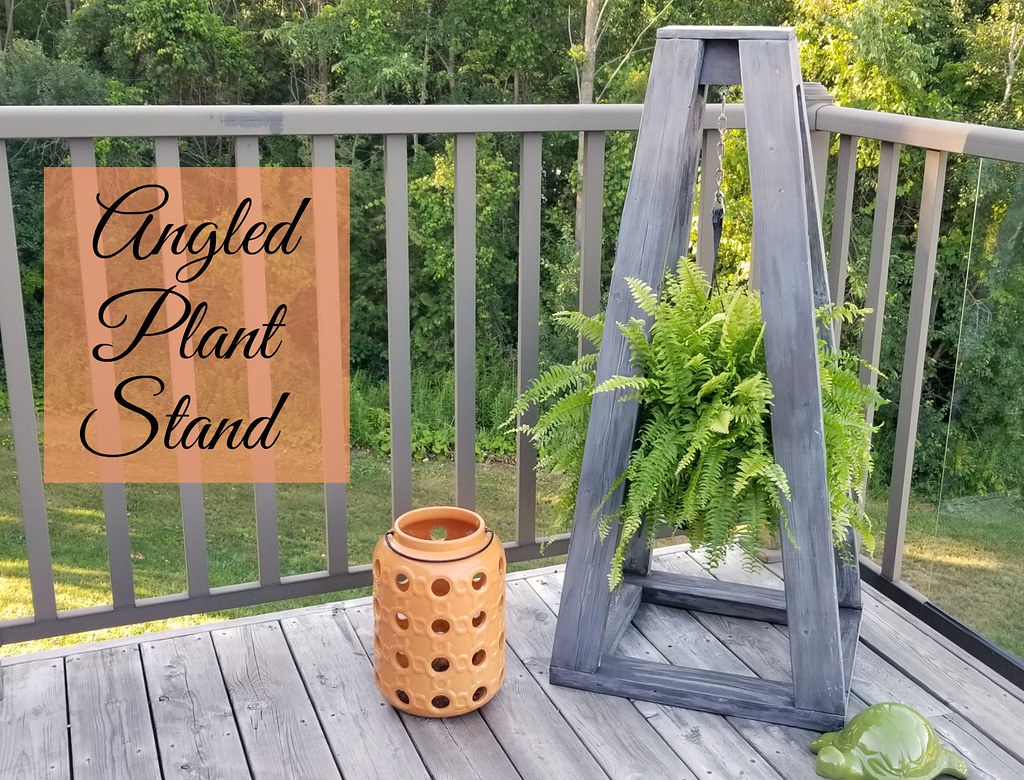
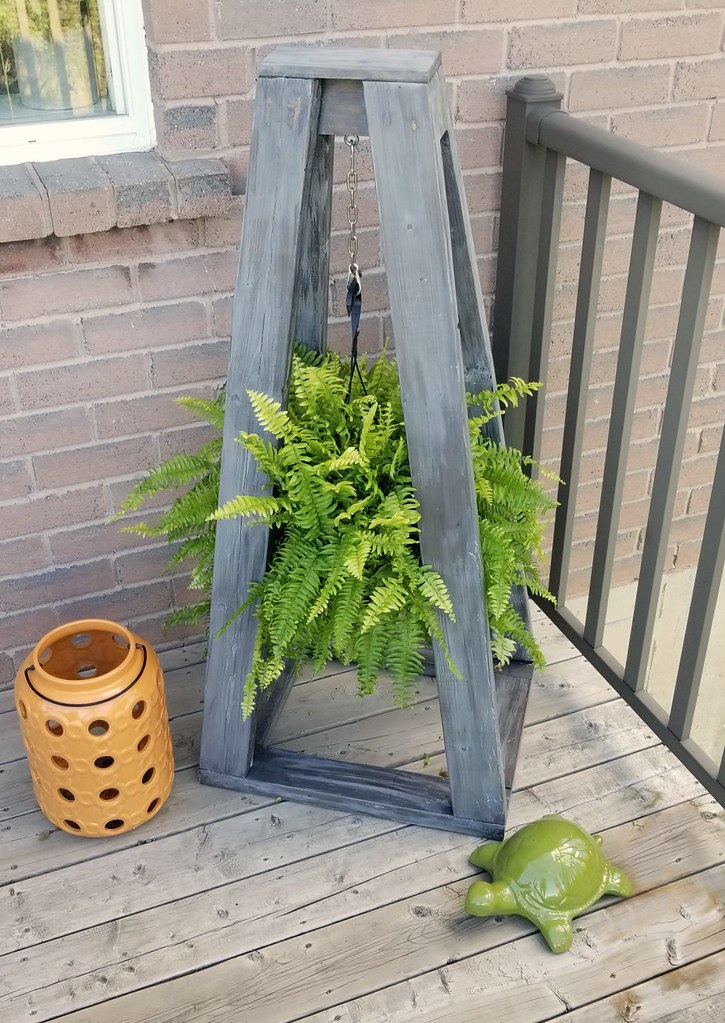
Angled Plant Stand

This plant stand idea comes from Overalls and Power Saws, and Brittany has very detailed instructions if mine aren't clear enough. Our planter is taller than hers so the measurements will be different, but the idea is the same. We also changed the top support to a 4x4 and added a board on top to cap it off.

Materials:

4 - 2x4x47" (uprights)
2 - 2x4x22" (base)
2 - 2x4x12" (base)
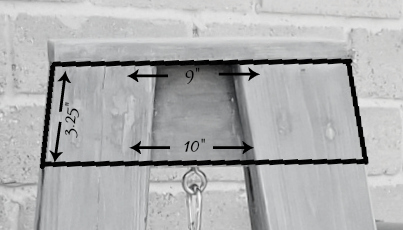
1 - 4x4x10" (top support)
1 - 1x4x9" (top)

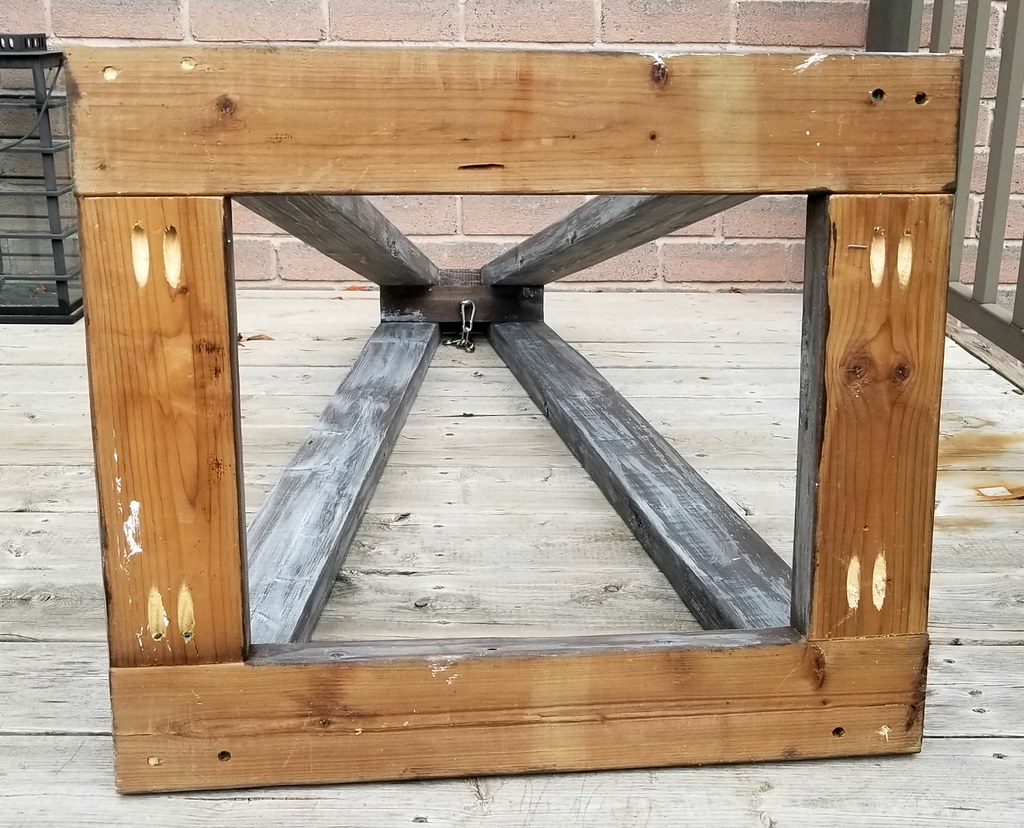
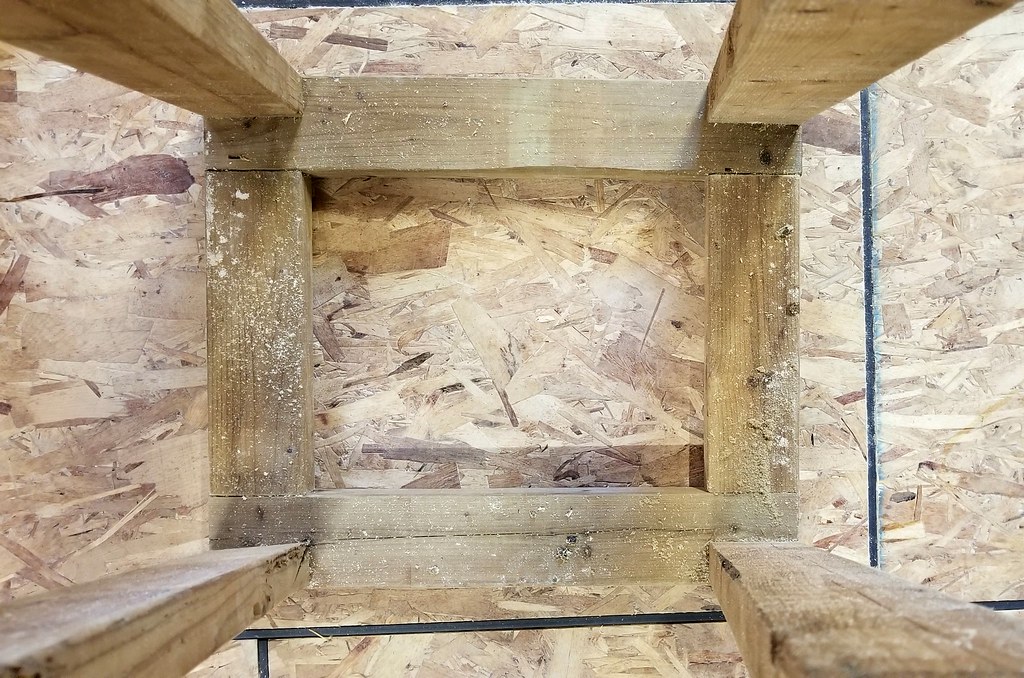
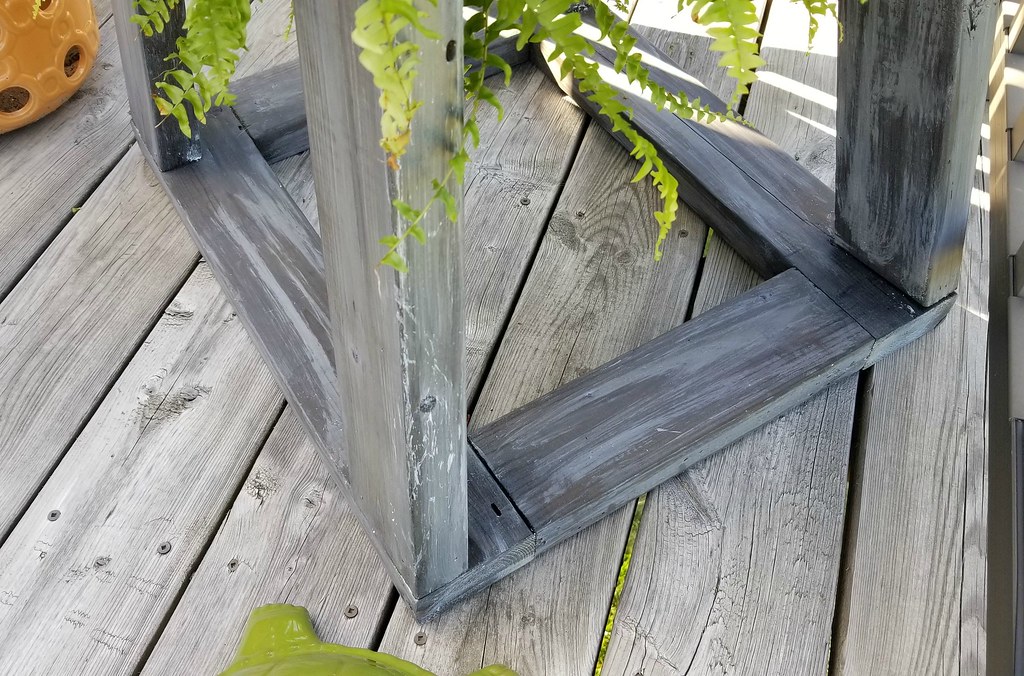
Start by building the base. The four base pieces are attached to each other in a rectangle using pocket screws on the underside. The 22" pieces go along the front and back with the 12" pieces on the sides.

Angled Plant Stand

To make the uprights, you'll cut the ends of your long 2x4s with a miter saw. The upright boards slope inwards side to side and front to back, so you'll need to cut the board at two angles at the same time. Set the bed angle at 7 degrees and the blade angle at 12 degrees. This is a complicated cut that you might want to practice on a scrap board first to make sure it's right. 

The four upright boards are anchored to the base with screws attached from underneath. Once the boards have been screwed in place, stand the frame upright and lean the boards against each other while the top support is put in place.


Angled Plant Stand

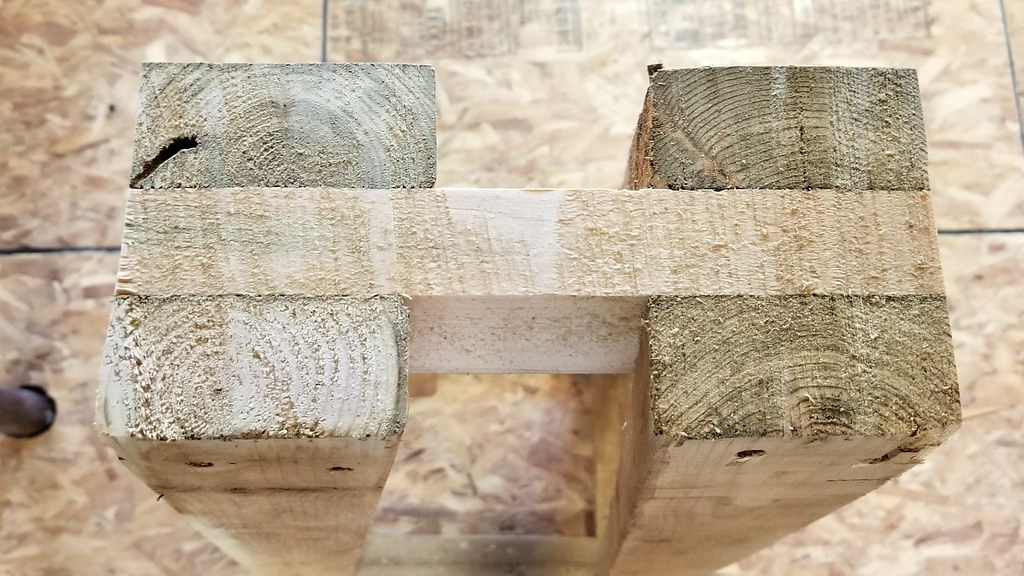
For the top support piece, take the 4x4 and run it through the table saw with the blade set at a 7 degree angle. Flip the wood around and do the same to the other side to get a trapezoid shape.


Angled Plant Stand

Next you'll attach the 4x4 support to the tops of the upright boards. Line up the bottom of the support with the outer edges of the boards. The ends at the top of the support will stick out on either side as the uprights slope inwards. Make sure the tops of the boards slightly overhang the top edge of the support. Keep in mind that all of the overhanging edges will be cut off later. If you have an air nailer, you might want to put a couple of finishing nails in each board to hold it in place while you screw them in. Attach two screws straight through each board into the support piece, maintaining your angles.

Angled Plant Stand

Now that your frame is built, you'll need to cut off the extra "bits". Take a reciprocating saw or a handsaw and cut off the upper corners of the support piece so that the angle matches the upright boards. Cut off the tips of the upright boards so that they're level with the top of the support piece. Finish with a palm sander to smooth out any rough or uneven spots.

Angled Plant Stand

Angled Plant Stand
Angled Plant Stand

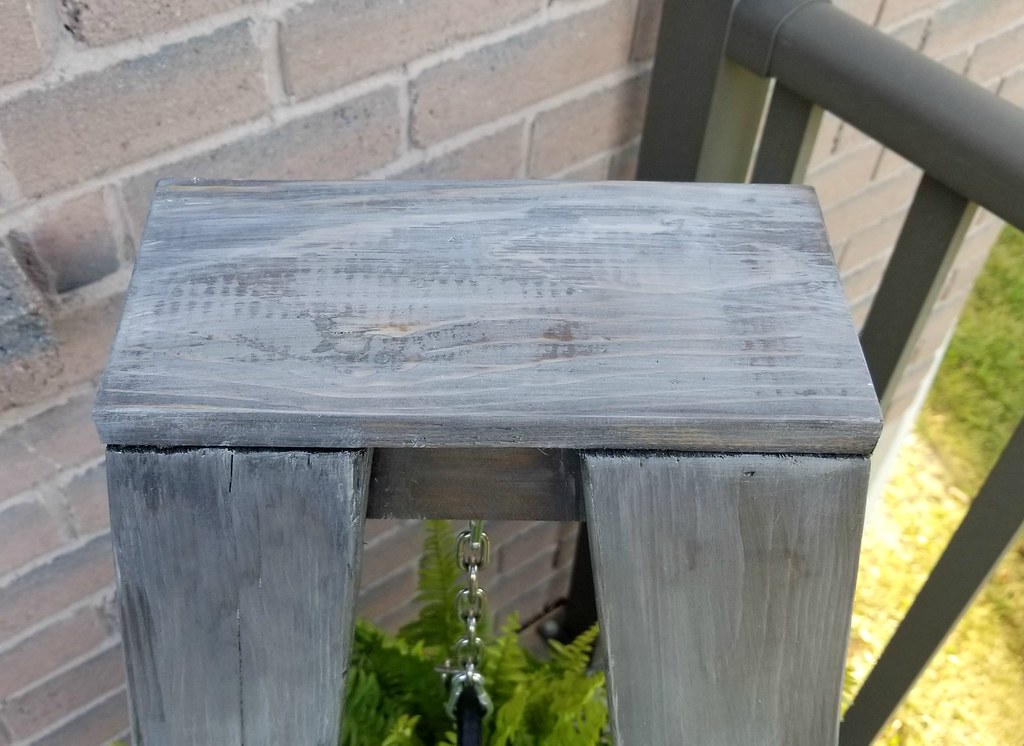
The final piece to attach is the "crown" on top. This piece isn't on the original plan, but we added it just to give the planter a more finished look, and to provide a level spot if we ever wanted to set something on it. Attach it with finishing nails for a cleaner look or screws if you don't mind filling them.

Angled Plant Stand

You can now finish your planter in whatever way you desire - paint, stain, lacquer - or leave it bare if that's the look you like. I puttied and sanded the screw/nail holes that were visible, and then I did a multi-step process - first a coat of stain in Minwax's Jacobean, then a coat of stain in Minwax's Classic Grey, and then finally some light brush strokes of white paint to give a weathered look. After applying the white paint I went over some areas with more grey stain if they needed to be blended.

Angled Plant Stand

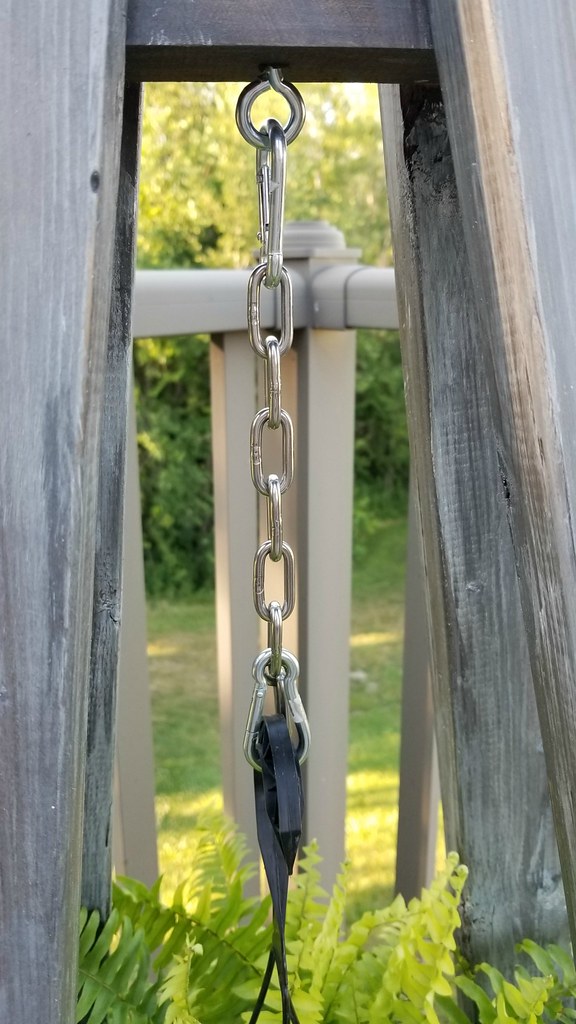
Once dry, you'll add your chain and plant hook. We used the combination of an eye hook, carabiner, chain, and then one more carabiner at the bottom, as the chain loops weren't wide enough for the plant hook.

Angled Plant Stand

And there you have it. A plant stand that's also a bit of an art piece. There's a mix of texture with the rough wood, smooth chain, and nearby glass and metal, yet the neutral colours let the green in the plants's leaves just pop.

Angled Plant Stand

Angled Plant Stand

Angled Plant Stand

Angled Plant Stand


Apr 10, 2018

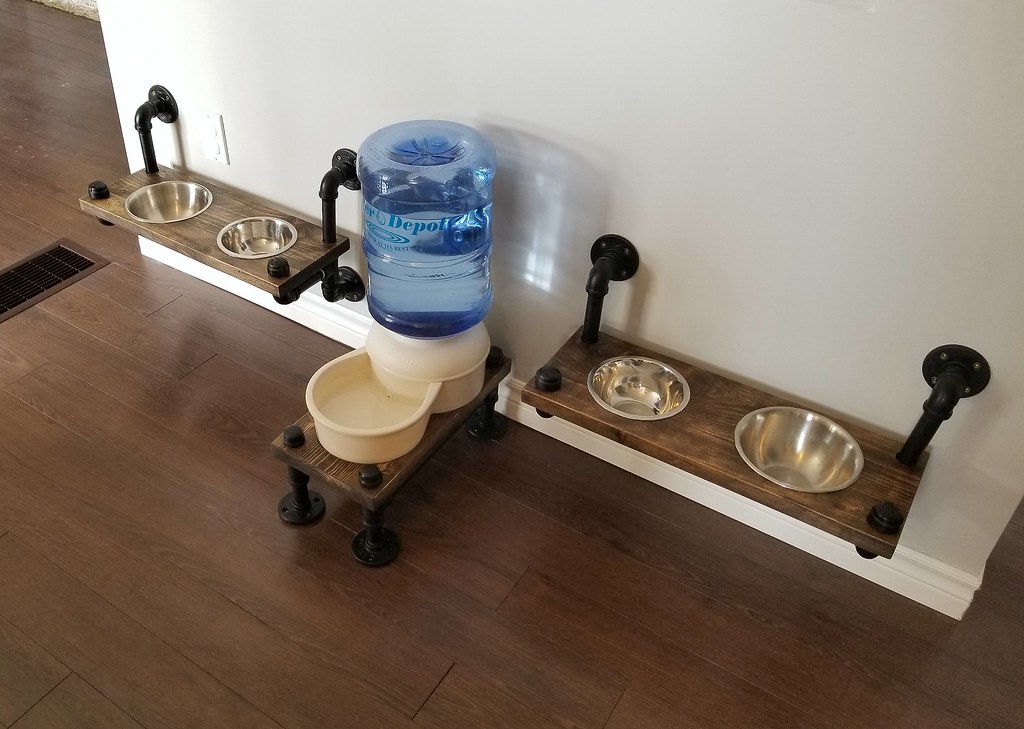
Industrial-Style Dog Feeding Station

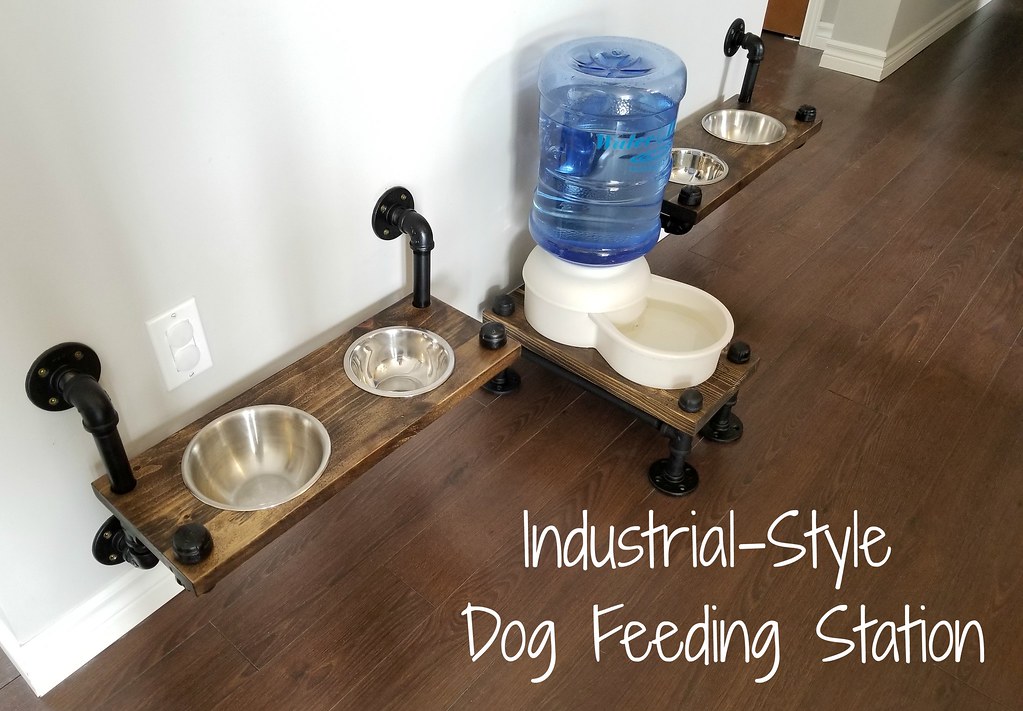
This week's project at the Turtles and Tails household involved upgrading the dog feeding area. If you recall, last year we built plumbing pipe open shelving in the dining area. We decided that we wanted to carry the look over into the kitchen and give the dogs an upgraded spot for eating.
Industrial style dog feeding station - plumbing pipe  dog bowl

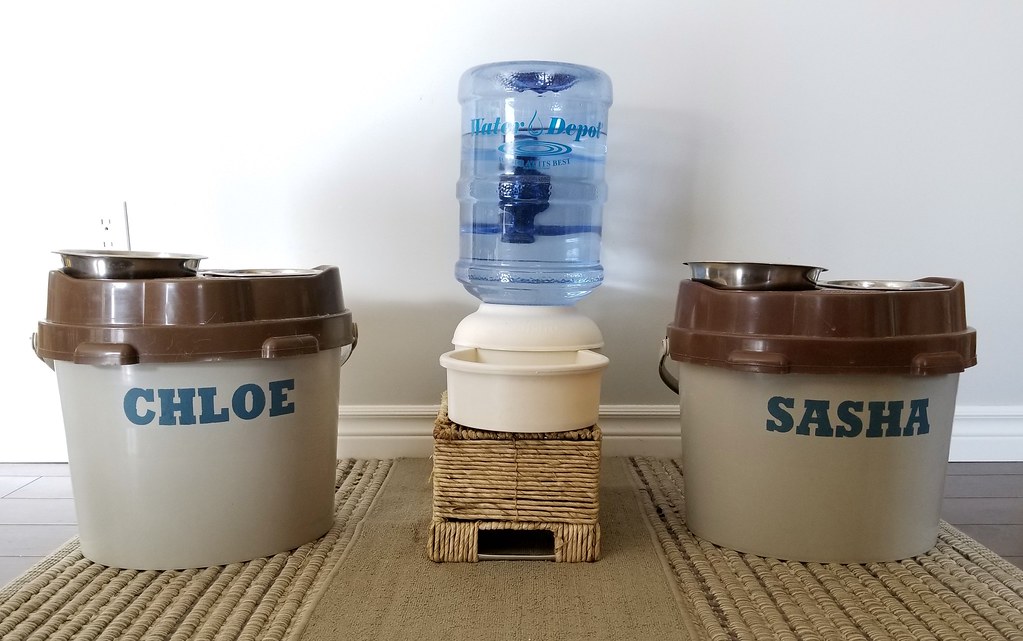
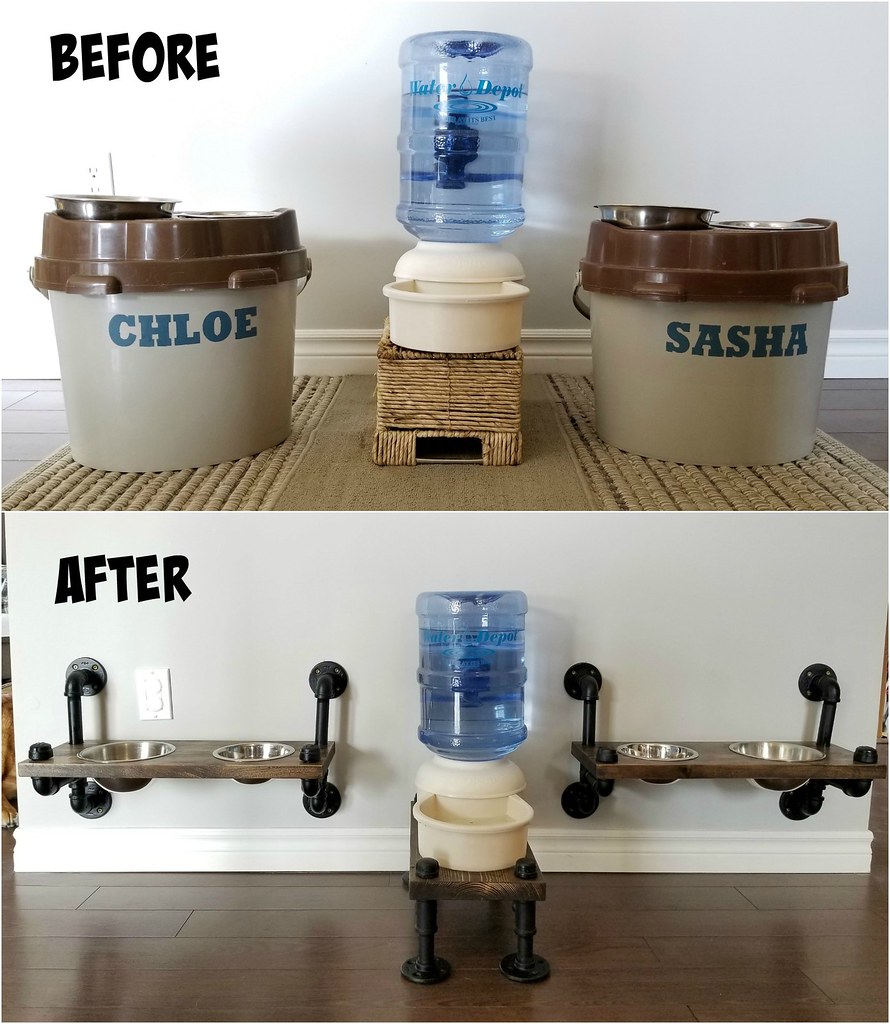
This is what their feeding area looked like before. The raised buckets - available here - have a carrying handle and built-in bowl areas in the lid. I stenciled their names on the buckets a few years ago and we liked to pretend that they always go to the correct bowl because they can read. It's all quite serviceable, we were just looking for something a little more rustic and easier to keep clean.

Omega Paw Lunchbox dog food bucket

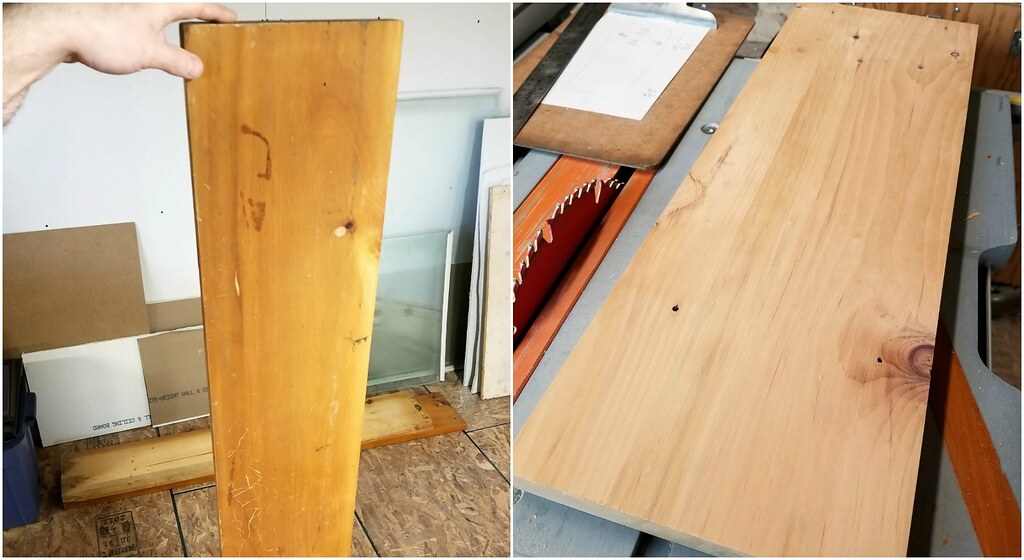
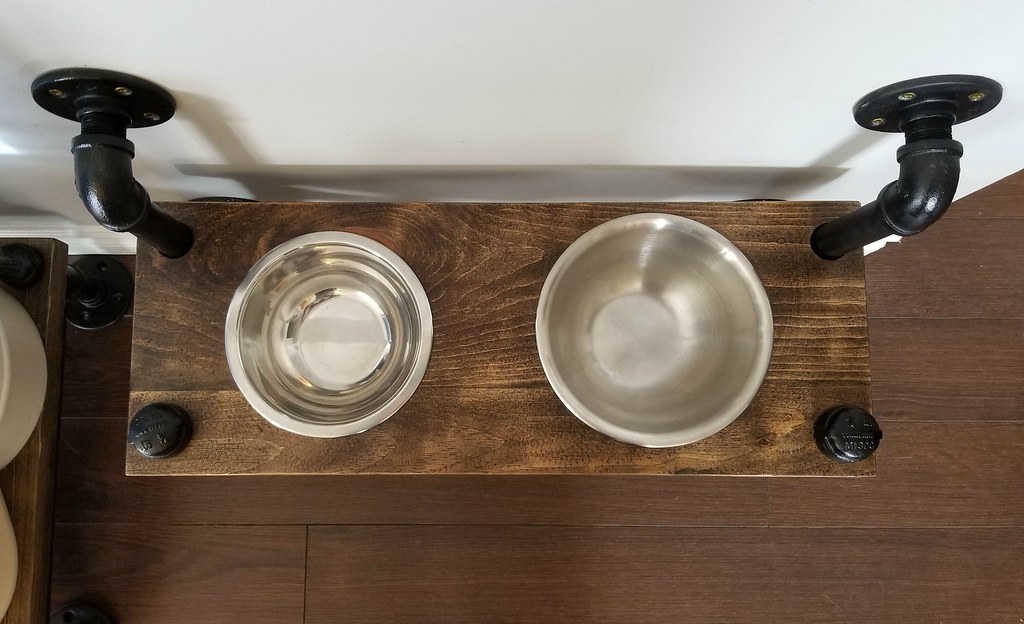
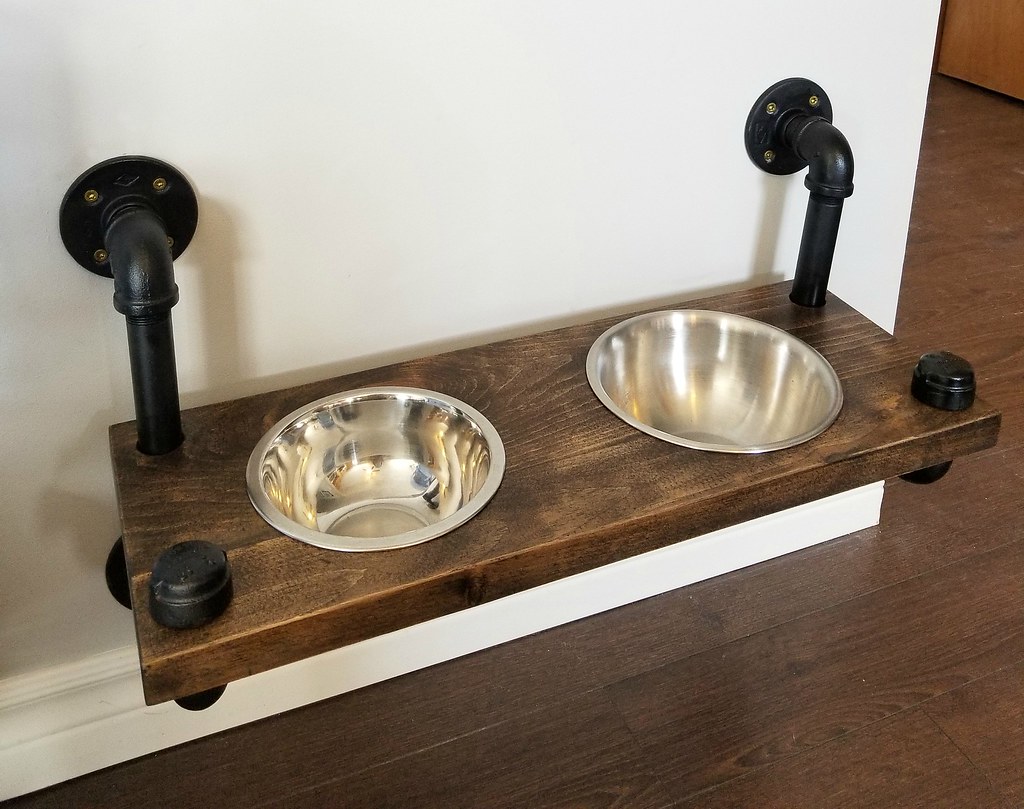
We were lucky enough to have some old lumber given to us recently. These 10" wide boards (1.5" thick) were originally the sides of a waterbed. A quick run through the planer to remove the lacquer and scratches and they were ready to go. Each "shelf" ended up being 8.5" x 22.5" x 1.25" thick.

Industrial style dog feeding station - plumbing pipe  dog bowl

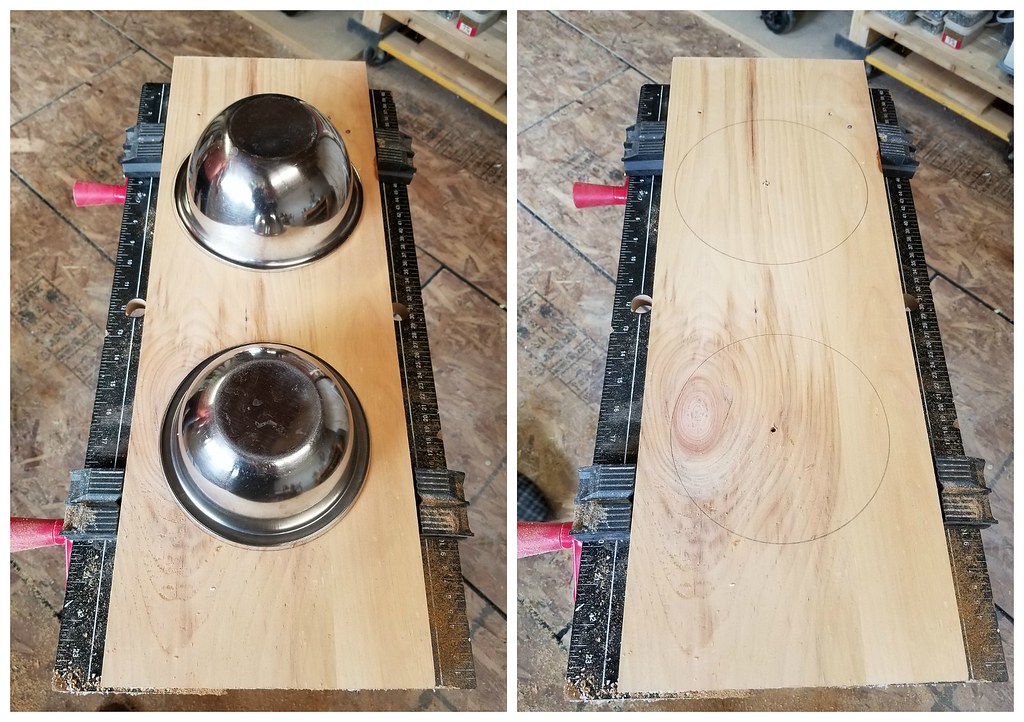
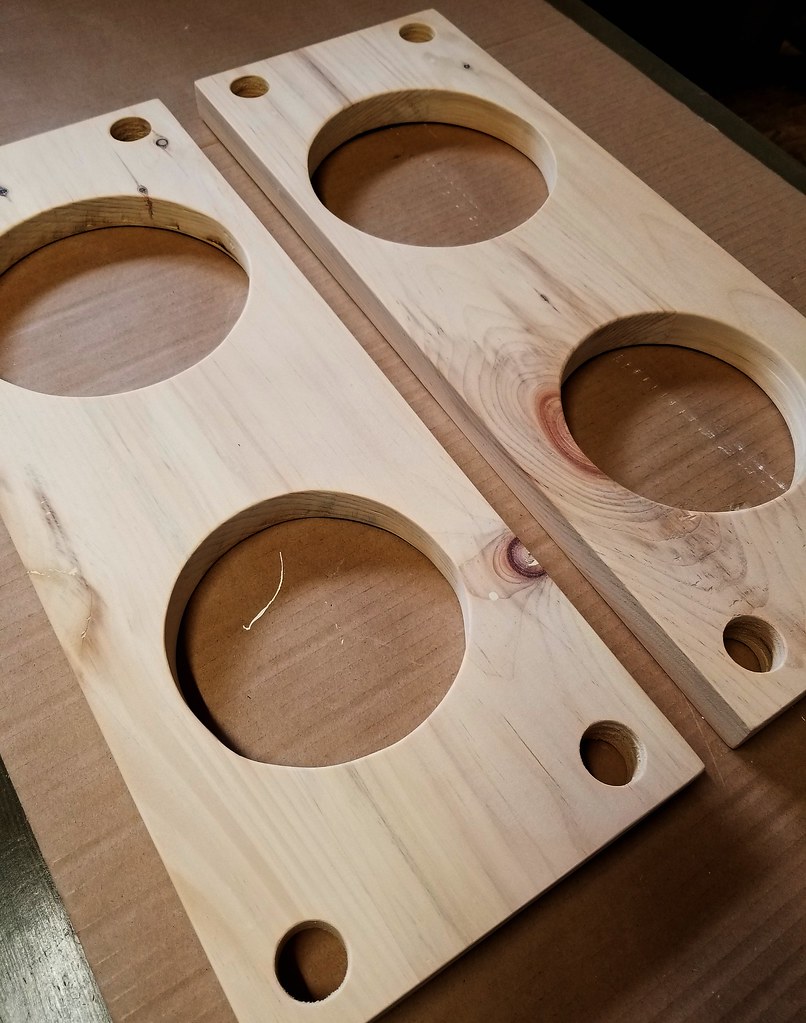
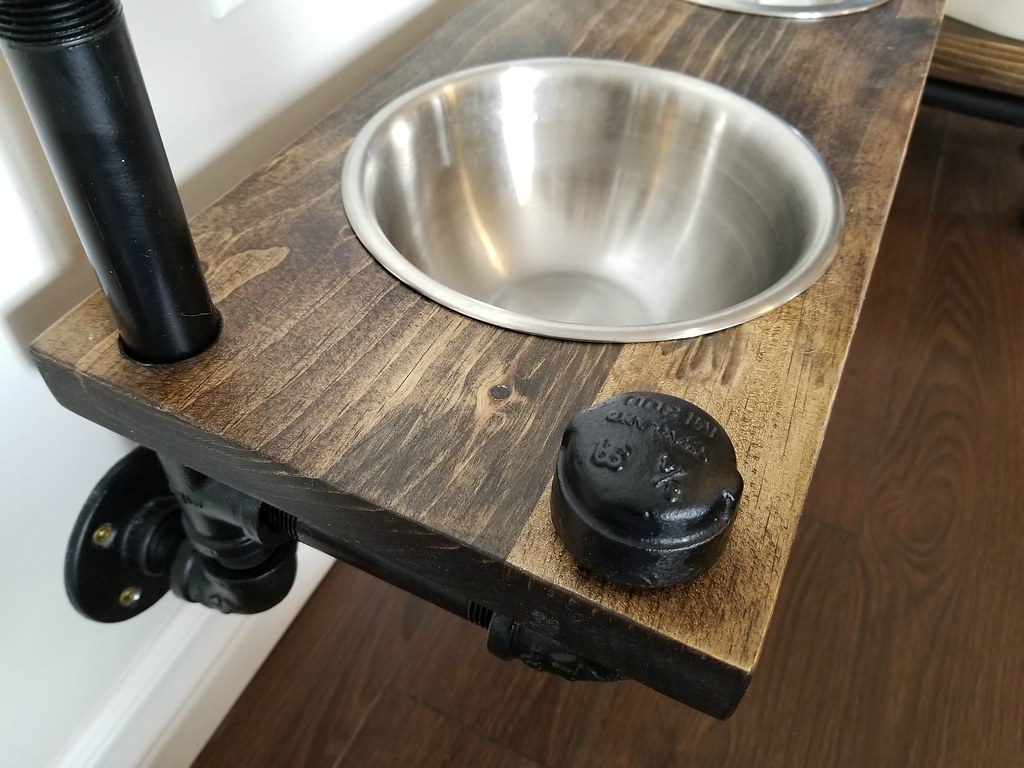
We started by taking the dogs' bowls and tracing them on the board and cutting out holes with a Rotozip

Important: You'll want to cut your holes slightly smaller than the circles you traced so that the edge of the bowl rests on the wood and holds it in place. 

Industrial style dog feeding station - plumbing pipe  dog bowl

Industrial style dog feeding station - plumbing pipe  dog bowl

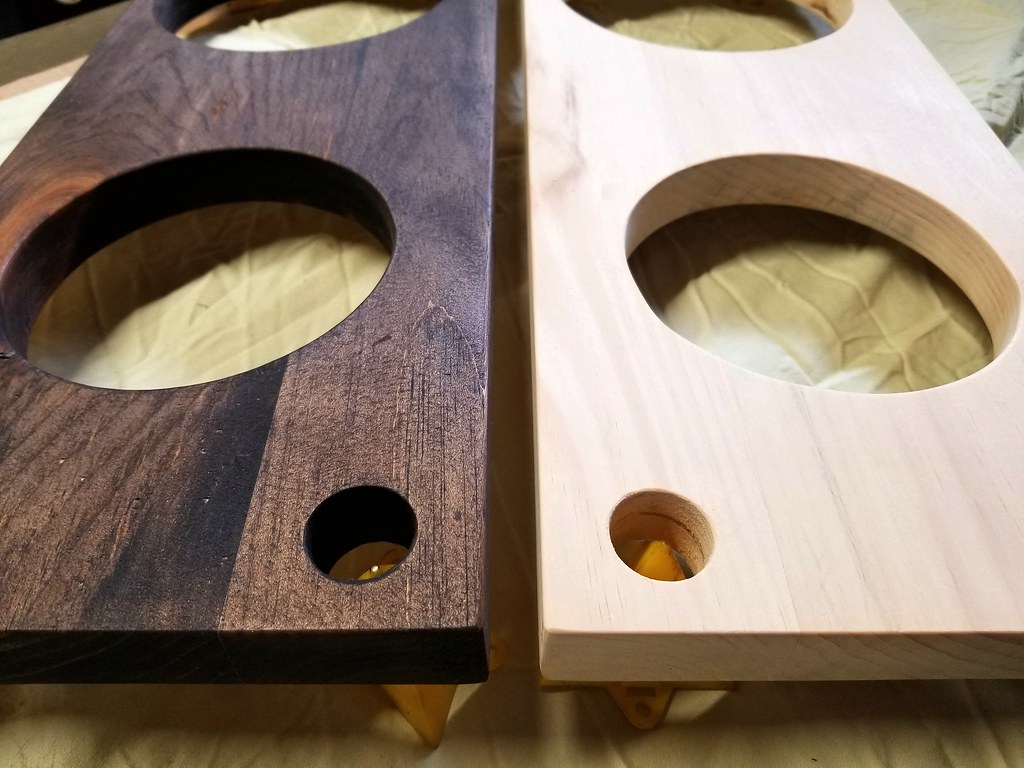
After puttying any imperfections and sanding everything smooth, I stained the wood with Minwax's Jacobean stain and then waxed it with 2 coats of Minwax's dark finishing wax. Another tip: To get a silky-smooth surface, finish by buffing the wood with extra fine steel wool.

Industrial style dog feeding station - plumbing pipe  dog bowl

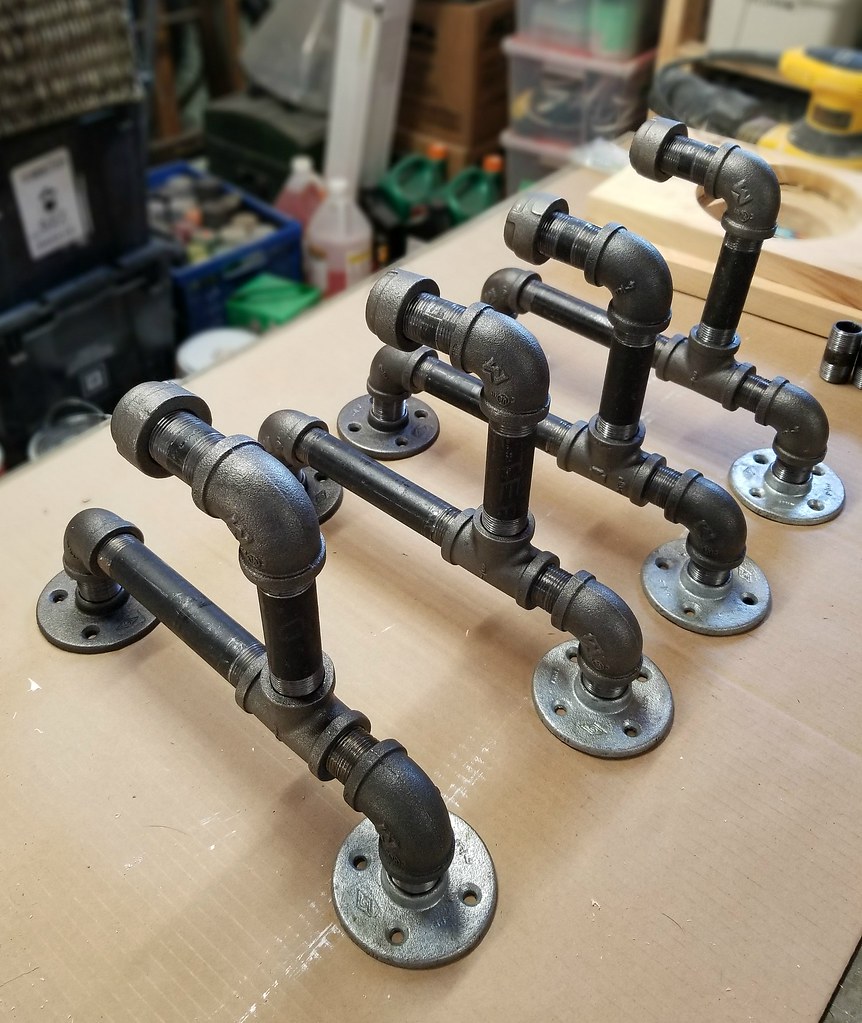
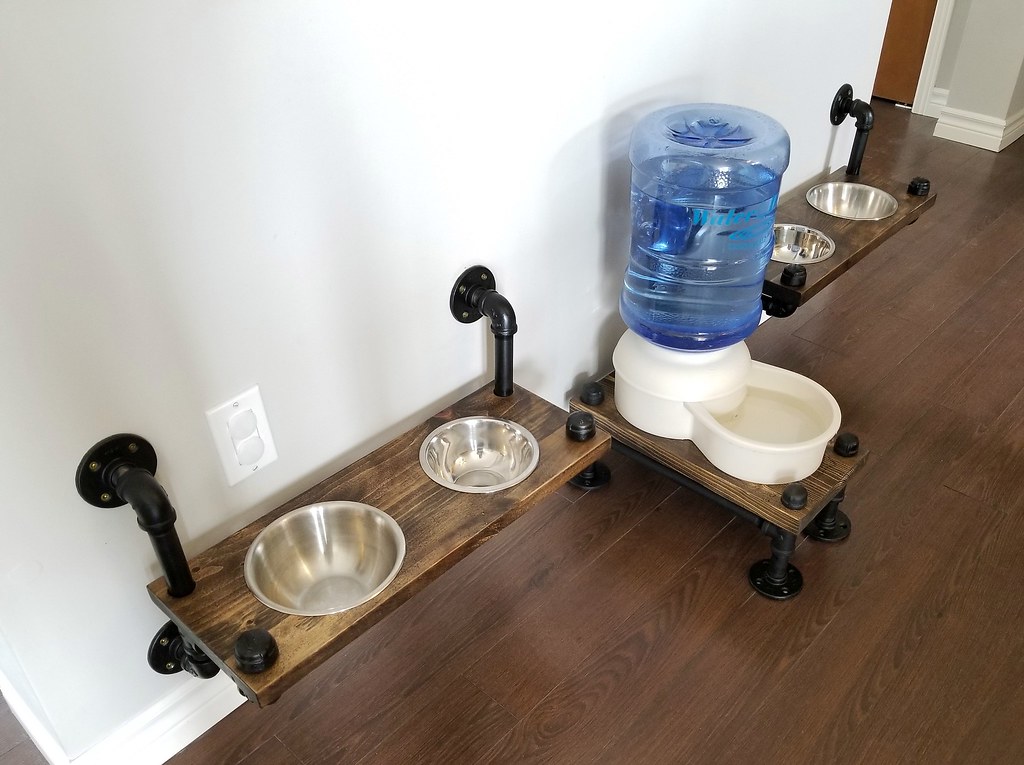
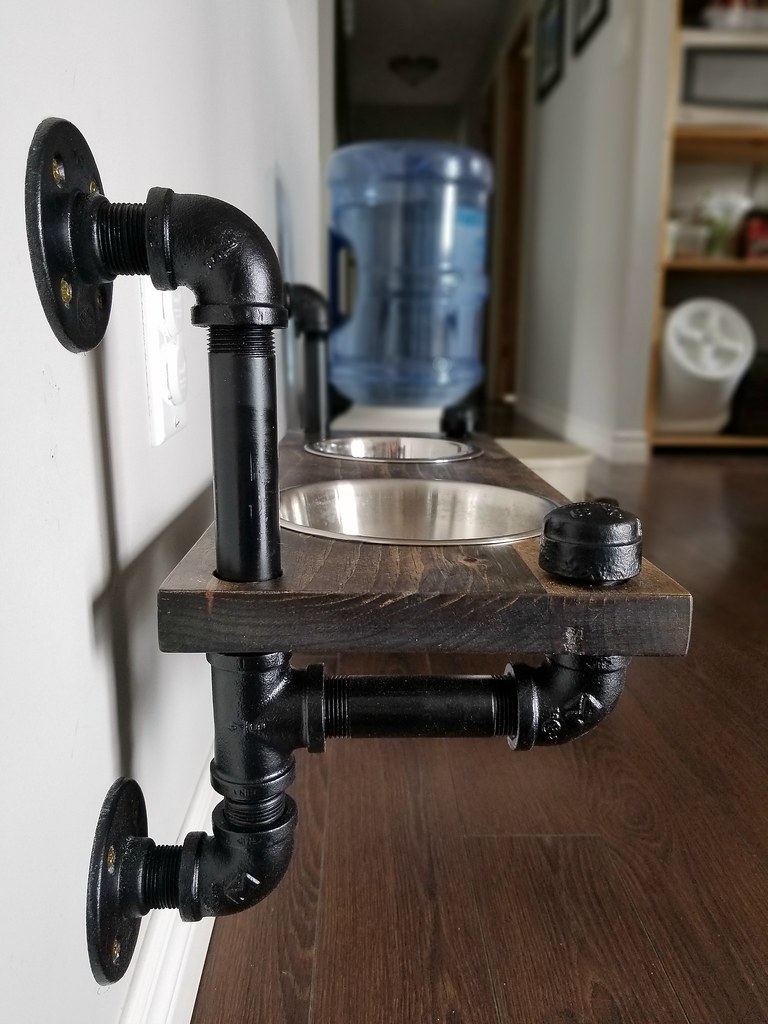
The framework to hold the shelf to the wall is made of everyday plumbing parts.

For each shelf we used:

8 - 2" length 3/4" nipple pipe
2 - 4" length 3/4" nipple pipe
2 - 6" length 3/4" nipple pipe
4 - 3/4" floor flanges
6 - 3/4" 90 degree elbows
2 - 3/4" tees
2 - 3/4" caps

Industrial style dog feeding station - plumbing pipe  dog bowl

The framework was assembled and then painted using Rustoleum's Flat Black spray paint. Once the paint was dry the pipes were reassembled with the shelf and mounted to the wall. Make sure you either hit a stud with your screws or use anchors as you don't want the shelves falling down.

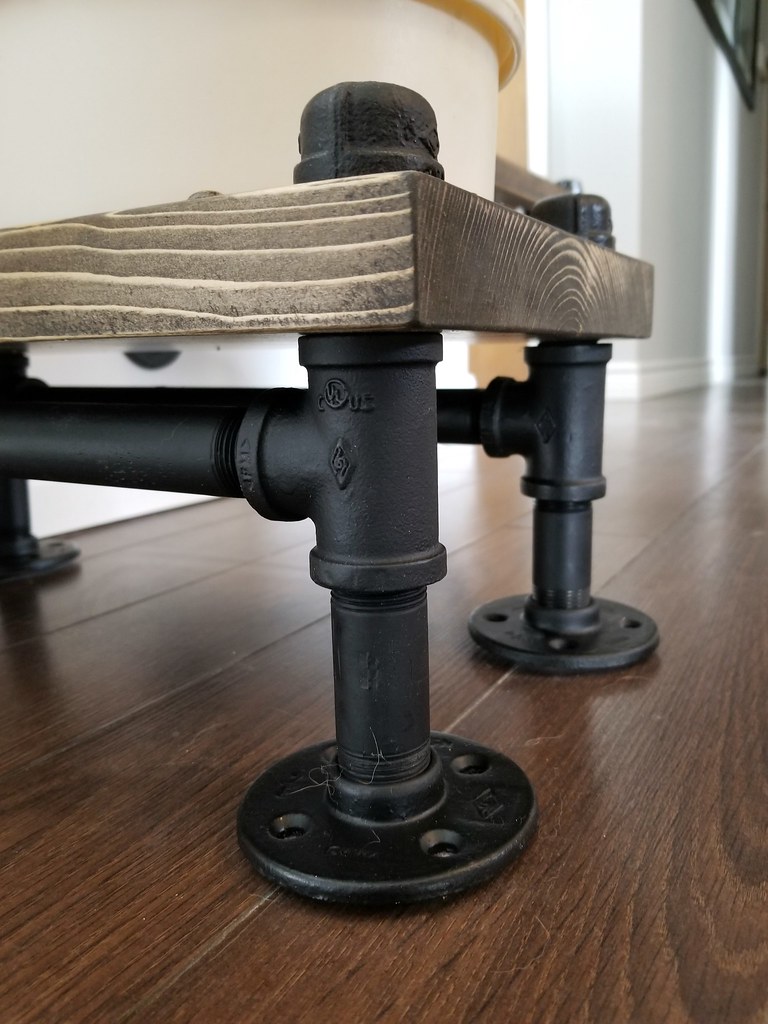
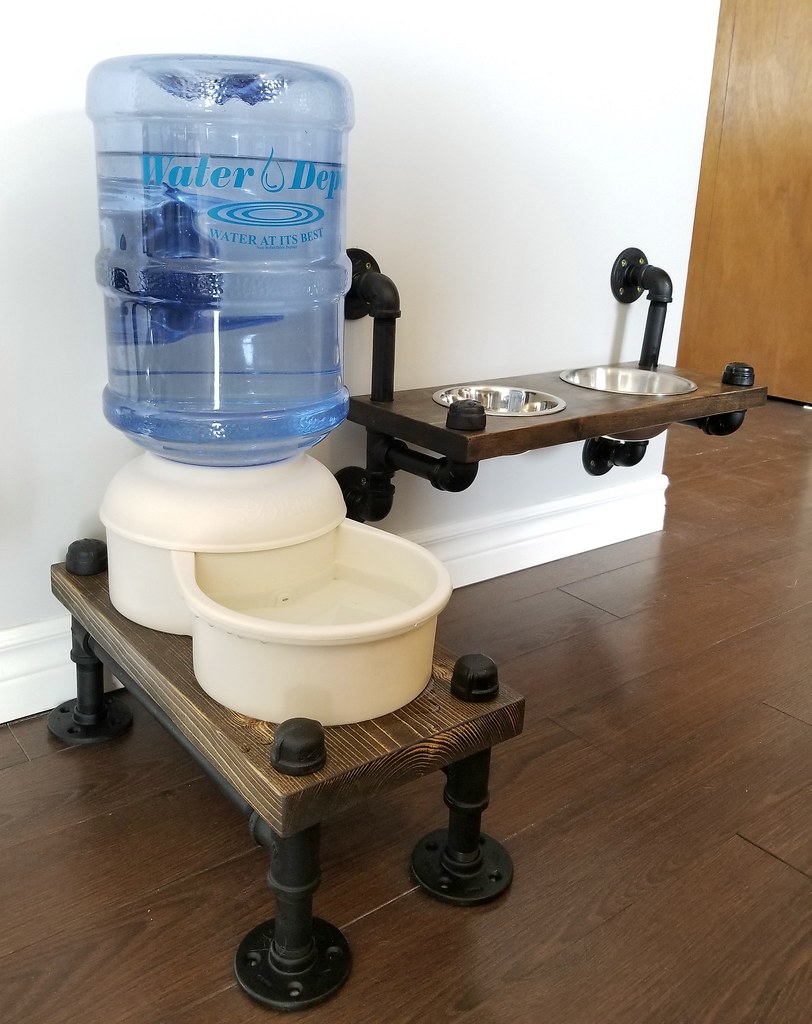
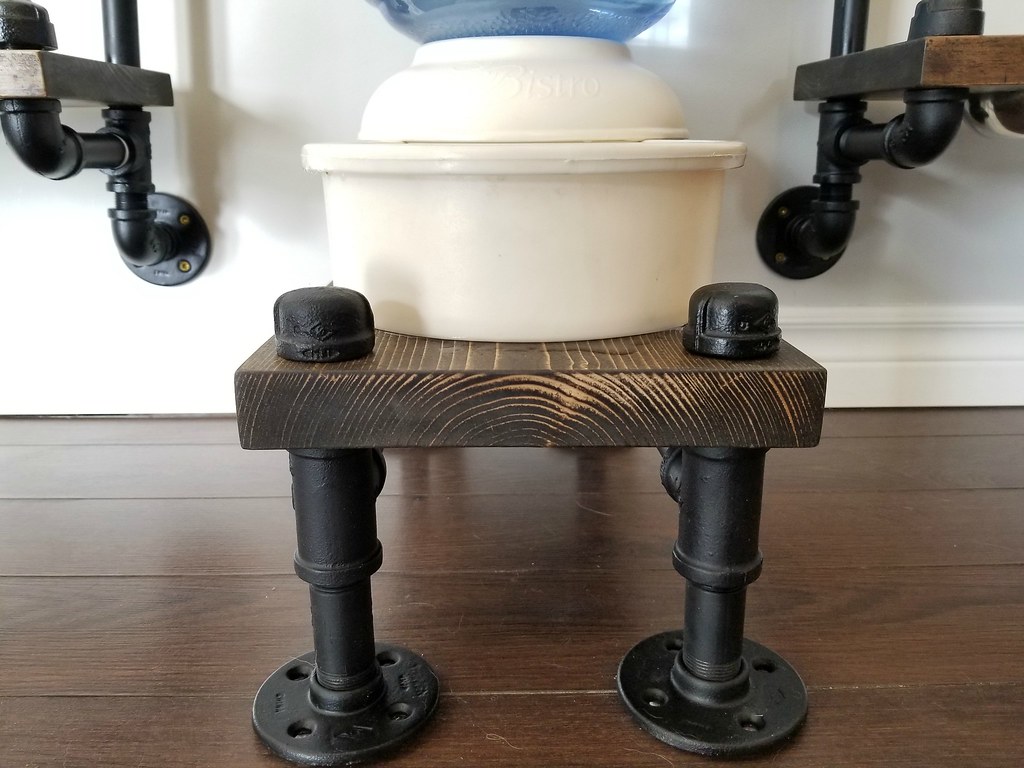
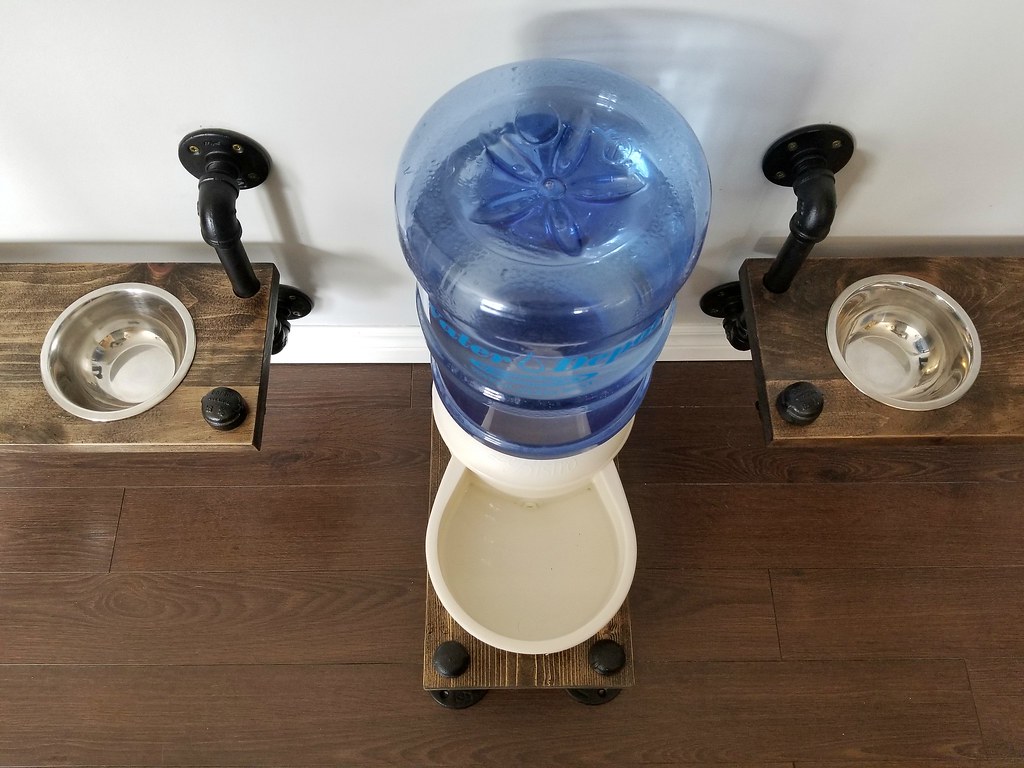
We also made a stand for the water bowl using the same wood and plumbing pipe. We considered mounting it to the wall (with support feet at the front) but decided it wasn't necessary. And the different style breaks up the look.

Industrial style dog feeding station - plumbing pipe  dog bowl

The dogs were unsure at first (and Sasha went to the wrong bowl the first day), but since then it's been business as usual. The new setup takes up much less space, leaving a clearer path from the hallway through the kitchen. And cleaning up the water spills and dog hair is so much easier. 

Industrial style dog feeding station - plumbing pipe  dog bowl


Here is one more before and after:

Industrial style dog feeding station - plumbing pipe  dog bowl

Industrial style dog feeding station - plumbing pipe  dog bowl

Industrial style dog feeding station - plumbing pipe  dog bowl

Industrial style dog feeding station - plumbing pipe  dog bowl

Industrial style dog feeding station - plumbing pipe  dog bowl

Industrial style dog feeding station - plumbing pipe  dog bowl

Industrial style dog feeding station - plumbing pipe  dog bowl

Industrial style dog feeding station - plumbing pipe  dog bowl

Industrial style dog feeding station - plumbing pipe  dog bowl

Related Posts Plugin for WordPress, Blogger...