I'm guessing that you'll be putting up your Christmas tree soon, if you haven't already. I'm about 90% there - I'm hoping to finish it this weekend. My favourite ornaments are the ones that I've made over the years. They give me a glimpse of what was going on at that time in my life. Here are a few that I hang year after year. Click on a picture to go to the original post.
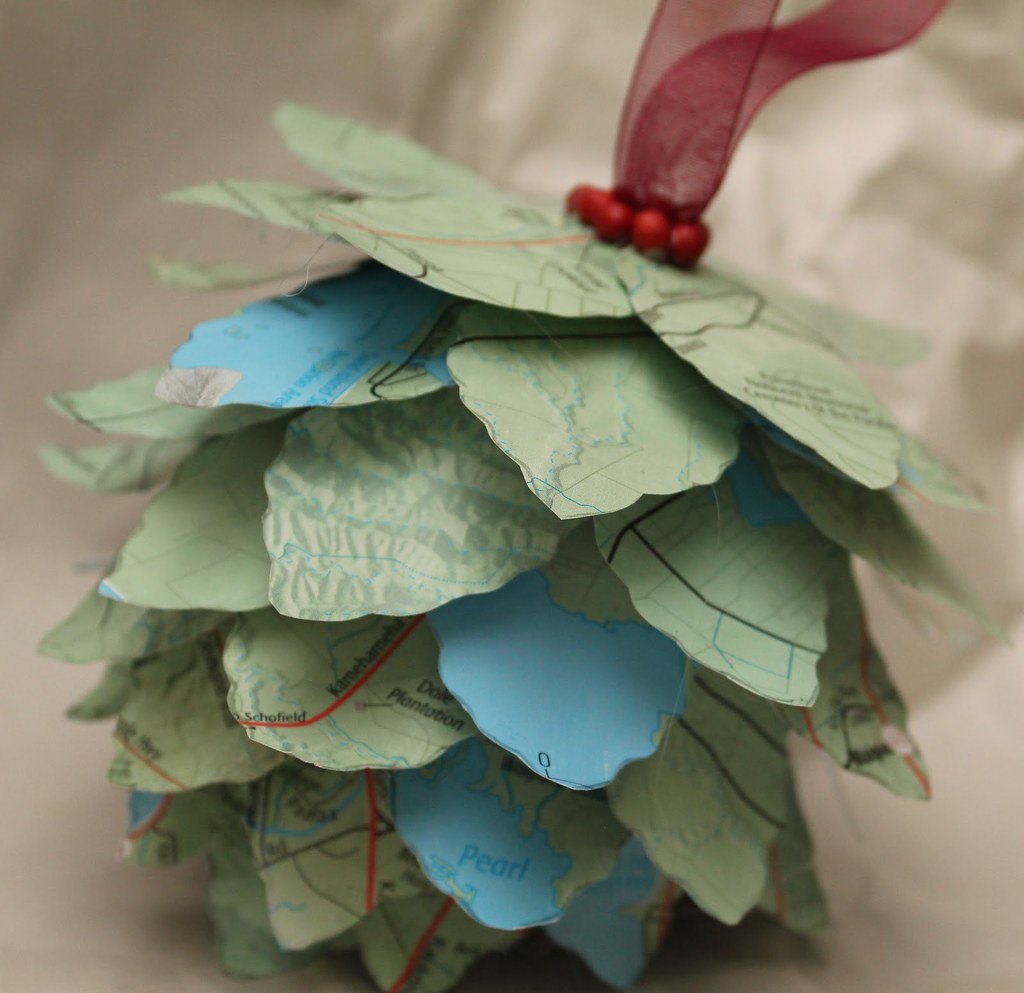
Pinecone Map Ornament
This ornament is made from paper leaves cut from a map of Honolulu. We went to Hawaii for our honeymoon and fell in love with the islands. I wanted an ornament to remember it by, just in case we didn't get a chance to see it again. (Spoiler: we've been back twice!)
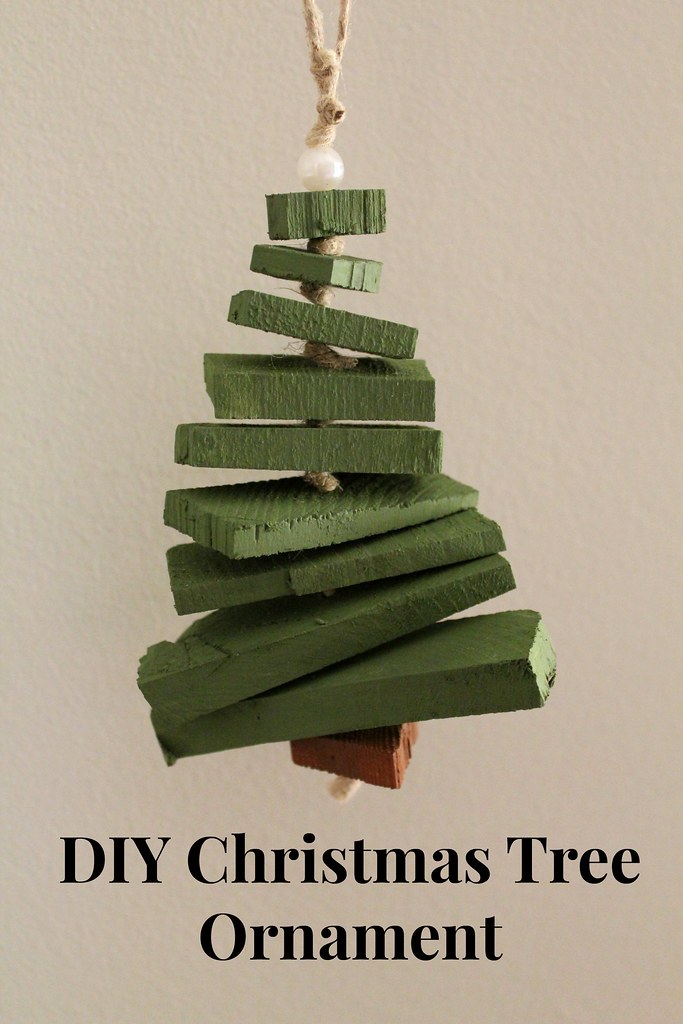
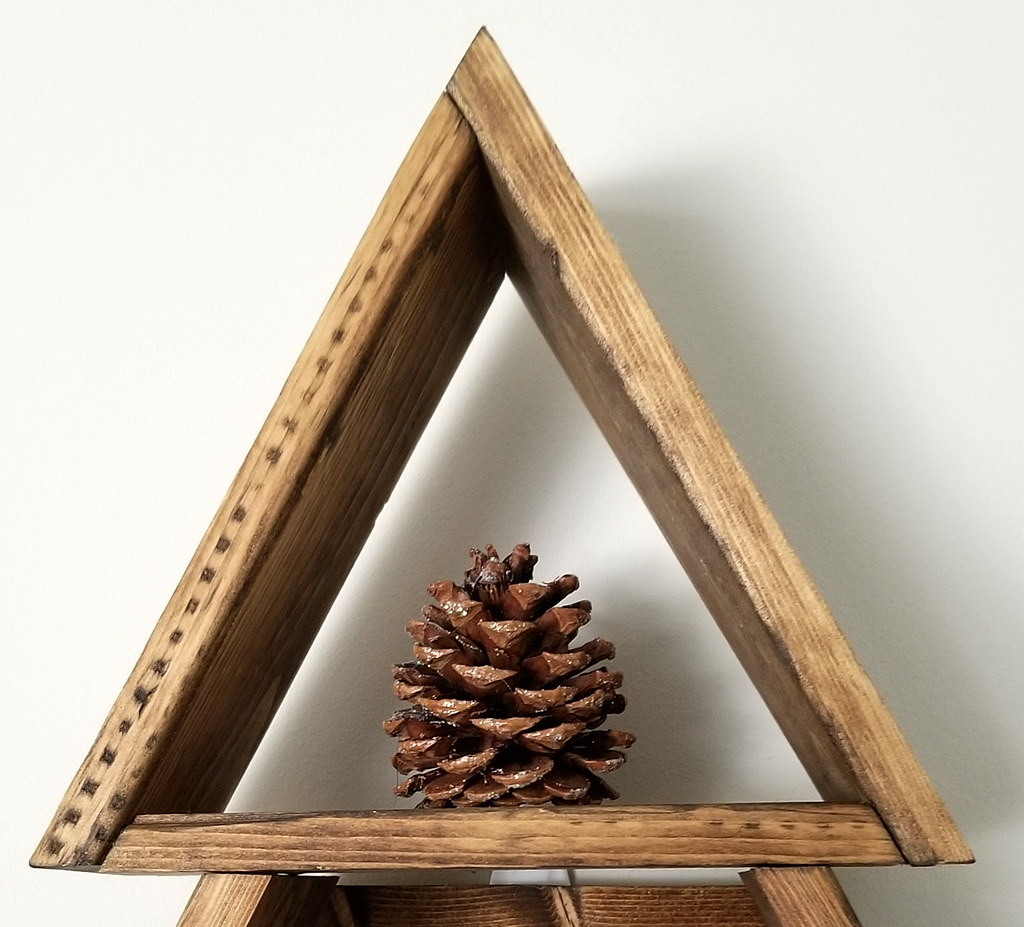
Scrap Wood Tree Ornament
This one was made from scraps left over from the porch that Tom built for his parents. He always laughs at me when I scurry around collecting the end cuts before he can throw them out.
Musical Ornament
I call this the "Jingle Bell" Ornament. It's made of strips of sheet music mod podged onto a Styrofoam ball. I bought a book of sheet music from a used book store so that I would have plenty to work with (and the paper is thicker than printer paper).
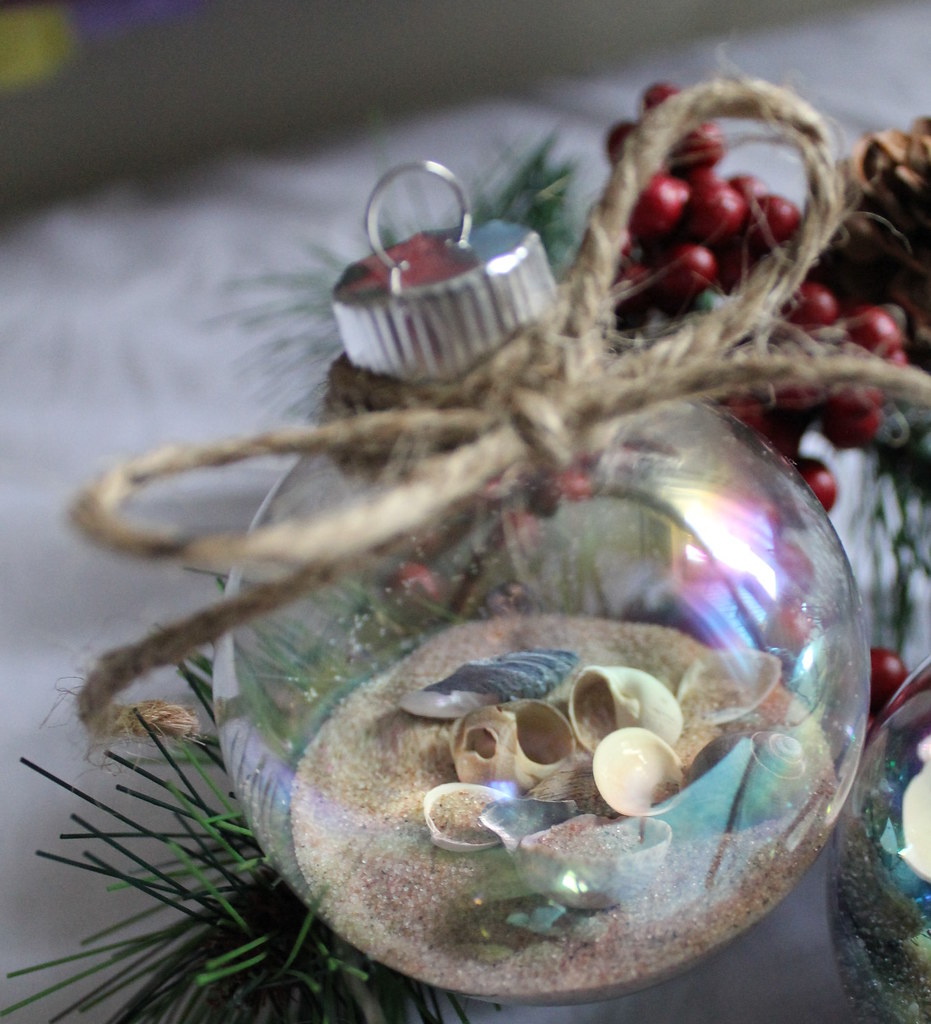
Vacation Memory Ornament
Because there were more trips to Hawaii, I needed another way to commemorate them. I bought clear bulb ornaments, filled them with sand from a favourite beach (each ornament is different), plus a few shells, and a scrap of paper with the trip details. These ones are fun, but a bit heavy!
SEARCH THE BLOG
Nov 30, 2018
Nov 26, 2018
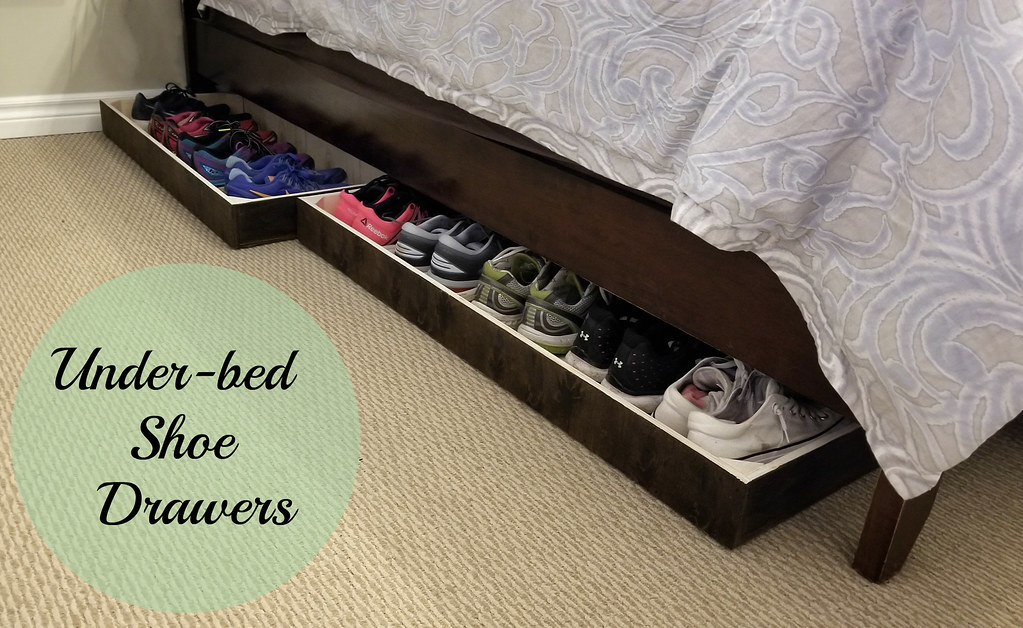
Under-bed Shoe Storage Drawers
I have a lot of running shoes. Maybe too many. I should probably throw some of them out, but it's so hard, you know?
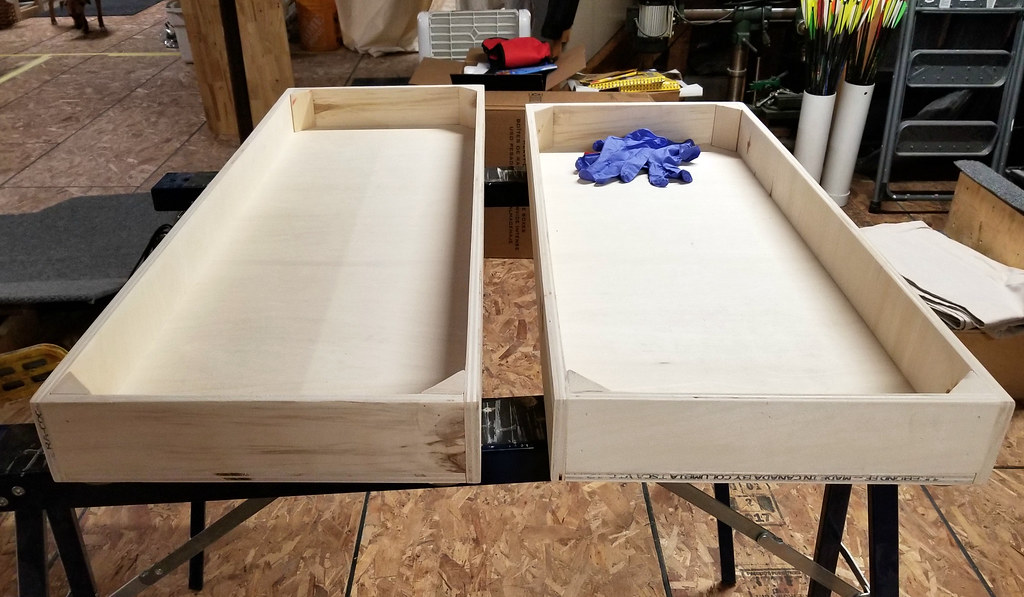
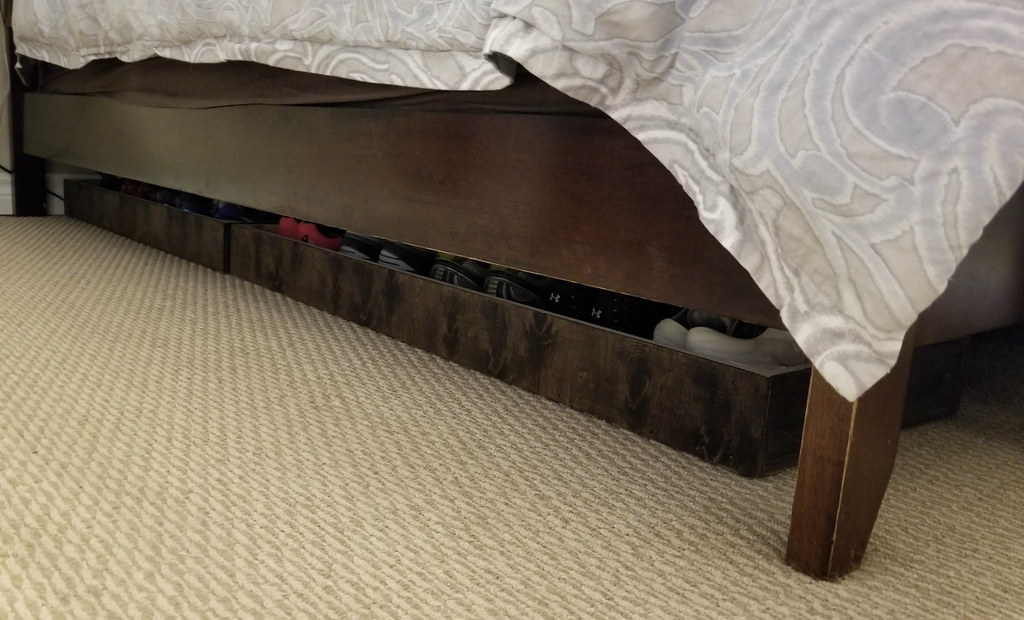
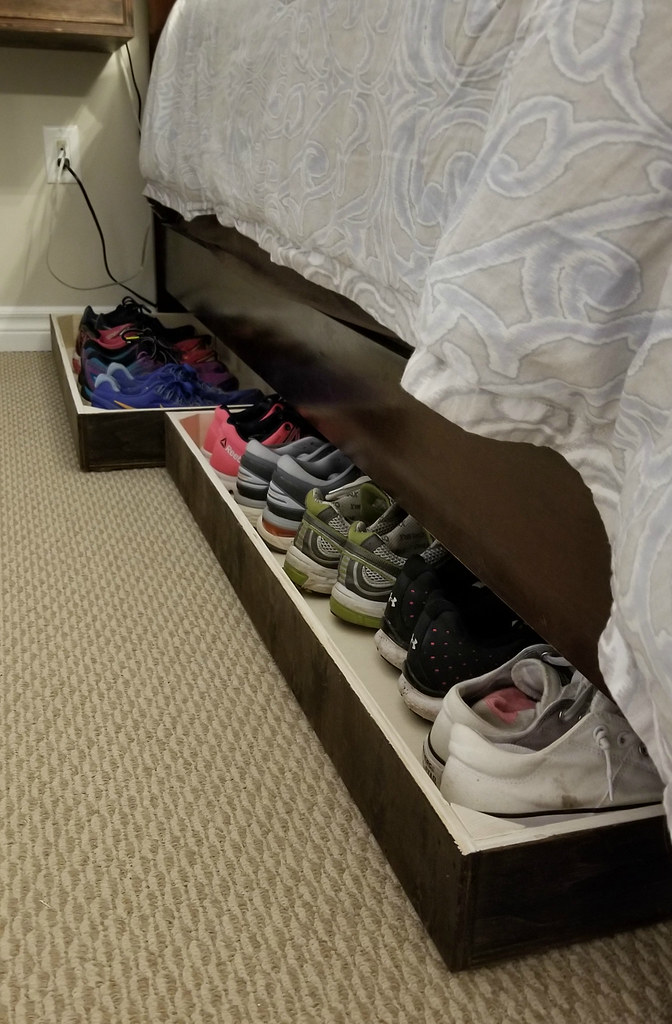
I was tired of looking at them piled up on a shelf in our closet, so I had Tom whip up some under-bed sliding drawers for me, to get them out of sight.
I wanted to use as much of the space as possible, but I didn't want the drawer to be too big to move, so we went with two drawers, one 3 feet wide and the other 3-1/2 feet wide. They're both 15 inches deep and made of 1/2" veneered plywood.
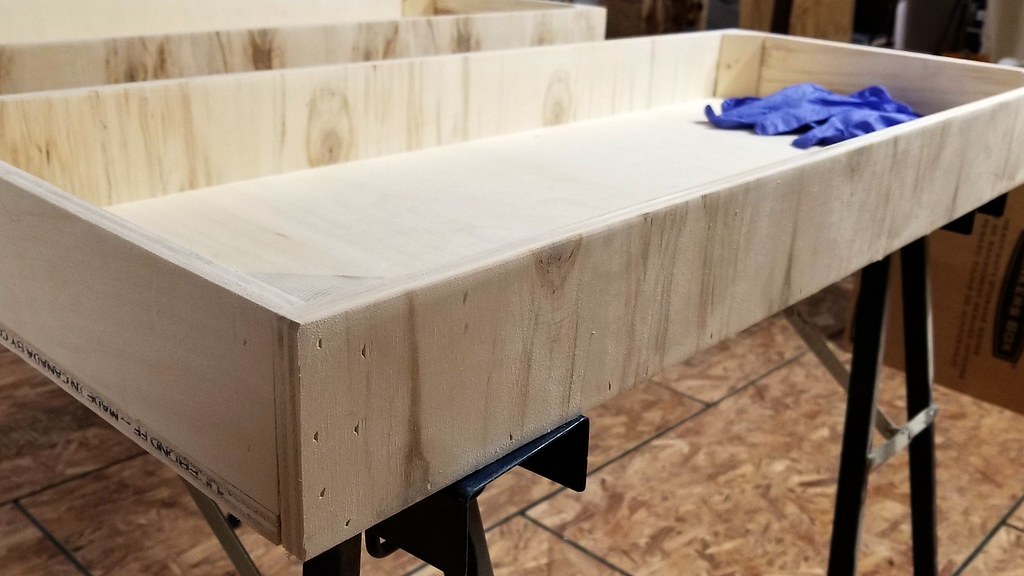
The edges are 3-1/2 inches high - high enough to hide the shoes from sight, but still low enough to give your fingers clearance to pull the drawers out.
The inside corners are reinforced with 2x2s cut on a diagonal. Since the front edge is what gets pulled on all the time, you don't want the board pulling right off.
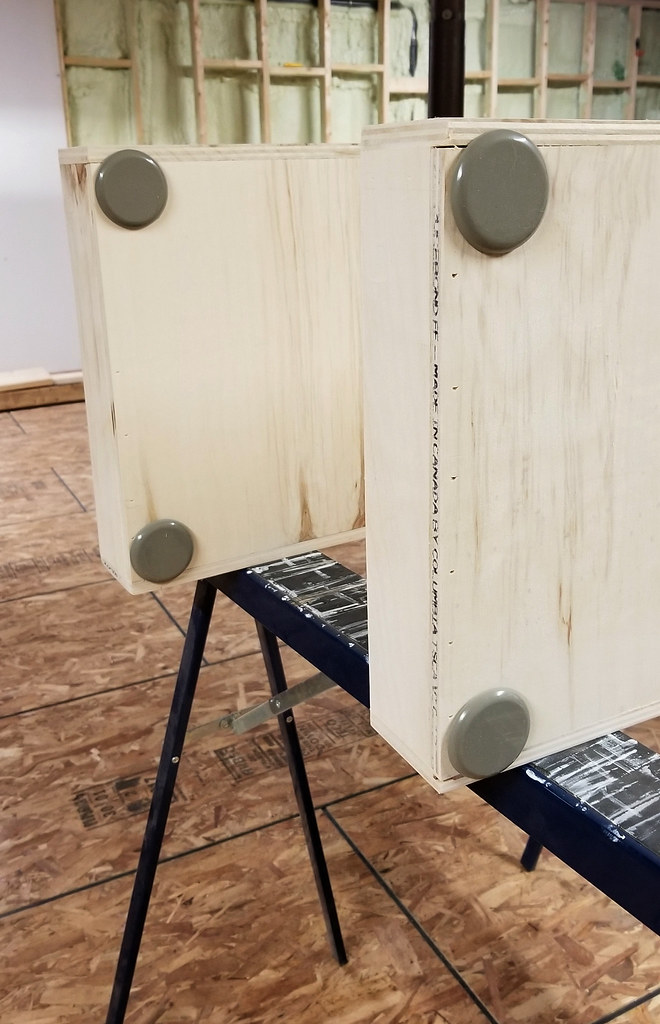
I stained the visible sides (front of drawers and side edge at the foot of the bed) a dark Jacobean brown to blend with the bed frame and then added 2" furniture sliders to the bottom corners so that the drawers don't get caught on the carpet.
Tom liked them so much that he built some for his side of the bed too. I think he's hoping I forget about them and he won't ever have to wear dress shoes. I'm just glad I don't have to look at his big ol' sweaty sandals anymore. :-)
Labels:
carpentry,
storage,
under bed,
weekend project
Nov 23, 2018
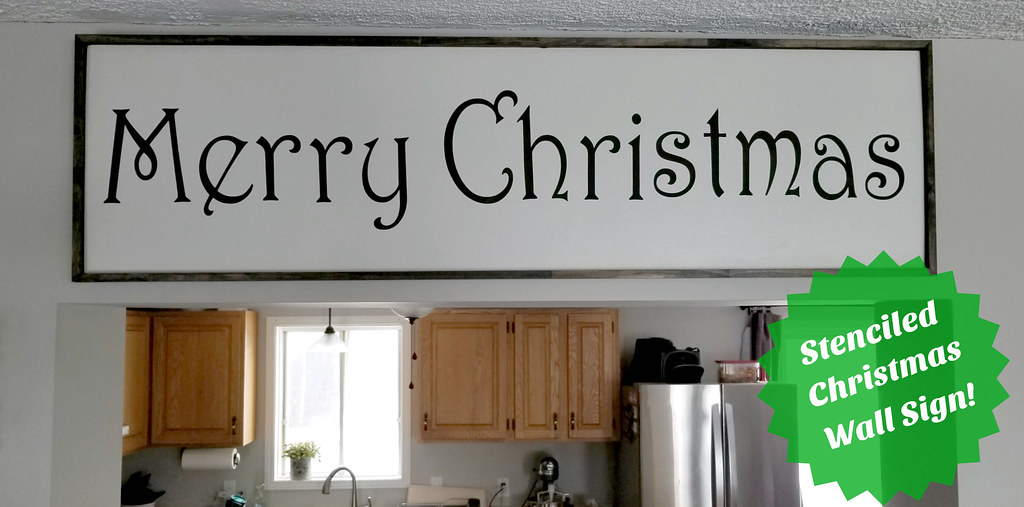
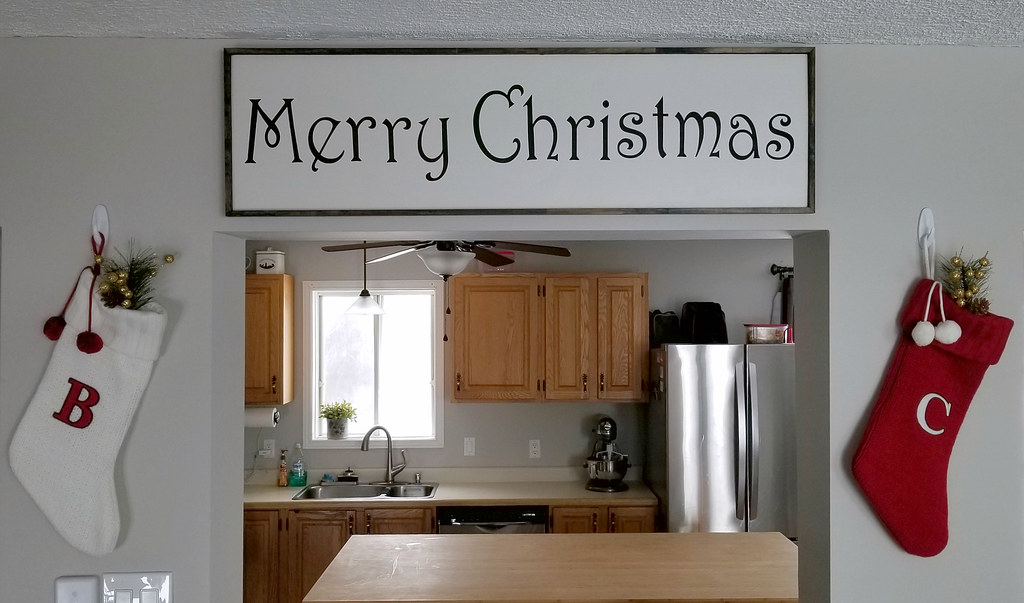
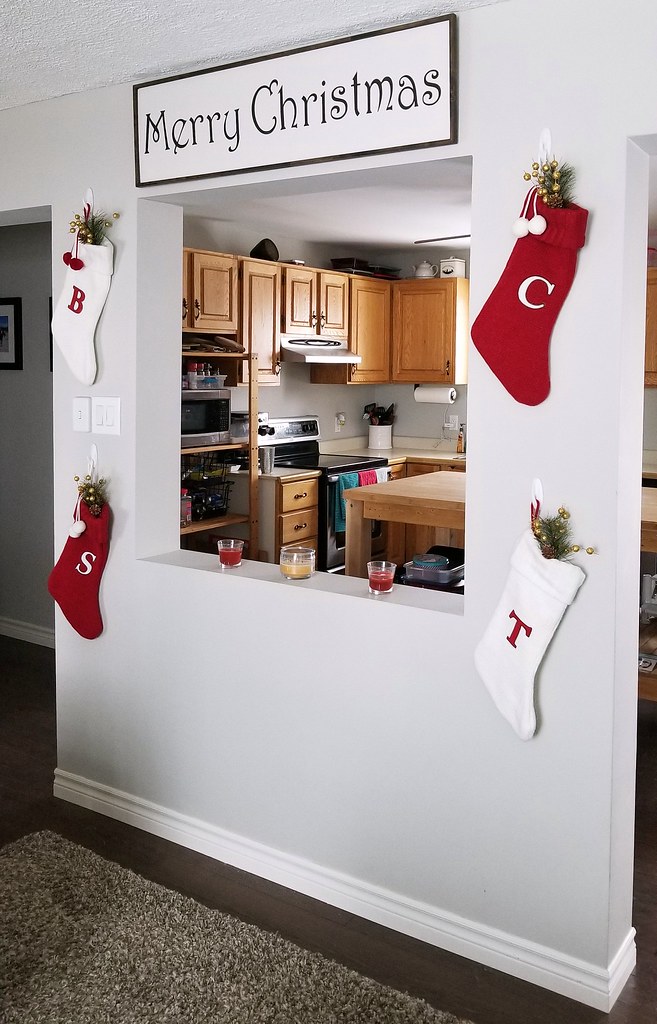
Merry Christmas Stenciled Wall Sign (Silhouette/Cricut)
More holiday decorations today. After slacking off the last couple of years, I vowed that this year I would complete all of the crafty projects I have saved up.
I made this sign for my house back in October and I've been waiting so impatiently to share it with you! The build is pretty easy - the most time-intensive part is placing the stencil.
You will need:
1 - 1x12 board - 42" long
2 - 1-1/4 x 3/8 trim pieces - cut at 45 degrees - 42.75" longest point to longest point
2 - 1-1/4 x 3/8 trim pieces - cut at 45 degrees - 12.75" longest point to longest point
Also:
Merry Christmas stencil (cut with Silhouette/Cricut/by hand)
Paint/stain
Brad nailer and brad nails or driver and screws
Miter saw
French cleat for hanging (optional)
Cut your sign board and sand it smooth on the face and edges. Cut your trim strips for the border at a 45 degree angle.
Paint one side of the board in your chosen colour. I mixed BM Edgecomb Gray with plain white paint to lighten it up. Stain your trim pieces in a contrasting colour. I chose Minwax Jacobean.
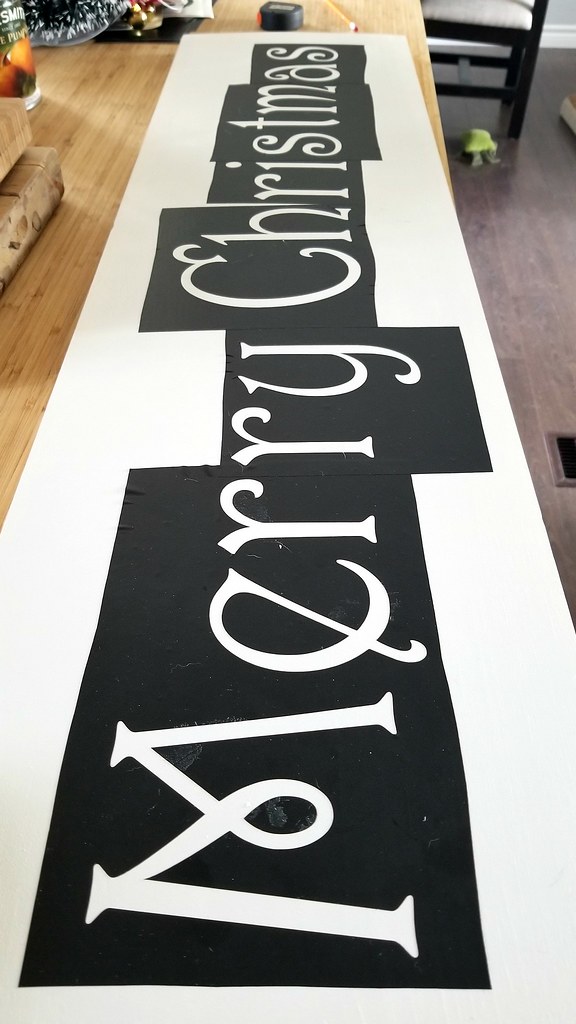
I used my Silhouette Cameo cutter to cut the words from vinyl. The font type is called Harrington. My vinyl is only 12" wide so I had to cut the words out in pieces, a few letters at a time.
Once you have your stencil cut, arrange it on your sign board so that the spacing is even. My vinyl is peel and stick, so the letters stay securely in place.
A trick to keep your letters sharp is to paint along the inside edges of the letters in your background colour first. This forms a seal to keep your top colour from bleeding around the edges.
I painted the letters with dark brown poster paint - several thin coats, letting it dry completely between coats.
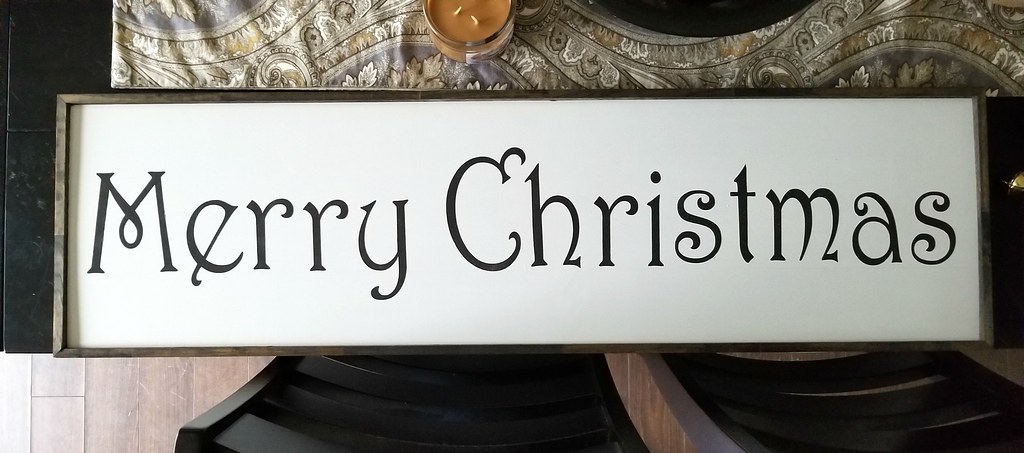
Once your letters are completely dry, peel off your stencil and do any touchups necessary. Nail your trim pieces onto the edges of the board, keeping them flush with the back and with a slight overhang at the front. Squeeze or clamp them tightly together when you nail the corners.
Nov 19, 2018
Holiday Wreaths
A cheery front door just sets the tone for the rest of the house. Today I'd like to share with you a roundup of holiday wreath ideas. Some are my own and some are beautiful creations I've found around the internet. Click on any photo to go to the original post.
This simple wreath is made entirely of items you can find at the dollar store. The cinnamon pine cones ensure that a lovely scent greets you right from the start. I made this wreath several years ago and still bring it out year after year.
This simple wreath is made entirely of items you can find at the dollar store. The cinnamon pine cones ensure that a lovely scent greets you right from the start. I made this wreath several years ago and still bring it out year after year.
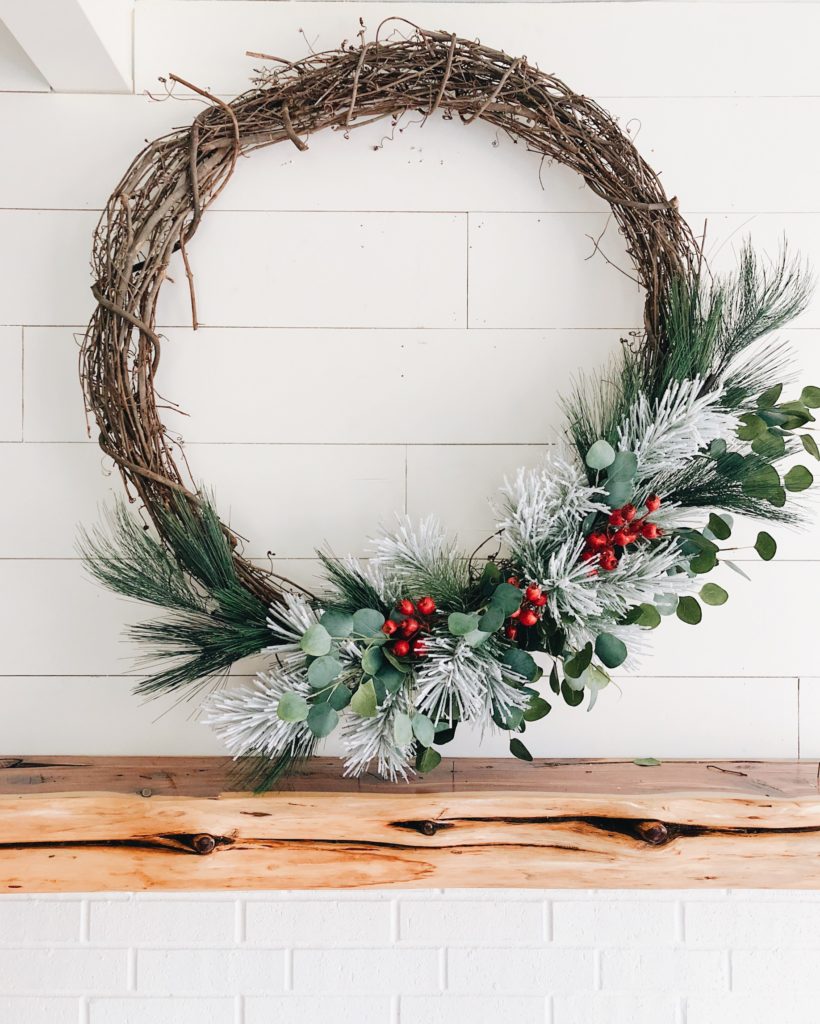
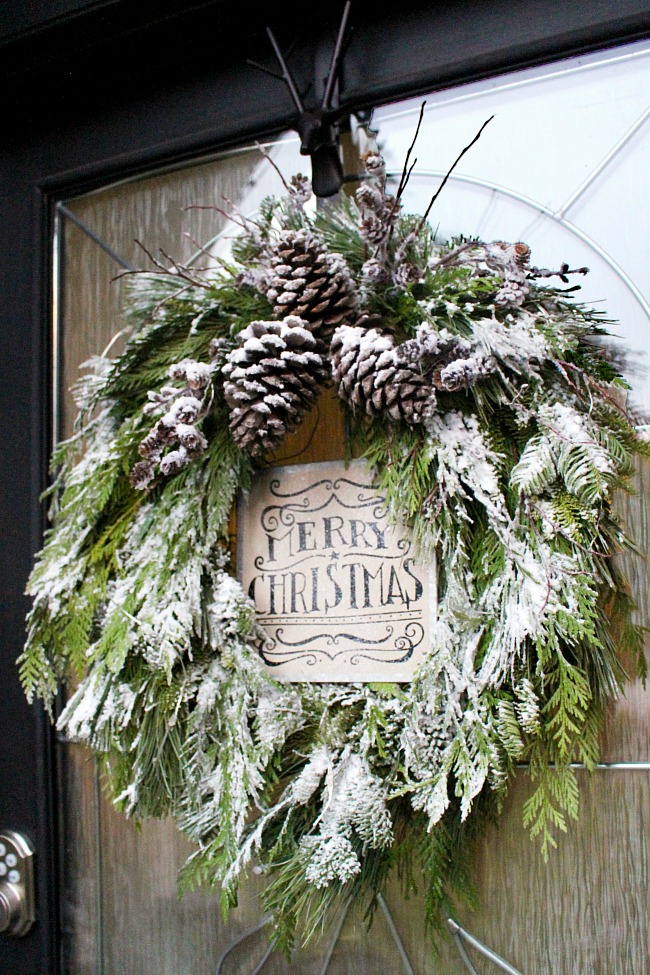
This wreath has a deceptive simplicity. The more you look at it, the more details you discover. There are at least six different types of greenery, and the white stems and red berries tie it all together.
This wreath started out with just greenery and pinecones. I gave it a boost by weaving in strips of burlap and bunches of green berries.
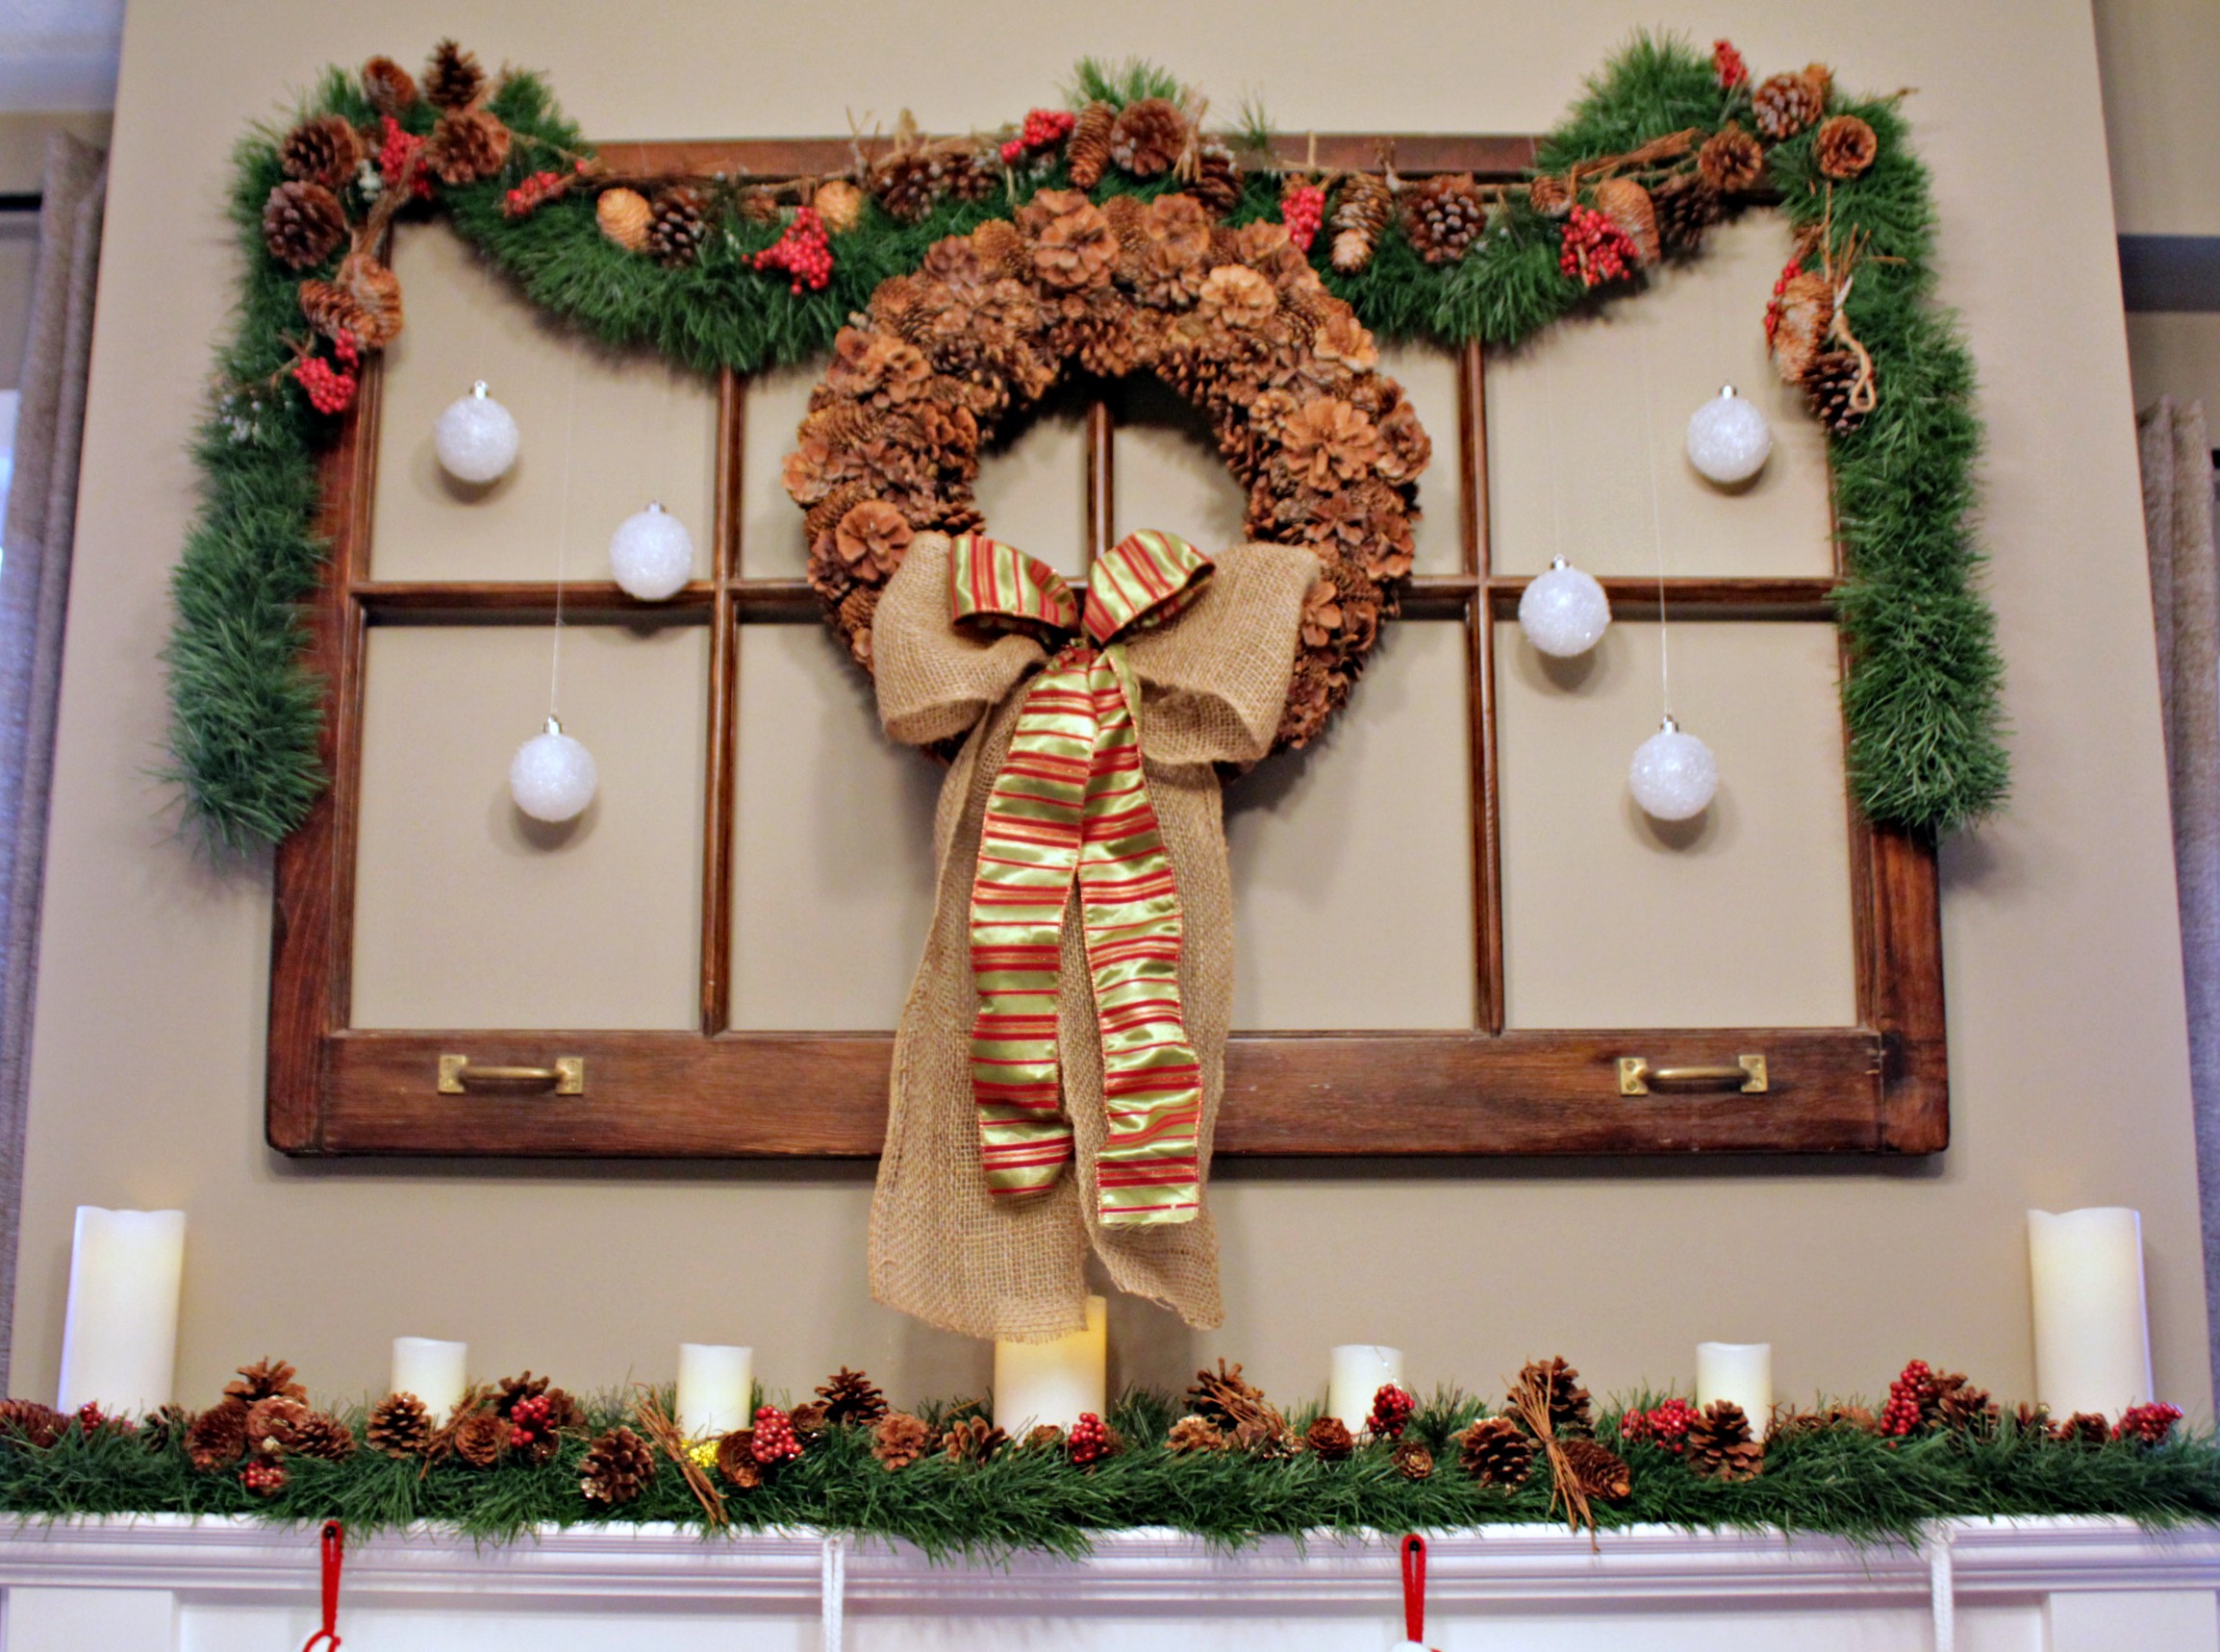
Your wreath doesn't always have to be on the front door. This pinecone-heavy wreath gets lightened up with the addition of snowball ornaments plus gold and burlap ribbons. The window frame turns it into a holiday vignette. This was my absolute favourite wreath display and I miss having a fireplace to decorate.
This wreath goes heavy on the greenery and has a lovely country farmhouse feel. If you're lucky enough to have a wooded area nearby, you can collect your own branches and pinecones.
Sometimes a wreath goes through many adjustments before its final incarnation. This one started out as a pool noodle. I loosely wrapped burlap around it like a sock and used it for an autumn wreath. For Christmas, I attached soft garland, pinecones, and ribbon. The final touch was a set of sleigh bells.
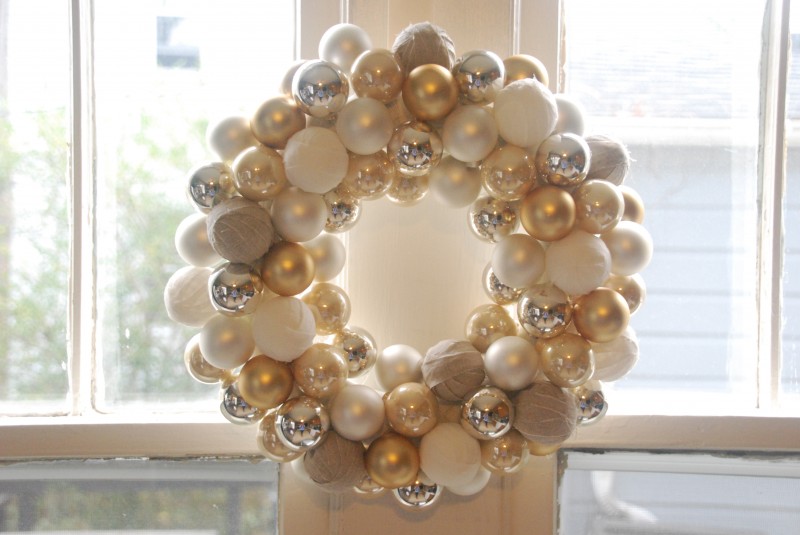
One last wreath. I adore this bright and shiny ornament wreath. Buy inexpensive plastic balls so that you don't have to worry about it getting bumped and breaking. Use ornaments with different sheens and textures to give a natural look.
Nov 16, 2018
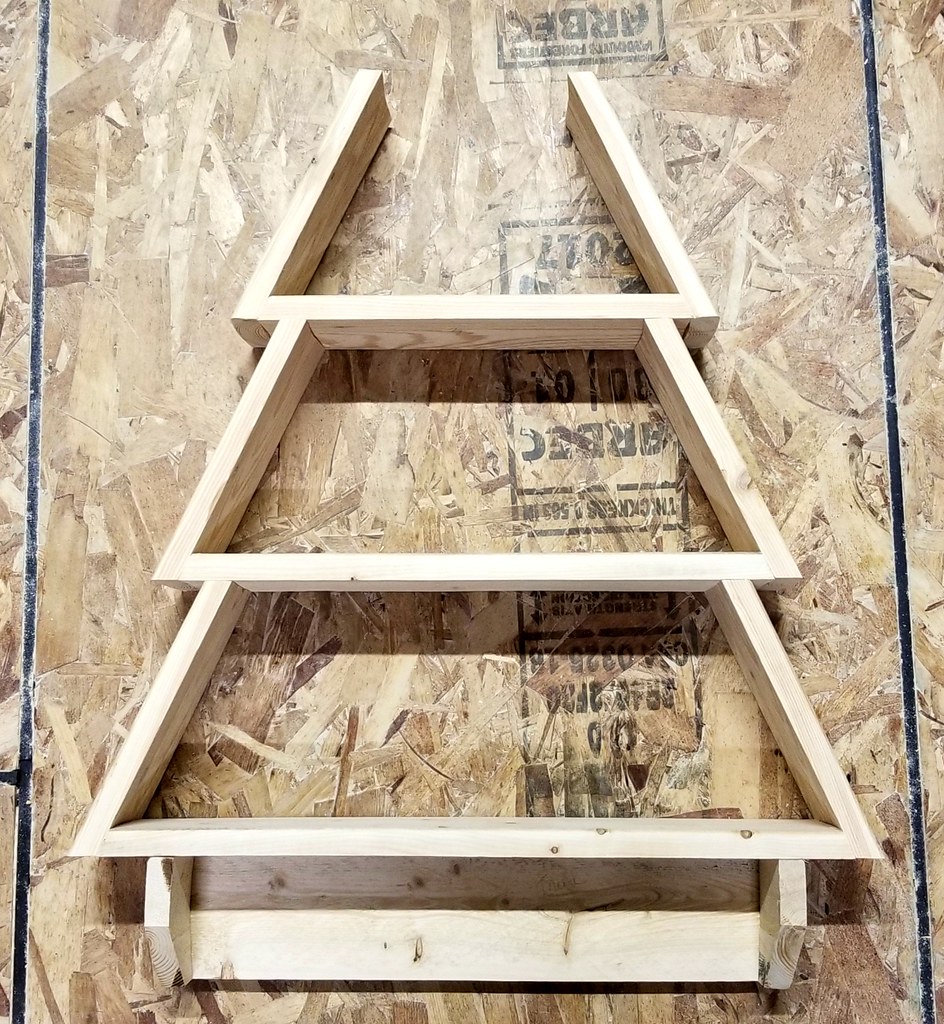
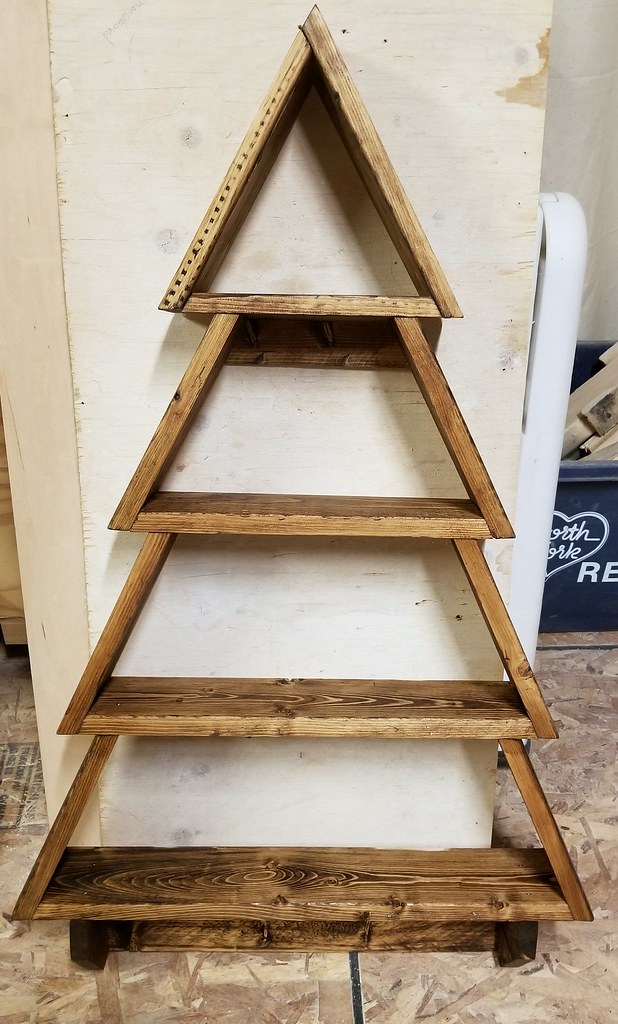
DIY Holiday Tree Wall Shelf
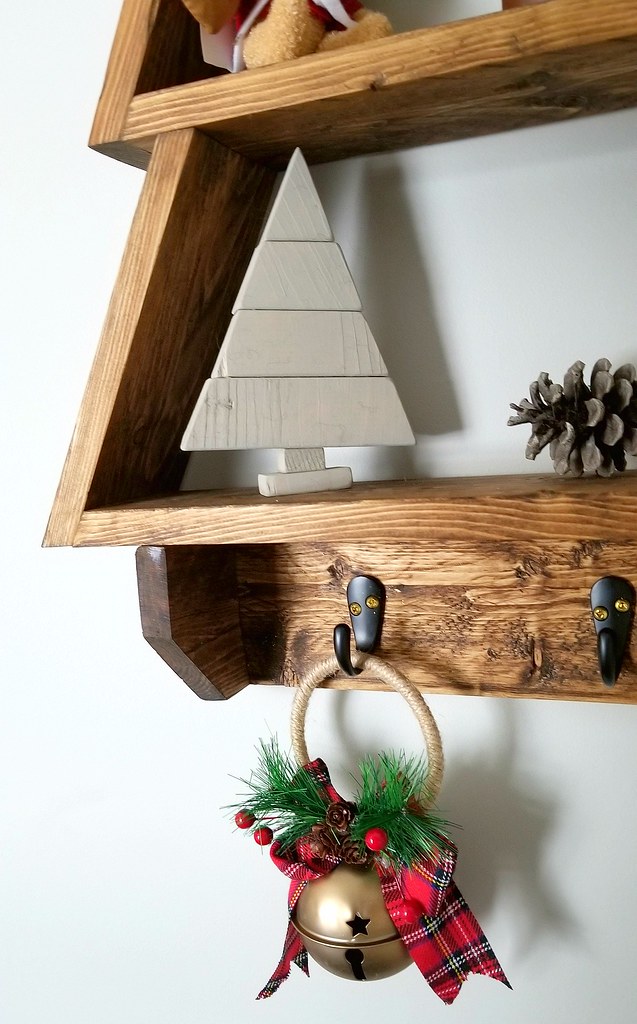
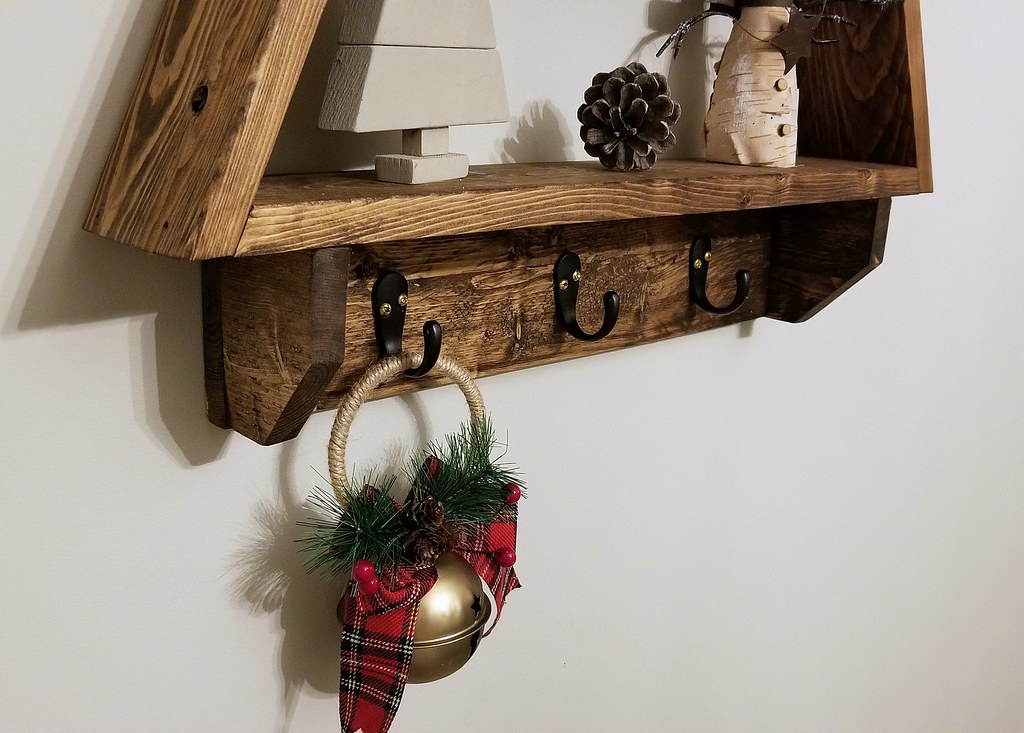
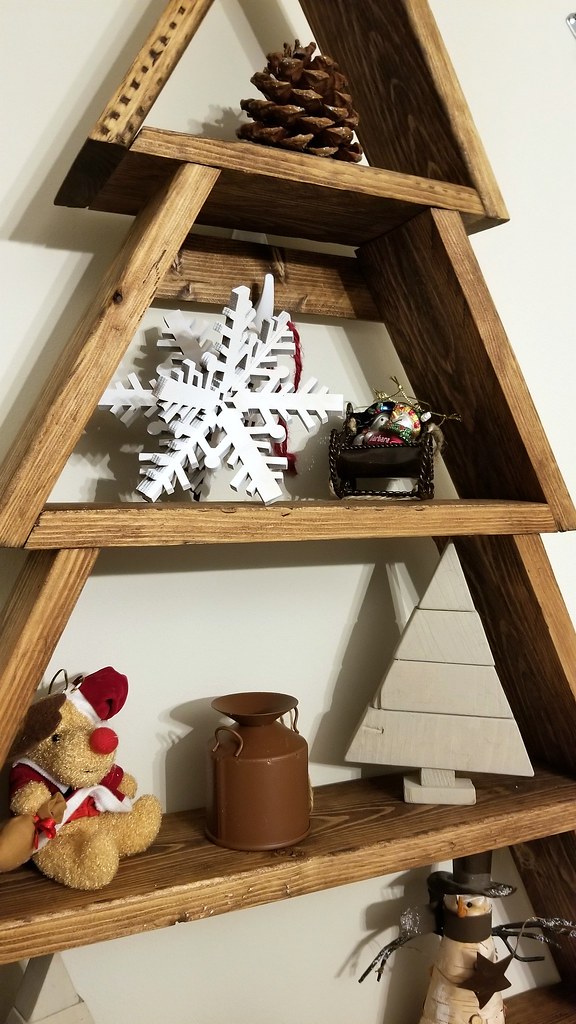
I want to share a Christmas woodworking project with you today - this adorable tree-shaped wall shelf!
My inspiration comes from Jaime Costiglio, and her inspiration came from Pottery Barn Kids - apparently you could buy something similar a few years ago for $79! Mine cost a whopping $7 for the hooks because I used discarded pallet wood plus stain that I already had in my stash.
The plans can be found on Ana White's site - she has excellent drawings that show more than my photos can.
Here is the cut list, directly from her site:
TRUNK
1 - 1x4 @ 16-1/4"2 - 1x4 @ 3-1/2"MAIN TREE1 - 1x4 @ 18-3/4" longest point to longest point both ends cut at 25 degrees off square6 - 1x4 @ 7-1/2" long point to short point, both ends cut at 25 degrees off square1 - 1x4 @ 15-1/8" longest point to longest point both ends cut at 25 degrees off square1 - 1x4 @ 11-3/8" longest point to longest point both ends cut at 25 degrees off squareTREETOP1 - 1x4 @ 7-3/4" long point to long point, both ends cut at 30 degrees off square1 - 1x4 @ 8-5/8" long point to long point, both ends cut at 30 degrees off square1 - 1x4 @ 9-1/2" long point to long point, both ends cut at 30 degrees off squareScrap 1/2" plywood for filling in second shelf approximately 6" x 15"
1-1/4" brad nails and nailer (air nailer), or screws and a drill/driver
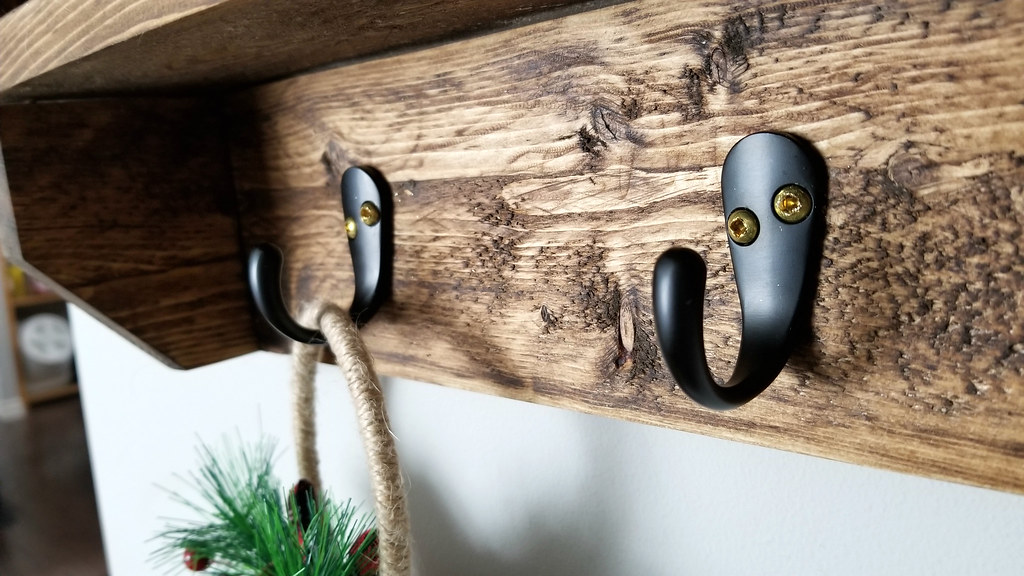
3 hooks
wood stain or paint
I usually cut and assemble as I go, just to make sure it fits together. But this time I made all my cuts first, and these measurements were spot on.
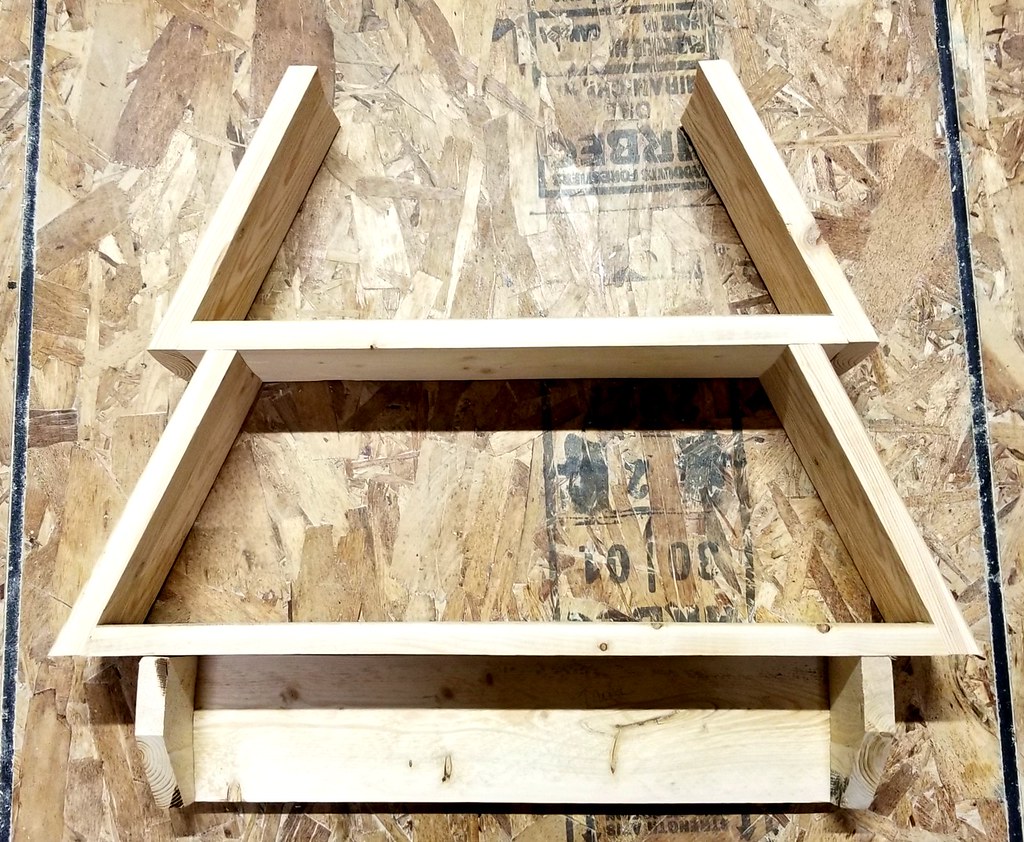
Start your assembly from the bottom, attaching the two side supports of the "trunk" to the back. The supports attach to the outside edges of the back piece, not to the front of it (A mistake I made the first time. Because of this I had to cut down the supports as they stuck out the front.)
You then build upwards, starting with the longest board for the main tree. Nail or screw it directly on top of the three-sided trunk you've built already. Follow this with two angled side boards, attached to the long board on the outer edges.
Then the middle board, two sides, the top board, and two more sides.
The treetop fits together kind of like a puzzle. I'm going to refer you to Ana's drawing again.
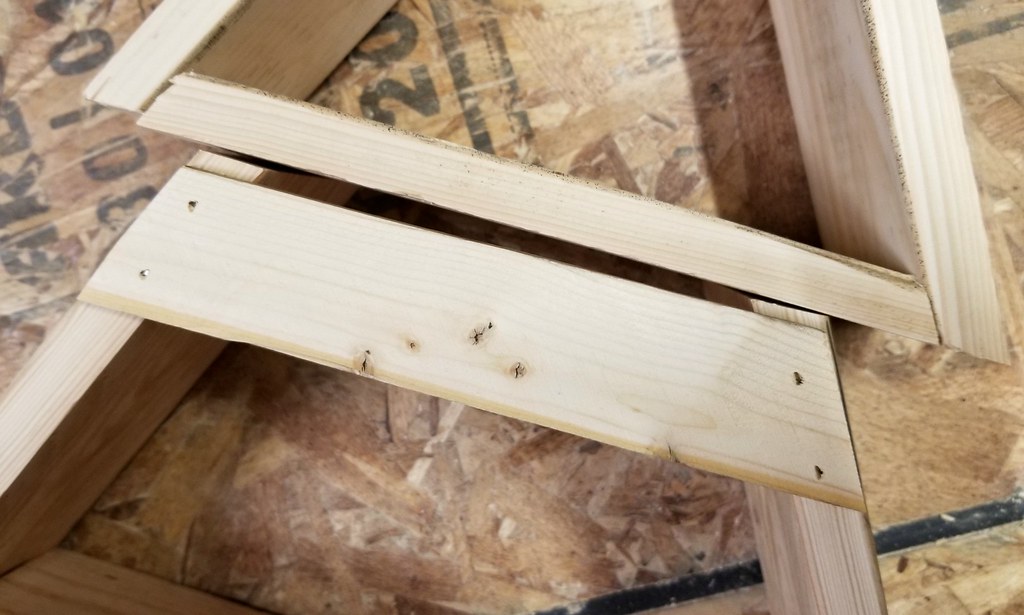
The final step before hanging is to attach a thinner piece of wood to the back to give you a place to mount it to the wall. I took a thin strip of scrap wood - about the size of a paint stirrer, put it across the back of the tree, traced the angles, and cut it to size. I then attached it to the tree with brad nails.
I stained the tree shelf with Minwax's Provincial stain and a soft cloth. I might also wax it but I haven't decided yet.
And there's your tree! Attach your hooks along the face of the trunk with 1/2" screws.
The decorations I used were scrounged from the ornament boxes. The two little trees were made from scraps from another project. I made them back when I was afraid of the power tools and just put them together with hot glue! The pine cones are from our property - the top one has glitter on it and is from this mantel project.
Nov 12, 2018
Holiday Gift Guide
As hard as we try to fight it, the holiday season is upon us. Here in Canada, since Thanksgiving is near the beginning of October, once Halloween is over it's full steam ahead to Christmas.
With that in mind I've put together some of my favourite gift ideas in the three categories I talk about most here on the blog - home décor, workshop tools, and pets. Some are items I already own and love, others are items that are on my wish list this year.
For the Handyperson
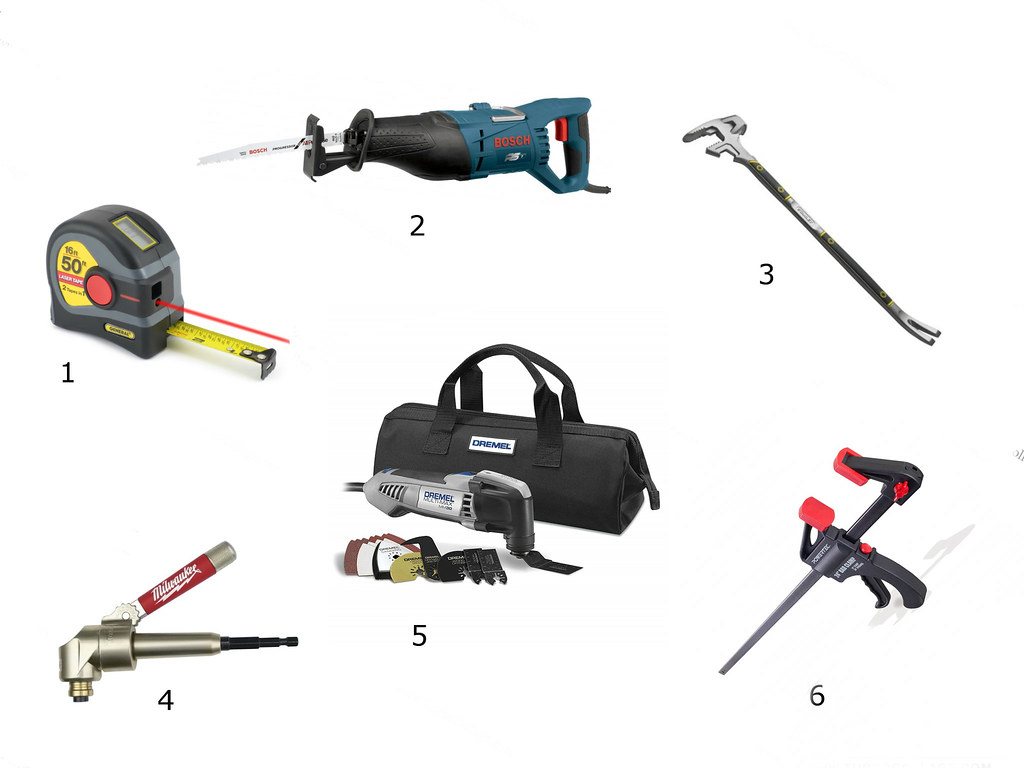
1. Know the precise measurement and keep your work level with this digital measuring tape with laser level.
2. A reciprocating saw makes cutting drywall, framework, or even metal pipe a breeze.
3. I just learned of this utility bar recently. It's a crowbar, board bender, wrench, and hammer all in one.
4. When I told Tom that I was adding this right angle drill attachment to the gift guide, his response? "I use mine all the time." 'Nuff said.
5. For fine cutting, grinding, and sanding, the Dremel MultiMax is the leader.
6. You can never have too many bar clamps. It's a fact.
With that in mind I've put together some of my favourite gift ideas in the three categories I talk about most here on the blog - home décor, workshop tools, and pets. Some are items I already own and love, others are items that are on my wish list this year.
For the Decor Enthusiast
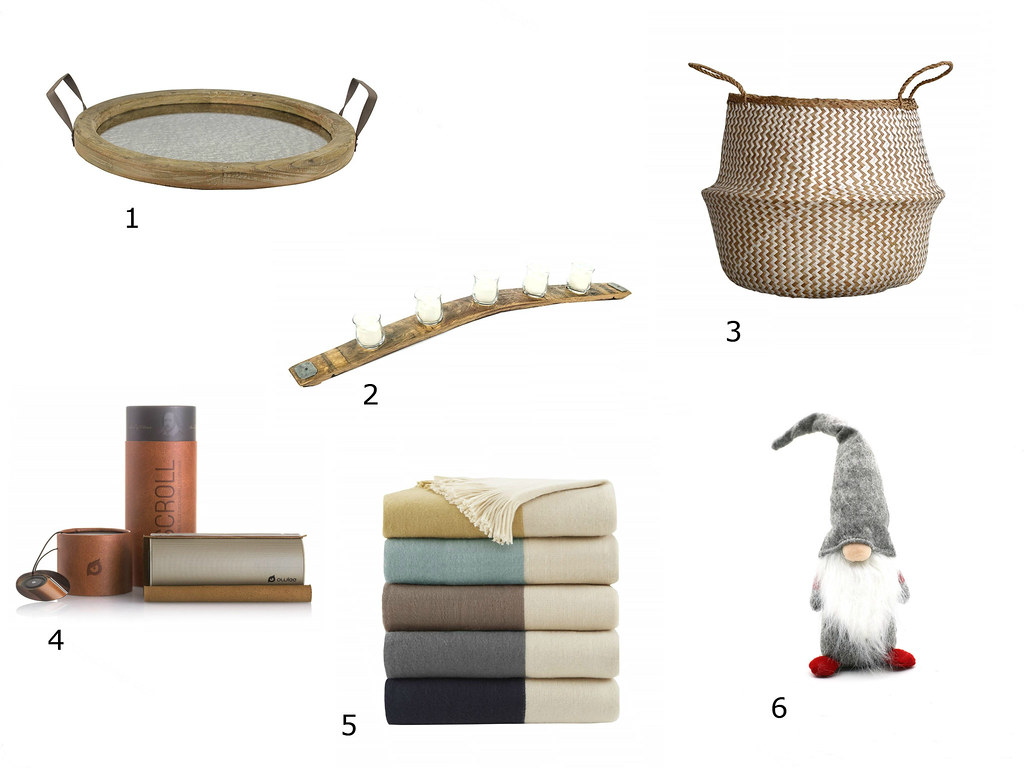
1. This rustic butler's serving tray is perfectly oversized and has a mirrored center.
2. Take your love of wine to the next level with a wine barrel stave candleholder.
3. Woven seagrass baskets of all sizes - to keep your belongings contained and beautiful.
4. For music indoors and out, this wireless bluetooth speaker is powerful and stylish.
5. Faux cashmere throws are just as cozy as the real thing. And getting dog hair on them won't make you cry.
6. Everyone needs a 16" felt gnome in their life, don't they? I know I do.
For the Handyperson
1. Know the precise measurement and keep your work level with this digital measuring tape with laser level.
2. A reciprocating saw makes cutting drywall, framework, or even metal pipe a breeze.
3. I just learned of this utility bar recently. It's a crowbar, board bender, wrench, and hammer all in one.
4. When I told Tom that I was adding this right angle drill attachment to the gift guide, his response? "I use mine all the time." 'Nuff said.
5. For fine cutting, grinding, and sanding, the Dremel MultiMax is the leader.
6. You can never have too many bar clamps. It's a fact.
For the Dog Lover
1. Try this travel container that holds both water and treats on your next walk.
2. This leash comes with a high-high speed frog connector and an adjustable length for more control.
3. For the extreme dog lover who's never met a dog they didn't want to pet - this t-shirt says it all.
4. Your dog deserves to be cozy too. This boyfriend sweater is stylin'.
5. I will praise the Jive Ball all.day.long. They last for years and the company guarantees them.
6. A bolster bed gives your dog a place to rest their chin as they watch the world crazy humans around them.
Hopefully I've given you some ideas to start (or finish) your shopping.
Happy Holidays!
Nov 9, 2018
DIY Wood and Metal Plant Stand
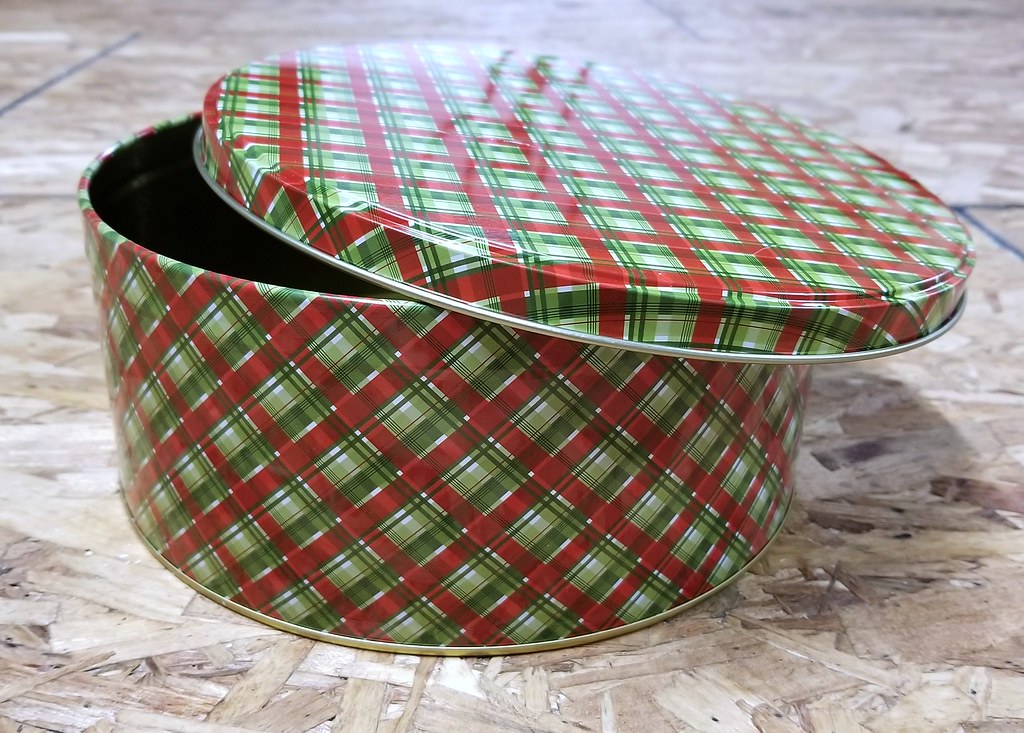
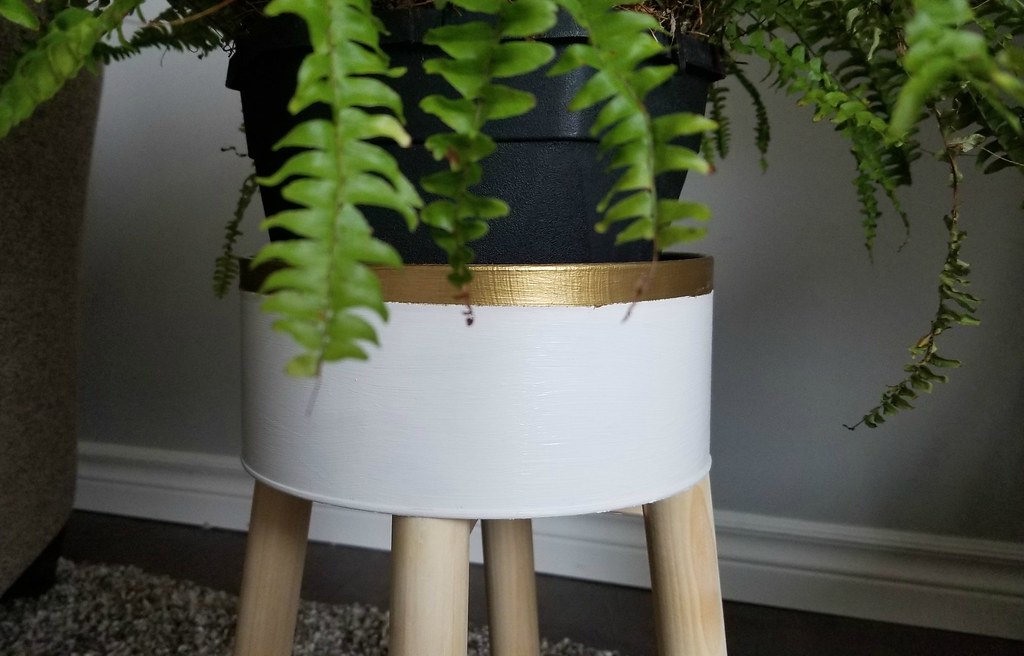
Have you ever seen an item in a store, fell in love, put it in your cart, and then realized you could make it yourself for a fraction of the price? That happened to me this week when I was at Walmart. I saw an adorable plant stand and had it halfway to my basket when it hit me - this is just a cookie tin with dowel legs. I can do that!
And so we have my latest creation:
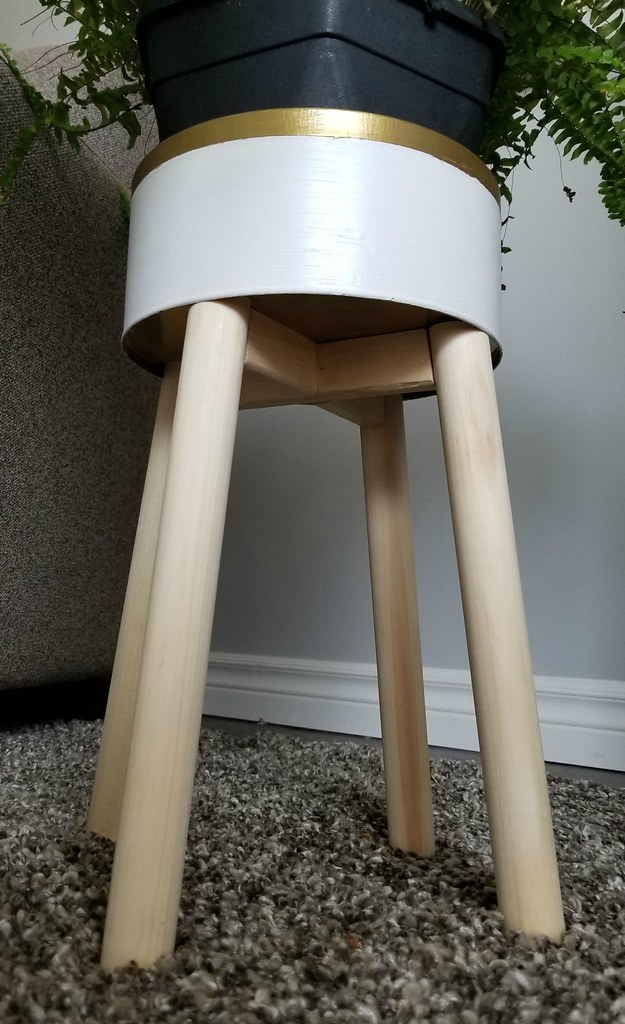
I bought the largest cookie tin I could find at the dollar store, and an 8-foot 1-1/4" dowel at the big box store. Total price - $10.50. And that's with 4 feet of dowel left over for another project. I used scrap wood for the cross pieces that go between the dowels - the same partially-rounded boards that I used on the ironing board holder.
For this project you will need:
1 - 8.5" cookie tin
4 - 12" dowels (1-1/4" diameter) - cut them a little longer to account for the angle
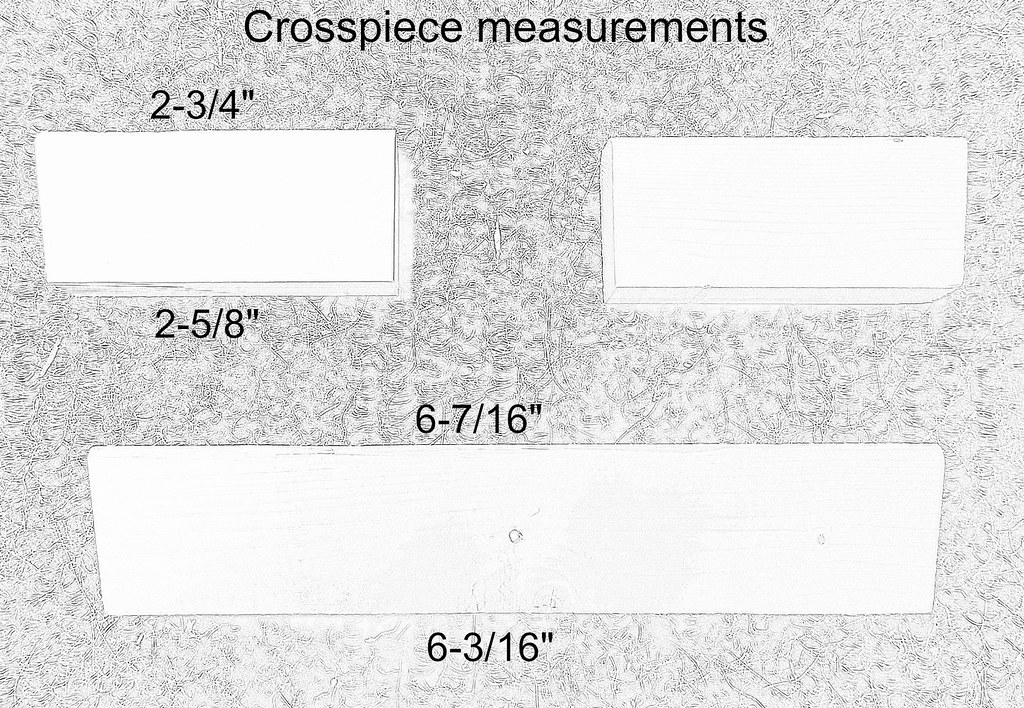
1 - 1-1/4" x 3/4" crosspiece with angles at both ends (see drawing for lengths)
2 - 1-1/4" x 3/4" crosspieces with angles at one end (see drawing for lengths)
screws, brad nails
spray paint
Tools I used:
miter saw
drill with countersink bit
air nailer
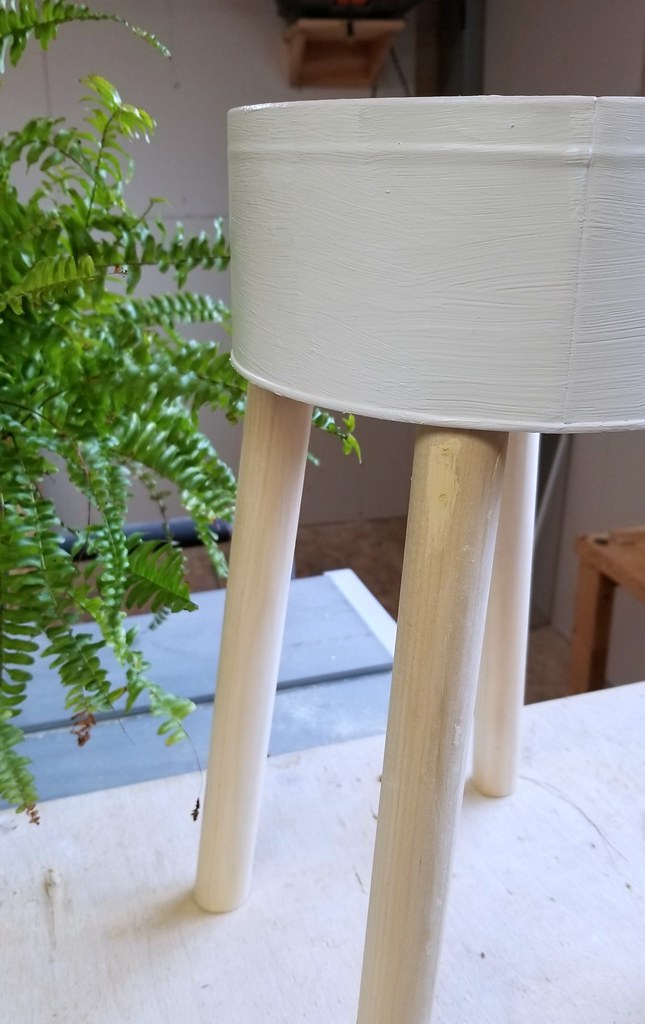
First I spray painted the cookie tin inside and out. It doesn't have the fancy scalloping pattern that the original has, but I can live with a plain stand. I could even stencil something on at a later date.
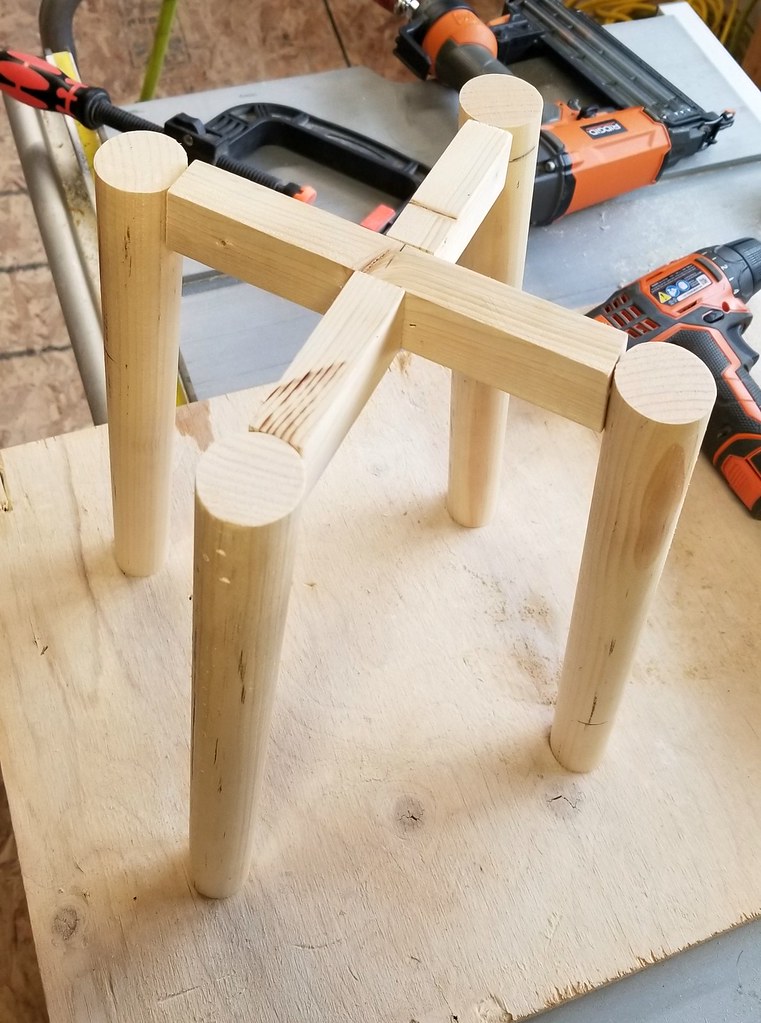
I wanted the legs to be about 12 inches long when finished, so I cut them to 13 inches, just to give myself some wiggle room for the angles. Through a little trial and error, I settled on a 7 degree angle. That gives the stand some stability without the legs sticking out too far to the sides. The cross pieces are also cut at a 7 degree angle so that they fit snugly against the legs.
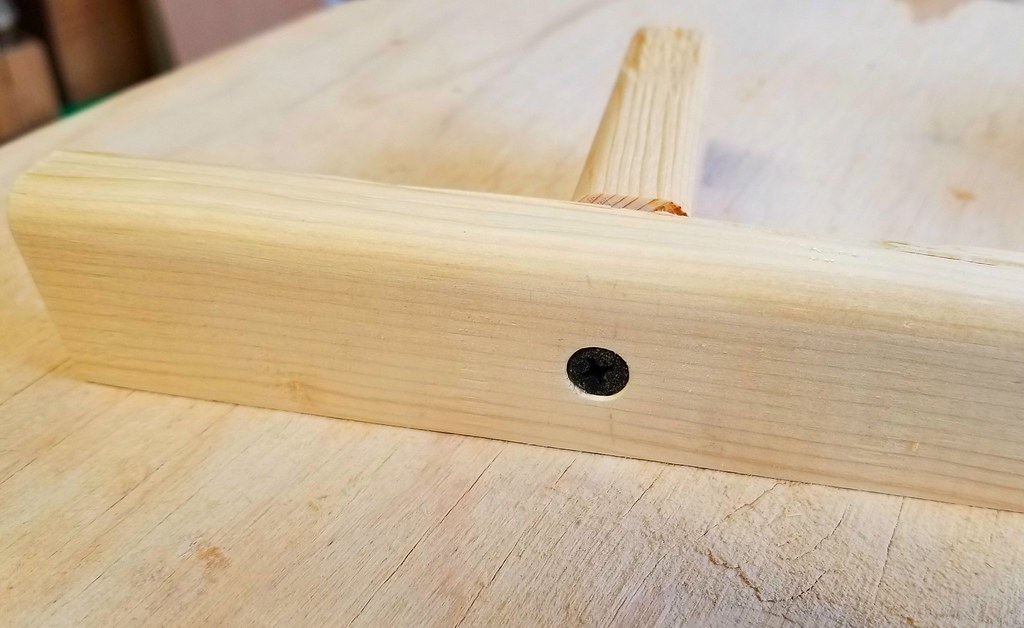
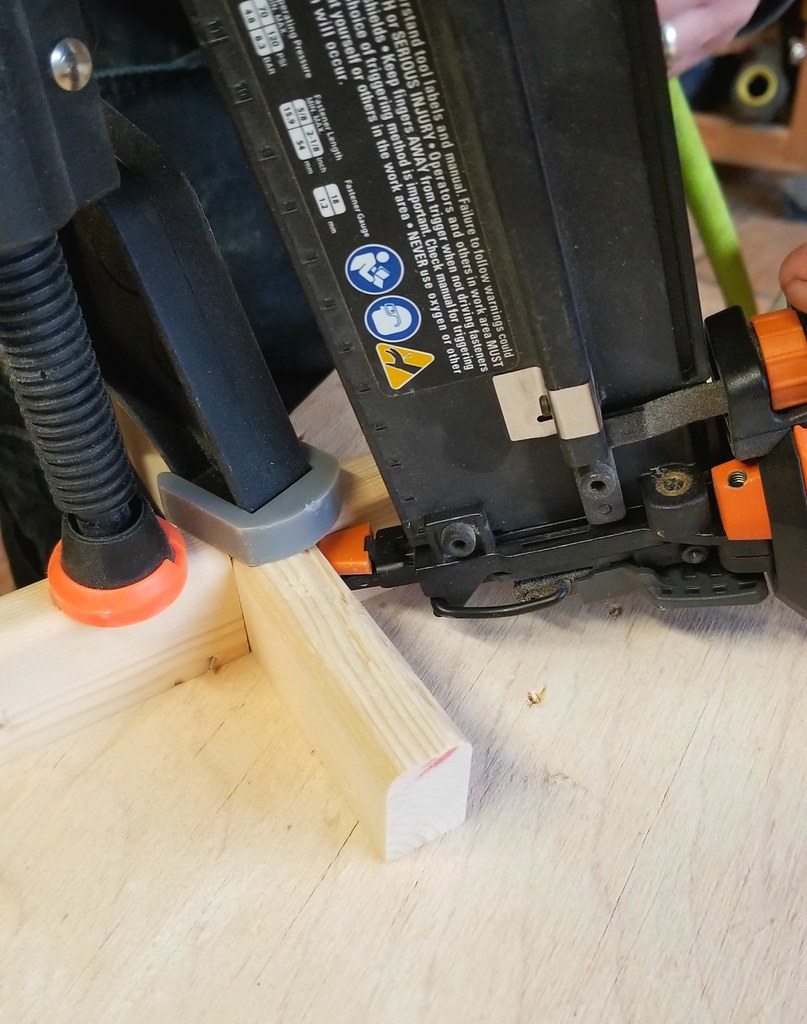
One of the shorter crosspieces was attached to the longer one with a countersunk screw. The other short crosspiece was then attached with two brad nails, one through each side. Clamping them together makes is easier to keep them lined up while nailing.
Once the crosspieces were secured, the legs needed to be attached. I flipped the tin over, put the crosspiece in the center, and held two of the legs in place while Tom nailed them to the crosspiece with two brad nails each. Then I held the other two legs in place and he nailed them in place as well.
The base can now stand on its own.
The tin went back up on the legs and I marked the position of each leg on the inside bottom of the tin. Using a small drill bit, I drilled a pilot hole in each spot.
The last step was to attach the tin to the base with 4 white pan head screws.
I puttied the nail holes on the legs, sanded all of the wood, and did a bit of paint touch-up around the screw heads. I also added felt feet to the bottom of the legs to keep them from scratching the floor.
I decided to leave the wood unfinished instead of staining it. I like the Scandinavian feel of the pale poplar and white together. However I did add a gold painted band around the top.
Subscribe to:
Comments (Atom)


