SEARCH THE BLOG

Showing posts with label furniture. Show all posts

Nov 9, 2018

DIY Wood and Metal Plant Stand

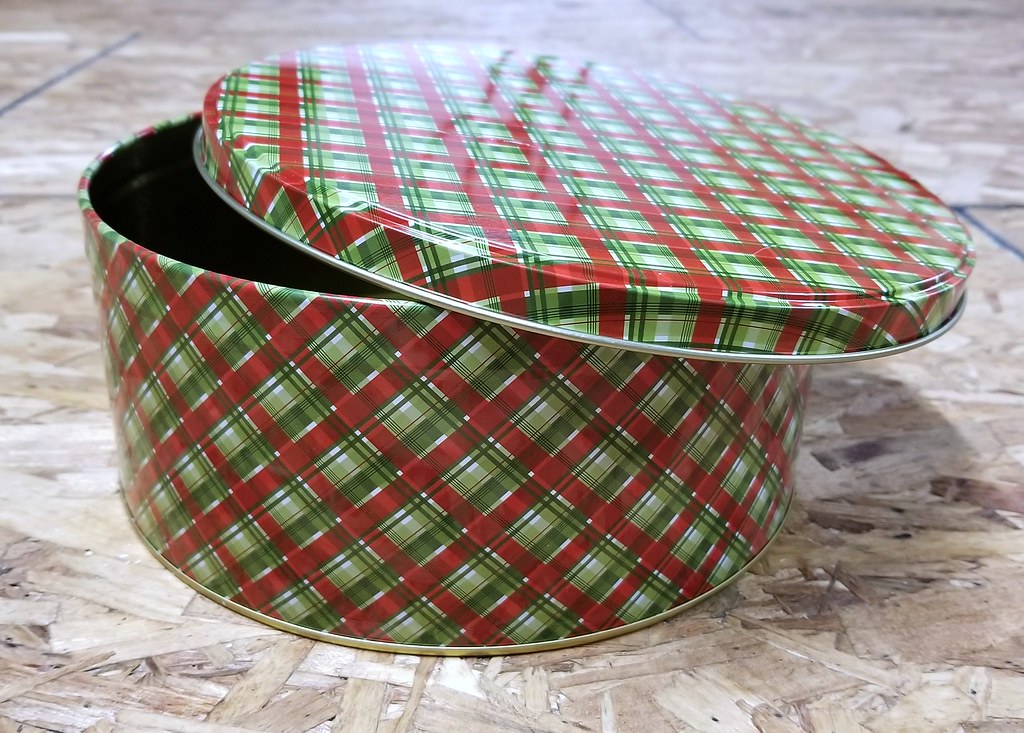
Have you ever seen an item in a store, fell in love, put it in your cart, and then realized you could make it yourself for a fraction of the price? That happened to me this week when I was at Walmart. I saw an adorable plant stand and had it halfway to my basket when it hit me - this is just a cookie tin with dowel legs. I can do that!

And so we have my latest creation:

DIY wood & metal plant stand

I bought the largest cookie tin I could find at the dollar store, and an 8-foot 1-1/4" dowel at the big box store. Total price - $10.50. And that's with 4 feet of dowel left over for another project. I used scrap wood for the cross pieces that go between the dowels - the same partially-rounded boards that I used on the ironing board holder.

DIY wood & metal plant stand


For this project you will need:

1 - 8.5" cookie tin
4 - 12" dowels (1-1/4" diameter) - cut them a little longer to account for the angle
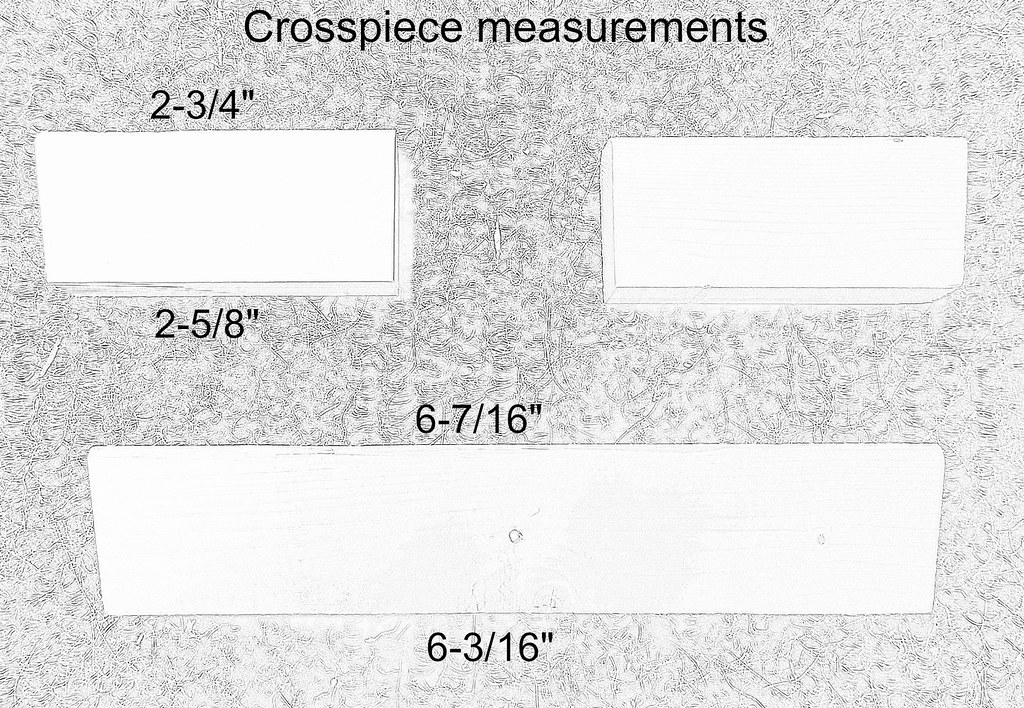
1 - 1-1/4" x 3/4" crosspiece with angles at both ends (see drawing for lengths)
2 - 1-1/4" x 3/4" crosspieces with angles at one end (see drawing for lengths)
screws, brad nails
spray paint

Tools I used:
miter saw
drill with countersink bit
air nailer

DIY wood & metal plant stand

First I spray painted the cookie tin inside and out. It doesn't have the fancy scalloping pattern that the original has, but I can live with a plain stand. I could even stencil something on at a later date.

I wanted the legs to be about 12 inches long when finished, so I cut them to 13 inches, just to give myself some wiggle room for the angles. Through a little trial and error, I settled on a 7 degree angle. That gives the stand some stability without the legs sticking out too far to the sides. The cross pieces are also cut at a 7 degree angle so that they fit snugly against the legs.

DIY wood & metal plant stand

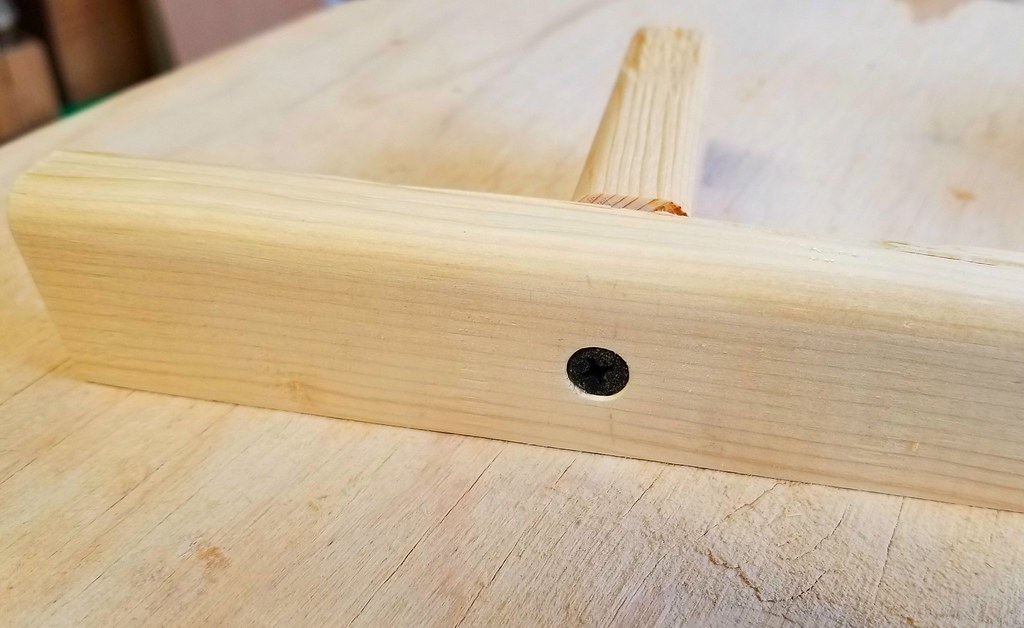
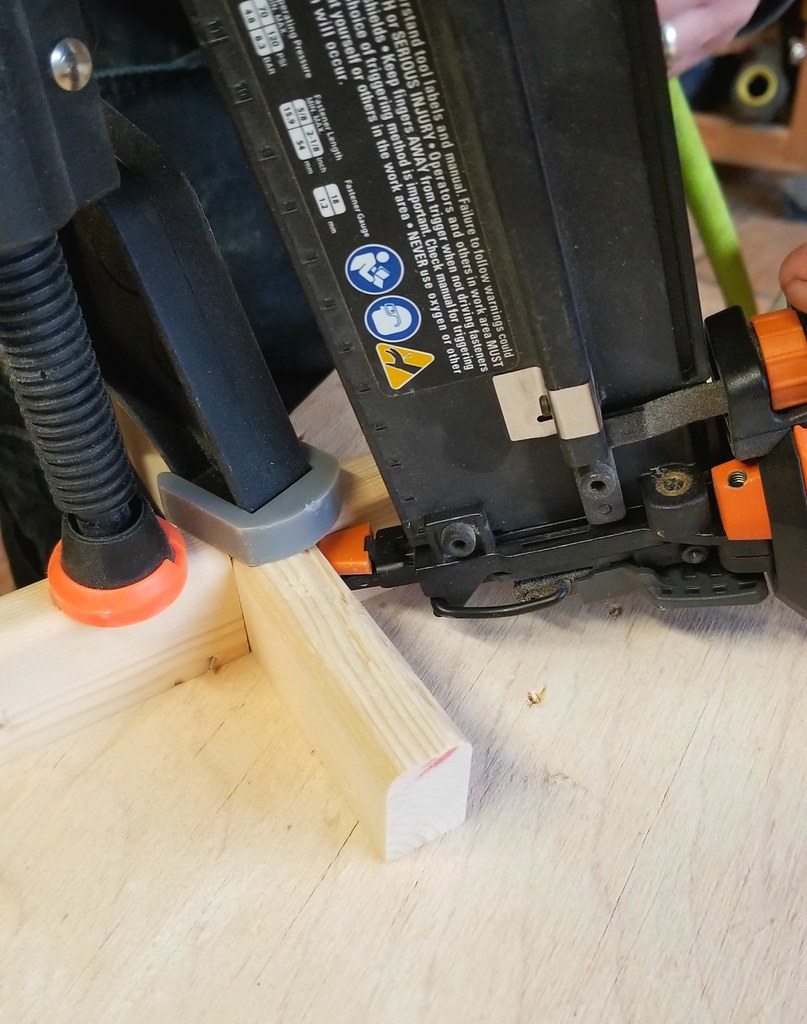
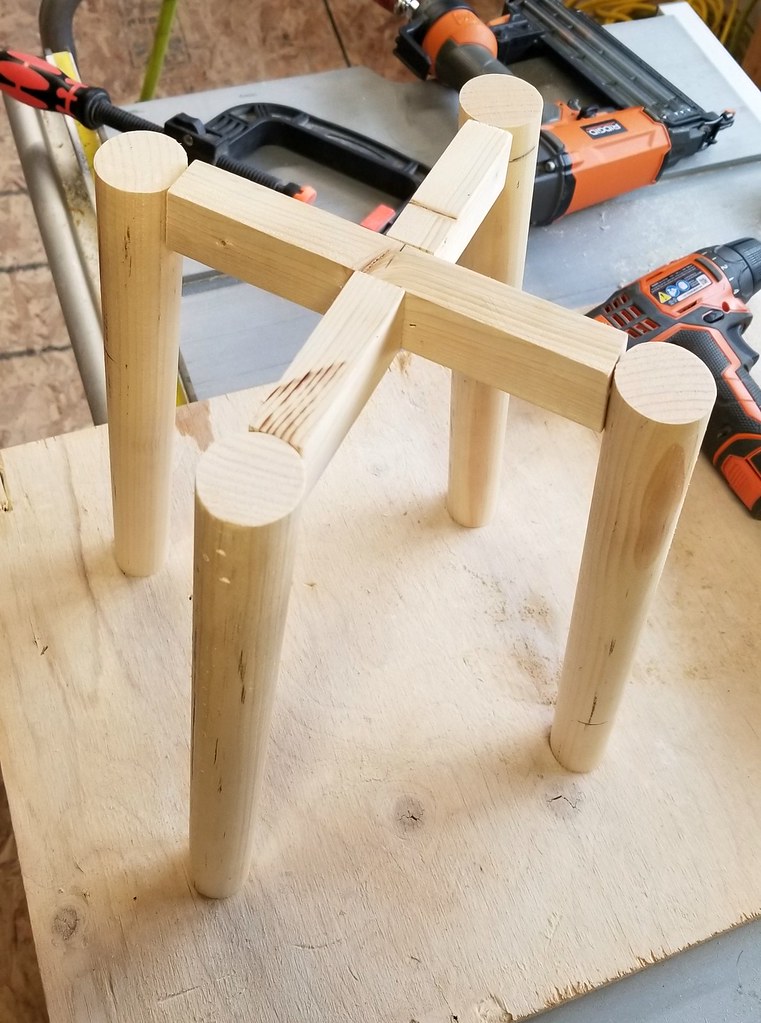
One of the shorter crosspieces was attached to the longer one with a countersunk screw. The other short crosspiece was then attached with two brad nails, one through each side. Clamping them together makes is easier to keep them lined up while nailing.

DIY wood & metal plant stand

Once the crosspieces were secured, the legs needed to be attached. I flipped the tin over, put the crosspiece in the center, and held two of the legs in place while Tom nailed them to the crosspiece with two brad nails each. Then I held the other two legs in place and he nailed them in place as well.

DIY wood & metal plant stand

The base can now stand on its own.

DIY wood & metal plant stand

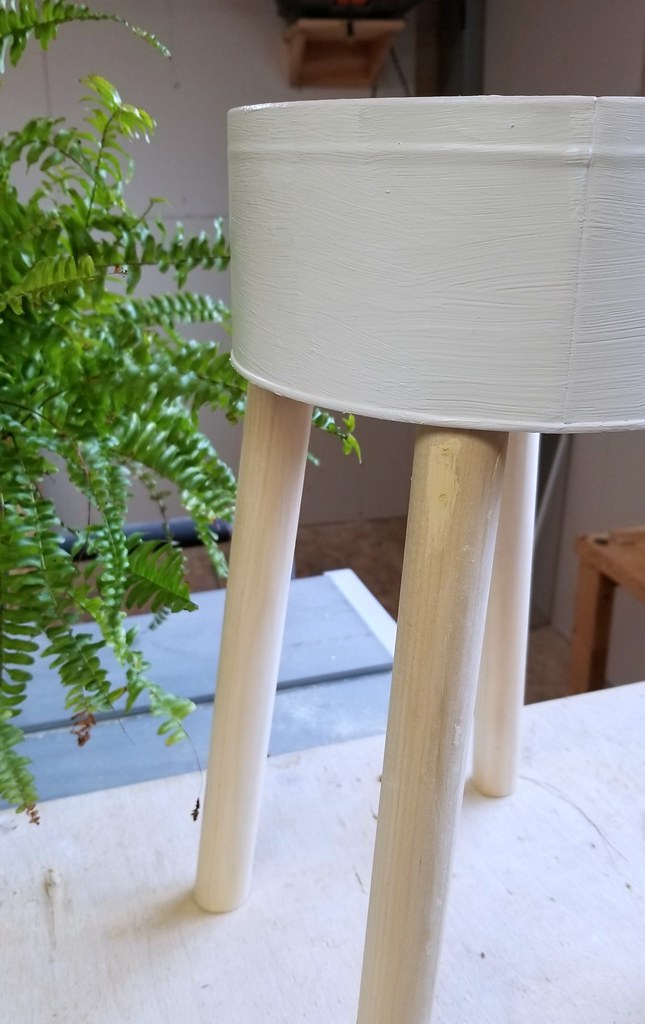
The tin went back up on the legs and I marked the position of each leg on the inside bottom of the tin. Using a small drill bit, I drilled a pilot hole in each spot.

DIY wood & metal plant stand

The last step was to attach the tin to the base with 4 white pan head screws.

DIY wood & metal plant stand

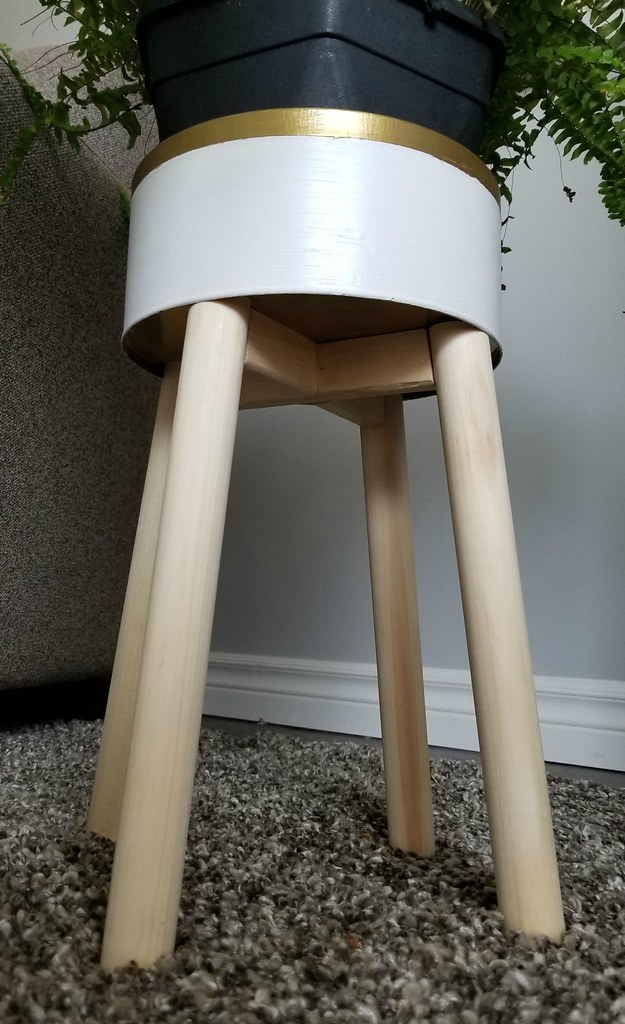
I puttied the nail holes on the legs, sanded all of the wood, and did a bit of paint touch-up around the screw heads. I also added felt feet to the bottom of the legs to keep them from scratching the floor.

DIY wood & metal plant stand

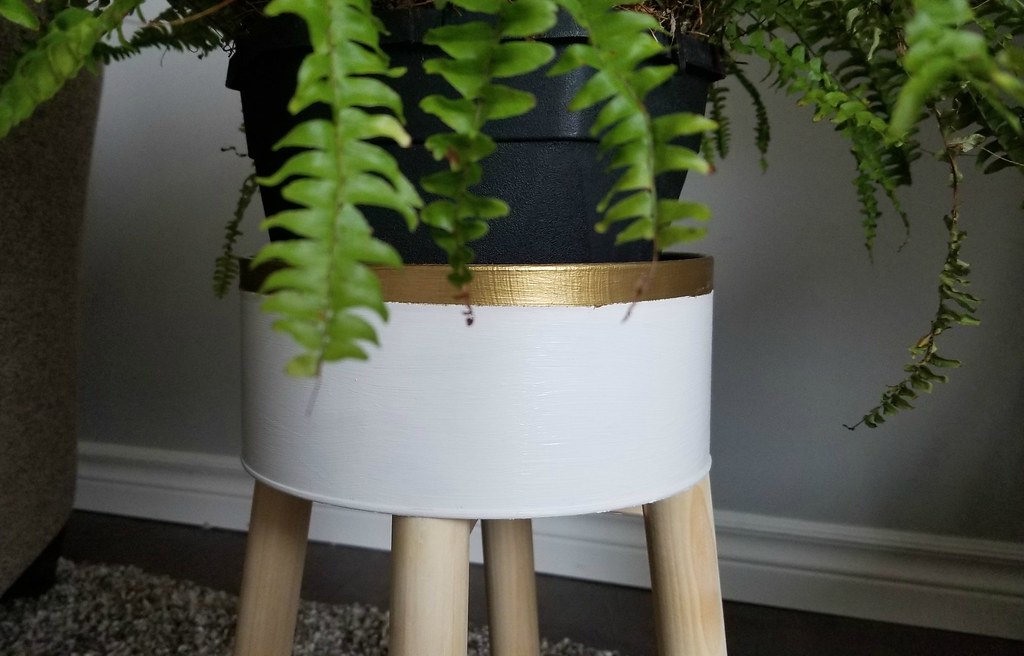
I decided to leave the wood unfinished instead of staining it. I like the Scandinavian feel of the pale poplar and white together. However I did add a gold painted band around the top.

DIY wood & metal plant stand

DIY wood & metal plant stand

DIY wood & metal plant stand

DIY wood & metal plant stand


Jun 20, 2018

Recovering a Patio Lounge Cushion


We've had the new dogs home for about six weeks now, and everything is going along fairly well.

squad goals

There are some ups (the new dogs don't have to be on leash when we go outside in the backyard) and some downs (I threw out the living room rug this weekend because I am so tired of steam cleaning out the bathroom "accidents").

We've also come to realize that, like most-two year-olds, they still need a lot of supervision or they get into mischief.

We spent a lovely Sunday out on the back deck a couple of weeks ago. Everyone was having a good time, and Scarlett discovered the joys of basking in the sun on the lounger.


Sweet face, right? Don't be fooled, there's a devil lurking in there. A few hours later, while we were inside eating dinner, we heard the two little dogs galloping back and forth, jumping over things and chasing each other. But then there was a loud ripping noise and we ran out to see what had happened.

We found this:


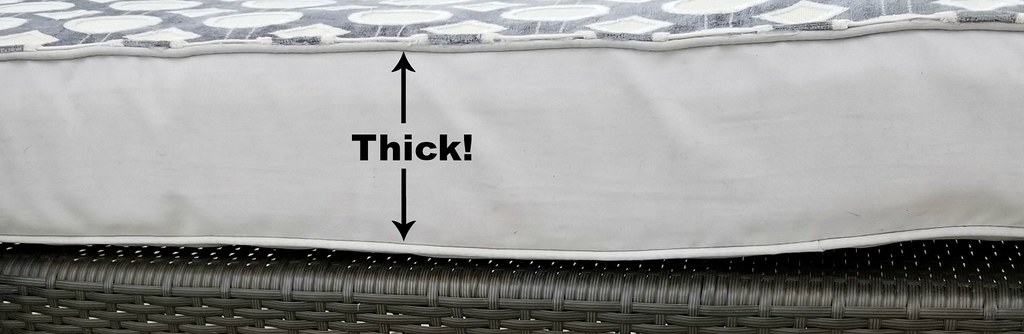
They were so proud of themselves. Tom had to hide his laugh behind his hands. I wasn't so happy because I love that lounger. Our neighbour gave it to us and the cushion is thick. Like six inches thick.


How do you replace that? Well first, you spend your lunch hour the next day searching every online site that delivers to Canada. Then you visit several stores after work. But you end up with nothing that even comes close. Unless you want one custom-made for $$$$.

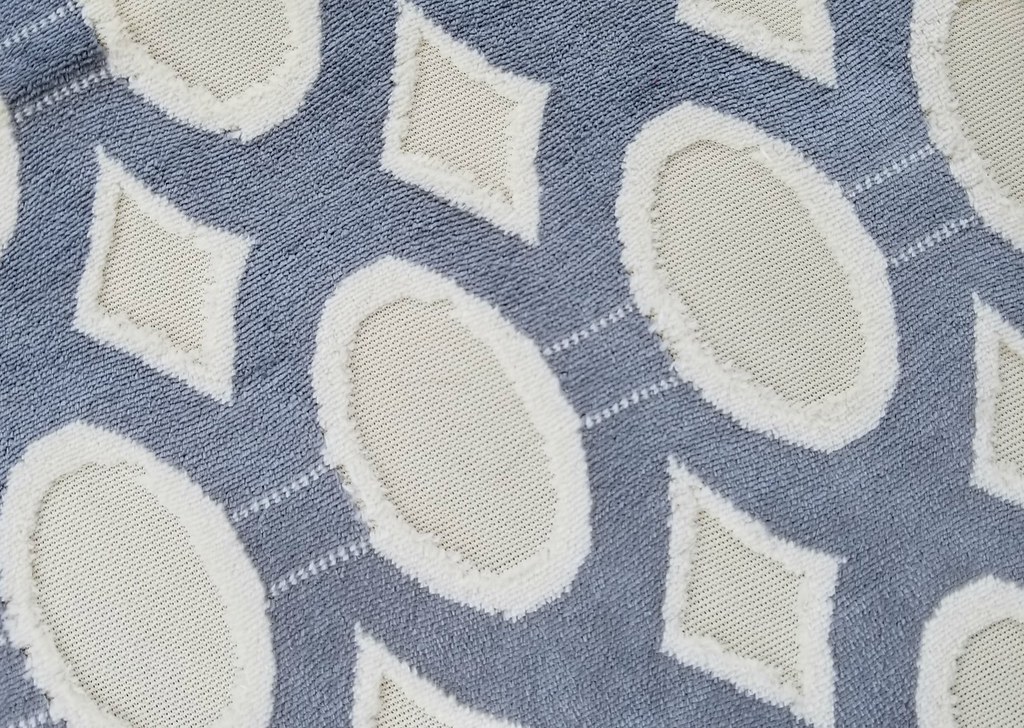
I was preparing myself mentally to just suck it up and settle on a thinner cushion, but decided to take a stab at repairing and recovering the ruined one instead. I went through my fabric stash to see if I had anything suitable for outdoor use and found some patterned material that was sturdy, yet still soft and velvety.


I restuffed the cushion with the foam and batting that had been torn out, then used thick thread to sew as much of the shredded fabric back together as possible, just to give a framework for the new material. (No pics, sorry.)

At first I only recovered the damaged section, and I was pretty happy with that.

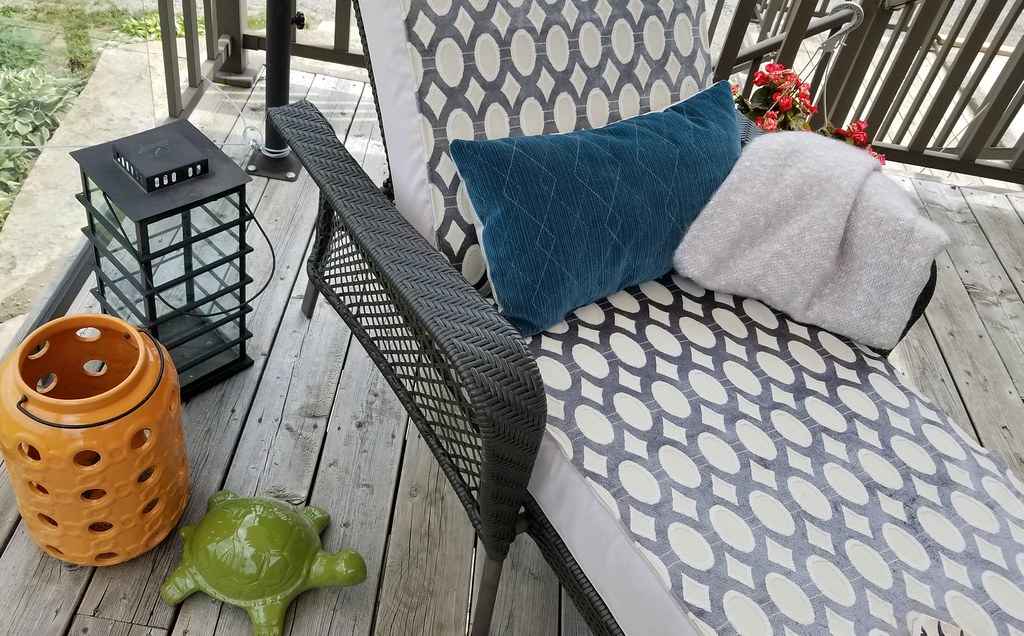
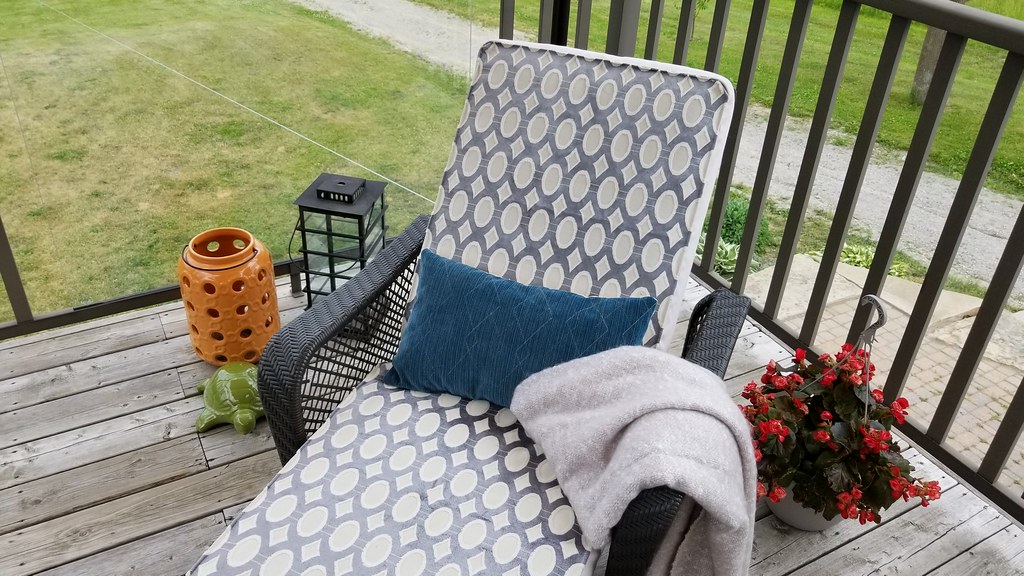
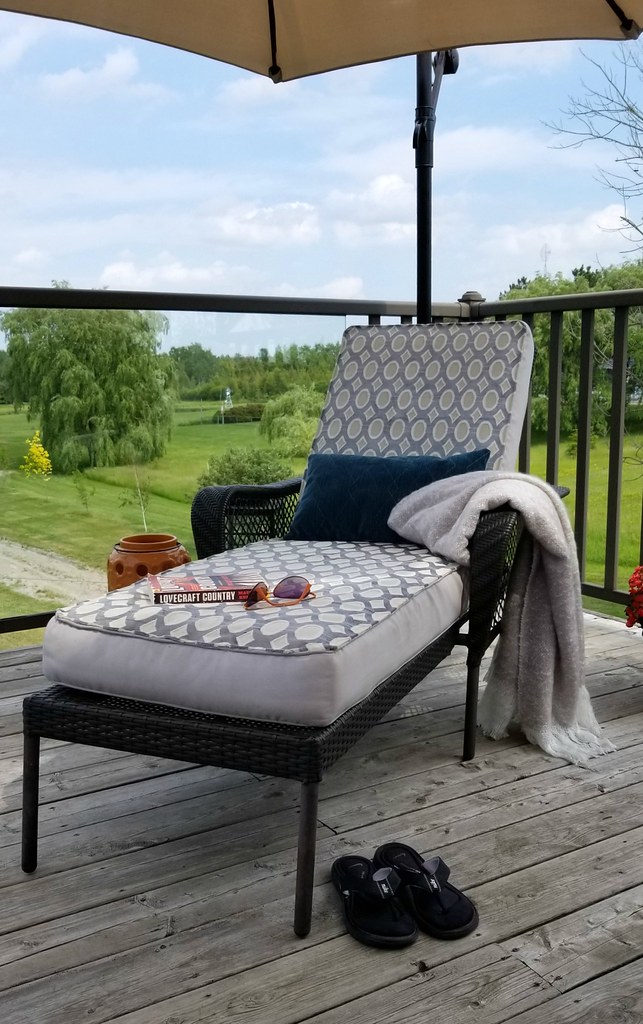
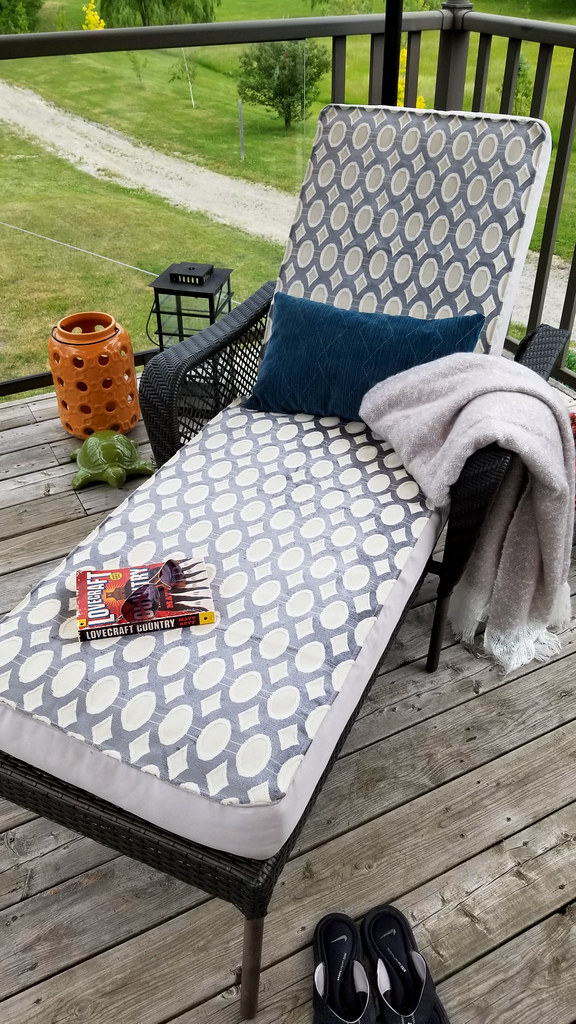
recovered patio lounge cushion

But then I started thinking it would look even better if the entire side was the same. So out came the fabric and sewing machine again, and I covered the top section as well. Hey, I was right, it did look better.

recovered patio lounge cushion

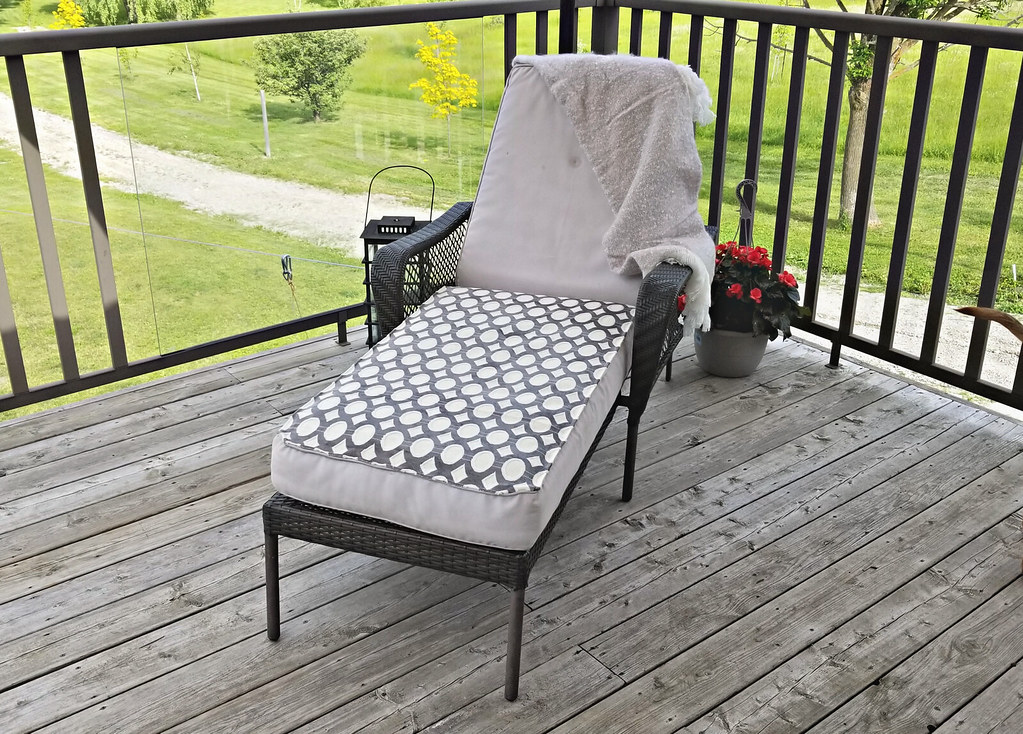
I'm so happy with it now. It looks intentional. It almost looks like I know what I'm doing or something. :-) I hate to admit it, but I even like it better than the original. Should I thank the little hooligans for making it happen?

recovered patio lounge cushion

recovered patio lounge cushion

recovered patio lounge cushion

recovered patio lounge cushion


Apr 20, 2018

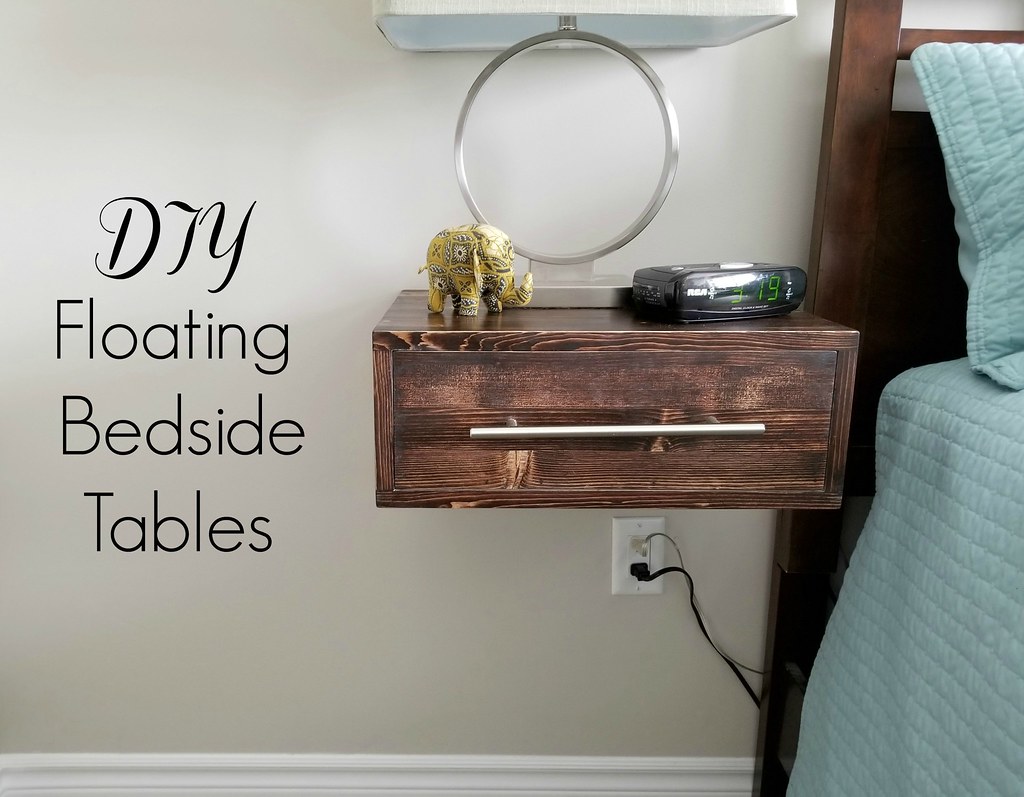
Floating Bedside Tables

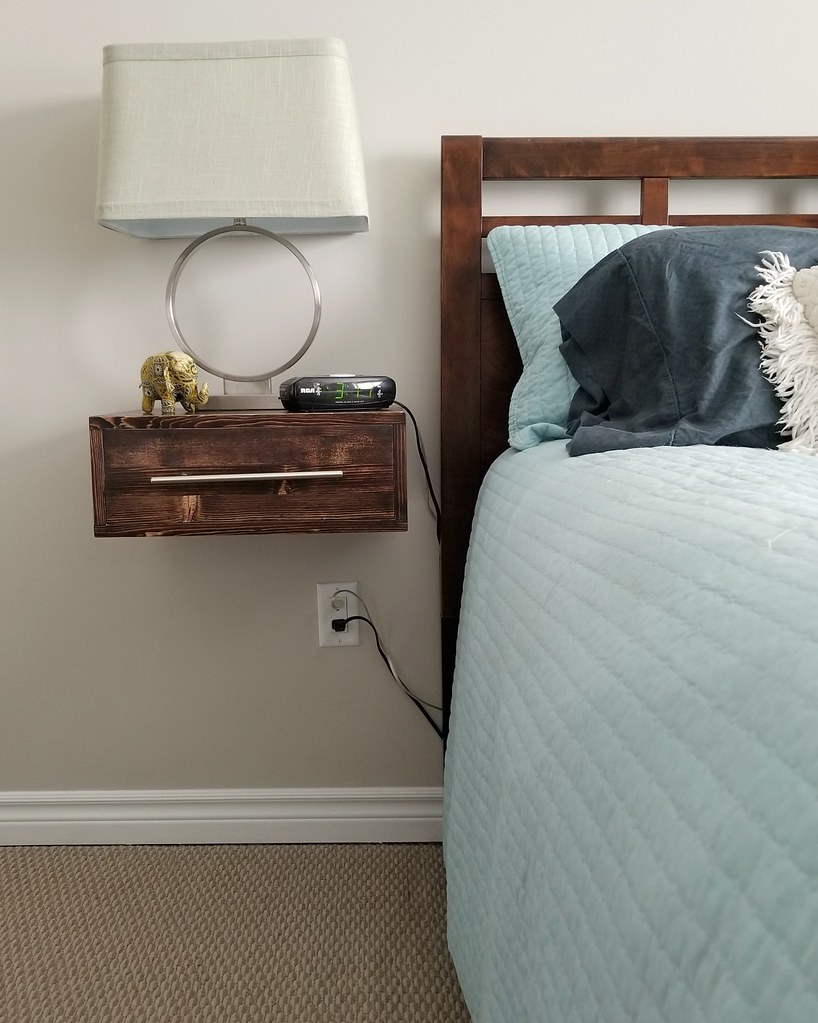
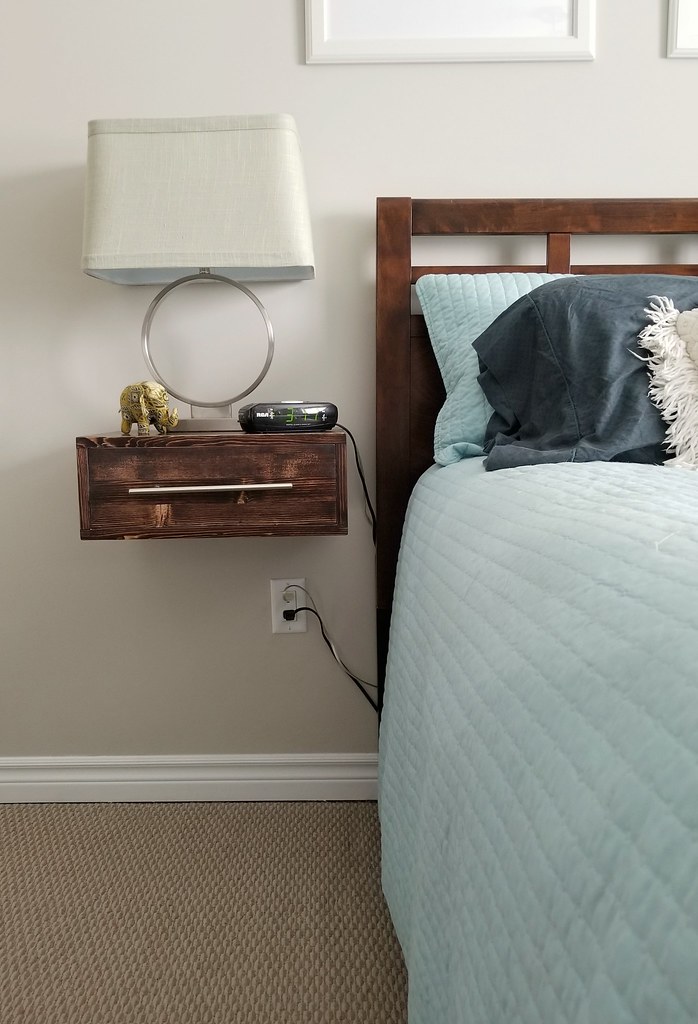
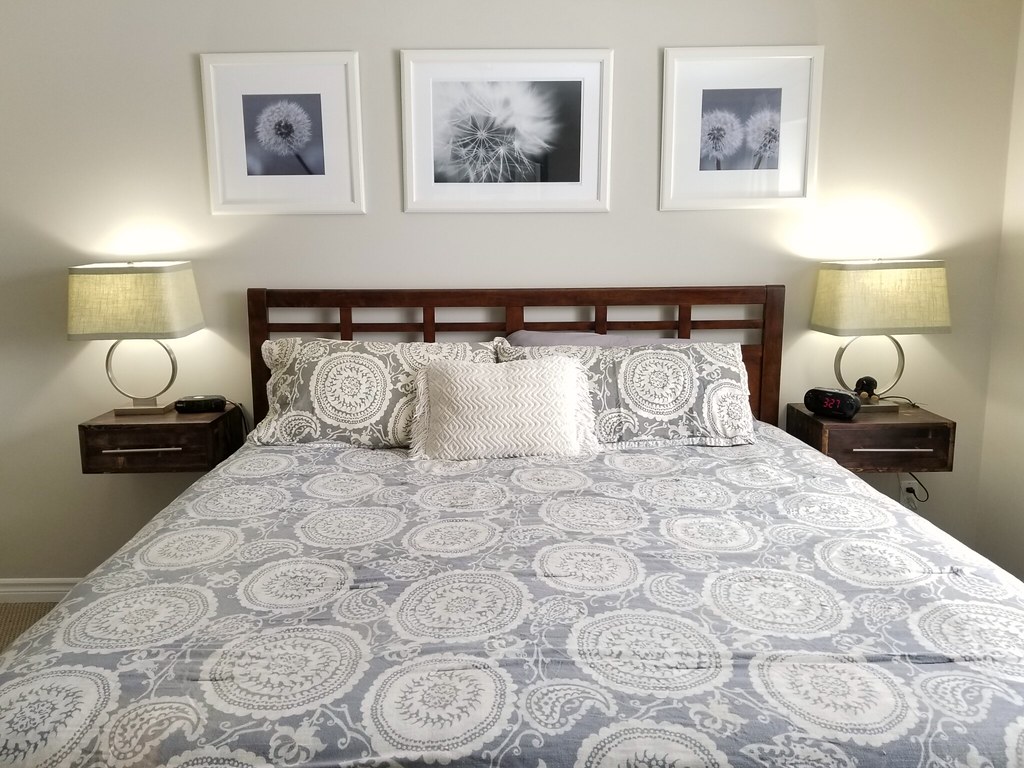
One positive effect of this never-ending winter weather (Spring - where are you????) is that it has allowed us more time to focus on projects inside the house. This past weekend we freed up some floor space in the bedroom by building and installing floating bedside tables.

DIY Floating Bedside Tables

Our current bedside tables are cheapies that I'd refinished for a Pinterest challenge. They're sweet and I love the colour, but they were too low for our bed. And since one of the dogs likes to sleep on the floor beside the bed, we thought it would be nice to give her some extra space to stretch out.

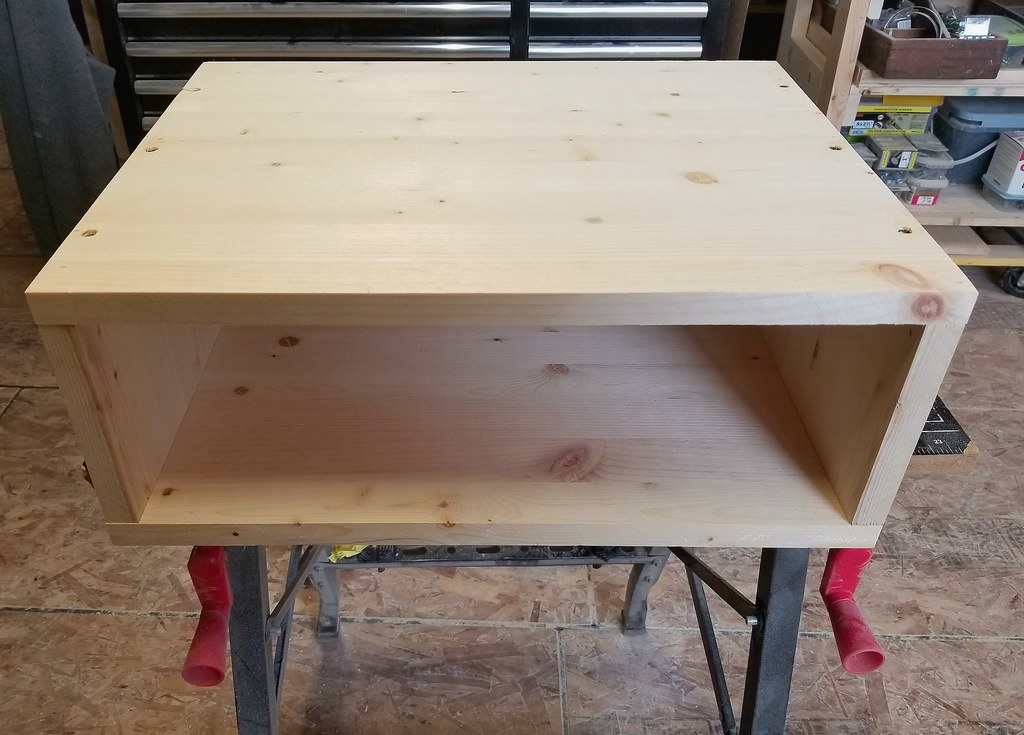
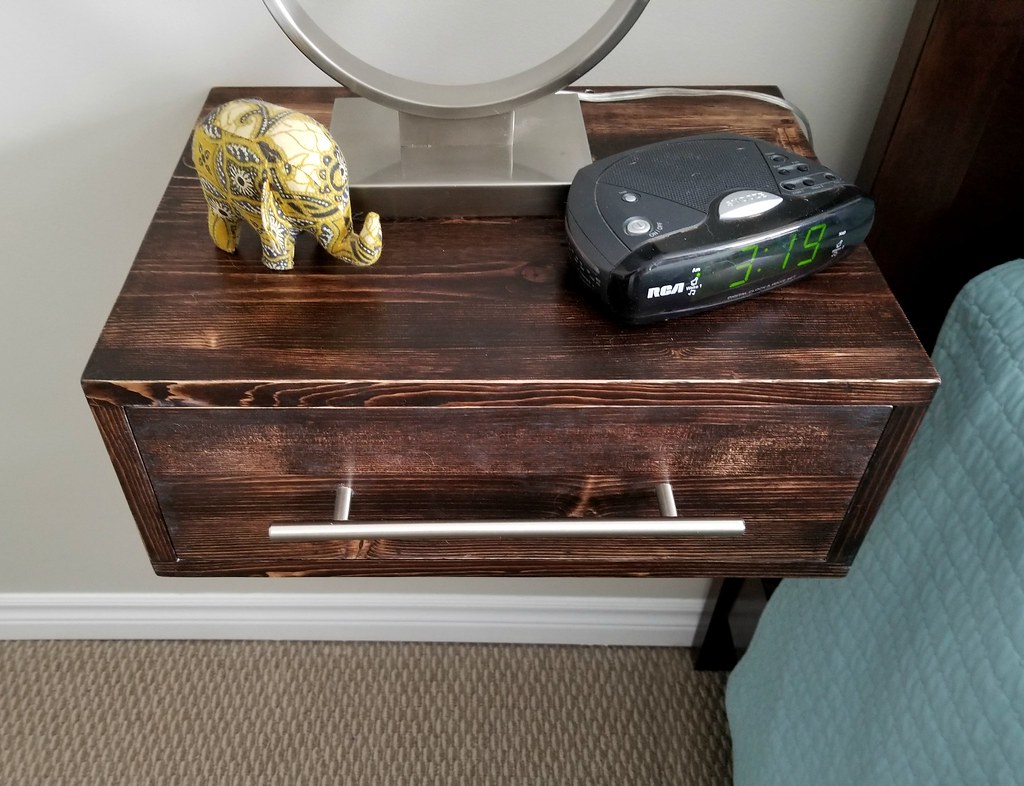
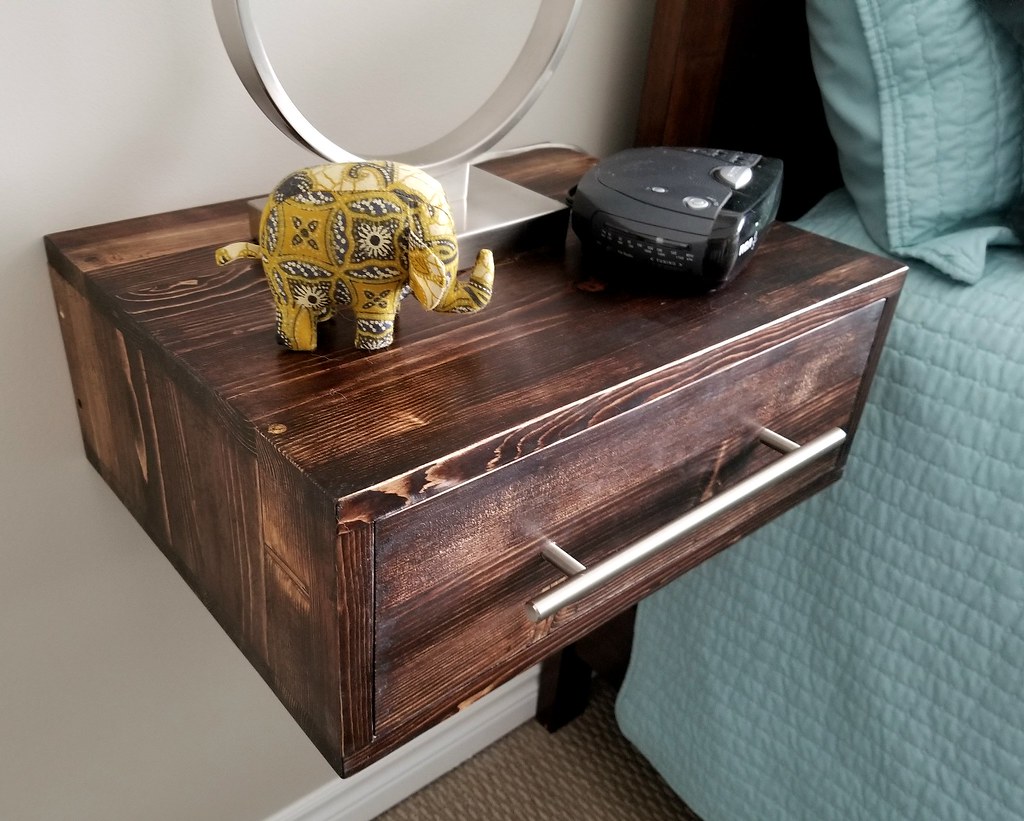
We went very streamlined with the new tables, to match the bed frame and to make the room seem as large as possible. The dimensions are 18"W x 14"D x 7"H, with drawers that are 16.5"W x 12.5"D x 5.5"H.

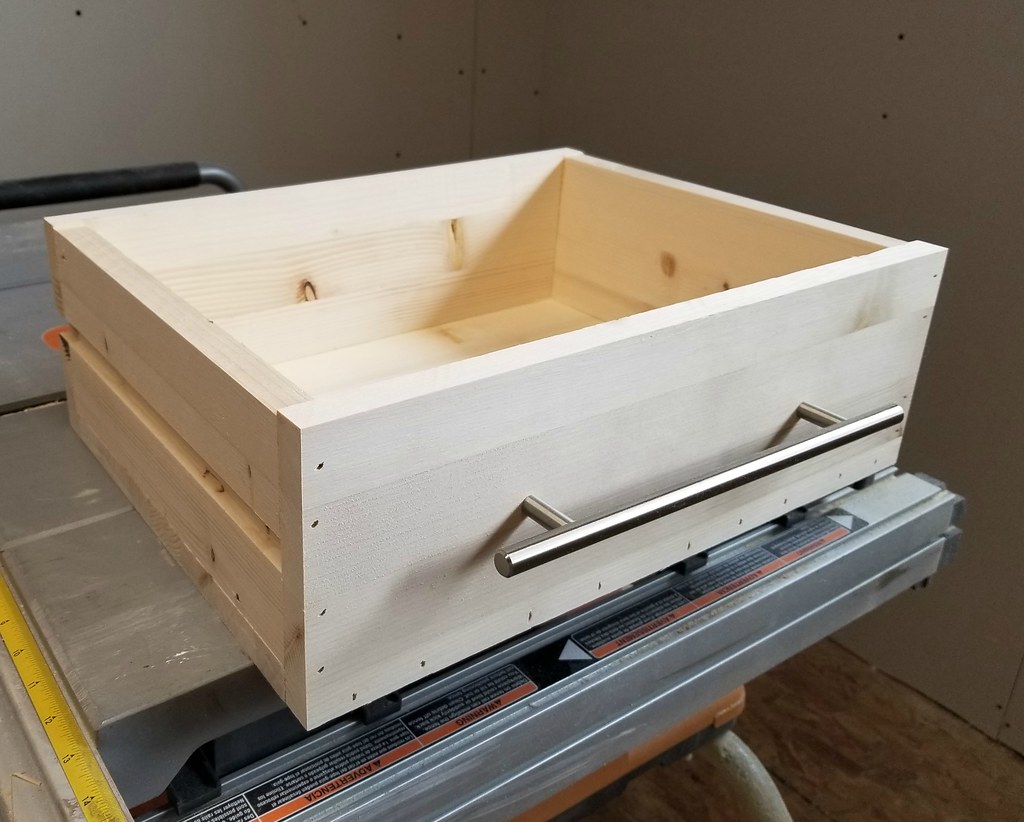
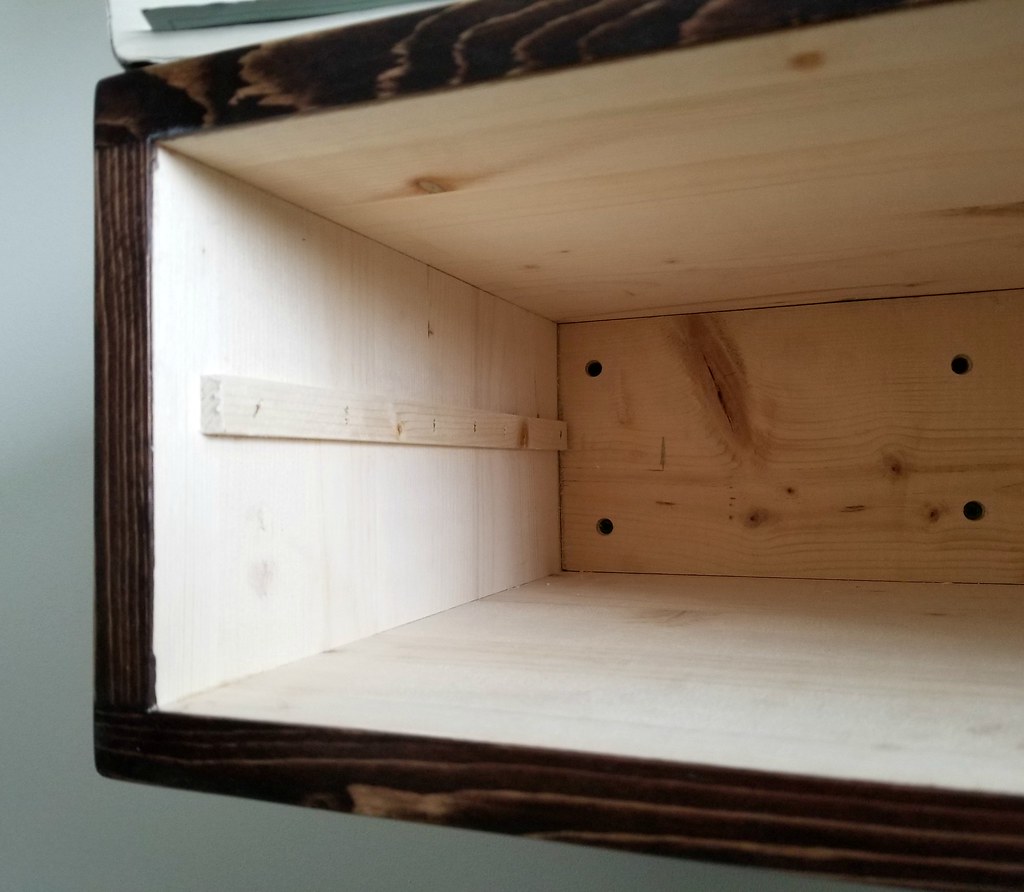
They're built from sheets of pine shelving boards - four 16" x 48" boards were enough for two frames and two drawers. They are both basically boxes, with sides that are joined with countersunk screws. The frame is open at the back so that it can fit over the mounting board that is anchored to the wall (see below on details for hanging it). The face of the drawer was attached with finishing nails.

DIY Floating Bedside Tables

DIY Floating Bedside Tables

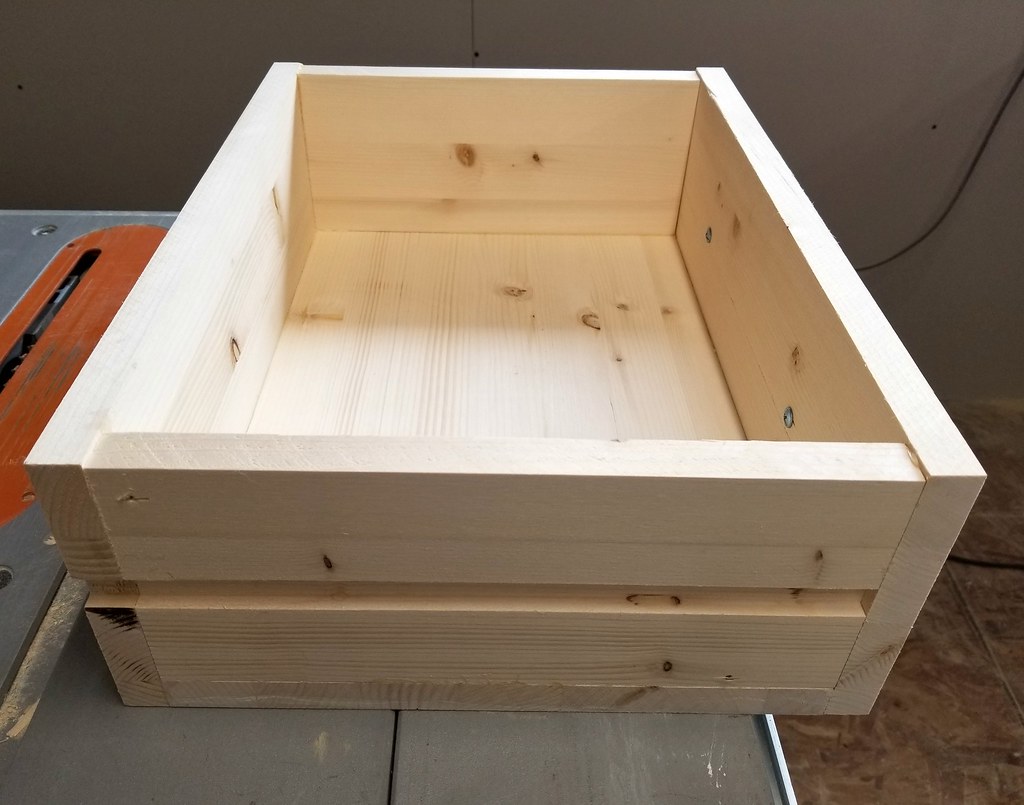
Wooden guides were attached to the insides of each frame that match with grooves in the side of each drawer. These guides help with drawer movement and keep the drawer from tipping forward when open. Tom cut the grooves in the drawers on the table saw with a dado blade, and then cut the matching sliders from leftover wood. The sliders are attached with glue and finishing staples.

DIY Floating Bedside Tables

DIY Floating Bedside Tables

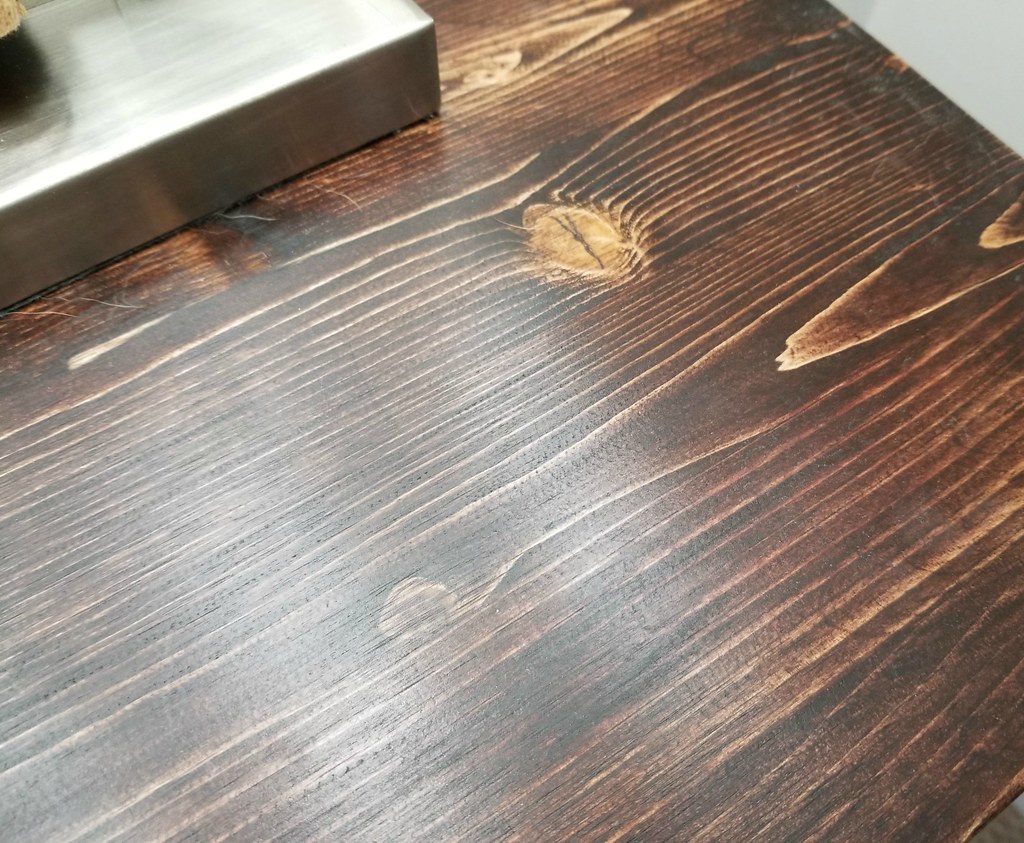
Once the frames and drawers had been built, I sanded them smooth, and then stained them with one coat of Minwax stain in Jacobean, and then two coats of MW stain in Red Mahogany. I was trying to get as close as possible to the colour of the bedframe without it being too matchy-matchy. Once the stain was dry I waxed the pieces with MW finishing wax and buffed them with extra fine steel wool.

DIY Floating Bedside Tables

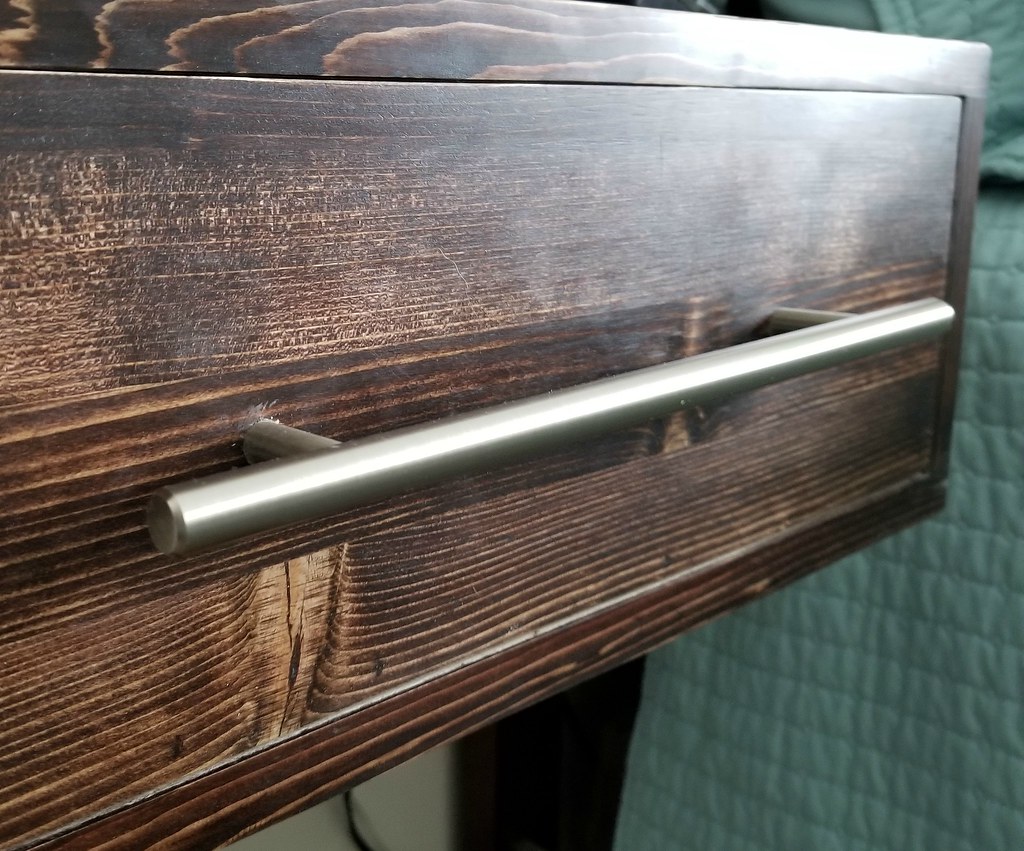
The handles on the drawers are a straight bar style, brushed steel, and 11 inches in length.

DIY Floating Bedside Tables

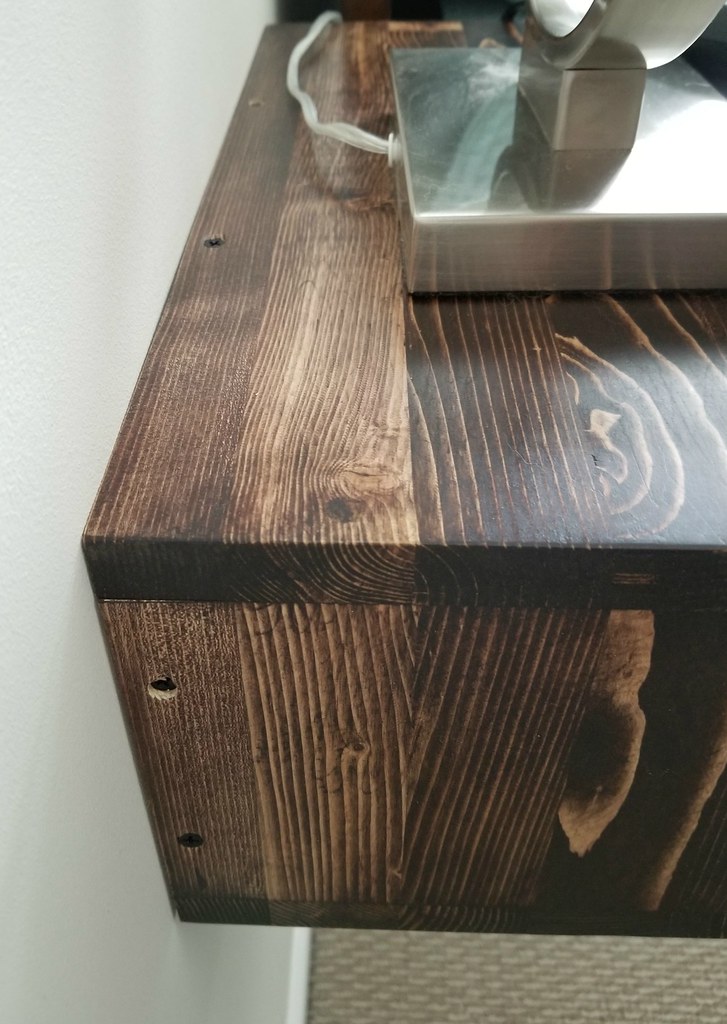
To mount the tables to the wall, Tom cut a piece of 2"x 6" lumber to match the inside dimensions of the table frame (16.5" x 5.5"). This board was mounted directly to the wall (on the studs) with 3 inch countersunk screws. For some reason I didn't take a photo of it, but you can reference these floating shelves to get an idea. The table frame "box" then slid over the mounting board and was screwed in on all four sides with countersunk screws.

DIY Floating Bedside Tables

The tables are mounted on the wall 3 inches higher than the top of the mattress to make it easy to reach the lamp and see the alarm clock when we're in bed.

DIY Floating Bedside Tables

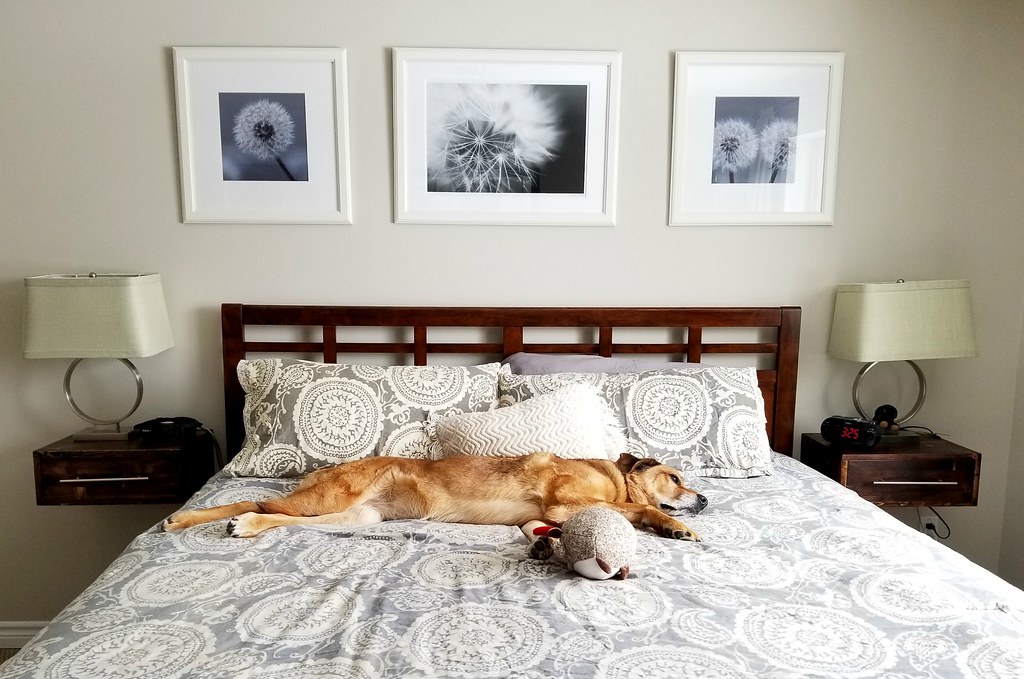
Here's a before and after of the tables once in place. The only bad thing with a floating bedside table is that the lamp and clock cords are visible. We could shorten up the cords but there's no hiding the outlet.

DIY Floating Bedside Tables

So far the dog isn't willing to sleep under the floating nightstand, but she has managed to fill up the extra space (mostly with her long giraffe legs and random toys).

And then sometimes she just takes over the bed instead.

DIY Floating Bedside Tables

~~~~~~~~~~~~

DIY Floating Bedside Tables

DIY Floating Bedside Tables

DIY Floating Bedside Tables

DIY Floating Bedside Tables

Oct 27, 2017

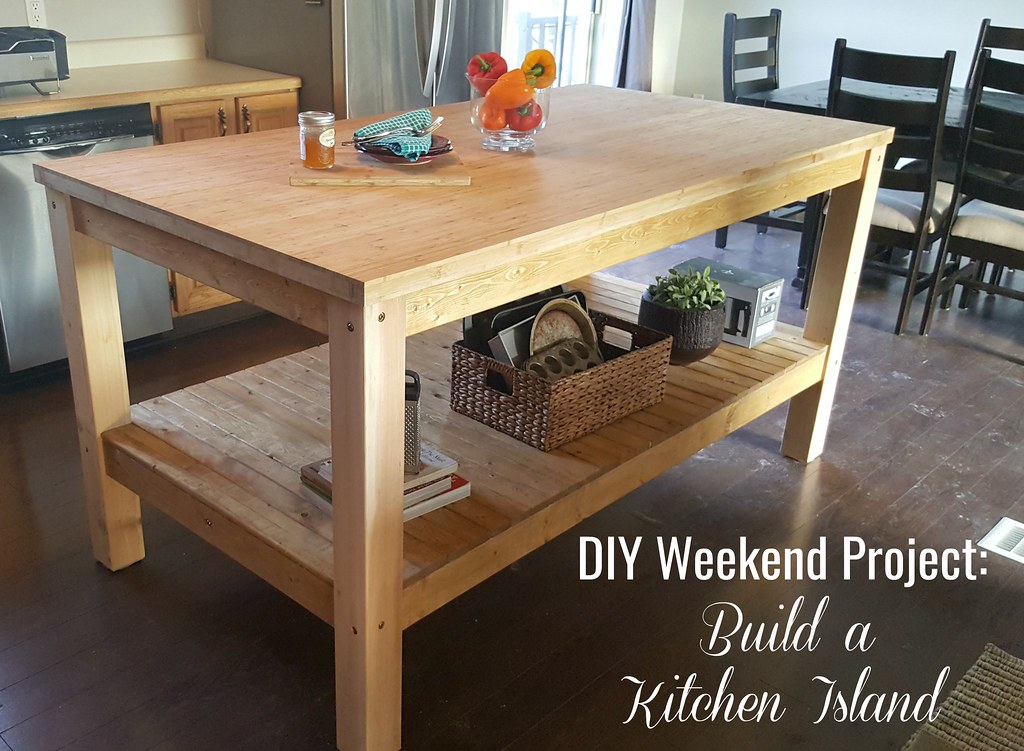
DIY Weekend Project: Kitchen Island


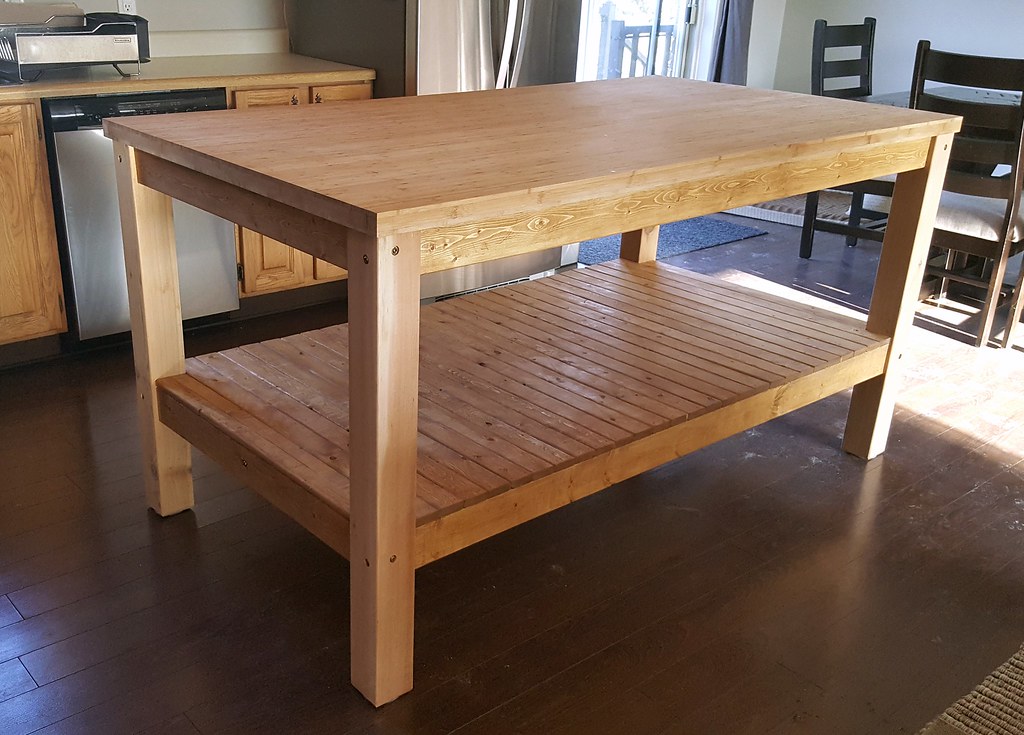
DIY Kitchen Island


We have a limited amount of counter space in our kitchen, while also having a large open space that is unused. We've always planned on including an island once we renovate.

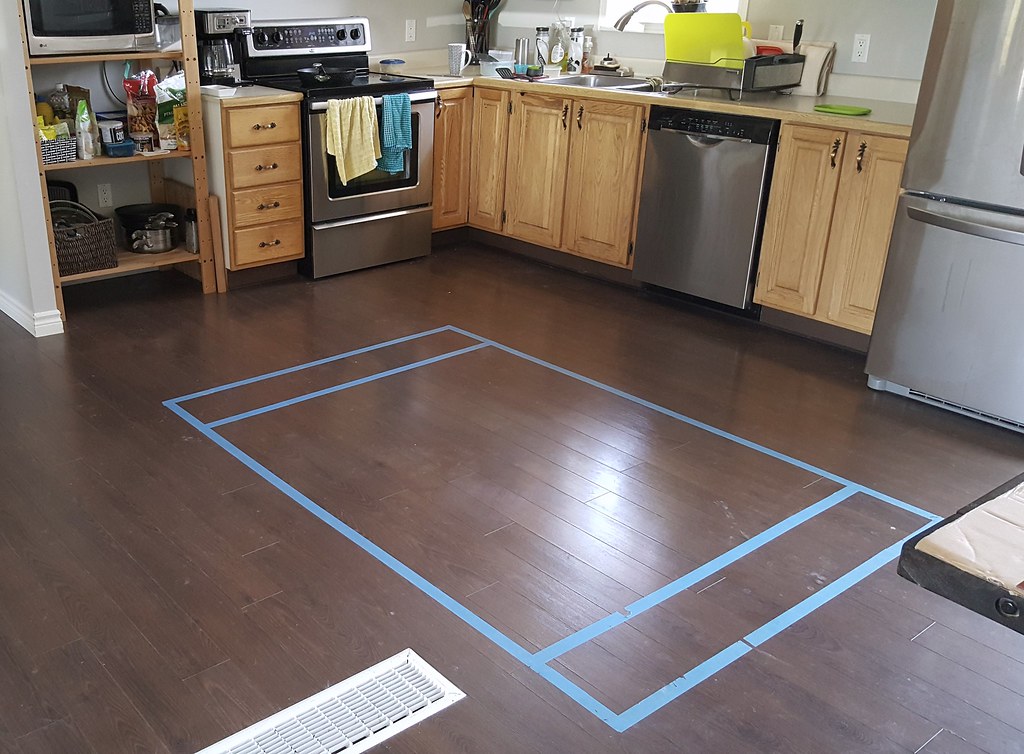
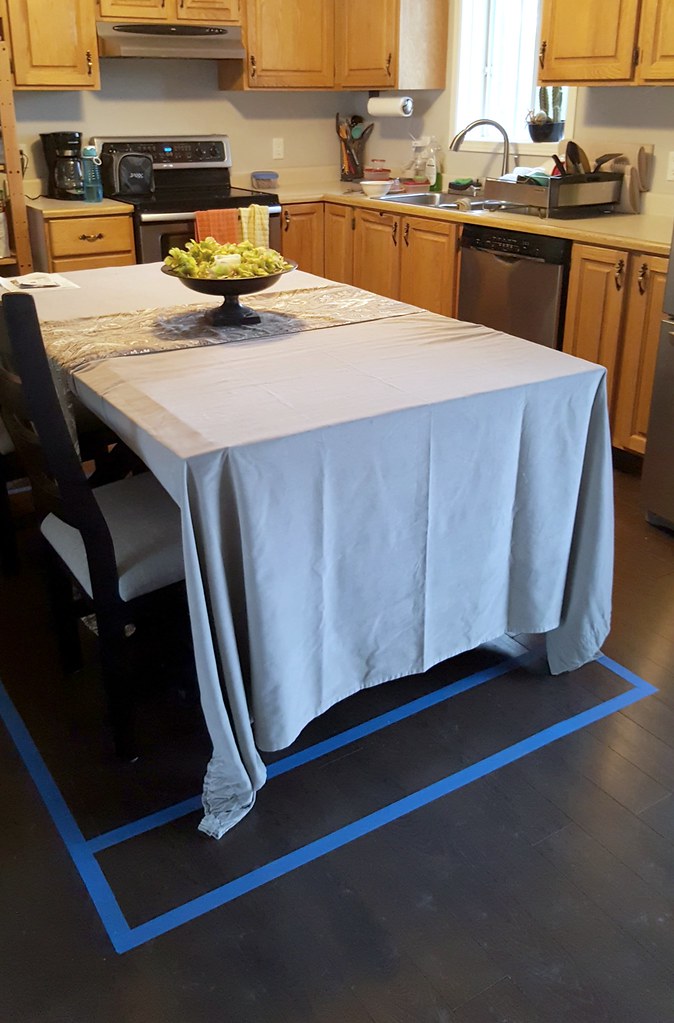
One day I grabbed the painters' tape and marked out an area on the floor that I thought would be a suitable size (about 3.5 feet by 6 feet). That still left about 42 inches between the cabinets and the island and even more space on the far side towards the living room. Can you believe how much unused space there is! Nothing's been pushed out of the way - that's how it looks every day.


When Tom got home, he looked at it for a while and then commented that the taped area looked about the same size as the dining room table. Indeed it was, so we immediately dragged the table into the kitchen area. We figured that with a 3-dimensional replica we'd have a better idea of whether or not an island would work for us. I put cardboard over the tabletop to protect the wood, and then a flat sheet over that, to make it a little nicer to use. We did have to wash that sheet a lot though.


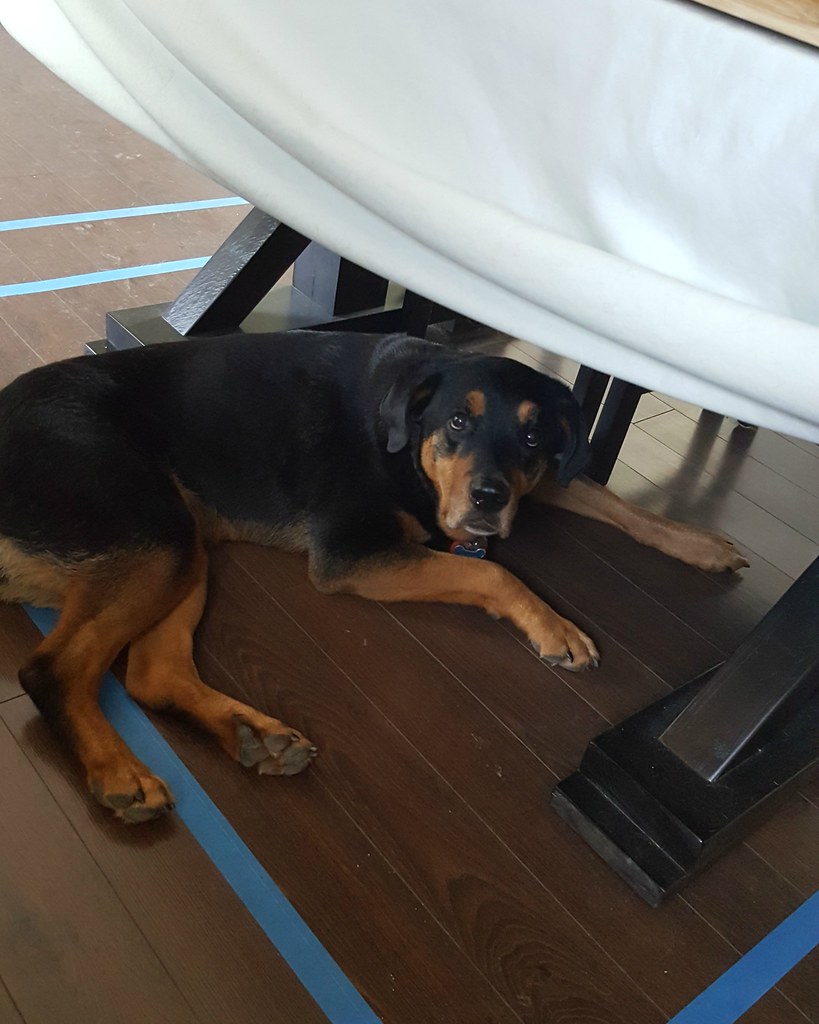
Right away we enjoyed having the extra prep space, and we didn't find ourselves bumping into it or feeling like it was in the way of our activities. Sasha even enjoyed having a new hiding spot where she could watch us cook up close. "Sunday Night Lunch Prep" is her favourite show.


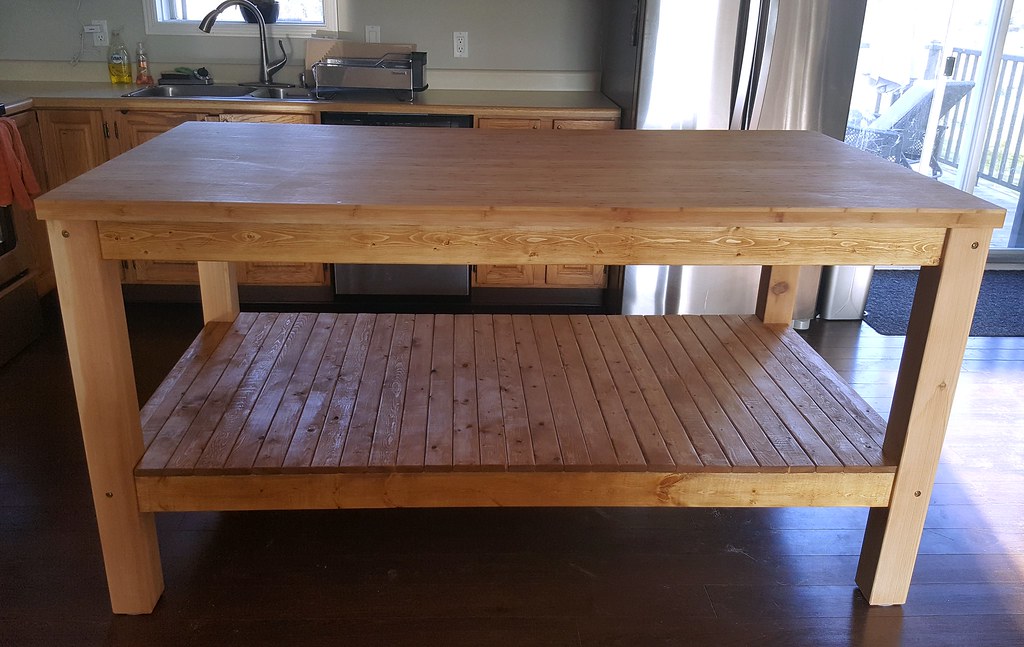
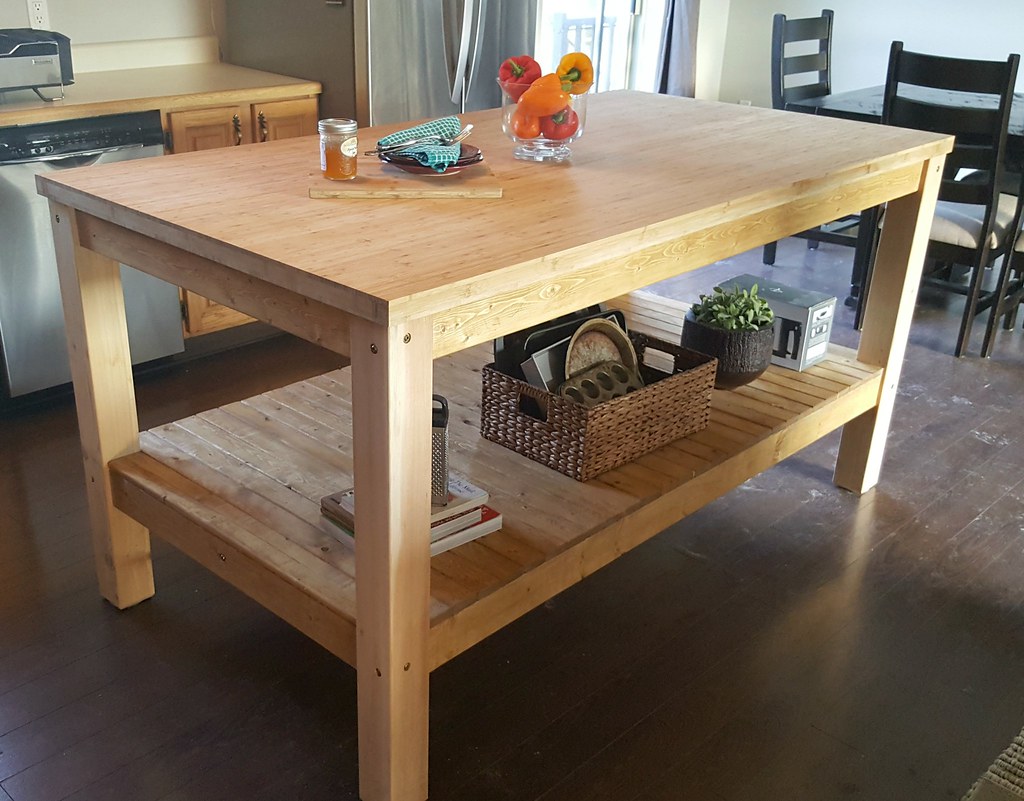
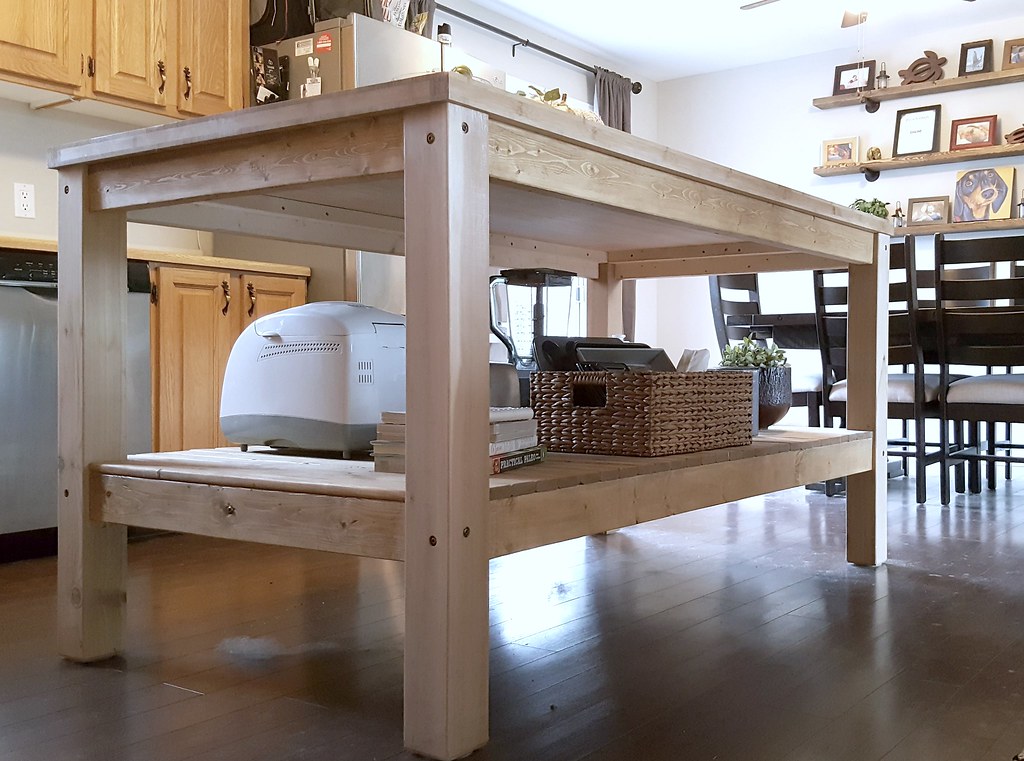
So we knew we definitely wanted an island, but we didn't want to wait until we renovated the kitchen to have it. We decided to build a butcher block-style island with open shelving underneath - a simple design that would give us all the counter space we needed and some additional storage space.

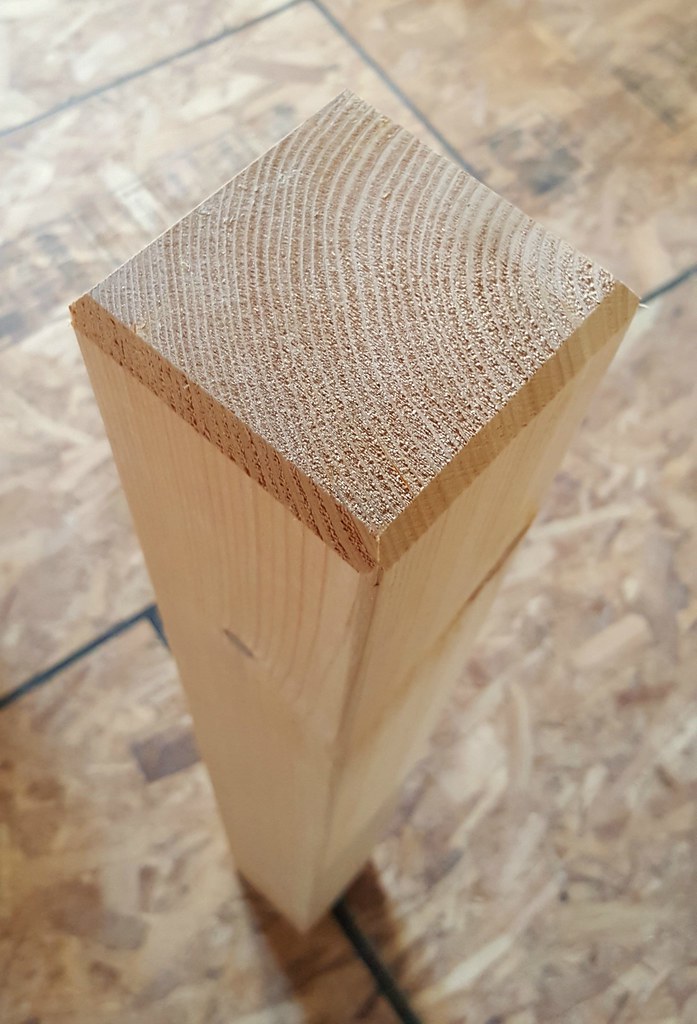
Tom had seen a bamboo tabletop at Lowe's that was the same size as our dining table, and he knew that there was no way we'd be able to build one for the same price. We bought it and used it on top of the dining room table for a while until we were ready to build the base. We bought 4x4 cedar posts for the legs, 2x4s for the framework, and 1x2 slats for the shelf.

How we built it:

1. First we determined how high we wanted the island. We settled on 38 inches, which was 2 inches higher than the other kitchen cabinets.  And if it ended up being too tall we could always shorten the legs. We cut the 4x4s to 36.5 inches. We also angle cut the bottom of the legs (the feet) so that they wouldn't scratch the floor if the island was moved around (we also added felt pads for this).

DIY Kitchen Island

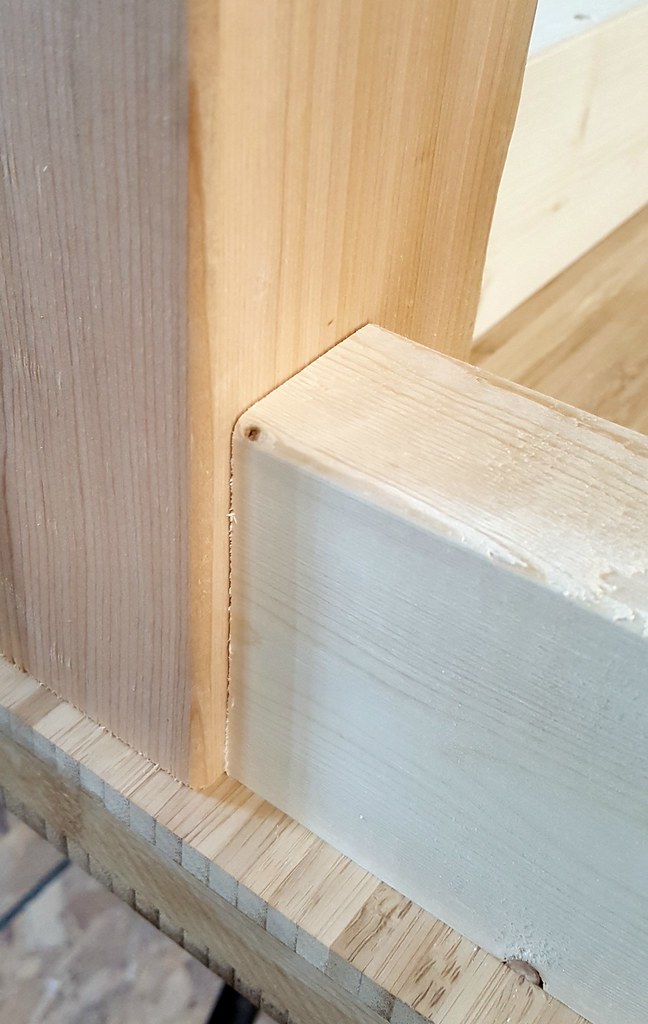
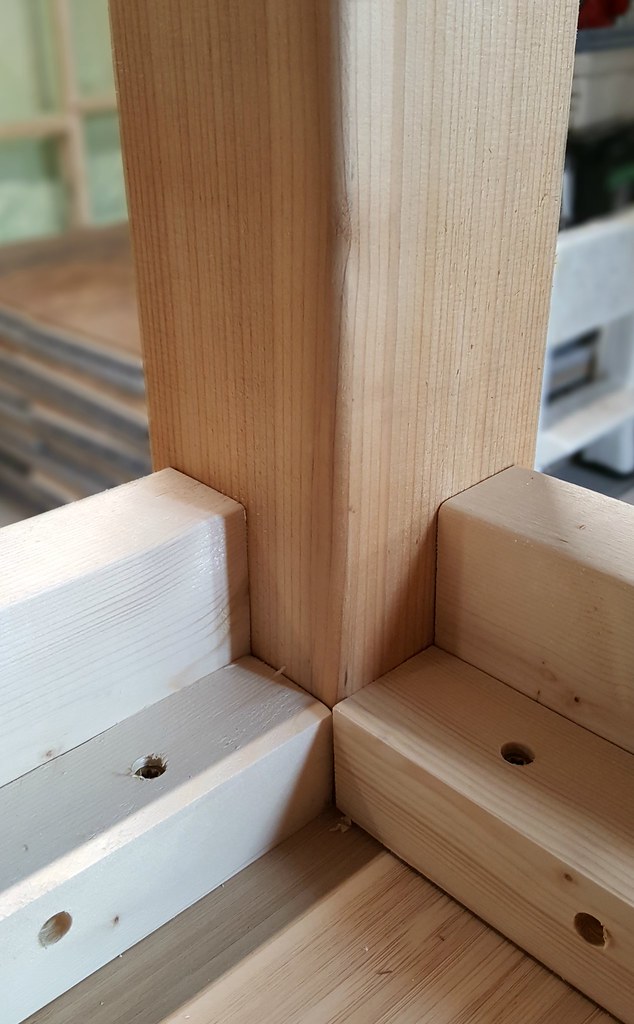
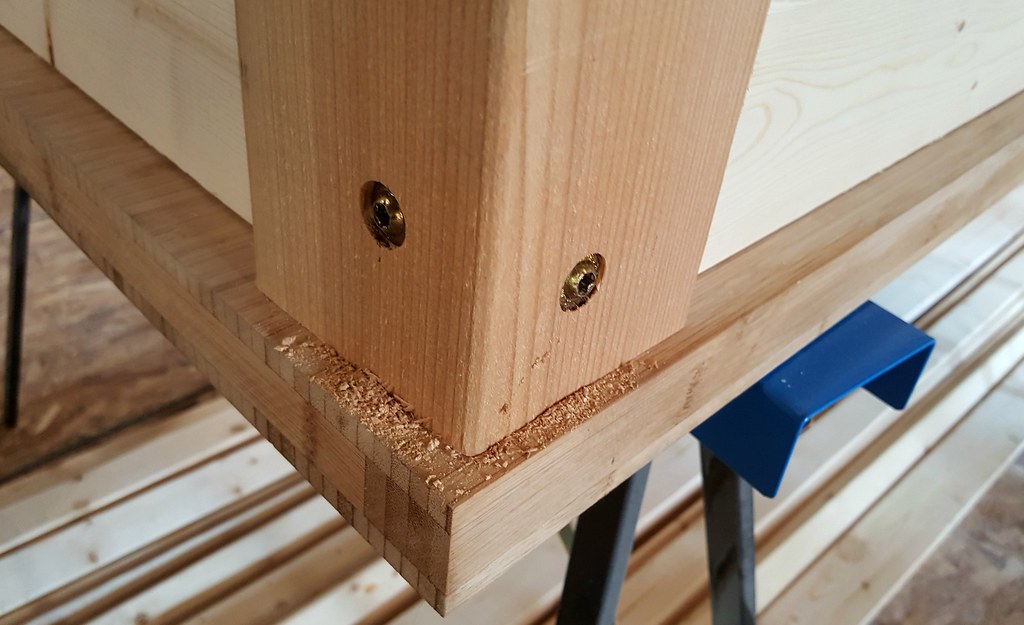
2. We turned the tabletop upside down on sawhorses and set the legs in place to determine how much of an overhang we wanted. The legs are slightly inset - about 1/2 an inch - and then the horizontal framework is inset just about a 1/4 inch more, so that the flat, cut edge of the 2x4 meets up with the flat of the leg.

DIY Kitchen Island

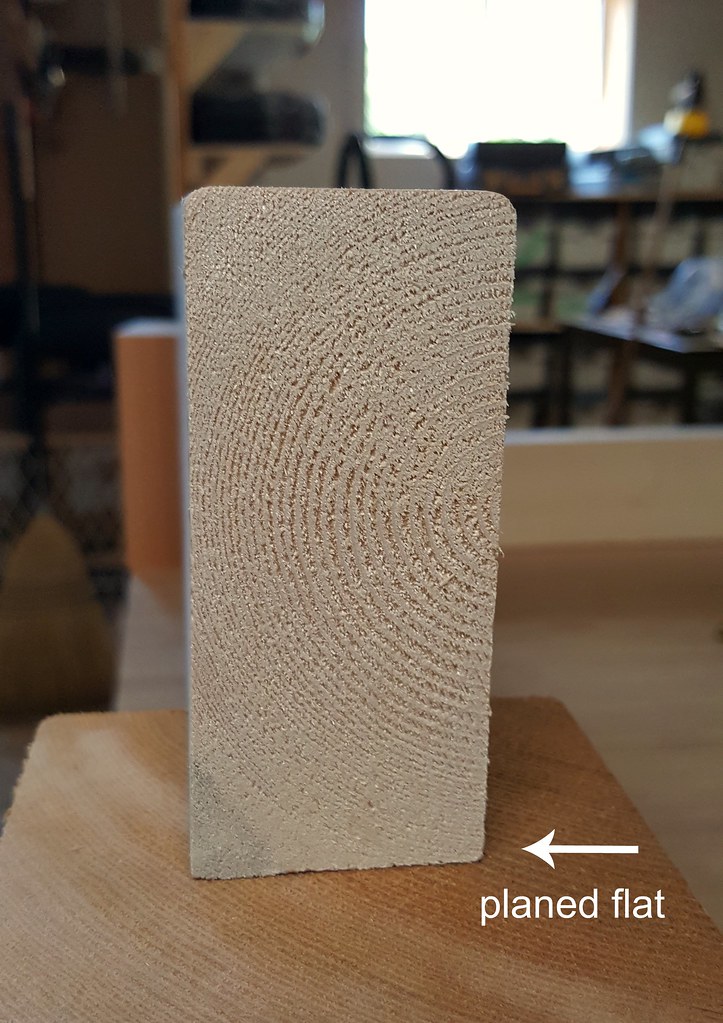
3. Next the 2x4s were cut to make a horizontal framework between the legs - 2 at 32 inches and 2 at 65.5 inches. One extra step we took was to plane the 2x4s on the edge that would be against the tabletop so that it sat flush (2x4s are slightly rounded on the edges).

DIY Kitchen Island

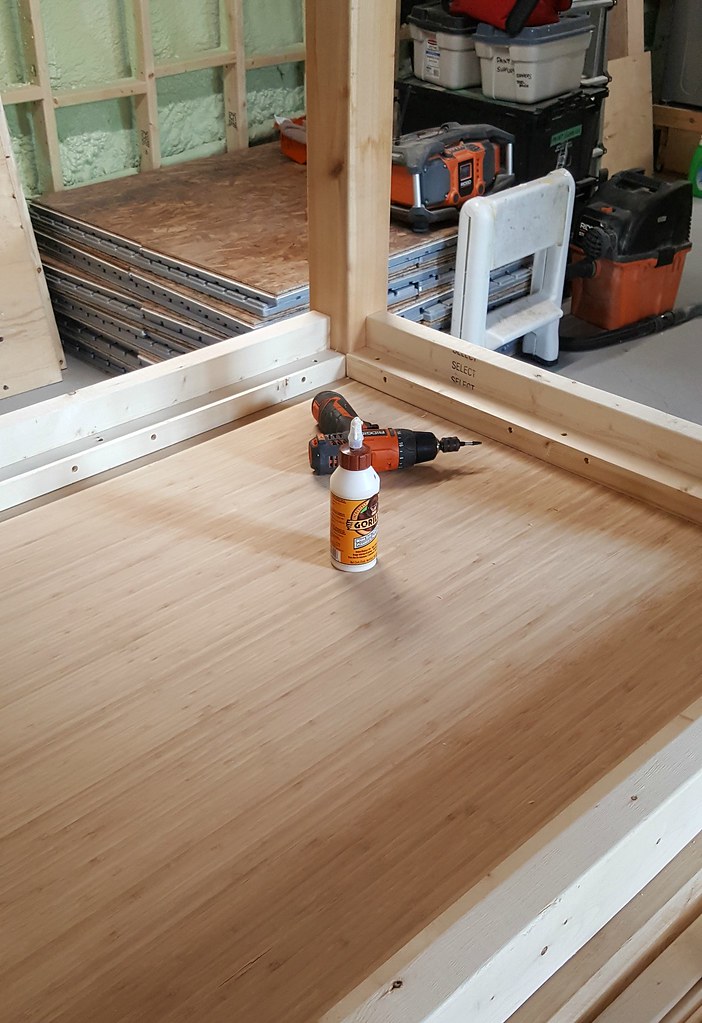
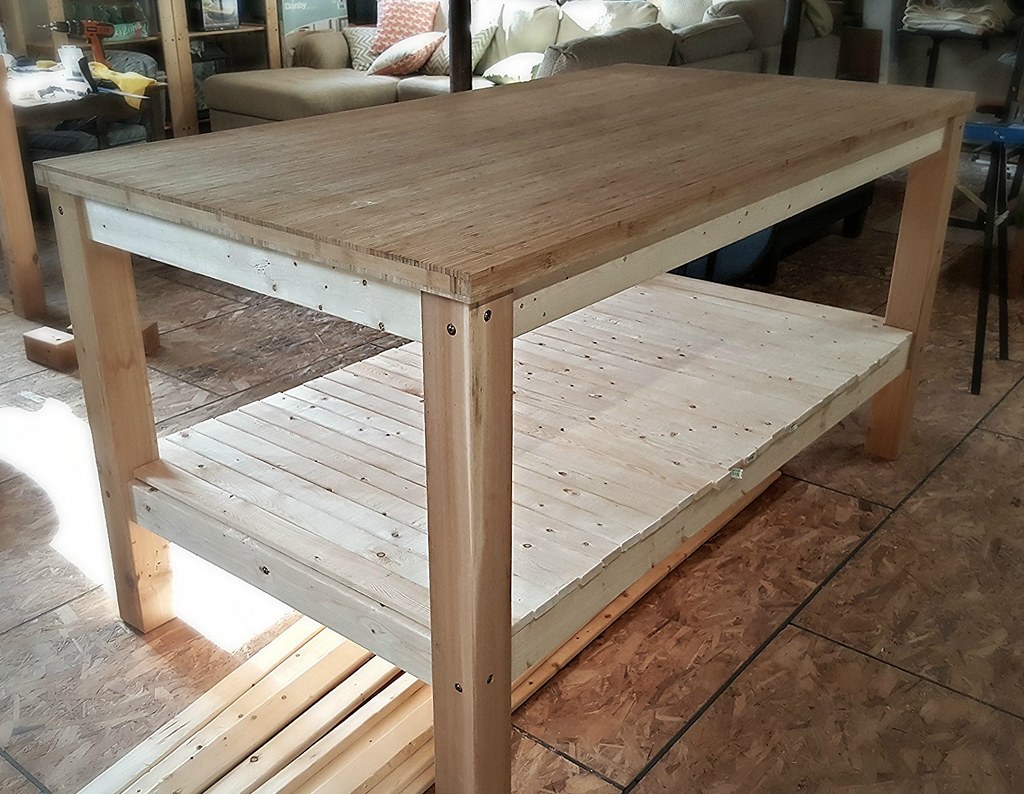
4. We added 2x2s (cut down from the 2x4s) inside the 2x4s. A framework within the framework. The 2x2s are attached both to the underside of the tabletop and sideways into the 2x4s. We did this so that there are no visible screws on the outer framework. They were glued in place and then also screwed in horizontally and vertically.

DIY Kitchen Island
DIY Kitchen Island

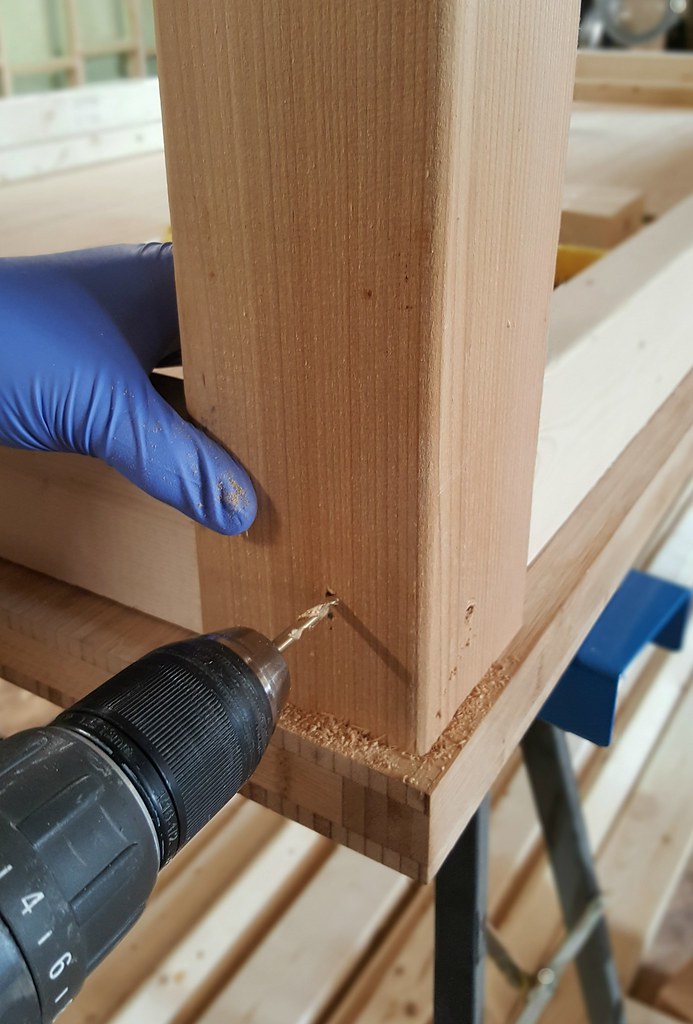
5.  Next the pilot holes for the leg screws were drilled through the legs into the 2x4 framework. The screws that we used - GRK structural screws - have a fancier head that look a bit like carriage bolts. We countersunk the holes so that the screw heads were flush with the wood.

DIY Kitchen Island
DIY Kitchen Island

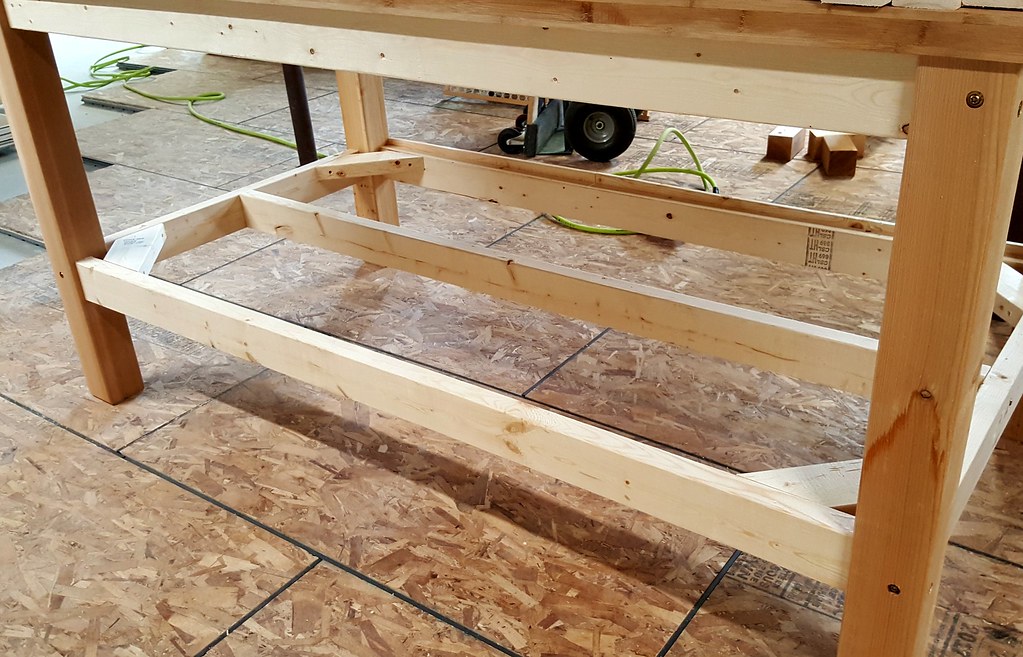
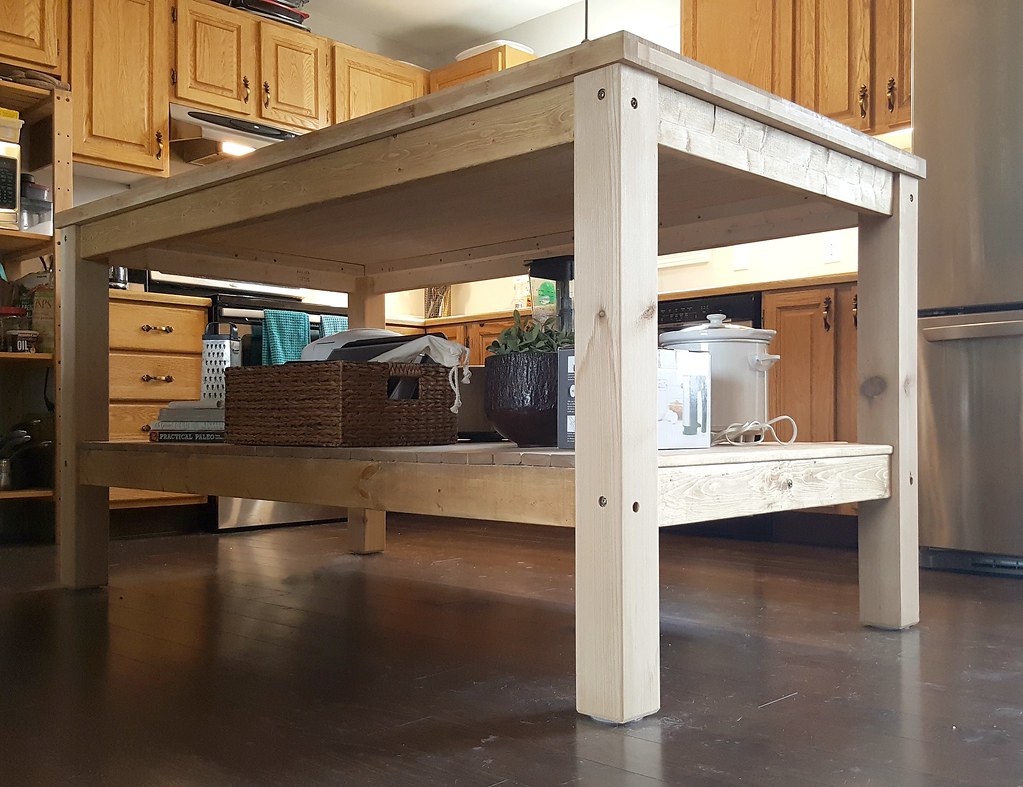
6. We built the lower shelf framework in the same way as the upper framework, i.e. 2x4s horizontally running between the table legs. We also included cross pieces at the corners and down the center for added strength and stability. The corner cross pieces are attached to the framework using pocket screws (here is a link to a  terrific little pocket hole jig kit that we use all the time), and the center board is attached from the outside with countersunk structural screws.

DIY Kitchen Island

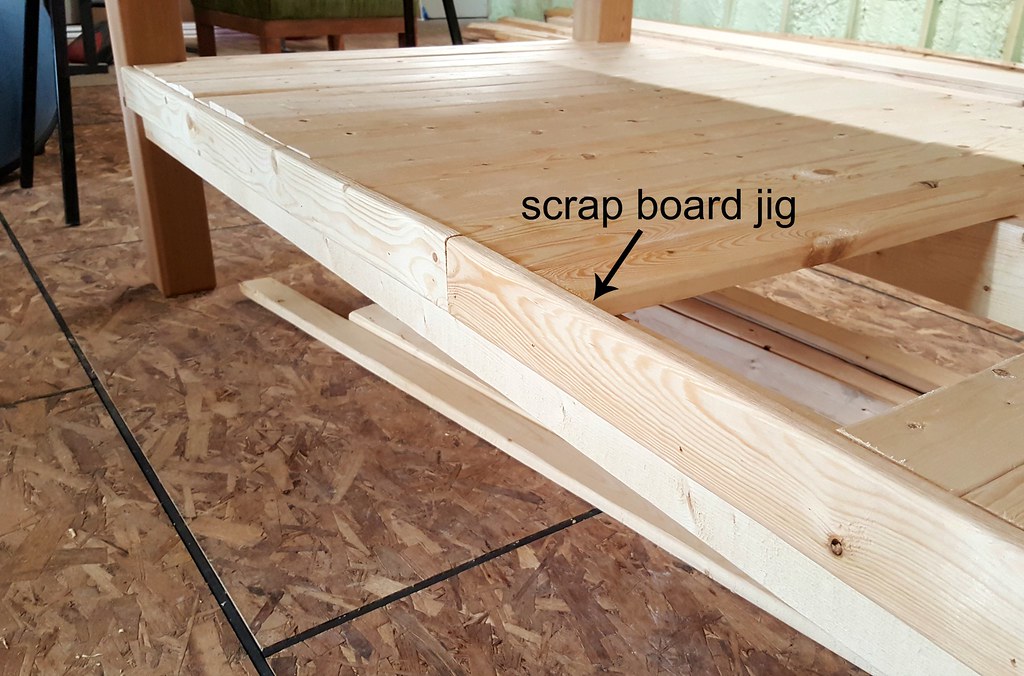
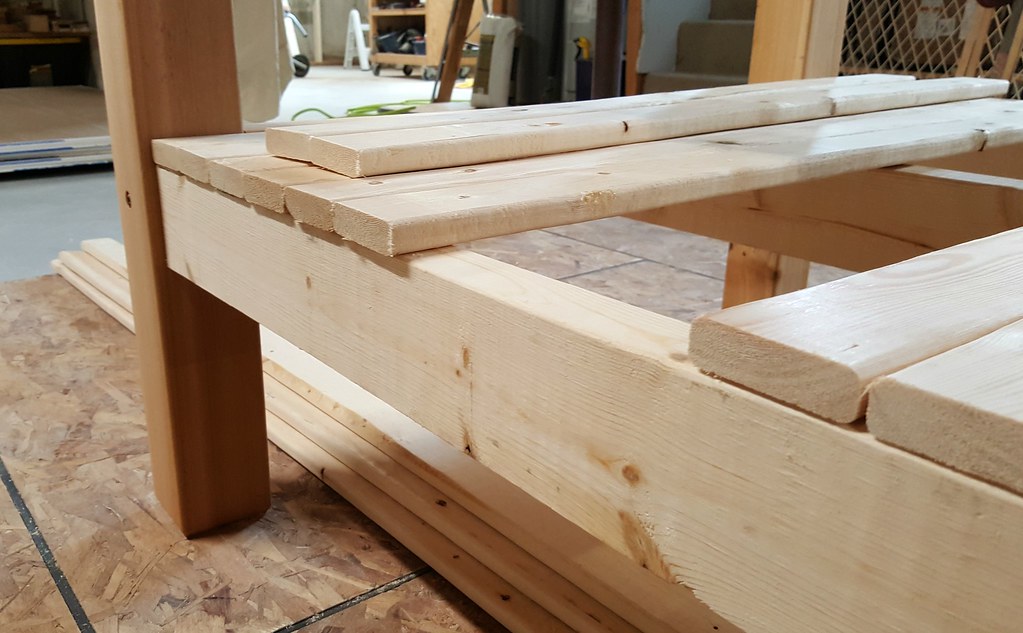
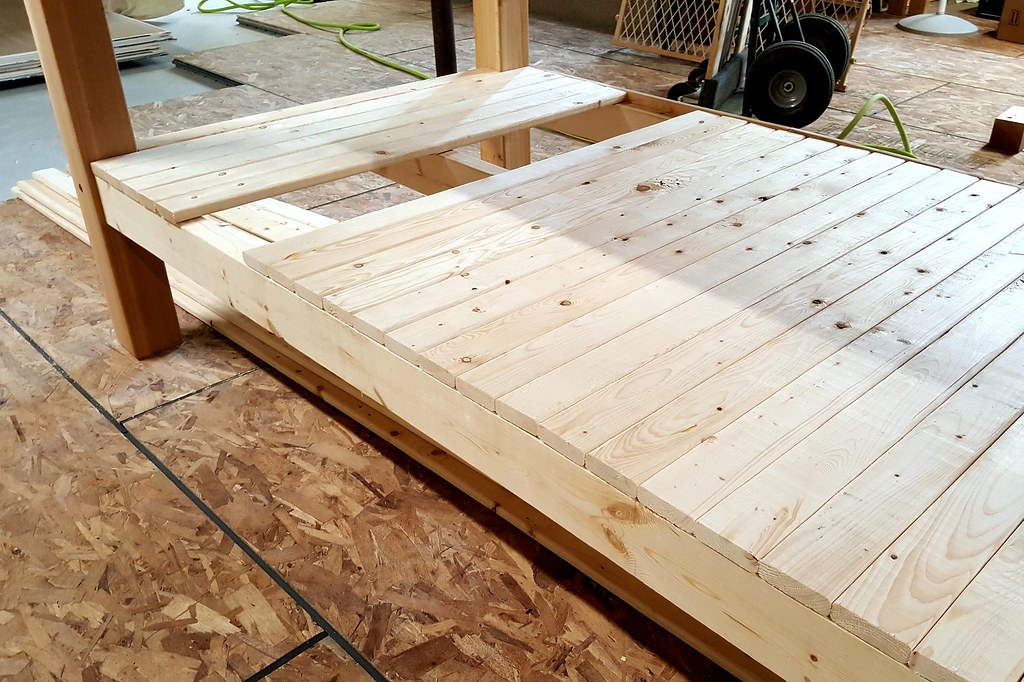
7. The shelf is 38 inches wide. Tom rough-cut the slats (1x2s) to about 39 inches - using one cut slat as a guide for the rest. We tacked two spare boards along one long side of the shelf framework to act as a jig that the slats would butt up against. This keeps them  all lined up on one edge while you're arranging them. Several other slats were cut shorter to fit between the table legs at each end.

DIY Kitchen Island
DIY Kitchen Island

8. Once all of the slats were laid in place, Tom ran a pencil along the underside of the slats that overhung on the open side of the shelf and cut them along the line so that they would be exactly the same length. The slats were put back on the frame and were air nailed into place. The jig boards could then be removed.

DIY Kitchen Island

9. I sanded all of the new wood twice, once with a medium grit sandpaper and then again with a fine grit. The island top of course doesn't need to be sanded.

DIY Kitchen Island

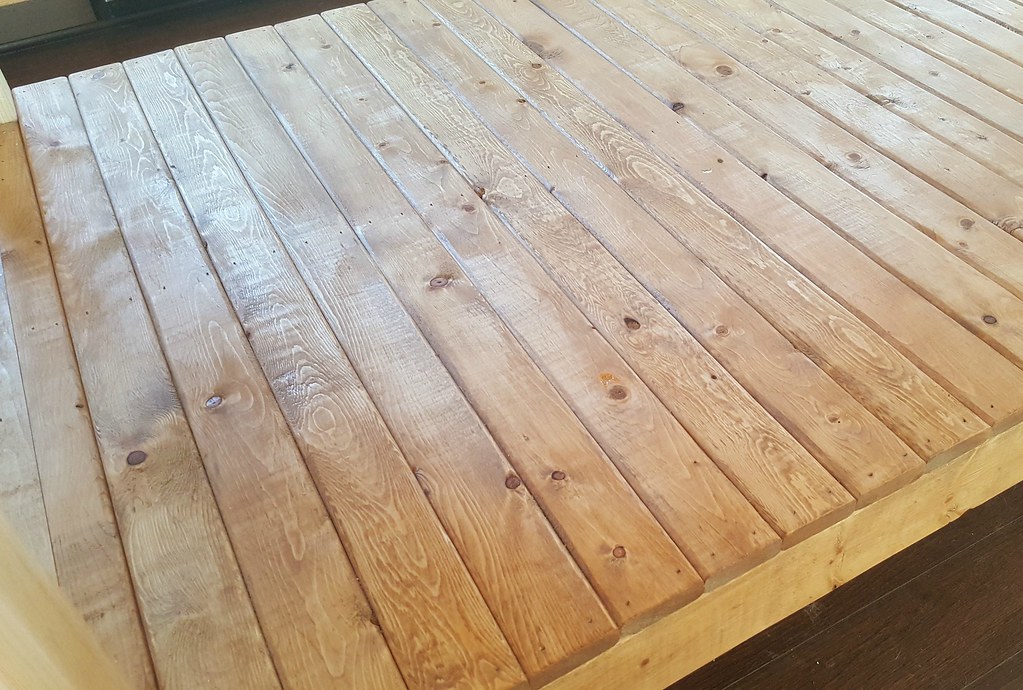
10a. Each of the different types of wood (cedar, bamboo, and pine) were different shades. The bamboo top and cedar legs were very close to each other so I chose to only stain the pine framework and slat shelf. I always seem to have several different stains on hand. I tested them out on scrap wood. and Minwax Provincial came the closest to the shade of the cedar and bamboo. I did test the stain on a scrap piece of cedar, just to see. It absorbed a lot of stain and went far too dark, confirming my decision not to stain the legs.

10b. I taped off the top and the legs to protect them, then applied two coats of stain with a soft cloth, letting it dry between coats. Applying stain with a cloth allows you to control the amount applied and you don't have to come back and wipe the excess off later. Once the second coat of stain had dried I removed all of the painters' tape and wiped the entire table down one last time.

DIY Kitchen Island
DIY Kitchen Island

We did have to take the island apart again to get it upstairs, but that's one good thing about the legs not being attached to the table top - we were able to undo the leg screws, take the pieces upstairs, and bolt it back together.

DIY Kitchen Island

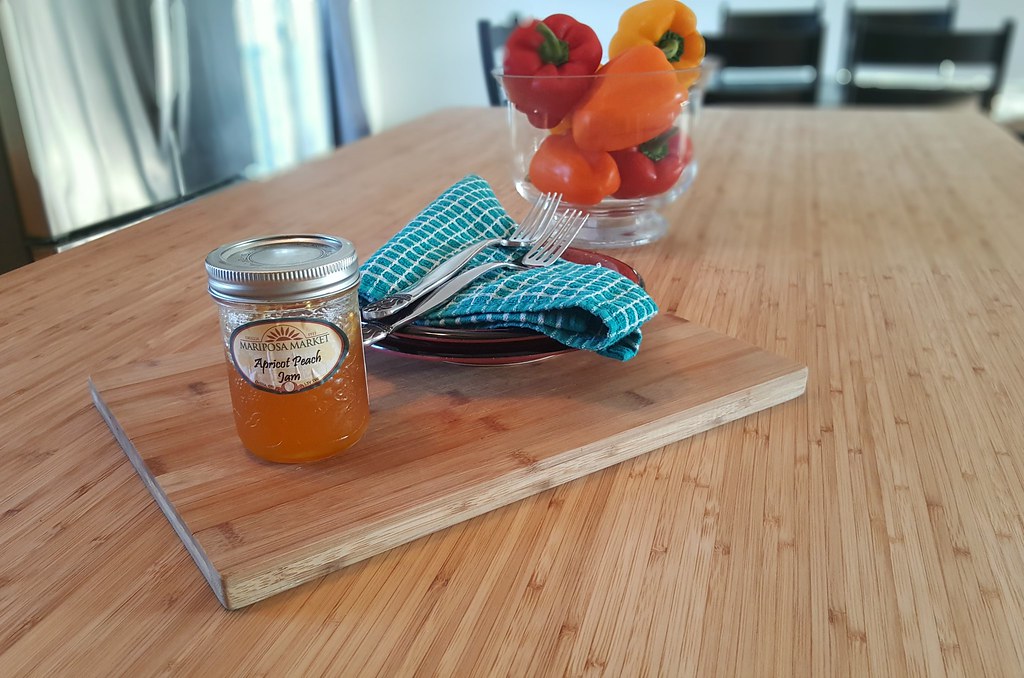
One more step: The bamboo top needs to be oiled regularly, especially when you first buy it. We just use generic food-grade mineral oil, wiping it all over the top, following the grain, and waiting for it to dry before using the tabletop again. If you do it at night before bed, you can leave it to dry overnight.

DIY Kitchen Island

At first I was worried that the island would be too high, being higher than the other cabinet counters, but it is the perfect height. I have no complaints at all. And that huge shelf underneath gives us a place to store all of those small appliances that get in the way.

After having it for a few weeks, it's hard to imagine life without it.

DIY Kitchen Island
DIY Kitchen Island
DIY Kitchen Island
DIY Kitchen Island


Related Posts Plugin for WordPress, Blogger...